An antique trunk already knows how to hold stories. It may have crossed an ocean, lived in an attic, survived three garage sales, and spent decades smelling faintly like cedar, dust, and family mystery. Turning that antique trunk into a bookshelf is not just a clever DIY project; it is a way to give an old piece of furniture a second act without erasing its first one.
Unlike a standard bookcase from a big-box store, a trunk bookshelf comes with character built in. Scuffed leather handles, metal corners, weathered wood, faded canvas, brass latches, and travel stickers can all become part of the design. The goal is not to make the trunk look brand-new. The goal is to make it useful, safe, stable, and handsome enough that visitors ask, “Where did you get that?” and you get to casually answer, “Oh, I made it.” Try not to look too smug. Actually, look a little smug. You earned it.
This guide explains how to turn an antique trunk into a bookshelf while protecting the trunk’s charm, improving its function, and avoiding common restoration mistakes. Whether you want a small floor-standing book nook, a vertical library cabinet, a children’s reading corner, or a vintage display shelf for novels, plants, and framed photos, the process starts with the same rule: respect the trunk before you redesign it.
Why an Antique Trunk Makes a Great Bookshelf
Antique trunks were built for storage, travel, and durability. Many were made with wood frames, metal hardware, canvas coverings, leather straps, or decorative tin panels. That sturdy box shape makes them surprisingly practical for a DIY bookshelf conversion. When placed upright, an old trunk can become a vertical bookcase. When opened and reinforced, it can become a low display shelf. When mounted carefully or set against a wall, it can serve as both storage and decor.
The best part is the visual contrast. Books are orderly; antique trunks are gloriously imperfect. Put them together and you get a piece that feels curated without trying too hard. It says, “I read classic novels,” but also, “I know where the good flea markets are.”
Before You Begin: Inspect the Trunk Like a Detective
Before cutting, sanding, painting, or adding shelves, inspect the trunk carefully. Look for rot, loose boards, missing rivets, warped panels, cracked leather, rusted hardware, and signs of mold. Open and close the lid. Check whether the hinges are strong or merely pretending to be strong for dramatic effect. If the trunk wobbles, flexes, or smells aggressively musty, do not rush into the decorative stage.
Check Its Value First
Some antique trunks are more valuable than they look. A rare designer trunk, early steamer trunk, or piece with original labels and hardware may be worth preserving rather than modifying. If you suspect the trunk is rare, consult an antique dealer or furniture conservator before making permanent changes. A $40 flea-market trunk is a perfect DIY candidate. A rare collectible trunk should not become a weekend experiment involving a drill and unearned confidence.
Look for Lead Paint and Old Finishes
If the trunk has old paint, especially if it may date from before 1978, avoid dry sanding or scraping until you know what you are dealing with. Older painted surfaces may contain lead, and disturbing them can create harmful dust. Use a lead test kit, follow lead-safe work practices, or ask a professional for help. For many antique projects, sealing an old painted surface is safer and smarter than stripping it completely.
Tools and Materials You May Need
Your exact supply list depends on the trunk’s condition and the bookshelf style you want. For a basic antique trunk bookshelf, gather a tape measure, pencil, level, soft cloths, mild soap, wood cleaner, screwdriver, clamps, sandpaper, wood boards for shelves, wood glue, small brackets, screws, drill, primer or clear sealer, paste wax or furniture finish, and protective gear such as gloves, eye protection, and a dust mask. If the trunk has suspected lead paint, do not sand it casually. This is not the moment to act like dust is just furniture confetti.
For shelves, use lightweight but sturdy wood. Pine, poplar, plywood, or reclaimed boards can work well. If the trunk is narrow, thinner shelves may look more proportional. If the trunk is deep, consider adding a backing panel or book stops so paperbacks do not disappear into the shadowy cave of “I’ll find it later.”
Step 1: Clean the Trunk Gently
Start with dry cleaning. Use a soft brush or vacuum with a brush attachment to remove loose dust from seams, corners, and hardware. Then wipe the surface with a barely damp cloth and mild soap solution. Avoid soaking the trunk, especially if it has canvas, paper lining, leather, or old glue. Water can loosen adhesives and damage fragile materials.
Inside the trunk, remove loose paper only if it is already peeling or damaged. If the interior lining is intact and attractive, consider keeping it. If it smells musty, let the trunk air out in a dry, shaded place. A small bowl of baking soda placed inside for a day or two can help reduce odor. Avoid heavy perfumes or harsh sprays; your goal is “fresh vintage,” not “antique trunk attacked by a candle shop.”
Step 2: Decide on the Bookshelf Design
There are three popular ways to turn an antique trunk into a bookshelf. Choose the one that fits your space, skill level, and the condition of the trunk.
Option 1: Upright Trunk Bookshelf
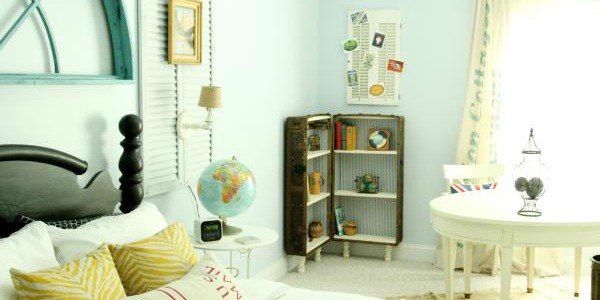
Set the trunk vertically so the lid opens like a cabinet door. Add horizontal shelves inside, secure the trunk to the wall for safety, and use the lid as a decorative door or leave it open for display. This design works beautifully in a living room, hallway, bedroom, or reading nook.
Option 2: Open Trunk Display Shelf
Lay the trunk flat, open the lid, and install shelves or dividers inside the base. This creates a low bookshelf that can sit under a window, at the foot of a bed, or beside a chair. It is especially charming for children’s books because the covers can face outward.
Option 3: Wall-Leaning Library Trunk
For a lighter trunk, you can create a leaning display piece by securing the trunk upright against a wall and using shallow shelves inside. This is more decorative than heavy-duty, so reserve it for paperbacks, small plants, framed photos, and collectibles rather than a full encyclopedia set. Your trunk has survived enough; do not make it bench-press hardcovers.
Step 3: Measure the Interior Carefully
Measure the inside width, depth, and height of the trunk. Antique trunks are rarely perfectly square, so measure at the top, middle, and bottom. Use the smallest measurement when cutting shelves. This prevents the classic DIY tragedy known as “it fit in my imagination.”
Decide how many shelves you want. For novels, allow about 10 to 12 inches of vertical space. For oversized art books, leave more room. For mixed storage, vary the shelf heights. A tall lower shelf can hold baskets or large books, while upper shelves can display smaller paperbacks, pottery, or framed art.
Step 4: Reinforce the Structure
Books are heavier than they look. A shelf full of hardcovers can strain an old trunk, especially if the wood is thin or the joints are loose. Before adding shelves, tighten hardware, glue loose joints, and reinforce weak corners with small interior blocks or brackets. Keep reinforcements discreet so the trunk still looks antique from the outside.
If the trunk will stand upright, add a stable base or small furniture feet. You can also attach an anti-tip strap to the wall. This is especially important in homes with kids, pets, or enthusiastic people who pull books off shelves like they are starting a literary tug-of-war.
Step 5: Cut and Fit the Shelves
Cut shelves from your chosen wood using your measurements. Dry-fit each shelf before attaching anything permanently. If the trunk walls curve, trim slowly and test often. A small gap is acceptable; a shelf wedged too tightly can stress the trunk frame.
You can support shelves with small wooden cleats, metal L-brackets, or adjustable shelf pins if the trunk frame is thick enough. For a reversible approach, use freestanding shelf inserts that slide inside the trunk without being screwed into the original structure. This is ideal if you want to preserve the trunk’s antique value or keep future options open.
Best Shelf Materials
Solid pine is easy to cut and affordable. Poplar is smooth and paint-friendly. Plywood is stable and strong, especially for wider shelves. Reclaimed wood adds character but should be checked for splinters, pests, and old finishes. Whatever you choose, sand shelf edges smooth and seal the wood before loading it with books.
Step 6: Preserve or Update the Finish
Once the shelves fit, decide whether to preserve the trunk’s original finish or refresh it. Preservation is often the better choice for antique pieces. A gentle cleaning, a clear protective coat, or a careful wax application can enhance the surface without erasing age. Patina is not dirt. Patina is history with better lighting.
If the trunk is plain, damaged, or not historically significant, painting may be an option. Clean the surface thoroughly, repair loose areas, prime where needed, and use quality paint. For a vintage look, consider muted colors such as deep green, navy, warm white, charcoal, or soft black. For farmhouse style, pair a lightly distressed exterior with natural wood shelves. For industrial decor, keep metal corners visible and use darker interior shelving.
Step 7: Style the Bookshelf
Styling turns the project from “storage box with shelves” into “intentional design feature.” Start with books, then add a few decorative objects. Stack some books vertically and others horizontally. Use a small plant, ceramic bowl, brass object, framed photograph, or vintage bookend to break up rows. Leave breathing room. A shelf packed edge to edge can look heavy, while a shelf with thoughtful spacing feels collected.
Try grouping books by color for a polished look, by genre for practical use, or by size for visual balance. If the trunk has a dramatic interior, let some of it show. If the lid remains open, treat it like a backdrop. You can line it with fabric, old maps, removable wallpaper, or thin cork. Just avoid permanent changes if the trunk has historical or sentimental value.
Design Ideas for Different Home Styles
Farmhouse Trunk Bookshelf
Use natural wood shelves, simple brackets, and a soft matte finish. Add baskets on the lower shelf and vintage hardcovers on top. A small ceramic pitcher or woven tray completes the look.
Industrial Trunk Bookshelf
Highlight metal hardware, dark stain, black brackets, and leather accents. This style works especially well with steamer trunks, metal-edged trunks, and pieces with visible rivets.
Boho Reading Nook
Add warm wood tones, patterned fabric, plants, and layered textures. Keep books mixed with objects from travel, art, or family history. The trunk should feel relaxed, not overly staged.
Classic Library Corner
Use rich stain, brass details, and neatly arranged books. Pair the trunk bookshelf with a reading chair, floor lamp, and small side table. Congratulations, you now have a corner that whispers, “I own a fountain pen.”
Common Mistakes to Avoid
The biggest mistake is over-restoring. Sanding away every mark can remove the very charm that made the trunk special. Another mistake is ignoring weight. Books are dense, and antique trunks may need reinforcement before they can safely function as shelving. A third mistake is using too much water during cleaning. Antique materials can swell, stain, peel, or separate when soaked.
Also avoid permanently altering a valuable trunk without research. Screws, new holes, paint, and removed hardware can reduce antique value. When in doubt, build a removable shelf insert instead of drilling into the trunk itself. That way, the trunk gains a new purpose without losing its past.
Where to Use Your Antique Trunk Bookshelf
A trunk bookshelf works beautifully in small spaces because it combines storage with personality. In an entryway, it can hold shoes, baskets, and a few favorite reads. In a bedroom, it can replace a nightstand or serve as a compact library. In a living room, it becomes a conversation piece. In a child’s room, it can display picture books at an easy-to-reach height. In a home office, it can hold notebooks, reference books, and decorative boxes.
For renters, the best version is freestanding and reversible. Use a shelf insert, felt pads, and anti-tip safety straps where appropriate. Avoid wall mounting unless allowed by your lease. Your landlord may appreciate your creativity, but probably not surprise holes shaped like “Pinterest ambition.”
Real-World Experience: What This Project Teaches You
Turning an antique trunk into a bookshelf teaches patience faster than almost any small furniture project. At first, it looks simple: clean the trunk, add shelves, place books, admire. Then you measure the inside and discover the left side is slightly wider than the right, the bottom bows like it has opinions, and one hinge only works when the moon is in a generous mood. That is not failure. That is antique furniture introducing itself.
The first practical lesson is to slow down. A modern flat-pack bookcase is designed to be predictable. An antique trunk is not. Every mark, nail, crack, and repair tells you something about how the piece was made and how it has aged. When you work with it instead of forcing it to behave like new furniture, the finished bookshelf looks more natural. Slightly uneven shelves can still be beautiful if they are secure and intentional.
The second lesson is that cleaning changes everything. Many trunks look hopeless under attic dust, but a gentle cleaning can reveal warm wood, interesting hardware, or faded texture worth preserving. It is tempting to grab aggressive tools immediately, but the best results often come from doing less. Wipe, inspect, wait, and reassess. A trunk that seemed destined for paint may only need cleaning, light repair, and a protective finish.
The third lesson is about function. A bookshelf must actually hold books. That sounds obvious until you fall in love with a design that looks great empty but sags under three cookbooks and a dictionary. Always test shelf strength before styling. Place heavier books low, keep delicate shelves for lighter items, and secure upright trunks to prevent tipping. Beauty matters, but gravity is undefeated.
The fourth lesson is that imperfections make the piece better. A scratch near the latch, a dented corner, or a stain inside the lid can become part of the story. Instead of hiding every flaw, use styling to balance it. Place darker books near dark marks, add a warm lamp nearby, or echo the trunk’s metal hardware with brass bookends. Design is not always about disguise; sometimes it is about giving old details better company.
Finally, this project creates a different relationship with your home. You are not just buying storage; you are making it. Every time you pull a book from the shelf, you remember the measuring, the cleaning, the tiny panic when the first shelf did not fit, and the satisfaction when it finally did. That experience gives the piece emotional weight. It becomes furniture with a plot twist.
Conclusion
To turn an antique trunk into a bookshelf, begin with respect for the piece. Inspect it, clean it gently, preserve what is worth saving, reinforce what needs support, and add shelves that fit both the trunk and your books. The best antique trunk bookshelf does not look mass-produced. It looks discovered, rescued, and reimagined.
This project is ideal for anyone who loves vintage decor, smart storage, sustainable home design, and DIY furniture with personality. It saves an old trunk from becoming forgotten clutter and transforms it into a useful, beautiful home feature. In other words, it gives your books a place to live and your trunk a reason to brag.