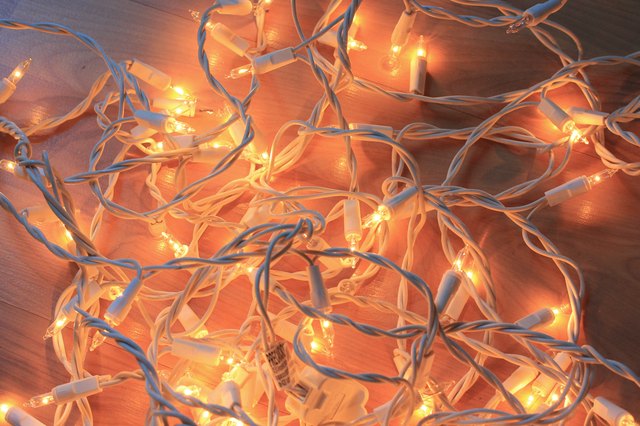
There is something magical about Christmas lights around windows. A plain house suddenly looks like it has been promoted to “cozy holiday cottage,” even if the recycling bin is still judging everyone from the driveway. Windows are natural frames, so when you outline them with warm white, multicolor, icicle, rope, or mini string lights, your home gains instant curb appeal without needing a roofline display visible from space.
The best way to hang Christmas lights around windows is simple: plan the layout, measure the window frames, choose outdoor-rated LED lights, use proper clips instead of nails or staples, keep cords safe, and test everything before climbing, sticking, clipping, or celebrating. It is not difficult, but it does reward patience. Christmas lights are basically glitter with electricity, so a little respect goes a long way.
This guide explains how to hang Christmas lights around windows neatly, safely, and without turning your trim into Swiss cheese. Whether you are decorating exterior windows, interior windows, bay windows, dormers, apartment windows, or a front-facing picture window that deserves its main-character moment, the method below will help you get straight lines, secure clips, and a display that looks intentional rather than “a raccoon helped.”
Why Window Christmas Lights Work So Well
Windows are one of the easiest places to decorate because they already provide shape, symmetry, and visibility. A glowing window outline looks polished from the street and warm from inside the home. You can keep the design minimal with a single strand around each frame, or you can add curtain lights, wreaths, garland, candles, or matching roofline lights for a fuller holiday scene.
Another advantage is flexibility. If you do not want to climb onto the roof, window lights can still make the entire exterior look festive. If you rent, adhesive clips or suction cup hooks can help you decorate without permanent holes. If you are decorating indoors, you can often use smaller clips, removable hooks, or curtain rods to hang lights neatly behind the glass.
Before You Start: Plan the Look
The secret to professional-looking Christmas window lights is not a secret at all. It is measuring. Yes, the humble tape measure is the holiday hero nobody sings about. Before buying lights, measure the top, sides, and bottom of each window you plan to decorate. Add a little extra length to reach the power source, but avoid long dangling tails that make your display look like it lost a fight with spaghetti.
Choose a Style
For a classic look, use warm white LED mini lights around every front-facing window. For a cheerful traditional look, use multicolor lights. For a dramatic outline, C7 or C9 bulbs can work beautifully on larger exterior windows, though they may be too bulky for small frames. Rope lights create smooth glowing lines and are easy to guide around rectangular shapes. Curtain lights are excellent for interior windows because they fill the glass with a soft waterfall effect.
Keep the Color Consistent
One of the fastest ways to make a display look messy is mixing warm white and cool white lights on the same elevation. Both can be beautiful, but together they may look mismatched. Choose one white temperature or one color theme and repeat it. Your windows will look coordinated, and your neighbors may assume you own a clipboard.
Choose the Right Lights for Windows
For outdoor windows, use lights specifically labeled for outdoor use. Indoor-only lights are not designed to handle rain, snow, sleet, humidity, or the general emotional drama of winter weather. Outdoor-rated LED Christmas lights are usually the best choice because they use less energy, stay cooler than incandescent bulbs, last longer, and allow more design flexibility.
Check the packaging for safety certification marks such as UL, ETL, or CSA. Also read the manufacturer’s instructions for how many strands can be connected end to end. This number varies by light type, wattage, and brand. Do not guess. Guessing is for how many cookies are left in the tin, not electrical loads.
Best Clips and Hooks for Hanging Christmas Lights Around Windows
The best way to attach Christmas lights around windows is with plastic light clips, outdoor adhesive clips, suction cup hooks, or siding-safe hooks. The right choice depends on your window material, trim surface, climate, and whether you are decorating inside or outside.
Outdoor Adhesive Light Clips
Outdoor adhesive clips are a favorite for smooth, sealed surfaces such as vinyl trim, painted wood, finished metal, glass, tile, or sealed siding. They are easy to install, do not require tools, and remove cleanly when used according to the product directions. For best results, clean and dry the surface first, press the clip firmly in place, and give the adhesive time to bond before adding lights.
Suction Cup Hooks
Suction cup hooks work best directly on clean glass. They are useful for indoor window lights, small mini-light strands, and lightweight decorations. They can be nearly invisible at night, which gives the lights a floating effect. However, suction cups may fail in very cold weather, on dusty glass, or under heavy strands. Use more cups than you think you need. Christmas lights are not heavy, but gravity is annoyingly consistent.
Plastic Trim or Siding Clips
If your windows have vinyl siding around them, siding clips can slide into seams without nails. For wood trim, small removable clips may work if the surface is smooth and painted. For masonry around windows, look for clips designed for brick or mortar joints, or use adhesive products rated for that surface. Avoid drilling unless you are comfortable with permanent hardware and moisture sealing.
What Not to Use
Do not use staples, nails, tacks, or metal fasteners through light wires. They can damage insulation, create shock hazards, and ruin an otherwise good light strand. Standard tape is also a poor long-term solution outdoors because cold, moisture, and dust can make it peel away. Duct tape may feel powerful, but it is not a holiday lighting strategy. It is a cry for help with adhesive backing.
Step-by-Step: How to Hang Christmas Lights Around Windows
Step 1: Measure Each Window
Measure the full perimeter of the window frame where the lights will sit. If you plan to outline only the top and sides, measure those sections only. Add enough extra length to reach the outlet or extension cord connection, but avoid unnecessary slack.
Step 2: Test Every Strand
Plug in the lights on the ground before installing them. Look for broken bulbs, frayed wires, cracked sockets, loose connections, or flickering sections. Replace damaged strands instead of trying to rescue them with optimism. Optimism is festive, but it is not insulation.
Step 3: Clean the Surface
For adhesive clips or suction cups, clean the window glass or trim and let it dry completely. Dirt, dust, wax, grease, and moisture can weaken the hold. If the surface is cold, check the clip instructions because some adhesives need a minimum temperature to bond properly.
Step 4: Place Clips Evenly
Place clips around the window at regular intervals. For mini lights, spacing clips every 12 to 24 inches often works well. For heavier C7 or C9 bulbs, use closer spacing to prevent sagging. Put clips near corners so the strand turns cleanly instead of drooping like a tired garland after a long office party.
Step 5: Start Near the Power Source
Begin at the corner closest to your power source. Work around the frame in one direction, gently pressing the wire into each clip. Keep the strand snug but not stretched. Pulling too tightly can stress the wire, especially at corners.
Step 6: Secure Corners Carefully
Corners determine whether your window lights look crisp or chaotic. Add an extra clip just before and after each corner. If you are using rope lights, avoid sharp bends that can damage the internal wiring. Smooth turns look better and last longer.
Step 7: Manage the Cord
Do not close windows or doors on electrical cords. Pinched cords can damage insulation and create hazards. Instead, route cords along trim, siding, or approved outdoor extension cord paths. Keep plugs and connections off the ground and away from standing water, snow, and runoff.
Step 8: Use a Timer
A timer or smart outdoor plug keeps the display consistent and saves you from the nightly “Did we turn off the lights?” mystery. Set the lights to turn on after dusk and off before bedtime. Your windows will glow when it matters, and your electric bill will not file a complaint.
Safety Tips for Outdoor Window Lights
Safety is not the boring part of holiday decorating. Safety is what lets the fun continue without a visit from the fire department, an electrician, or your most lecture-prone relative. Before installing Christmas lights around windows, inspect the lights, cords, outlets, clips, and ladder.
Use GFCI-protected outlets for outdoor displays. A GFCI helps reduce shock risk when electricity and moisture are in the same neighborhood. Use outdoor-rated extension cords, and never overload outlets or power strips. Keep cords away from snow, puddles, and high-traffic walkways.
If you need a ladder, choose a sturdy one and place it on level ground. A fiberglass or wood ladder is safer around electricity than a metal ladder. Do not lean sideways to reach that “just one more inch” spot. Move the ladder. Yes, it is annoying. So is falling.
Indoor Window Christmas Lights
Indoor window lights are easier to install because you do not have weather to battle. You can use removable indoor clips, suction cups, curtain rods, tension rods, or small adhesive hooks. Curtain lights work especially well inside because the top support wire can rest on hooks above the window while the vertical strands hang evenly down the glass.
For a simple indoor outline, use mini LED lights and clear clips around the inner window casing. Hide the plug behind a curtain, plant stand, or side table if possible. If the window has blinds, make sure the light strand does not interfere with cords, tracks, or moving parts.
How to Make Window Lights Look Professional
Professional-looking window Christmas lights have three things in common: straight lines, repeated spacing, and clean cord management. The lights do not have to be expensive. They just need to be consistent.
Match Every Window
If you are outlining several windows, use the same light type, bulb size, and color on each one. Even if your home has different window sizes, repeating the same lighting style creates harmony. Think of it as giving your house a holiday uniform, but without making it attend a pep rally.
Hide the Dark Gaps
Dark gaps often happen where one strand ends and another begins. Plan connections at bottom corners or near trim where they are less visible. If a strand is slightly too long, do not bunch extra bulbs in one corner. Continue the strand along nearby trim, tuck the unlit lead neatly, or choose a shorter strand.
Use Green or White Wire Strategically
Green wire blends into greenery, shrubs, and garland. White wire blends better with white trim and snow-colored displays. Clear or silver wire can work inside windows. The wire color matters during the day, even if the lights steal the show at night.
Common Mistakes to Avoid
The first mistake is decorating without testing the lights. Nothing builds holiday character like climbing down a ladder to discover half the strand is dark, but character is overrated. Test first.
The second mistake is using indoor lights outdoors. Weather exposure can damage lights that were never designed for it. The third mistake is pinching cords through windows. It may seem convenient, but it can damage the cord. The fourth mistake is using too few clips. A sagging strand can look messy and may pull clips loose over time.
The fifth mistake is leaving lights up too long. Temporary holiday lights are not meant to become permanent architecture. Remove them after the season, store them carefully, and label each bundle by window. Next year, you will feel like a genius who owns storage bins.
Troubleshooting Window Light Problems
Clips Keep Falling Off
Clean the surface again, let it dry, and check whether the adhesive is rated for outdoor use and cold temperatures. Add more clips to reduce weight on each one. If the trim is rough or dusty, try a different style of clip.
Lights Sag Between Clips
Shorten the spacing between clips, especially along the top of the window. Place extra clips at corners and near plugs. For large bulbs, use clips designed for that bulb size.
The Display Looks Uneven
Step back to the sidewalk or driveway and look at the whole window. Small adjustments are easier when you view the display from where people will actually see it. A strand that looks straight from two feet away may look crooked from across the street.
Experience: Lessons From Hanging Christmas Lights Around Windows
After hanging Christmas lights around windows more than a few times, the biggest lesson is that the job is usually won or lost before the first clip goes up. The years when everything looks clean are the years when the lights were measured, tested, and sorted before installation. The years when the project turns into a holiday comedy special are the years when someone says, “Let’s just start and see what happens.” That sentence has caused more crooked window lights than eggnog ever could.
One practical experience is to label each strand by window after taking it down. A simple piece of painter’s tape marked “front left window” or “kitchen bay window” saves time the next season. You do not need to solve the puzzle again every December. Future you deserves kindness, especially future you standing in the garage wearing one glove and wondering why every cord has formed a friendship knot.
Another lesson is that corners need more support than straight sections. Many beginners place clips evenly along the top and sides but forget the turns. Then the lights droop at the corners, and the window outline loses its sharp shape. Adding two clips at every corner makes the entire display look more polished. This is especially helpful with rope lights and larger bulbs.
It is also worth checking how the display looks from inside the house. Exterior window lights can sometimes shine directly into bedrooms or reflect off blinds. If the glow is too bright indoors, switch to warmer LEDs, use fewer bulbs around bedroom windows, or set the timer to turn off earlier. Christmas spirit is wonderful, but sleep is also a holiday miracle.
For renters, removable outdoor adhesive clips are often the least stressful option, but surface preparation matters. Clean trim, dry weather, and patient installation make a huge difference. Press each clip firmly and wait before hanging the strand if the instructions recommend it. Adhesive clips are strong, but they are not magic. Treat them like tiny seasonal employees: give them a clean workplace and do not overload them.
Finally, do not underestimate the value of stepping back. Hang one window, turn the lights on, walk to the street, and check the effect. You may notice that the bottom edge does not need lights, or that warm white looks better than multicolor on your trim, or that the upstairs windows need larger bulbs to match the scale of the house. The best displays are adjusted in real time. Decorating is part planning, part craftsmanship, and part standing in the yard with your hands on your hips like a festive general.
Conclusion
The best way to hang Christmas lights around windows is to keep the process simple, safe, and neat. Measure first, choose outdoor-rated LED lights, use the right clips for your surface, test every strand, avoid nails and staples, protect cords from moisture and pinching, and use a timer for easy control. A beautiful display does not require a professional crew or a ladder tall enough to make your knees write a complaint letter. It requires planning, patience, and the courage to use more clips than your overconfident inner decorator thinks necessary.
When done well, window Christmas lights add instant warmth to your home. They frame the architecture, welcome guests, brighten dark winter evenings, and make the whole place feel cheerful before anyone even reaches the front door. Whether you prefer elegant warm white lights, nostalgic multicolor bulbs, curtain lights, rope lights, or a simple indoor glow, your windows can become the coziest part of your holiday display.