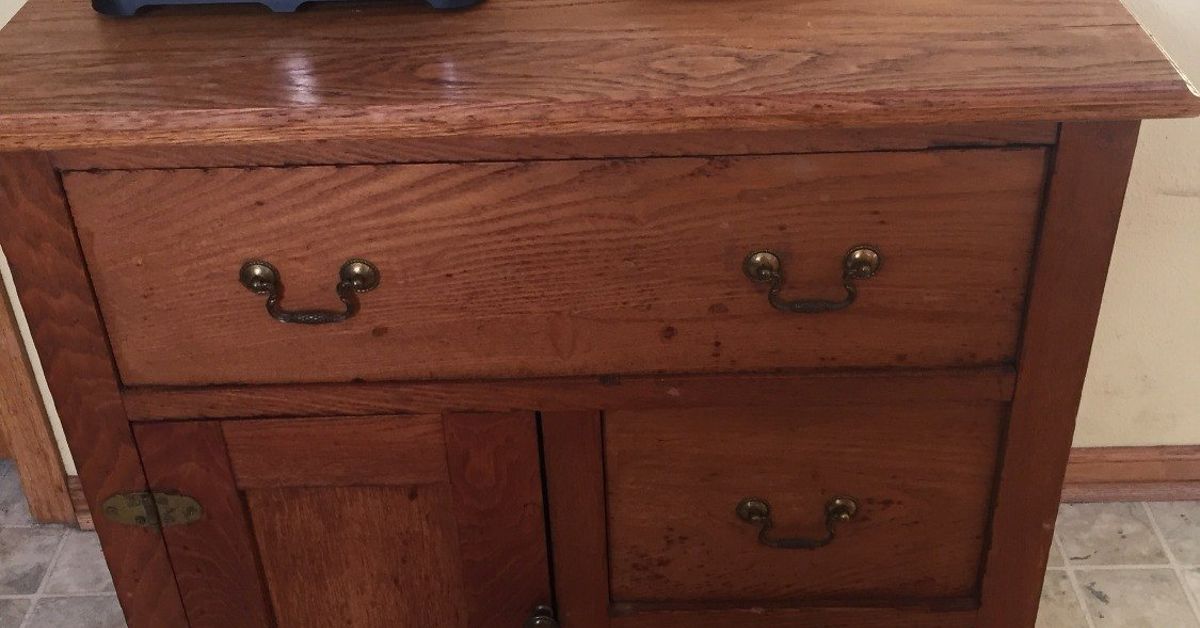
An old cabinet can be many things: useful storage, a family hand-me-down, or a large wooden object quietly collecting dust while pretending to be “vintage.” Fortunately, a shades-of-blue Unicorn SPiT cabinet makeover can turn that tired piece into functional artwork without erasing every trace of its original character.
Unicorn SPiT is a concentrated gel medium that can act as a stain, glaze, paint, color wash, or antiquing tint. On bare wood, it allows grain and natural variation to remain visible. Over a prepared painted surface, it behaves more like a translucent glaze. That flexibility makes it especially effective for layered blue finishes, where turquoise, navy, cobalt, smoky gray-blue, and white can flow together instead of sitting on the cabinet like one flat sheet of color.
The finished cabinet can look coastal, bohemian, artistic, weathered, modern, or slightly magical. The final style depends on the blue palette, blending method, hardware, distressing, and protective topcoat. In other words, the cabinet does not have to look as though a unicorn sneezed directly onto itunless that is precisely the design goal.
Why a Shades-of-Blue Cabinet Makeover Works
Blue is unusually forgiving in furniture design. Pale blue can brighten a dark room, navy adds visual weight, turquoise creates energy, and smoky blue-gray works comfortably with neutral interiors. Layering several shades produces more movement than using a single opaque cabinet paint.
A multitone treatment is particularly useful on cabinets with carved doors, recessed panels, decorative trim, or visible wood grain. Dark pigment can settle into corners and grooves, while lighter blue highlights raised areas. The contrast reveals details that may have disappeared beneath an old brown finish.
This approach also reduces the pressure to make every brushstroke identical. Small variations become part of the design. A streak that might look like a mistake in a factory-smooth finish can resemble wood grain, water, stone, clouds, or weathered paint in a layered Unicorn SPiT makeover.
Choose the Right Cabinet Before You Begin
The ideal makeover candidate is structurally sound but cosmetically outdated. Look for a cabinet with solid doors, working hinges, stable legs, and drawers that still open without requiring a wrestling match.
Inspect the Structure
Check for loose joints, cracked panels, swollen particleboard, missing veneer, and water damage. Tighten screws and repair minor defects before applying color. Paint and stain can improve an unattractive surface, but they cannot negotiate peace between two cabinet sides that are separating.
If the piece is made from solid wood or wood veneer, a translucent stain effect can emphasize the grain. Laminate, MDF, and previously painted surfaces can also be transformed, but they generally need cleaning, light sanding, and an appropriate bonding primer or base coat before decorative glazing.
Use Extra Care With Older Painted Furniture
Do not aggressively sand an unidentified old painted finish until you have considered the possibility of lead. Renovation activities that disturb lead-based paint can create hazardous dust. For a genuinely old cabinet, use lead-safe practices, test when appropriate, or consult a qualified professional before stripping or power sanding.
Materials and Tools
You do not need an industrial workshop, but organizing the supplies before starting prevents the classic DIY moment in which one hand is covered in blue glaze while the missing spray bottle is somehow in another room.
- A wooden cabinet, nightstand, buffet, or small storage cupboard
- Two to four compatible shades of Unicorn SPiT
- A dark blue, black, or charcoal tone for depth
- A light blue or white tone for highlights
- Degreasing cleaner appropriate for the cabinet surface
- Sandpaper or sanding sponges in medium and fine grits
- Wood filler and a putty knife for minor repairs
- Lint-free cloths and a vacuum or tack cloth
- Disposable gloves
- Foam brushes, natural-bristle brushes, artist brushes, or soft cloths
- A fine-mist spray bottle filled with clean water
- Small containers for mixing diluted colors
- Painter’s tape and a drop cloth
- A compatible non-water-based clear topcoat
- New or refinished knobs, pulls, and hinges
Blue Thunder is an obvious starting color for this theme. Depending on the desired effect, it can be combined with a teal, white, dark navy, gray, black, or metallic accent. Always confirm current product labels and test the complete color-and-topcoat combination on scrap wood or a hidden section first.
Plan the Blue Color Palette
The easiest way to avoid a muddy finish is to assign each color a job before applying it.
Base Blue
The base color should cover the largest area. A medium blue is usually easier to build on than an extremely pale or extremely dark shade.
Shadow Color
Use navy, charcoal, deep teal, or a small amount of black around panel edges, beneath trim, and in recessed details. This creates dimension and prevents the cabinet from looking like one enormous blueberry.
Highlight Color
A pale aqua, icy blue, or diluted white mixture can brighten the center of door panels and the upper edges of molding. Highlights should be selective. When every inch is highlighted, nothing is actually highlighted.
Accent Color
A tiny amount of turquoise, violet-blue, metallic silver, or sea-green can make the finish more interesting. Keep the accent controlled so it supports the blue palette instead of starting an unrelated side project.
Step-by-Step Unicorn SPiT Cabinet Makeover
Step 1: Remove Doors, Drawers, and Hardware
Take off the knobs, pulls, hinges, cabinet doors, and removable shelves. Label each hinge and door with painter’s tape so the parts return to their original positions. Older cabinets are not always perfectly square, and swapping two similar-looking doors can create gaps that seem personally insulting.
Place small hardware pieces in labeled bags. If you intend to reuse the hardware, clean it separately and decide whether it should remain original, receive a metallic finish, or be darkened to complement the blue tones.
Step 2: Clean Thoroughly
Remove grease, wax, furniture polish, dust, and residue. Pay special attention to areas around handles and door edges, where years of contact may have left an invisible layer that interferes with adhesion.
Allow the cabinet to dry completely. Proper cleaning, repair, and surface preparation are consistently recommended before furniture painting or refinishing because decorative coatings perform best on a clean, stable surface.
Step 3: Repair Damage
Fill unwanted holes, deep scratches, chipped corners, and missing veneer where practical. Let the filler dry, then sand it flush. Leave intentional dents or age marks if they contribute to the character of the piece.
If you are changing the hardware size, fill the old mounting holes now and drill new ones after confirming the placement of the replacement pulls.
Step 4: Sand for the Intended Finish
For a true stained-wood effect, remove the old finish sufficiently to expose clean, absorbent wood. Sand in the direction of the grain and remove the dust thoroughly.
For a glazed or painted effect, you may only need to scuff-sand a stable existing finish so the base coat can bond. A smooth, glossy surface should not remain glossy. Manufacturer and refinishing guidance commonly recommends cleaning, controlled sanding, dust removal, and testing before committing to the visible surfaces.
Do not automatically attack veneer with the most aggressive sander available. Veneer can be thin, and sanding through it creates a much larger project with considerably less cheerful language.
Step 5: Decide Between Bare Wood and a Painted Base
Use Unicorn SPiT directly on properly prepared bare wood when you want visible grain and a translucent stained appearance. Diluting the gel generally creates a lighter, more transparent color wash.
Use a compatible painted base when the cabinet has mismatched repairs, unattractive manufactured wood, or a surface that cannot be evenly stripped. White creates brighter blues, pale gray softens the palette, and black creates a dramatic jewel-toned effect. Over paint, Unicorn SPiT functions more like a decorative glaze than a penetrating wood stain.
Step 6: Make Sample Boards
Mix small test amounts rather than guessing on the cabinet door. Test each shade alone, then test overlapping combinations. Allow the samples to dry and apply the planned topcoat because sealing can dramatically deepen and intensify the color.
Write down the ratios that work. “A little blue, some water, and whatever felt emotionally correct” is not a recipe you will successfully reproduce on the second door.
Step 7: Apply the First Blue Layer
Shake or mix the product according to its label. Apply the medium blue with a brush, foam pad, cloth, or other suitable applicator. Follow the wood grain when working on bare wood.
Work in manageable sections. Unicorn SPiT can dry quickly on the surface, so keep a spray bottle nearby. A light mist of water can extend working time and help move or soften the pigment. Avoid soaking engineered wood, veneer edges, or joints.
Step 8: Add Darker Blue Shadows
Apply the darker shade along the edges of doors, around carved details, beneath the top, and near the cabinet base. Blend it into the medium blue while the surface remains workable.
Use a clean damp brush or cloth to soften harsh boundaries. Move the color in long, irregular strokes rather than drawing a perfect dark outline around every panel. The goal is depth, not cartoon eyebrows for the cabinet doors.
Step 9: Blend in Lighter Highlights
Add pale blue or a small amount of white near the center of flat panels and on selected raised details. Blend outward until the transition appears natural.
For a watery coastal effect, use long horizontal movements. For a dramatic artistic finish, use curved strokes, cross-blending, or soft cloudlike patches. For a weathered look, drag a nearly dry brush lightly across edges and high points.
Step 10: Create Movement Without Making Mud
Blue shades blend beautifully until they are overworked. Once the surface starts looking dull or gray, stop touching it. Let the section dry before deciding whether it needs another layer.
Keep separate tools for the lightest and darkest colors. Frequently wiping every shade with the same cloth is a fast and efficient way to manufacture one large batch of accidental blue-brown.
Step 11: Refine the Details
Use a small artist brush to add dark pigment inside carvings, around trim, or along narrow door frames. Wipe back selected areas to reveal the base color.
Inspect the cabinet from several feet away. Close-up work helps with blending, but distance reveals whether one door is dramatically darker than the others. Correct imbalances with thin layers rather than a heavy emergency coat.
Step 12: Let the Color Dry Completely
The unsealed surface may appear chalky, pale, or less exciting than expected. That is normal for this type of medium. Drying time varies with the surface, application thickness, humidity, temperature, and technique. Do not judge the final depth until the test area has been sealed.
Step 13: Distress Only Where Wear Makes Sense
For a softly aged finish, lightly sand corners, door edges, raised molding, and areas near handles. Natural wear occurs on exposed surfaces, not randomly in the middle of protected recesses.
Distressing is optional. A smoothly blended blue cabinet can look elegant without a single fake scratch. Do not distress a piece simply because the sanding sponge seems lonely.
Step 14: Remove Every Trace of Dust
Vacuum the piece and wipe it carefully with a suitable lint-free cloth. Dust trapped beneath a clear coat becomes permanent texture, and unfortunately, “historic workshop crumbs” is not a widely admired finish.
Step 15: Seal the Cabinet
Sealing is essential for a cabinet that will be touched, cleaned, opened, and used. Current Unicorn SPiT guidance recommends a non-water-based coating over the dried color. A light oil-based clear spray is one manufacturer-recommended approach for handled objects. Gloss can create greater visual depth, while satin or matte produces a flatter, more subdued effect.
Because oil-based clear finishes can alter or warm some colors, test the exact topcoat over your sample first. Apply thin, even coats in a well-ventilated work area and follow every drying, recoating, temperature, and safety instruction on the selected product.
Do not substitute a random clear finish merely because it is already in the garage. Compatibility matters. The decorative layer can reactivate or smear if an unsuitable coating is brushed over it too aggressively.
Step 16: Refinish or Replace the Hardware
Hardware can push the cabinet toward a specific style:
- Brushed brass creates a sophisticated contrast with navy and cobalt.
- Matte black works with modern and industrial interiors.
- Antique bronze supports a traditional or weathered finish.
- Crystal knobs add a playful, jewel-like accent.
- White ceramic pulls suit cottage and coastal designs.
Repeat one finish across the knobs, pulls, and visible hinges unless an intentionally mixed-metal design is part of the plan.
Step 17: Reassemble After the Finish Has Cured
Dry and cured do not mean the same thing. A topcoat may feel dry while remaining vulnerable to dents, sticking doors, and hardware impressions. Follow the product’s cure instructions before reinstalling doors, loading shelves, or placing decorative objects on top.
Design Variations for a Blue Unicorn SPiT Cabinet
Coastal Water Effect
Blend pale aqua, medium blue, and deep teal in long horizontal layers. Use white sparingly as a softened highlight. Pair the finish with brushed nickel, rope-style pulls, or simple white ceramic hardware.
Midnight Blue Drama
Begin with a charcoal or black base, then layer saturated blue over it. Highlight only the raised trim and panel centers. Brass hardware keeps the result rich rather than gloomy.
Weathered Farmhouse Blue
Use a pale neutral base and layer gray-blue, muted navy, and white. Distress high points lightly and finish with a low-sheen clear coat. Avoid excessive sanding, or the cabinet may look less “historic farmhouse” and more “left beside the road during a storm.”
Bohemian Jewel-Tone Finish
Combine vivid blue with turquoise, violet, and a restrained metallic accent. Emphasize carved details and use decorative knobs. This variation works particularly well on small cabinets, bar cabinets, and accent tables.
Blue Wood-Grain Wash
On attractive bare wood, apply diluted pigment in the direction of the grain. Wipe away excess and build the depth gradually. The grain should remain an active part of the design rather than disappearing beneath opaque color.
Common Mistakes and How to Fix Them
The Blue Finish Looks Muddy
Too many wet colors were probably blended together. Let the surface dry, then rebuild definition with a thin layer of medium blue. Add highlights and shadows in separate passes.
The Color Is Too Dark
Lift workable pigment with a damp cloth, or apply a lighter diluted layer after drying. Do not immediately scrub the entire cabinet unless you are fully committed to starting again.
The Surface Looks Patchy
Uneven preparation, sealed areas, glue residue, filler, or mixed wood species may absorb color differently. Use the variation intentionally, apply another controlled layer, or switch to a glazed finish over a uniform base coat.
Brush Marks Are Too Obvious
Mist lightly and soften the marks with a clean brush while the color remains workable. On the next section, use longer strokes and avoid repeatedly brushing partially dried pigment.
The Topcoat Smears the Design
Stop brushing immediately. The decorative color may not have been fully dry, or the coating may be incompatible. Let the area stabilize, test a light spray application elsewhere, and follow the Unicorn SPiT and topcoat manufacturers’ instructions.
The Cabinet Doors Stick
Paint or clear coat may be too thick around the edges, or the piece may have been reassembled before curing. Allow more curing time and lightly correct problem areas only after the finish is firm enough to sand safely.
How to Style the Finished Cabinet
A shades-of-blue cabinet already has strong visual personality, so the surrounding decor does not need to compete with it. Place the piece against a warm white, pale gray, beige, or muted green wall. Natural wood, woven baskets, linen, brass, matte black metal, and simple ceramics pair well with layered blue.
Use the cabinet as a dining-room bar, entryway storage piece, bathroom linen cabinet, craft organizer, bedroom accent cabinet, or living-room media console. Keep the objects displayed on top relatively simple so the finish remains the focal point.
Experience-Based Notes From a Shades-of-Blue Makeover
The most important lesson from a layered blue cabinet project is that the final appearance develops in stages. The first coat rarely looks impressive. In fact, the early phase may resemble a cabinet that lost an argument with a blue marker. The depth appears only after darker pigment is introduced, lighter areas are restored, and the transitions are softened.
Working on removable doors laid flat is much easier than blending every section vertically. Flat positioning slows runs and gives the color more time to settle. It also makes it easier to compare the doors side by side. When each door is completed in isolation, the first may end up pale and airy while the second becomes a midnight seascape created during an unexpectedly dramatic mood.
Another practical lesson is to mix more of the primary diluted color than seems necessary. Recreating a custom blue halfway through the cabinet can be frustrating. Written ratios help, but small differences in water, pigment, and brush loading may still be visible. Keeping a covered container of the main mixture improves consistency.
The spray bottle is valuable, but enthusiasm must be controlled. A fine mist helps move the color; repeated spraying can create drips, raise wood fibers, or introduce too much moisture around veneer and MDF. Mist the applicator or small working area rather than giving the entire cabinet a weather forecast.
It also helps to establish one “hero surface,” such as the pair of front doors. Spend the most blending time there. Side panels can be simpler and slightly darker, while the top may receive a more restrained treatment for durability and easier styling. Not every surface needs the same level of visual activity.
Hardware decisions are best delayed until the blue finish is dry. A knob that looks perfect beside a color chart may appear too yellow, too silver, or too decorative against the completed cabinet. Testing two or three options directly against the finished door prevents an expensive case of twenty matching knobs that match absolutely nothing.
The sealing stage is where patience becomes especially important. The chalky dry appearance can make the blue seem disappointing, but a compatible clear coat often restores saturation and contrast. Because that change can be dramatic, sample boards are more useful than trying to imagine the sealed result. They reveal whether the darkest blue will become nearly black and whether a pale aqua will remain subtle or suddenly demand its own spotlight.
Thin topcoat applications usually create a cleaner result than one heavy coat. Heavy spraying encourages runs around molding and door edges. It can also collect in corners, where it remains soft longer. Rotating the doors and inspecting them under side lighting makes drips easier to catch before they harden into permanent decorative icicles.
Finally, a successful Unicorn SPiT cabinet makeover benefits from knowing when to stop. Layered furniture finishes are seductive because one more streak, highlight, or shadow always seems possible. Step away for an hour, view the cabinet from across the room, and take a photograph. A photograph often reveals balance more clearly than staring at the surface from twelve inches away. When the colors have depth, the details are visible, and the doors feel related without being identical, the makeover is finished. Put down the brush before the cabinet evolves into a different species.
Conclusion
A shades-of-blue Unicorn SPiT cabinet makeover combines practical furniture restoration with creative color blending. Careful cleaning, repair, sanding, testing, layered application, and compatible sealing are far more important than artistic perfection. The goal is not to create four mechanically identical doors. It is to produce a balanced finish with movement, contrast, and enough durability for everyday use.
Start with a sound cabinet, choose a controlled palette, and let each shade serve a purpose. Medium blue provides unity, darker blue creates depth, and pale highlights reveal shape. Finish the piece with thoughtfully selected hardware, and an ordinary storage cabinet can become the most memorable object in the room.
Note: Product formulas, color availability, drying conditions, and topcoat compatibility can change. Always follow current package instructions, test the full finish system on an inconspicuous area, and use suitable ventilation and protective equipment.