Night vision has a way of making ordinary darkness feel like a secret world with the lights turned halfway on. A backyard becomes a wildlife documentary. A dark garage becomes a mystery lab. A hallway at midnight becomes, unfortunately, the place where you discover a sneaker with your toes.
But what is actually inside night vision? Is it magic? Military wizardry? A tiny owl trapped in a tube? Not quite. Night vision technology is a clever mix of optics, sensors, electronics, and light that humans cannot always see. Some systems amplify tiny amounts of visible and near-infrared light. Others detect heat. A practical DIY night vision project usually uses a camera sensor that can see infrared light, plus an infrared illuminator that acts like an invisible flashlight.
This guide breaks down how night vision works, what is inside real night vision devices, and how to build a safe, beginner-friendly night vision viewer of your own using accessible electronics.
What Is Night Vision?
Night vision is any technology that helps you see when your eyes do not have enough light to form a useful image. The term is often used broadly, but there are three main categories: image intensification, digital infrared night vision, and thermal imaging.
Image Intensification
Traditional night vision goggles and monoculars use image intensifier tubes. These devices collect tiny amounts of light from the moon, stars, streetlights, or infrared sources, then amplify that light into a visible image. This is the classic green or white glowing view many people associate with night vision.
Digital Infrared Night Vision
Digital night vision uses a camera sensor instead of an image intensifier tube. Many camera sensors can detect near-infrared light, but standard cameras usually include an infrared-cut filter to block it for better daytime color accuracy. Remove that filter or use a NoIR-style camera, add infrared LEDs, and suddenly the camera can see in darkness that looks pitch-black to your eyes.
Thermal Imaging
Thermal cameras do not need reflected light. They detect infrared radiation emitted as heat. That is why a thermal camera can spot a warm animal in total darkness, through light fog, or against a cooler background. Thermal imaging is powerful, but it is also more expensive and usually produces lower visual detail than a camera-based night vision image.
What’s Inside a Real Night Vision Device?
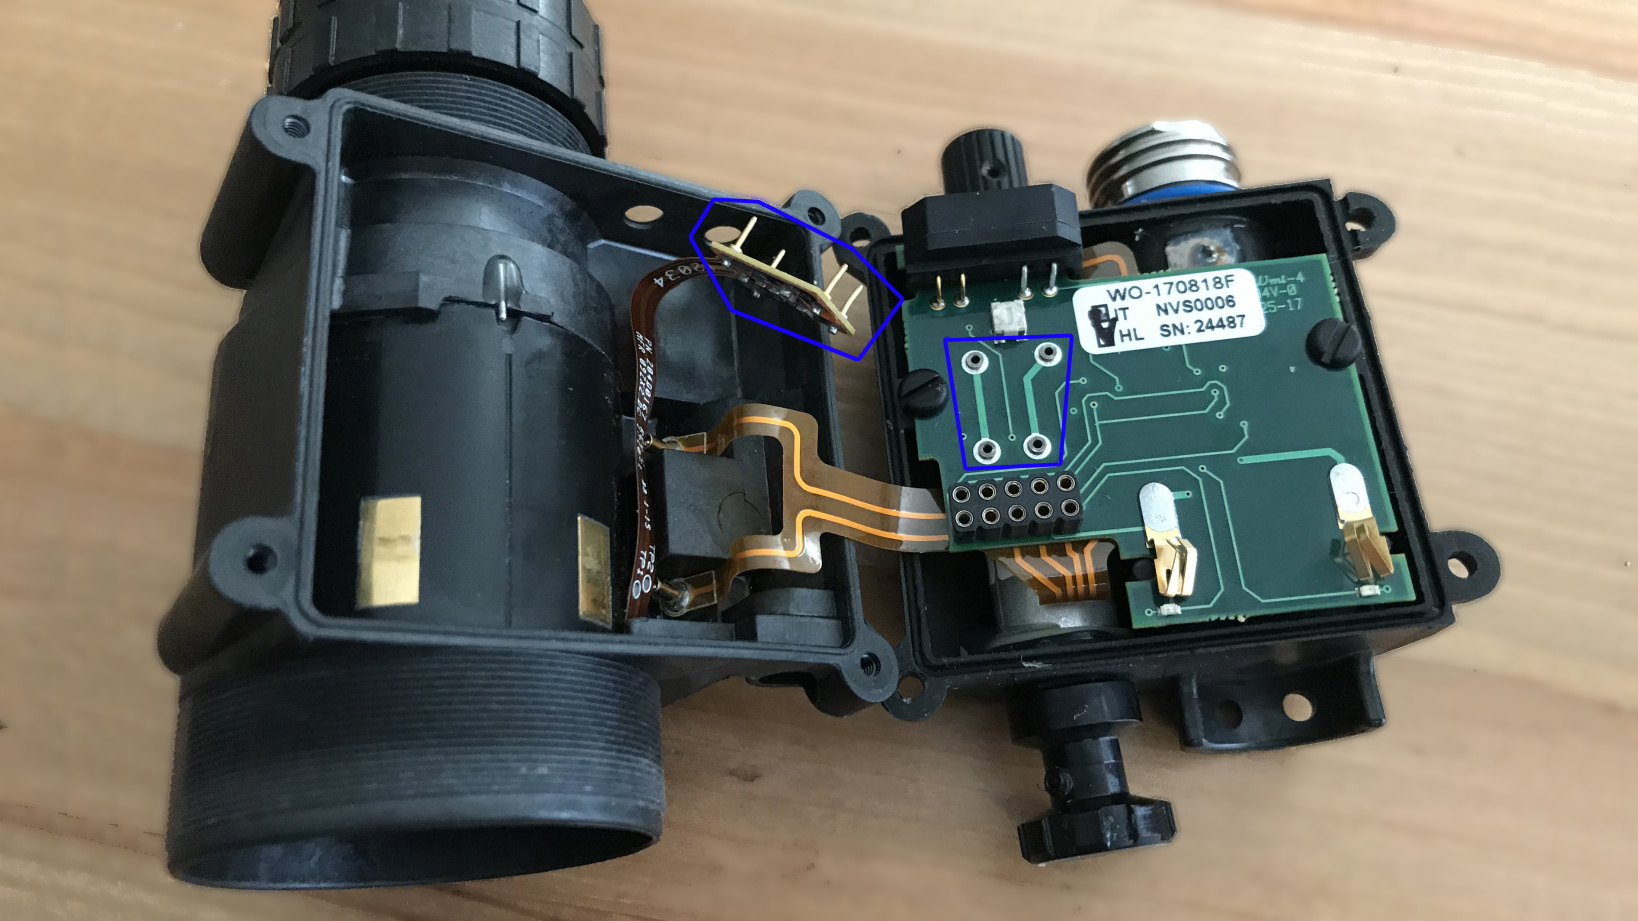
A true image-intensifier night vision device is a beautifully engineered sandwich of optics and electron magic. The housing may look like a simple tube, but inside it is a carefully aligned system designed to collect, amplify, and display light.
1. Objective Lens
The objective lens sits at the front of the device. Its job is to gather available light and focus the scene onto the image intensifier tube or sensor. Lens quality matters because any blur, distortion, or poor light transmission becomes more obvious in low-light conditions.
2. Photocathode
In an image intensifier tube, incoming photons hit a photocathode. The photocathode converts those photons into electrons. Think of it as a tiny nightclub bouncer for light: photons enter, electrons leave, and the party gets louder very quickly.
3. Microchannel Plate
The microchannel plate, often called an MCP, is where most of the amplification happens. It contains thousands or millions of microscopic channels. When electrons enter these channels, they strike the walls and create more electrons. Those new electrons create even more electrons, producing a cascade effect. One tiny light signal becomes a much stronger electron signal.
4. Phosphor Screen
After amplification, the electrons hit a phosphor screen. The screen converts the electron pattern back into visible light. Older and many common devices use green phosphor because the human eye is very sensitive to green, but modern systems may use white phosphor for a more natural-looking image.
5. Eyepiece
The eyepiece lets your eye focus on the intensified image. In a digital system, this final display might be a small LCD or OLED screen instead of a direct optical eyepiece.
Why DIY Night Vision Usually Uses Infrared
Building a true image intensifier at home is not practical. The tube requires vacuum manufacturing, special materials, high voltages, and precision assembly. It is not the sort of weekend project where you say, “I found some parts in a drawer, let’s make military-grade optics.” That is how you accidentally create a very expensive paperweight.
Digital infrared night vision, however, is very approachable. The concept is simple: use a camera that can detect infrared light, illuminate the scene with infrared LEDs, and view the video on a screen. To the human eye, the area may still look dark. To the camera, it looks lit.
The most common DIY route is a Raspberry Pi with a NoIR camera module, a small display, and an infrared LED illuminator. “NoIR” means “no infrared filter,” not “noir detective mode,” although the results do make your garage look like a black-and-white crime scene.
Parts You Need to Build Your Own Night Vision Viewer
Here is a practical parts list for a beginner-friendly digital night vision build:
- Raspberry Pi board, such as a Raspberry Pi 4, Raspberry Pi 5, or Raspberry Pi Zero 2 W
- Raspberry Pi NoIR Camera Module or another infrared-sensitive camera module
- Infrared LED illuminator, commonly 850 nm or 940 nm
- Small HDMI, DSI, or SPI display
- Portable USB power bank or suitable battery pack
- MicroSD card with Raspberry Pi OS installed
- Camera ribbon cable compatible with your board
- Case, handle, tripod mount, or 3D-printed enclosure
- Optional: push button, focusable lens, heat sinks, or weather-resistant housing
850 nm vs. 940 nm Infrared LEDs
Infrared illuminators are often sold in 850 nm and 940 nm versions. An 850 nm illuminator usually gives better camera performance and longer range, but the LEDs may show a faint red glow. A 940 nm illuminator is more discreet to human eyes, but many camera sensors are less sensitive to it, so the image may be darker or require more illumination.
For a first build, 850 nm is usually easier. For watching skittish wildlife or keeping the glow less noticeable, 940 nm can be useful if your camera handles it well.
How to Build a Simple DIY Night Vision Camera
This project is intended for lawful, educational, home, hobby, and wildlife observation uses. Do not use it to invade privacy, record people without consent where they expect privacy, or attach it to weapons. The cool factor drops sharply when the project becomes creepy.
Step 1: Set Up the Raspberry Pi
Install Raspberry Pi OS on a microSD card using Raspberry Pi Imager. Boot the board, connect it to a monitor or network, and update the system. Make sure the camera interface is supported on your Raspberry Pi model and operating system version.
Step 2: Attach the NoIR Camera
Power down the Raspberry Pi before connecting the camera. Insert the ribbon cable into the camera connector carefully and lock the connector tab. The shiny contacts must face the correct direction for your board. This is the part where patience matters. Camera ribbon cables are not fond of dramatic gestures.
Step 3: Test the Camera in Daylight
Before testing in the dark, confirm that the camera works in normal light. Use the camera preview or a simple capture command. A NoIR camera may show unusual colors in daylight because it sees infrared light along with visible light. That is normal.
Step 4: Add Infrared Illumination
Mount your infrared LEDs near the camera, but not so close that they reflect directly into the lens. Many ready-made IR illuminator boards can be powered separately, which is often easier and safer than trying to drive high-current LEDs directly from the Raspberry Pi pins.
Never stare directly into high-power infrared LEDs at close range. Infrared can be invisible or nearly invisible, but that does not mean it is harmless. Treat IR light sources with the same respect you would give a bright flashlight pointed at your eyes.
Step 5: Connect a Display
For a handheld viewer, connect a small display to the Raspberry Pi. HDMI displays are easy to configure, while smaller SPI screens may require extra setup. Keep the screen brightness low if you are using the device outdoors at night, or your face will glow like you are telling ghost stories under a blanket.
Step 6: Build the Enclosure
Mount the Raspberry Pi, camera, display, and power source in a case. A simple plastic project box works. A 3D-printed case looks cleaner. A cardboard prototype works too, as long as you accept that it may look like a science fair project that escaped into the woods.
Make sure the camera has a clear view, the IR LEDs are aimed forward, and the Raspberry Pi has enough airflow. If you plan to use the system outdoors, protect it from moisture. “Weather-resistant” and “I wrapped it in hope” are not the same thing.
What You Can Expect From a DIY Build
A DIY infrared night vision camera can be surprisingly useful. In a dark room, it can reveal furniture, tools, pets, and movement clearly. Outdoors, performance depends on the strength of your IR illuminator, the sensitivity of the camera, the lens, and weather conditions.
Do not expect a homemade digital system to match high-end Gen 3 night vision goggles. A real intensifier tube amplifies existing light with incredible sensitivity and very low latency. A Raspberry Pi camera system is more like a smart infrared camcorder. It is affordable, flexible, educational, and fun, but it has limits.
Common Problems and Fixes
If the image is too dark, use a stronger IR illuminator, move the light closer to the subject, or increase camera exposure. If the image looks washed out, reduce illumination or angle the LEDs away from reflective surfaces. If the video is laggy, lower the resolution or frame rate. If everything looks blurry, adjust the lens focus, especially if you are using a module with a manually focusable lens.
Digital Night Vision vs. Thermal: Which Should You Build?
For most hobbyists, digital infrared night vision is the best starting point. It is cheaper, easier to understand, and produces recognizable images. You can see branches, boxes, paths, and facial details if the scene is properly lit with infrared.
Thermal imaging is better for detecting heat differences. It can show a warm animal hiding in darkness or reveal heat escaping from a window. However, affordable thermal sensors often have lower resolution. They are great for detection, not always great for identification.
A fun advanced project is a hybrid viewer that combines a normal camera feed with a thermal overlay. That gives you visual detail plus heat information. It is more complex, but it feels satisfyingly futuristic, like something a polite robot would use to inspect your attic insulation.
Legal, Privacy, and Safety Considerations
Night vision devices can be used responsibly for wildlife observation, home projects, boating, camping, astronomy, and security. They can also be misused. Before recording, consider where the camera is pointed and whether people have a reasonable expectation of privacy.
Avoid aiming cameras into neighbors’ windows, private yards, bathrooms, bedrooms, or any place where recording would be invasive. Be especially careful with audio recording because consent laws vary by state. If your build stores footage or streams video over Wi-Fi, secure it with strong passwords, software updates, and encryption whenever possible.
Also remember that some advanced night vision and thermal equipment may be subject to U.S. export controls. A basic DIY camera project is not the same as exporting controlled military-grade equipment, but if you buy high-end night vision optics, tubes, or thermal devices, read the manufacturer’s compliance warnings and follow the law.
Best Uses for a DIY Night Vision Project
A homemade night vision viewer is ideal for learning electronics, observing nocturnal animals, checking a dark crawlspace, monitoring a 3D printer at night, building a robot camera, or creating a low-light security experiment for your own property.
It is also a great teaching project because it connects physics, biology, optics, programming, and ethics. You learn that “darkness” is not empty; it is simply a range of light your eyes cannot use well. Add the right sensor and illumination, and the hidden world appears.
Experiences From Building and Using DIY Night Vision
The first time you use a DIY night vision camera, the experience is usually half science and half comedy. You turn off the lights, expect a dramatic spy-movie moment, and then realize the first thing your amazing new device reveals is dust on the bookshelf. Night vision is honest. Too honest, sometimes.
One of the most useful lessons is that illumination matters more than beginners expect. A NoIR camera without infrared light is not a miracle machine. It may see slightly better than a regular camera, but in a truly dark room, it still needs help. Once you add an IR illuminator, the scene changes completely. A garage that looked black becomes visible. A backyard path appears. A sleeping dog becomes a glowing loaf with ears.
Another experience is learning how reflective surfaces behave. Glass, glossy paint, license plates, shiny tools, and pale walls can bounce infrared light back into the camera and wash out the image. Moving the illuminator just a few inches away from the lens can reduce glare. Angling the light slightly downward can make the picture more natural. This is where DIY turns into experimentation, and experimentation turns into you standing in the dark moving LEDs around like a very technical raccoon.
Focus is another surprise. Many small camera modules are set for general use, but night vision often works better when you adjust the lens for your actual viewing distance. If you are watching a bird feeder 12 feet away, focus for that. If you are inspecting a circuit board in the dark, focus closer. A tiny twist of the lens can change the image from “mysterious fog” to “hey, I can read that label.”
Battery life also becomes part of the adventure. The Raspberry Pi, display, and IR illuminator all draw power. A small power bank may work for short tests, but longer sessions need a larger battery or separate power for the LEDs. Heat can build up inside a tight case, especially outdoors in warm weather, so ventilation is not optional. Electronics enjoy breathing. They do not enjoy being baked like cookies.
Using DIY night vision outdoors teaches patience. Insects may be attracted to faint visible light or warmth. Rain, mist, and dust can scatter infrared light and reduce clarity. Wildlife may ignore 940 nm illumination more than 850 nm, but your camera may prefer 850 nm. The “best” setup depends on what you want to see, how far away it is, and whether you care about maximum image brightness or minimum visible glow.
The biggest takeaway is that building night vision gives you respect for commercial systems. High-end devices are expensive for a reason: low-light sensitivity, lens quality, rugged housings, fast response, and clean image processing are hard to perfect. Still, a DIY version delivers something commercial gear cannot always provide: understanding. You are not just looking through night vision; you know why it works.
And that is the real reward. Once you have built your own system, darkness feels different. You notice porch lights, moonlight, reflective signs, warm objects, and the invisible beam of an infrared remote control. You begin to understand that “seeing at night” is not one technology but a collection of clever tricks. Some amplify light. Some add invisible light. Some detect heat. All of them remind us that the world has more layers than our eyes can catch alone.
Conclusion
Night vision is not magic, but it is close enough to feel magical when you build it yourself. Inside traditional night vision devices, objective lenses, photocathodes, microchannel plates, phosphor screens, and eyepieces work together to amplify faint light. In DIY digital night vision, an infrared-sensitive camera and IR illumination make the invisible visible in a simpler, safer, and more affordable way.
If you want a realistic first project, build a Raspberry Pi NoIR night vision viewer with an 850 nm illuminator, a small display, and a sturdy case. Keep expectations reasonable, protect your eyes, respect privacy, and use the project for learning, observation, and practical problem-solving. The night has plenty to show you. You just need the right sensor to ask politely.