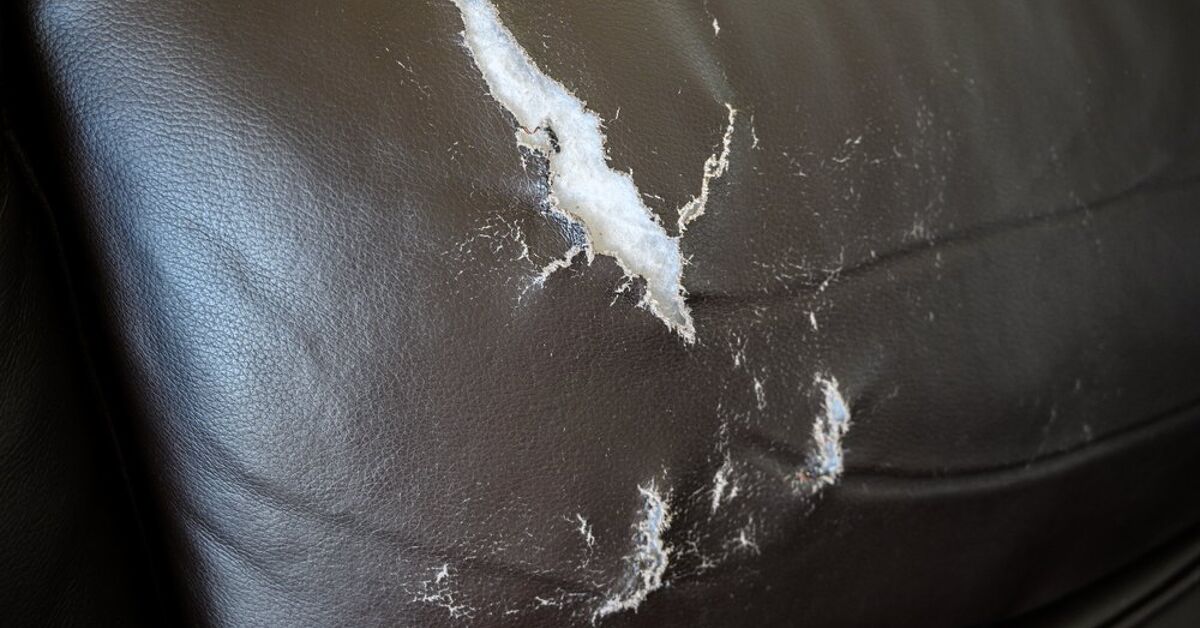
A tear in a leather couch has a special talent for attracting attention. You can have beautiful lighting, stylish pillows, and a perfectly arranged coffee table, yet every visitor’s eyes will somehow land on that tiny rip as if it were the season finale of a home-improvement drama.
The good news is that many small and medium-size tears can be repaired without replacing the sofa or paying for full reupholstery. A successful leather couch repair usually involves supporting the damaged area from underneath, bonding the torn edges, rebuilding any missing surface, matching the color, and protecting the finished repair. The work is not difficult, but patience matters. Leather does not respond well to panic, puddles of glue, or enthusiastic sanding.
This guide explains how to repair a tear in a leather couch, which materials to use, mistakes to avoid, and when a professional repair technician is the smarter choice.
First, Identify What Your Couch Is Made Of
Before opening a leather repair kit, confirm that the sofa is actually leather. Genuine leather, polyurethane faux leather, vinyl, and bonded leather may look similar from across the room, but they behave differently during repair.
Genuine leather
Real leather is a fibrous natural material. It may show irregular grain patterns, subtle color variations, and pores that do not repeat perfectly. Many pigmented and protected leathers can be cleaned, filled, recolored, and sealed successfully.
Faux leather and vinyl
Faux leather usually consists of a fabric backing covered with polyurethane or vinyl. When it tears, the surface coating may separate from the backing. Products labeled for both leather and vinyl are generally the safest choice, but you should still follow the kit manufacturer’s directions.
Bonded leather
Bonded leather contains leather fibers combined with binders and a coated surface. When that coating begins peeling across a wide area, repairing one tear may not solve the larger problem. A patch can make the couch usable, but widespread flaking often means the upholstery itself is reaching the end of its practical life.
Aniline and specialty leather
Unprotected aniline leather absorbs moisture and color more readily than heavily finished leather. It can darken, stain, or develop a visible halo around a repair. Antique, premium, unusually colored, or highly absorbent leather should be evaluated by a professional before you start experimenting.
Decide Whether the Tear Is a DIY Repair
A home repair kit is best suited to a clean cut, puncture, split, or modest tear where the surrounding leather remains strong. The damage should not extend deeply into the cushion, frame, springs, or structural seams.
Professional help is usually worth the cost when:
- The tear runs along a heavily loaded seam.
- The leather around the damage feels thin, brittle, or rotten.
- A large section of material is missing.
- Foam is badly damaged or protruding from the opening.
- The couch is valuable, antique, or covered in delicate aniline leather.
- The damage is on a highly visible center cushion and an imperfect repair would bother you daily.
Also check the sofa’s warranty or furniture protection plan before applying anything. Unauthorized DIY work can affect coverage. Filing a claim after coating the area in mystery adhesive is rarely the beginning of a cheerful customer-service conversation.
Tools and Materials You May Need
A complete leather couch repair kit often includes several of the following items. Kits vary, so choose one designed for your upholstery material and type of damage.
- Leather-safe cleaner
- Lint-free microfiber cloths
- Small sharp scissors
- Tweezers
- Backing fabric or a flexible subpatch
- Flexible leather or vinyl adhesive
- Leather repair filler
- Palette knife, spatula, or application card
- Fine abrasive pad or manufacturer-approved sandpaper
- Matching leather colorant
- Small sponge, cotton swab, or detail brush
- Grain paper or texturing pad
- Leather finish or protective sealer
- Disposable gloves
Some repair compounds cure at room temperature, while others require a heat-transfer tool. Never improvise with direct heat unless the product specifically instructs you to do so. Excessive heat can shrink, harden, discolor, or permanently mark leather and vinyl.
How to Repair a Tear in a Leather Couch
Step 1: Stop using the damaged seat
Pressure and movement can turn a short cut into a long split. Keep people and pets away from the area until the repair is complete. If the cushion is removable, place it on a stable work surface with the tear facing upward.
Step 2: Inspect the damage closely
Gently bring the torn edges together without stretching them. Check whether the material is merely cut or whether part of the surface is missing. Look underneath for loose foam, damaged lining, or a failed seam.
A clean tear with both edges present may need only a subpatch, flexible adhesive, a small amount of filler, and color. A hole or gouge will require more rebuilding.
Step 3: Test every product in a hidden area
Apply a tiny amount of cleaner, dye, and finish to an inconspicuous location, such as the back or underside of the couch. Allow it to dry fully. A product that looks perfect while wet may dry darker, lighter, shinier, or flatter than expected.
Step 4: Clean the repair area
Remove crumbs and dust with a soft vacuum attachment or dry cloth. Then clean the leather around the tear using a product approved for the upholstery. Body oils, conditioner residue, furniture polish, and grime can prevent adhesives and colorants from bonding properly.
Do not soak the leather. Use only enough cleaner to remove contamination, and allow the surface to dry completely before continuing.
Step 5: Trim only loose, unusable fibers
Use small scissors to remove fuzzy threads, lifted synthetic coating, or badly shredded fragments that cannot be laid flat. Trim conservatively. Every piece you cut away becomes a piece you must later replace with filler.
Do not enlarge the tear simply to make it look neater. Leather repair is not surgery, and the couch does not need a dramatic incision.
Step 6: Prepare and insert the subpatch
For a tear larger than a tiny puncture, cut a flexible backing patch slightly larger than the damaged opening on every side. Round the corners so they are less likely to catch or create visible ridges.
Fold the patch gently and guide it through the tear with tweezers. Position it flat beneath the leather. Avoid wrinkles, because a folded patch can create a permanent lump that becomes impressively obvious whenever sunlight crosses the couch.
Step 7: Bond the backing patch
Apply a thin layer of flexible leather adhesive between the subpatch and the underside of the upholstery. A toothpick, small spatula, or precision applicator can help you control the amount.
Press the leather down onto the patch, working from the center toward the edges. Align the torn edges as closely as possible without overlapping them. Wipe away excess adhesive immediately according to the product instructions.
Allow the bond to cure for the full recommended time. “Dry to the touch” does not always mean “ready to sit on.” Adhesives often need considerably longer to develop useful strength.
Step 8: Apply flexible filler in thin layers
Once the backing is secure, inspect the surface. If a groove remains between the torn edges, spread a very thin layer of leather filler over the gap. Feather the filler slightly beyond the tear so the transition is gradual rather than forming a raised stripe.
Let each layer dry before applying another. Several thin applications usually flex and blend better than one thick application. Thick filler can shrink, crack, remain soft underneath, or turn the repair into a miniature speed bump.
Step 9: Smooth the filled area carefully
After the filler has cured, smooth only the repaired material using the abrasive method recommended by the kit. Some systems allow very fine sandpaper, while others call for an abrasive pad or additional smoothing compound.
Use minimal pressure. Aggressive sanding can remove the factory finish from the surrounding leather, creating a pale ring much larger than the original tear.
Step 10: Match and apply the color
Color matching is often the most challenging part of leather sofa repair. Couch upholstery may contain undertones of red, yellow, blue, gray, or brown that are not obvious until a repair color is placed beside it.
Mix small test batches and allow each sample to dry before judging it. Begin with the closest base color and adjust gradually. It is easier to darken a light mixture than to rescue a cup of colorant that has suddenly become midnight black.
Apply the color in light coats with a sponge, swab, or detail brush. Stippling with a sponge often blends better than brushing long strokes. Extend the color slightly beyond the filler, but avoid repainting half the cushion unless the finish is uniformly worn.
Step 11: Recreate the grain
A flat repair on textured leather can remain visible even when the color is excellent. Some kits include grain paper that is pressed into uncured compound or used during heat curing. Others create texture by stippling the final filler or color layer with a sponge.
Select the grain pattern that most closely resembles the couch. Follow the kit instructions exactly, especially if heat is involved. Never place a hot tool directly against the upholstery.
Step 12: Apply the protective finish
When the color is fully dry, apply a compatible leather finish or sealer. The finish helps protect the color and allows you to adjust the sheen. A glossy repair on a matte couch can be more noticeable than a small color mismatch, so compare the repaired area from several angles.
Use multiple light coats rather than one heavy coat. Allow each coat to dry as directed.
Step 13: Let the repair cure
Keep the repaired area free from pressure, bending, moisture, and enthusiastic inspection until all products have cured. Depending on the system, that may mean several hours or longer. Follow the manufacturer’s cure time rather than guessing.
Once cured, gently flex the area by hand. If the edges remain stable and the surface does not feel sticky, the cushion can return to normal use.
What About Tears Along a Seam?
A separated seam differs from a tear through the middle of a leather panel. If the stitching has failed but the leather is still strong, the seam may need to be restitched with upholstery thread and a curved needle. Access can be difficult because the repair must align the original needle holes without creating new perforations too close to the edge.
Do not simply spread filler over a structural seam. The filler may look acceptable briefly, but it cannot replace the strength of stitching. A long seam failure, torn piping, or damage in a reclining section is generally a job for an upholstery or leather repair professional.
Common Leather Repair Mistakes
Using ordinary household glue
Rigid adhesives may dry hard and create a brittle spot on flexible upholstery. Choose an adhesive specifically designed to move with leather or vinyl.
Skipping the cleaning step
Even a couch that looks clean can hold skin oils, silicone polish, or conditioner residue. Adhesive placed over that invisible layer may eventually peel away.
Overfilling the tear
Filler is meant to rebuild missing material, not create a protective mountain range. Apply the smallest amount needed to level the surface.
Rushing the drying times
Stacking wet adhesive, filler, color, and sealer can trap moisture and produce a weak or tacky finish. Cure times are part of the repair, not optional intermissions.
Conditioning immediately before repair
Conditioner can interfere with bonding. Clean and repair first. Apply conditioner later only when the repair products are fully cured and the conditioner is suitable for that leather type.
Expecting a completely invisible result
A careful repair can become difficult to notice during normal use, but it may remain visible under close inspection or strong side lighting. The practical goals are to stop the tear from spreading, restore a smooth surface, and make the damage blend into the surrounding upholstery.
How to Help the Repair Last
Keep the couch away from intense sunlight, fireplaces, radiators, and heating vents that can dry or fade the upholstery. Remove dust regularly with a soft cloth or vacuum attachment, and clean spills promptly without saturating the leather.
Use cleaning and conditioning products recommended for the specific leather finish. More conditioner is not automatically better; excess product can leave residue and attract dirt. Rotate removable cushions when possible so one seat does not receive all the household attention.
For homes with pets, trim claws, provide scratching surfaces, and protect favorite sofa zones with a washable throw. Apparently, a cat considers a luxury leather couch to be a scratching post with excellent lumbar support.
Repair Experience Notes: What Usually Makes the Biggest Difference
A common first-time repair begins with a homeowner assuming the glue will do most of the work. The torn edges are pushed together, adhesive is squeezed into the opening, and everything looks encouraging for about ten minutes. Then the cushion flexes, the unsupported edges pull apart, and the tear returns wearing a shiny glue necklace. The lesson is simple: for anything beyond a tiny cut, the subpatch is the foundation. It spreads stress across a wider area and gives the adhesive a stable surface to grip.
Another familiar experience involves color matching. A repair compound may look exactly right in the mixing cup but appear too dark after drying. Brown leather is especially sneaky because “brown” may actually be a combination of tan, burgundy, yellow, charcoal, and the emotional residue of several family movie nights. Testing a small dried sample prevents a much larger correction later. Natural daylight is helpful, but the match should also be checked under the room’s usual lamps.
The third lesson is that thin layers produce better results. New DIYers often apply enough filler to finish the job in one pass. The surface may remain soft underneath, shrink unevenly, or develop a smooth plastic appearance that does not resemble the surrounding grain. Two or three light layers require more patience, but each layer dries more evenly and is easier to feather into the leather.
Location also changes the outcome. A repair on the back or side of a couch experiences relatively little stretching and can remain stable for years when properly prepared. A repair in the center of the household’s favorite seat faces compression, twisting, body heat, and the occasional child performing an unauthorized gymnastics routine. High-stress locations need stronger backing, complete cure times, and realistic expectations.
It is also worth repairing damage early. A one-inch cut may require only a small patch and a few drops of adhesive. After months of use, the same cut can spread, expose foam, and weaken the surrounding material. Early repairs preserve more of the original leather and generally require less filler and color.
Finally, successful repairs are rarely rushed. The most convincing results usually come from stopping between stages, viewing the work from several angles, and correcting small problems before adding the next product. Leather repair rewards restraint. The person who uses less glue, less filler, less sanding pressure, and more drying time often produces the cleaner finish.
Conclusion
Learning how to repair a tear in a leather couch can save a comfortable, attractive piece of furniture from an unnecessarily early trip to the curb. For a manageable tear, the essential process is straightforward: identify the material, clean the area, install a flexible subpatch, bond the edges, rebuild the surface in thin layers, match the color, restore the texture, seal the finish, and allow everything to cure.
The repair may not become invisible under a magnifying glass, but it can stop further damage and make the sofa presentable again. Work slowly, test products in a hidden area, and recognize when a valuable couch or structural tear deserves professional attention. Your sofa has supported countless naps, snacks, conversations, and questionable streaming choices. Returning the favor is only fair.
Note: Product formulas and curing methods vary. Always follow the instructions supplied with your leather repair kit, provide adequate ventilation, and test cleaners, adhesives, colorants, and finishes in an inconspicuous area before treating visible upholstery.
Research note: This article synthesizes repair, material-care, product, and professional-service guidance from established home-improvement publishers, leather restoration specialists, manufacturers, and furniture-care organizations.