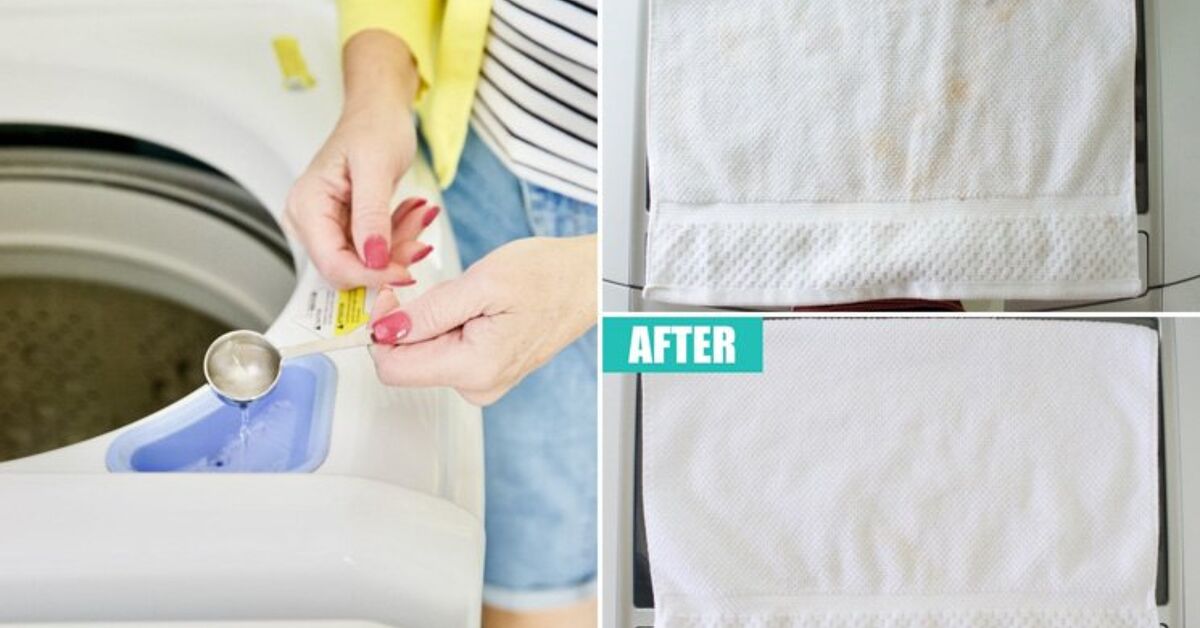
Bleach has a reputation for being the cleaning equivalent of a superhero: dramatic, intense, and slightly terrifying when it enters the room. It can whiten, disinfect, and rescue a grimy bathroom from the brink of “let’s just move.” But bleach is also harsh, smelly, easy to misuse, and absolutely not the kind of product you want to casually mix with anything else while pretending your kitchen is a chemistry lab.
That is why many homeowners are looking for a powerful DIY alternative to bleach that can brighten stains, freshen surfaces, and tackle everyday grime without the eye-watering fumes. The good news? You do not need a cart full of specialty cleaners. For many household jobs, two inexpensive ingredients can do a surprisingly good job: 3% hydrogen peroxide and baking soda.
Together, they create a simple homemade cleaning paste that can help lift stains, brighten grout, deodorize surfaces, and loosen gunk from sinks, tubs, tile, cookware, and white laundry pretreatments. It is not magic in the “tiny wizard under the sink” sense. It is chemistry, which is basically magic with better paperwork.
Why Look for a Bleach Alternative?
Bleach can be useful when it is properly diluted and used according to label directions, especially for disinfecting certain hard, nonporous surfaces. But it is not always necessary for everyday cleaning. In fact, for routine dirt, soap scum, food residue, and many stains, scrubbing and cleaning are often more important than disinfecting.
Many people want a bleach alternative because chlorine bleach has a strong odor, can irritate skin and lungs, may discolor fabrics, and can damage certain surfaces. It also becomes dangerous when mixed with other cleaners such as ammonia, vinegar, acids, or even some products hiding in plain sight, like toilet bowl cleaners. The safest cleaning routine is usually the least dramatic one: use one product at a time, ventilate the area, and avoid turning your bathroom into a fog machine.
Hydrogen peroxide and baking soda offer a gentler approach for many cleaning tasks. They are affordable, easy to find, and useful in multiple rooms. Even better, they do not leave behind the classic bleach smell that announces, “Someone cleaned aggressively in here.”
The 2 Ingredients: Hydrogen Peroxide and Baking Soda
Ingredient 1: 3% Hydrogen Peroxide
Hydrogen peroxide is a mild oxidizer. That means it can help break down certain organic stains and brighten dingy areas by releasing oxygen. The brown bottle sold in most pharmacies is usually a 3% solution, which is the strength most appropriate for household DIY cleaning. Stronger peroxide products, such as hair developer or industrial formulas, are not recommended for casual home cleaning because they can irritate skin, damage surfaces, and behave more aggressively than expected.
Hydrogen peroxide is especially helpful for whitening grout, removing some food stains, freshening bathroom surfaces, and pretreating stains on white or colorfast fabrics. It can also bubble when it meets organic matter, which is always satisfying. It is the cleaning-world version of applause.
Ingredient 2: Baking Soda
Baking soda is a gentle abrasive and deodorizer. It helps scrub without being as harsh as many powdered cleansers. It can also absorb odors, which makes it useful for sinks, tubs, cutting boards, trash cans, refrigerators, and other places where mysterious smells sometimes hold secret meetings.
When mixed with hydrogen peroxide, baking soda thickens the liquid into a paste. That paste clings to vertical surfaces, settles into grout lines, and gives your brush something to work with. Instead of a runny cleaner disappearing down the drain, you get a targeted scrub that stays where you put it.
The Basic DIY Bleach Alternative Recipe
This simple hydrogen peroxide and baking soda cleaner works best as a fresh paste. Do not mix it in advance and store it in a sealed container. Hydrogen peroxide breaks down over time, especially when exposed to light, and pressure can build if mixtures are stored improperly.
What You Need
- 1/2 cup baking soda
- 1/4 cup 3% hydrogen peroxide
- A small bowl
- A spoon or spatula
- Gloves
- An old toothbrush, grout brush, sponge, or soft cloth
How to Make It
- Add the baking soda to a small bowl.
- Slowly pour in the hydrogen peroxide.
- Stir until the mixture forms a spreadable paste.
- Use immediately.
- Discard any leftover paste after cleaning.
For a thicker paste, add a little more baking soda. For a looser paste, add a splash more hydrogen peroxide. The goal is a texture similar to toothpaste: spreadable, clingy, and not so runny that it flees the scene.
Best Uses for This DIY Alternative to Bleach
1. Whitening Grout Lines
Grout is porous, which means it collects dirt, soap scum, mildew stains, and the emotional residue of every shower you forgot to squeegee. The hydrogen peroxide helps brighten stains, while baking soda gives you gentle scrubbing power.
To use it, apply the paste directly to grout lines. Let it sit for 5 to 10 minutes, then scrub with a grout brush or old toothbrush. Rinse thoroughly with clean water and dry the area. For stubborn grout, repeat the process rather than attacking it like you are trying to win a medieval duel.
2. Freshening Bathroom Sinks and Tubs
Bathroom sinks and tubs often collect toothpaste splatter, soap residue, body oils, and mineral film. This two-ingredient paste can help loosen grime and brighten dull areas without the harsh odor of bleach.
Apply the paste to the surface, scrub gently with a sponge, and rinse well. It is especially useful on white porcelain or ceramic surfaces. Always test first if your tub or sink has a specialty finish, because not every surface enjoys a scrubbing party.
3. Cleaning Stained Cutting Boards
Plastic cutting boards can develop stains from tomatoes, berries, spices, and other colorful foods. A baking soda and hydrogen peroxide paste may help lighten stains and reduce odors. Spread the paste over the stained area, let it sit for several minutes, scrub, then rinse thoroughly with hot water and dish soap.
For wooden cutting boards, be more cautious. Too much moisture or peroxide may affect the wood. A gentle baking soda scrub followed by proper drying is often safer for wood than a wet peroxide paste.
4. Brightening White Laundry Stains
This mixture can be useful as a pretreatment for white socks, undershirts, towels, and other washable white fabrics. Apply a small amount to the stained area, let it sit briefly, then wash as usual. It may help with sweat marks, dinginess, and some food stains.
However, hydrogen peroxide can lighten dyes. Do not use it casually on colored clothing unless you test an inconspicuous area first. Otherwise, your favorite navy shirt may return from the laundry with a surprise abstract art feature.
5. Removing Baked-On Residue from Cookware
Baking sheets, enamel cookware, and some pots can develop cooked-on stains that laugh at ordinary dish soap. Spread the paste over the residue and let it sit for 10 to 20 minutes. Scrub gently and rinse thoroughly.
Avoid using this method on cast iron, uncoated aluminum, nonstick coatings, or delicate finishes unless the manufacturer says it is safe. Cast iron, in particular, wants oil and respectnot peroxide paste and chaos.
6. Deodorizing Trash Cans and Utility Sinks
For smelly trash cans, utility sinks, and laundry sink stains, this paste can help scrub and freshen. Apply it to dirty areas, scrub, rinse, and let the surface dry. The baking soda helps with odor, while hydrogen peroxide helps brighten and loosen organic residue.
Where You Should Not Use Hydrogen Peroxide and Baking Soda
A good DIY cleaner is useful, but it is not universal. Hydrogen peroxide can have a mild bleaching effect, and baking soda is still an abrasive, even if it is gentle. Before using this mixture, always test a hidden spot.
Avoid Using It On:
- Colored fabrics that may fade
- Leather
- Natural stone such as marble, granite, limestone, or travertine
- Unsealed grout or damaged grout
- Wood furniture, hardwood floors, or wood cabinets
- Electronics and screens
- Brass, copper, or delicate metals
- Nonstick cookware coatings
- Painted surfaces without testing first
Natural stone deserves extra caution because acids, oxidizers, and abrasives can damage sealants or dull the finish. If you have stone countertops, use a pH-neutral stone cleaner instead. Your marble countertop did not sign up to be a science experiment.
Safety Rules You Should Never Ignore
This DIY bleach alternative is simple, but simple does not mean “do whatever and hope for the best.” Cleaning safety matters, especially when you are using products that can react with other chemicals.
Do Not Mix With Bleach
Never mix hydrogen peroxide with chlorine bleach. Also never mix bleach with vinegar, ammonia, toilet bowl cleaner, drain cleaner, or other disinfectants. These combinations can create dangerous gases or irritating fumes. If bleach has already been used on a surface, rinse the area thoroughly and wait before using another product.
Do Not Mix With Vinegar in the Same Bottle
Hydrogen peroxide and vinegar are sometimes recommended as separate cleaning steps, but they should not be combined in the same container. Together, they can form peracetic acid, which can irritate the skin, eyes, throat, and lungs. If you use them separately, wipe and rinse between products.
Use Fresh Paste Only
Make only what you need. Do not store the mixture in a sealed jar or spray bottle. Hydrogen peroxide breaks down into water and oxygen, and homemade mixtures are not designed for long-term storage.
Wear Gloves and Ventilate
Gloves help protect sensitive skin, and ventilation is always smart when cleaning. Open a window, turn on a fan, and let fresh air do its quiet heroic work.
Is This DIY Cleaner a Disinfectant?
This is an important distinction: cleaning and disinfecting are not the same thing. Cleaning removes dirt, grease, and many germs from surfaces. Disinfecting uses an approved product to kill specific germs when used for the required contact time.
Hydrogen peroxide can be an effective disinfecting ingredient in properly formulated products, and 3% hydrogen peroxide has recognized antimicrobial uses. However, a homemade baking soda and hydrogen peroxide paste should be treated mainly as a cleaner, brightener, stain remover, and deodorizernot as a guaranteed disinfectant for illness-related situations.
If someone in your home is sick, or if you need to disinfect after raw meat, bodily fluids, or high-risk contamination, use an EPA-registered disinfectant and follow the label exactly. Yes, reading labels is less exciting than discovering a secret cleaning hack, but it is much better than guessing.
Hydrogen Peroxide vs. Bleach: Which One Should You Use?
Bleach is stronger in certain disinfection situations, especially when diluted correctly for appropriate hard surfaces. It is also useful for whitening some laundry and removing mildew stains from specific nonporous areas. But bleach can damage fabrics, irritate airways, and create dangerous reactions when mixed with other products.
Hydrogen peroxide and baking soda are better for routine brightening, deodorizing, grout cleaning, and stain lifting where harsh disinfection is not required. They are also a good option when you want less odor and a more controlled paste rather than a liquid that runs everywhere like it has somewhere more important to be.
Use the DIY Paste For:
- Grout brightening
- White sink and tub stains
- Plastic cutting board stains
- White laundry pretreatment
- Baked-on cookware residue
- Trash can and utility sink deodorizing
Use a Registered Disinfectant For:
- Illness cleanup
- Raw meat contamination
- Bathroom surfaces needing verified germ kill
- High-touch surfaces during outbreaks
- Any situation where label-backed disinfection matters
Step-by-Step Example: Cleaning Dingy Shower Grout
Let’s say your shower grout has gone from “fresh white” to “suspicious beige.” Here is a practical way to use the two-ingredient bleach alternative.
- Remove bottles, razors, and bath accessories from the shower area.
- Rinse the grout with warm water to remove loose dirt.
- Mix 1/2 cup baking soda with 1/4 cup 3% hydrogen peroxide.
- Apply the paste to grout lines with a brush or gloved finger.
- Let it sit for 5 to 10 minutes.
- Scrub in small circles with a grout brush.
- Rinse thoroughly with clean water.
- Dry the surface with a towel or run the fan to reduce moisture.
If stains remain, repeat the process later. Do not keep adding stronger chemicals. More products do not always mean more cleaning power. Sometimes they mean fumes, regret, and an emergency phone call.
Common Mistakes to Avoid
Using Too Much Hydrogen Peroxide
A watery mix will slide off surfaces and dilute the scrubbing effect. Add peroxide slowly until the paste is thick enough to stay in place.
Letting the Paste Dry Completely
If the paste dries into a crust, it becomes harder to rinse. For deep stains, let it sit longer, but keep an eye on it. Cleaning should not require archaeological tools afterward.
Skipping the Patch Test
Always test first, especially on fabrics, painted surfaces, tile, grout, and countertops. A thirty-second test can save you from a permanent pale spot shaped like bad judgment.
Expecting It to Fix Everything
This mixture can brighten and clean, but it cannot repair cracked grout, remove every old stain, or undo years of moisture damage. If grout is crumbling, mold keeps returning, or stains are deep below the surface, you may need sealing, repair, better ventilation, or professional help.
How to Make the Results Last Longer
The best cleaner is the one you do not have to use constantly. After cleaning grout, sinks, or tubs, keep surfaces dry when possible. Moisture feeds mildew and makes soap scum cling. Run the bathroom fan after showers, wipe down wet areas, and clean small messes before they become dramatic.
For grout, sealing can help reduce staining and moisture absorption. For laundry, pretreat stains quickly. For cutting boards, rinse soon after use, especially after colorful foods like tomato sauce, turmeric, berries, or beets. Beets are delicious, but they stain like they are trying to leave a legacy.
Real-Life Experience: What Happens When You Actually Use This 2-Ingredient Cleaner?
The first time many people try a hydrogen peroxide and baking soda paste, they expect either disappointment or a miracle. The reality is somewhere better: practical, visible improvement without much drama. It is not a thunderclap from the heavens. It is more like looking at your grout and saying, “Oh. So you were white under there.”
One of the best places to test this DIY bleach alternative is a bathroom sink. Bathroom sinks collect toothpaste film, hard-water marks, makeup smudges, shaving residue, and tiny mysteries no one in the household will admit creating. A small scoop of the paste on a damp sponge usually gives immediate feedback. The baking soda provides a gentle grit, while the hydrogen peroxide helps brighten light stains. After a few circles with the sponge, the surface often feels smoother and looks cleaner. Rinse well, and the sink has that fresh, quiet sparkle that makes you briefly believe your whole life is under control.
Grout is where the mixture feels most impressive. Apply it along dingy grout lines, wait a few minutes, then scrub with an old toothbrush. The paste stays put better than liquid cleaners, which is a huge advantage on shower walls. You may notice some bubbling, especially where organic grime is present. That little fizz is satisfying, but it is not a substitute for scrubbing. The brush still has to do its job. Think of the peroxide as the clever assistant and the brush as the employee who actually carries the couch upstairs.
On white laundry, the experience is more cautious but still useful. A dab of paste on a white cotton towel or sock can help brighten dull spots before washing. The key is restraint. Do not smear it over colored fabrics and wander away for an hour unless you enjoy accidental tie-dye. For whites, a short pretreatment followed by a normal wash can make fabric look fresher, especially when the stain is recent. Old stains may need more than one round, and some may never fully leave. Stains, like certain houseguests, sometimes overstay permanently.
In the kitchen, the paste can be helpful on stained plastic cutting boards and certain baking sheets. For cutting boards, it works best when paired with a thorough rinse and a final wash with dish soap. For baking sheets, it can loosen brown cooked-on residue, but patience matters. Spread the paste, let it sit, then scrub. Do not expect a pan with ten years of roasted vegetables baked into it to look brand-new in two minutes. That pan has a biography.
The biggest lesson from using this cleaner is that it rewards good habits. It works best on regular maintenance, light stains, and surfaces that are safe for mild oxidation and gentle abrasion. It is less successful when used as a desperate rescue mission after months of buildup. A weekly or biweekly touch-up can keep grout, sinks, and tubs from reaching the “do we need a new bathroom?” stage.
The second lesson is safety. The simplicity of the ingredients can make people too confident. Do not add vinegar “for extra power.” Do not add bleach “just a little.” Do not bottle the mixture for later. Use the two ingredients, use them fresh, rinse thoroughly, and move on with your day. Cleaning should make your home healthier, not turn it into a cautionary tale with a surprisingly expensive ending.
Overall, the hydrogen peroxide and baking soda paste earns its place as a practical DIY alternative to bleach for everyday cleaning. It is cheap, easy, low-odor, and surprisingly effective on the right messes. It will not replace every disinfectant or specialty cleaner in your home, but it can absolutely reduce how often you reach for bleach. And that is a win for your surfaces, your nose, and everyone who has ever walked into a freshly bleached bathroom and immediately reconsidered breathing.
Conclusion
A powerful DIY alternative to bleach does not need to be complicated. With just 3% hydrogen peroxide and baking soda, you can make a simple cleaning paste that brightens grout, tackles stains, freshens sinks, deodorizes surfaces, and helps with everyday messes. The key is using it correctly: mix it fresh, test surfaces first, rinse thoroughly, and never combine it with bleach, vinegar, ammonia, or other cleaners.
This two-ingredient cleaner is best for cleaning and stain removal, not guaranteed high-level disinfection. For serious germ-killing needs, choose an EPA-registered disinfectant and follow the label. But for routine household grime, this paste is a smart, budget-friendly option that proves you do not always need the harshest product to get satisfying results. Sometimes the best cleaning solution is already sitting quietly in your cabinet, waiting for its big, bubbly moment.
Note: This article is based on current household cleaning safety guidance, public health recommendations, poison control warnings, university extension cleaning resources, and professional home-care best practices. Always follow product labels and test surfaces before using any DIY cleaner.