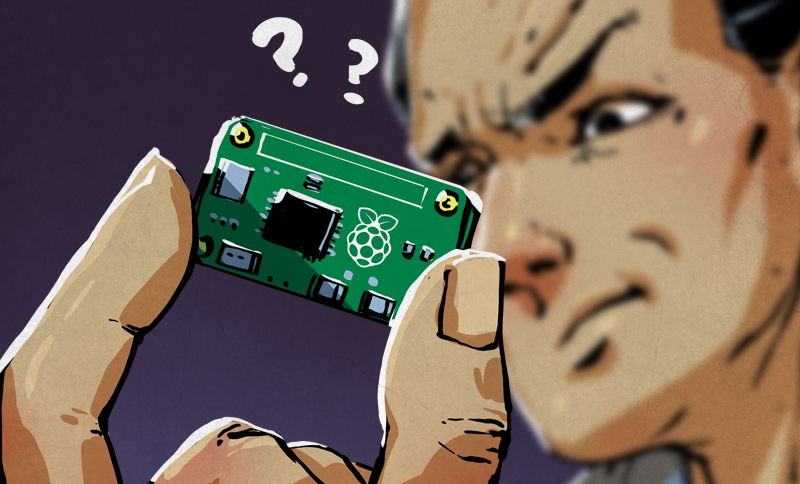
Every great hack begins with a dangerous little sentence: “What happens if I plug this into that?” Sometimes the answer is a blinking LED. Sometimes it is a robot that follows your cat around the kitchen. Occasionally, it is smoke, panic, and a sudden respect for datasheets. Welcome to the world of new parts, new hacks, where fresh components, better tools, and open-source hardware turn everyday curiosity into working inventions.
The phrase sounds simple, but it captures a major shift in modern DIY electronics and maker culture. New parts are not just replacement pieces or shiny gadgets for a drawer. They are tiny invitations. A low-cost microcontroller can become the brain of a weather station. A sensor can turn a bookshelf into a smart display. A repair kit can save a laptop from the recycling bin. A 3D-printed bracket can make an old machine useful again. The part arrives in the mail; the hack begins at the workbench.
Today’s makers have access to parts that once belonged mostly in engineering labs: compact microcontrollers, wireless modules, programmable LEDs, precision sensors, battery-management boards, machine-learning development kits, and repair components for phones, laptops, game consoles, appliances, and more. The result is a creative landscape where beginners can build real projects and experienced tinkerers can prototype ideas faster than ever. The parts are smaller, cheaper, smarter, and better documented. Naturally, the hacks are getting wilder.
What “New Parts, New Hacks” Really Means
At its heart, “new parts, new hacks” is a mindset. It means looking at a new component and asking not only what it was designed to do, but what else it might do with a little persuasion. A temperature sensor is not just for weather data; it can monitor a terrarium, prevent a 3D printer enclosure from overheating, or trigger a fan in a homemade fermentation box. A tiny camera board is not just for snapshots; it can help a robot navigate, watch a bird feeder, or inspect hard-to-reach plumbing.
Modern hacking does not always mean breaking into systems. In the maker world, a hack is a clever, practical, often delightfully odd solution built from available parts. It can be elegant or messy. It can live on a breadboard forever, held together by jumper wires and optimism. It can also become a polished product, open-source design, classroom project, or repair method that helps thousands of people.
The Parts That Changed the Game
Microcontrollers: Tiny Brains for Big Ideas
Microcontrollers are the celebrities of the parts bin. Boards such as Arduino-compatible devices and Raspberry Pi Pico-style microcontrollers give makers a simple way to read sensors, control motors, blink lights, collect data, and communicate with other devices. They are inexpensive enough for experiments, powerful enough for serious prototypes, and supported by huge communities of tutorials, libraries, and example code.
The Raspberry Pi Pico, built around the RP2040 microcontroller, helped remind the maker world that small boards can do surprisingly serious work. With dual-core processing, flexible input and output options, and programmable I/O features, boards in this category let builders handle timing-sensitive tasks without needing a full computer. That opens the door to custom keyboards, LED controllers, robotics, audio experiments, environmental monitors, and hardware interfaces that would have felt intimidating a decade ago.
Arduino remains just as important because it lowered the emotional temperature of electronics. Before Arduino-style workflows became common, microcontroller programming felt like a secret handshake club. Now a beginner can plug in a board, open an editor, upload a sketch, and make something happen in minutes. That first blinking LED may not look like much, but it is basically the gateway drug of physical computing.
Sensors: Giving Projects Eyes, Ears, and Nerves
New hacks often begin with new ways to sense the world. Distance sensors can detect whether a parking spot is occupied. Light sensors can adjust a display automatically. Accelerometers can detect motion, vibration, or orientation. Soil moisture sensors can remind you to water a plant before it becomes botanical jerky. Air-quality sensors can transform vague indoor complaints into actual data.
The magic is not just the sensor itself. It is the ecosystem around it: breakout boards, plug-and-play connectors, open-source libraries, and clear tutorials. Systems such as I2C and Qwiic-style connectors reduce wiring mistakes and make it easier to chain multiple sensors together. That means more time building and less time whispering threats at a breadboard.
Wireless Modules: Hacking Without the Cable Nest
Wireless connectivity has expanded what DIY projects can become. Wi-Fi and Bluetooth modules let makers build dashboards, smart-home tools, remote sensors, and phone-controlled devices. A garage temperature logger can publish data to a web page. A homemade smart lock can communicate with an app. A garden monitor can send an alert when the soil is dry. The project no longer has to sit beside your computer like a nervous pet.
Of course, connected hacks require connected responsibility. Any device on a network should be treated like a tiny computer with tiny risks. Strong passwords, firmware updates, secure communication, and thoughtful data handling matter. If your smart lamp can join the Wi-Fi, it should not also become the neighborhood’s most decorative security problem.
Repair Parts: The Underrated Hack
Not every hack begins with a blank breadboard. Some begin with a broken screen, a dead battery, a cracked hinge, or a game controller button that has chosen retirement. Repair parts are one of the most practical categories of “new parts” because they turn ownership back into action. Instead of replacing a whole device, you replace the failed component.
This matters for your wallet and for the planet. Repair keeps useful electronics in service longer and reduces unnecessary waste. It also teaches useful skills: how devices are assembled, why adhesives complicate repairs, how fragile ribbon cables can be, and why the right screwdriver bit can feel like a tiny miracle. A successful repair is a hack with manners. It does not shout, “Look what I invented!” It simply says, “I refused to throw this away.”
Why New Parts Create Better Hacks
New parts improve hacking in three big ways: access, speed, and confidence.
Access: More People Can Start
A beginner no longer needs a professional lab to build useful electronics. Starter kits include resistors, LEDs, jumper wires, buttons, motors, sensors, and microcontroller boards. Online tutorials explain wiring and code step by step. Maker communities answer questions that range from “Why is my LED backwards?” to “Why did my robot become emotionally committed to crashing into the wall?”
Speed: Ideas Become Prototypes Faster
Modular parts shorten the distance between concept and test. Instead of designing a custom circuit board on day one, a maker can combine breakout boards, development kits, and 3D-printed mounts. This does not replace engineering discipline; it accelerates learning. You can test whether the idea works before investing time in a polished design.
Confidence: Documentation Reduces Fear
Good documentation is a force multiplier. Clear pinouts, wiring diagrams, code examples, and troubleshooting notes help makers try ambitious projects without feeling completely alone. This is why ecosystems around parts matter as much as the parts themselves. A cheap sensor with no documentation can become a tiny rectangle of confusion. A well-documented part becomes a weekend project.
Practical Examples of New Parts Becoming New Hacks
1. A Smart Plant Monitor
Parts needed: a microcontroller, soil moisture sensor, temperature sensor, small display, and optional Wi-Fi module. The hack: monitor a houseplant and display whether it needs water. Add wireless alerts and you have a plant that politely complains before dramatically wilting on your windowsill.
2. A Retro Radio Bluetooth Upgrade
Parts needed: Bluetooth audio receiver, small amplifier, rechargeable battery module, and basic wiring tools. The hack: give an old AM/FM radio modern audio input while preserving its vintage look. It is less “throw away the old thing” and more “teach Grandpa’s radio to stream podcasts.”
3. A Custom Keyboard Macropad
Parts needed: microcontroller board, mechanical switches, keycaps, diodes, and a 3D-printed case. The hack: create a small programmable keypad for video editing, streaming, coding shortcuts, or launching frequently used commands. Bonus points if one key is labeled “Do Not Press” and absolutely launches a disco lighting scene.
4. A Weather Dashboard
Parts needed: sensor board, microcontroller or single-board computer, display, enclosure, and code library. The hack: show temperature, humidity, pressure, forecast data, or local air-quality readings. This project is useful, educational, and perfect for people who want to argue with the weather using numbers.
5. A Repair-and-Upgrade Laptop Project
Parts needed: replacement battery, SSD, RAM if supported, thermal paste, precision tools, and a repair guide. The hack: extend the life of an older laptop. A battery replacement can restore portability, an SSD can improve speed, and cleaning the cooling system can reduce fan noise. This is not flashy, but it is deeply satisfying. Few sounds are sweeter than an old laptop booting quickly after years of wheezing like a haunted accordion.
How to Choose the Right Part for a Hack
The most common beginner mistake is buying the most exciting part instead of the most suitable one. A powerful board is fun, but your project may only need a simple microcontroller. A fancy sensor is tempting, but it may require calibration you are not ready to perform. Before ordering, ask four questions.
What does the project need to sense, control, or communicate?
Start with the job, not the part. If you need to detect motion, choose between passive infrared, ultrasonic, radar, camera-based, or accelerometer solutions based on the environment. If you need to control a motor, check voltage, current, torque, speed, and driver requirements. The part should serve the problem, not the other way around.
Is the documentation clear?
Look for pin diagrams, datasheets, sample code, wiring examples, and known limitations. Strong documentation saves time and reduces mystery failures. When a listing says “easy to use” but provides no pinout, translate that as “may require snacks and emotional support.”
Does it match your power system?
Voltage mistakes are the classic maker tax. Some parts use 5 volts, others 3.3 volts, and some tolerate both. Motors and LED strips can draw far more current than a microcontroller pin can provide. Always check power requirements before connecting parts. Electricity is invisible, but it is not especially forgiving.
Can you replace or repair it?
For long-term projects, choose parts that are available from reliable suppliers and not mysterious one-off modules with no future. A hack built from replaceable parts is easier to maintain, improve, and share with others.
Safety: The Part of Hacking That Keeps the Fun Fun
Good hacks respect safety. Low-voltage electronics are usually beginner-friendly, but batteries, mains electricity, high-current motors, lasers, heat, sharp tools, and old CRT displays demand caution. Use fuses where appropriate. Do not charge lithium batteries with random boards of unknown quality. Do not work on plugged-in appliances. Do not assume a capacitor is discharged because it looks innocent. Capacitors are tiny metal cans full of betrayal.
When repairing devices, use guides from reliable repair communities, wear eye protection when prying glass or cutting materials, and keep screws organized. A magnetic mat, labeled containers, or even a muffin tin can prevent the classic ending where the device works again but you have three screws left and a new spiritual crisis.
Security for Connected Hacks
As DIY projects become connected, security becomes part of craftsmanship. A smart-home hack should use strong authentication, avoid hard-coded public passwords, and receive updates when possible. Makers should separate experimental devices from critical home networks, avoid exposing dashboards directly to the public internet, and think carefully about what data a project collects.
Government and standards organizations have increasingly focused on consumer IoT security because connected devices can create real risks when poorly designed. For makers, the lesson is simple: build like someone else might copy your project. Document safe defaults. Explain update steps. Avoid teaching bad habits. A clever hack is even better when it is not accidentally a cyber raccoon crawling through the network vents.
Sustainability: The Green Side of Hacking
New parts do not always mean buying more stuff. Some of the best hacks come from reuse: salvaged motors, old laptop screens, broken toys, discarded speakers, spare fasteners, empty enclosures, and rescued power supplies. Reuse reduces waste and encourages creative problem-solving. It also teaches reverse engineering, which is the fine art of asking, “What were the original designers thinking?” followed by “Actually, that is pretty clever.”
Repair and reuse are especially important for electronics because devices contain metals, plastics, glass, batteries, and other materials that require energy and resources to produce. Extending the useful life of a device is often better than replacing it early. When repair is not practical, responsible recycling keeps valuable materials in circulation and helps prevent pollution.
A Simple Workflow for Any New Hack
Step 1: Define the smallest working version
Do not begin with the deluxe version that has Wi-Fi, Bluetooth, voice control, solar charging, a mobile app, and a dramatic startup animation. Begin with the simplest version that proves the idea. If you are building a smart mailbox, first detect whether the door opened. Add alerts later.
Step 2: Prototype on the bench
Use a breadboard, jumper wires, and sample code. Confirm each part works alone before combining everything. When something fails, isolate the problem. Debugging five new parts at once is like interviewing five suspects who all have alibis written in C++.
Step 3: Build the enclosure last
Many beginners design the case too early. Then the circuit changes, the battery grows, the button moves, and the beautiful enclosure becomes a plastic regret sculpture. Let the electronics stabilize first. Then measure carefully and build the housing.
Step 4: Document everything
Take photos. Save code versions. Label wires. Write down part numbers. Future you will not remember why the purple wire goes to pin 12. Future you is busy, tired, and possibly holding a multimeter upside down.
Step 5: Share the result
Publishing a project helps others learn and helps you improve. Include what worked, what failed, what you would change, and what parts you used. Honest project notes are more valuable than perfect glamour shots. The maker community runs on shared wins and shared mistakes.
Common Mistakes When Working With New Parts
The first mistake is skipping the datasheet. The second is believing wire colors are universal law. The third is powering everything from a microcontroller pin and wondering why the board has become a tiny space heater. The fourth is assuming “compatible” means “effortless.” Compatibility often means “possible after installing the right library, choosing the right board settings, and sacrificing one afternoon.”
Another mistake is buying too many parts too soon. A drawer full of modules can be inspiring, but it can also become a museum of unfinished intentions. Buy what you need for the next experiment, not for the imaginary laboratory montage in your head. Parts are tools, not achievements.
Experience Notes: What New Parts Teach at the Workbench
The most useful lesson from working with new parts is that confidence grows through small, repeatable wins. The first time you connect a sensor and see real data appear on a serial monitor, it feels like discovering a secret tunnel under reality. Suddenly temperature, distance, movement, pressure, and light are not abstract conditions. They are numbers your project can understand.
One practical experience many makers share is the “one new part at a time” rule. When building a smart shelf light, for example, it is tempting to connect an LED strip, motion sensor, microcontroller, battery pack, charging circuit, and Wi-Fi dashboard all at once. That is how a relaxing weekend becomes a detective novel. A better approach is to test the LED strip first with a known power supply. Then test the motion sensor alone. Then combine them. Then add battery power. Then add the enclosure. Each step reduces confusion and makes the final hack stronger.
Another experience is learning that mechanical problems are just as important as electronic ones. A circuit can work perfectly on the bench and fail miserably in the real world because the wires strain, the button is hard to reach, the sensor points in the wrong direction, or the enclosure traps heat. New parts often need old-fashioned craftsmanship: drilling clean holes, smoothing edges, adding strain relief, choosing the right screws, and mounting boards so they do not rattle like loose change in a dryer.
Repair projects teach a different kind of patience. Replacing a phone battery or laptop fan is not about inventing something new; it is about respecting how something was built. You learn to heat adhesive gently, lift connectors carefully, and keep track of screws that are almost identical but not quite. You also learn that the correct tool is cheaper than the damage caused by the wrong one. A $5 spudger can save a $200 mistake. That is not a tool; that is a tiny insurance policy.
New parts also teach humility. A sensor may be noisy. A clone board may behave differently from the official board. A library may be outdated. A battery may sag under load. A 3D-printed bracket may look perfect until the screw holes are off by one millimeter, which is apparently the official measurement of rage. These frustrations are not signs of failure. They are the curriculum. Every broken prototype improves the next one.
The best experience, however, is the moment a hack becomes useful. The plant monitor actually saves a basil plant. The repaired laptop goes back to school or work. The garage sensor prevents a scratched bumper. The custom macropad speeds up editing. The old radio plays music again. That is when the pile of parts stops looking like clutter and starts looking like possibility.
In the end, “new parts, new hacks” is not about chasing every new board or module. It is about staying curious, learning carefully, and using available tools to solve real problems. The newest part on your bench might become a toy, a tool, a repair, an artwork, or the first prototype of something much bigger. Just read the datasheet first. Your eyebrows will thank you.
Conclusion: The Future Belongs to Curious Builders
New parts keep changing what makers can build, repair, and imagine. Microcontrollers make projects smarter. Sensors connect code to the physical world. Wireless modules let small devices communicate. Repair parts keep valuable products alive. Better documentation helps beginners start with confidence and helps experts move faster. Together, these tools create a culture where invention is no longer locked behind factory doors.
The best hacks are not always the most complicated. They are the ones that solve a problem, teach a lesson, extend the life of a device, or make someone grin when the lights blink exactly as planned. Whether you are building a robot, fixing a laptop, upgrading a vintage radio, or making a plant send passive-aggressive moisture alerts, the principle is the same: every new part is a new question. Every good hack is an answer with wires attached.