Your iPhone microphone has one job: make you sound like a normal human being instead of a mysterious robot calling from the bottom of a cereal box. So when people keep saying, “Hello? Are you there?” while you are clearly delivering a very important monologue, it gets old fast.
The good news is that an iPhone microphone not working does not always mean your phone is doomed. Sometimes the culprit is pocket lint, a case blocking a tiny opening, a Bluetooth headset stealing the audio, a privacy setting, a buggy app, or an iOS hiccup that needs a quick restart. Other times, yes, the microphone may need professional repairbut let’s not jump straight to “panic purchase a new phone” just yet.
This guide walks you through eight practical ways to troubleshoot iPhone microphone problems, whether your issue happens during phone calls, FaceTime, Siri, Voice Memos, video recording, WhatsApp, Instagram, Zoom, or any other app that needs your voice. Start with the simple fixes and work your way down. Your microphone may be one gentle cleaning away from a comeback tour.
Why Your iPhone Microphone Might Not Be Working
Modern iPhones usually use more than one microphone. Depending on the model, you may have a bottom microphone for calls and Voice Memos, a front microphone near the top of the phone for FaceTime or selfie videos, and a rear microphone near the camera system for video recording. That means one app may sound fine while another sounds muffled, silent, or oddly distant.
Common causes include blocked microphone openings, a case or screen protector covering the wrong spot, dust or pocket lint, Bluetooth audio routing, app permission problems, temporary software glitches, outdated iOS software, water or moisture exposure, or hardware damage from drops. The trick is to test carefully instead of guessing. Guessing is how people end up resetting everything when the real problem was a crumb-sized lint monster living in the bottom mic hole.
1. Test the Microphone First
Before changing settings, test the microphone so you know what kind of problem you are dealing with. Open the Voice Memos app, record a short clip, speak clearly near the bottom of the iPhone, then play it back. If your voice is clear, the primary microphone is probably working.
Next, open the Camera app and record a short selfie video while speaking. Play it back. Then record a video using the rear camera and test that audio too. This helps you identify whether the issue affects all microphone functions or only one microphone path.
What the results mean
If Voice Memos sounds clear but callers cannot hear you, the problem may involve phone-call settings, Bluetooth routing, your carrier connection, or the Phone app rather than the physical microphone. If selfie videos are silent but rear videos sound fine, one microphone may be blocked or damaged. If every recording is silent or extremely muffled, you may have a broader software or hardware issue.
Testing first saves time. It also gives you useful information if you later contact Apple Support or visit a repair technician. “My mic is broken” is vague. “Voice Memos records nothing, but rear-camera video has sound” is much more helpfuland it makes you sound like the Sherlock Holmes of tiny phone holes.
2. Remove the Case, Screen Protector, and Accessories
Cases are wonderful until they accidentally cover a microphone. Some thick, rugged, decorative, magnetic, wallet-style, or off-brand cases can partially block microphone openings. Screen protectors and camera lens protectors can also interfere if they are misaligned, peeling, or designed poorly.
Take off the case. Remove any film, damaged protector, or accessory that sits near the microphone openings. Then test Voice Memos and a short video again. If the microphone suddenly works, congratulations: your iPhone was not broken; it was wearing an audio-blocking turtleneck.
Also unplug wired headphones, adapters, microphones, charging accessories, or anything connected through the Lightning or USB-C port. If the iPhone thinks an accessory microphone is connected, it may route audio away from the built-in microphone. Even a dirty or damaged connector can create weird behavior.
3. Clean the Microphone Openings Gently
Your iPhone spends a lot of time in pockets, bags, purses, car cup holders, kitchen counters, and other glamorous lint environments. Over time, dust and debris can collect in the small microphone openings. When that happens, your voice may sound low, muffled, crackly, or far away.
Use a clean, dry, soft-bristled brush to gently clear the microphone areas. A soft toothbrush used only for electronics can work. Brush lightly around the openingsdo not jam anything into the holes. Avoid metal pins, needles, wet cotton swabs, or aggressive scraping. The goal is to remove lint, not perform amateur phone surgery at the dining table.
If there is visible debris, hold the phone so the opening faces downward while brushing. That helps dust fall out instead of being pushed deeper inside. After cleaning, test the microphone again with Voice Memos and video recording.
Be careful with compressed air
Some people recommend compressed air, but it can push debris deeper or damage delicate components if used too closely or forcefully. A gentle dry brush is usually safer for everyday cleaning. If the microphone grille looks clogged with sticky residue, corrosion, or compacted dirt, professional cleaning may be a better choice.
4. Restart Your iPhone and Reopen the App
Yes, “turn it off and on again” is the broccoli of tech advice: boring, predictable, and annoyingly useful. A restart can clear temporary software glitches, frozen background processes, audio routing bugs, or app conflicts that affect the microphone.
First, close the app where the microphone is failing. Reopen it and test again. If that does not help, restart your iPhone. On many newer models, press and hold the side button and either volume button until the power-off slider appears. Turn the phone off, wait a few seconds, then power it back on. On older models with a Home button, the restart steps may vary slightly.
After restarting, test the microphone before opening a dozen apps. This gives you a cleaner result. If the mic works after a restart but fails again later, pay attention to which app, accessory, or setting was active when the problem returned.
5. Check Microphone Permissions for Apps
If your iPhone microphone works in Voice Memos but not in Instagram, WhatsApp, Zoom, Snapchat, Facebook Messenger, TikTok, or another app, check microphone permissions. iOS requires apps to ask for microphone access. If you denied permission earlierperhaps during a rushed “just let me use the app already” momentthe app may not hear you.
Go to Settings > Privacy & Security > Microphone. Look for the app that is having trouble and make sure the switch is turned on. If the app is not listed, open the app and try using a microphone feature again. It may prompt you for access.
You can also try toggling the permission off and back on. Then close and reopen the app. For stubborn app-specific issues, check whether the app has an update available in the App Store. If only one app has microphone problems and every Apple app works normally, the issue may belong to that app rather than your iPhone hardware.
Watch for the orange microphone indicator
On modern versions of iOS, an orange indicator appears when an app is using the microphone. If you see it unexpectedly, open Control Center to check which app recently accessed the mic. This can help you spot an app that is holding the microphone in the background or creating a conflict during calls.
6. Disconnect Bluetooth Devices and Check Audio Routing
Bluetooth is convenient, but it can also create confusion. Your iPhone may be using the microphone on AirPods, earbuds, a car system, a speaker, a headset, or another nearby accessory instead of the built-in microphone. That can make your voice sound distant, muffled, choppy, or completely absent.
Open Control Center and temporarily turn off Bluetooth, or go to Settings > Bluetooth and disconnect active devices. Then test the built-in microphone again. If the microphone works when Bluetooth is off, reconnect devices one at a time to find the troublemaker.
If you use AirPods or another wireless headset, make sure they are charged and clean. Try putting them back in their case, waiting briefly, then reconnecting. You can also test a call using the iPhone speaker, the built-in receiver, and the headset separately. This tells you whether the issue is the iPhone microphone or the accessory microphone.
For car Bluetooth problems, delete the iPhone from the car’s Bluetooth system and delete the car from the iPhone’s Bluetooth list, then pair again. Car audio systems can be dramatic little goblins, especially after software updates.
7. Check Call Settings, Mute, and Microphone Modes
If the microphone problem happens mainly during phone calls or FaceTime, check the simple call controls first. Make sure you have not muted yourself. During a call, look for the microphone icon and confirm it is not active in mute mode. Also test both regular call mode and speakerphone mode. Sometimes one audio path fails while another works.
On compatible iPhones and iOS versions, microphone modes such as Voice Isolation, Standard, or Wide Spectrum may be available during supported calls. Voice Isolation can reduce background noise and make your voice clearer, which is helpful in loud places. However, if audio sounds unnatural or too processed, switch back to Standard and test again.
To find these options during a supported call, open Control Center and look for call or microphone controls. Availability can vary by app, call type, iPhone model, and iOS version.
When the issue is only with one caller
If only one person cannot hear you, call someone else. Then ask the original person to test their speaker, network, headset, or phone. It is entirely possible your microphone is innocent and the other person’s device is the villain wearing a fake mustache.
For cellular calls that cut in and out, try toggling Airplane Mode on and off, moving to a stronger signal area, or testing Wi-Fi Calling if your carrier supports it. Poor network conditions can make people think the microphone is failing when the real issue is call transmission.
8. Update iOS, Reset Settings, or Get Service
Software bugs can affect audio features, so make sure your iPhone is running the latest available iOS version. Go to Settings > General > Software Update. If an update is available, back up your iPhone first, then install it.
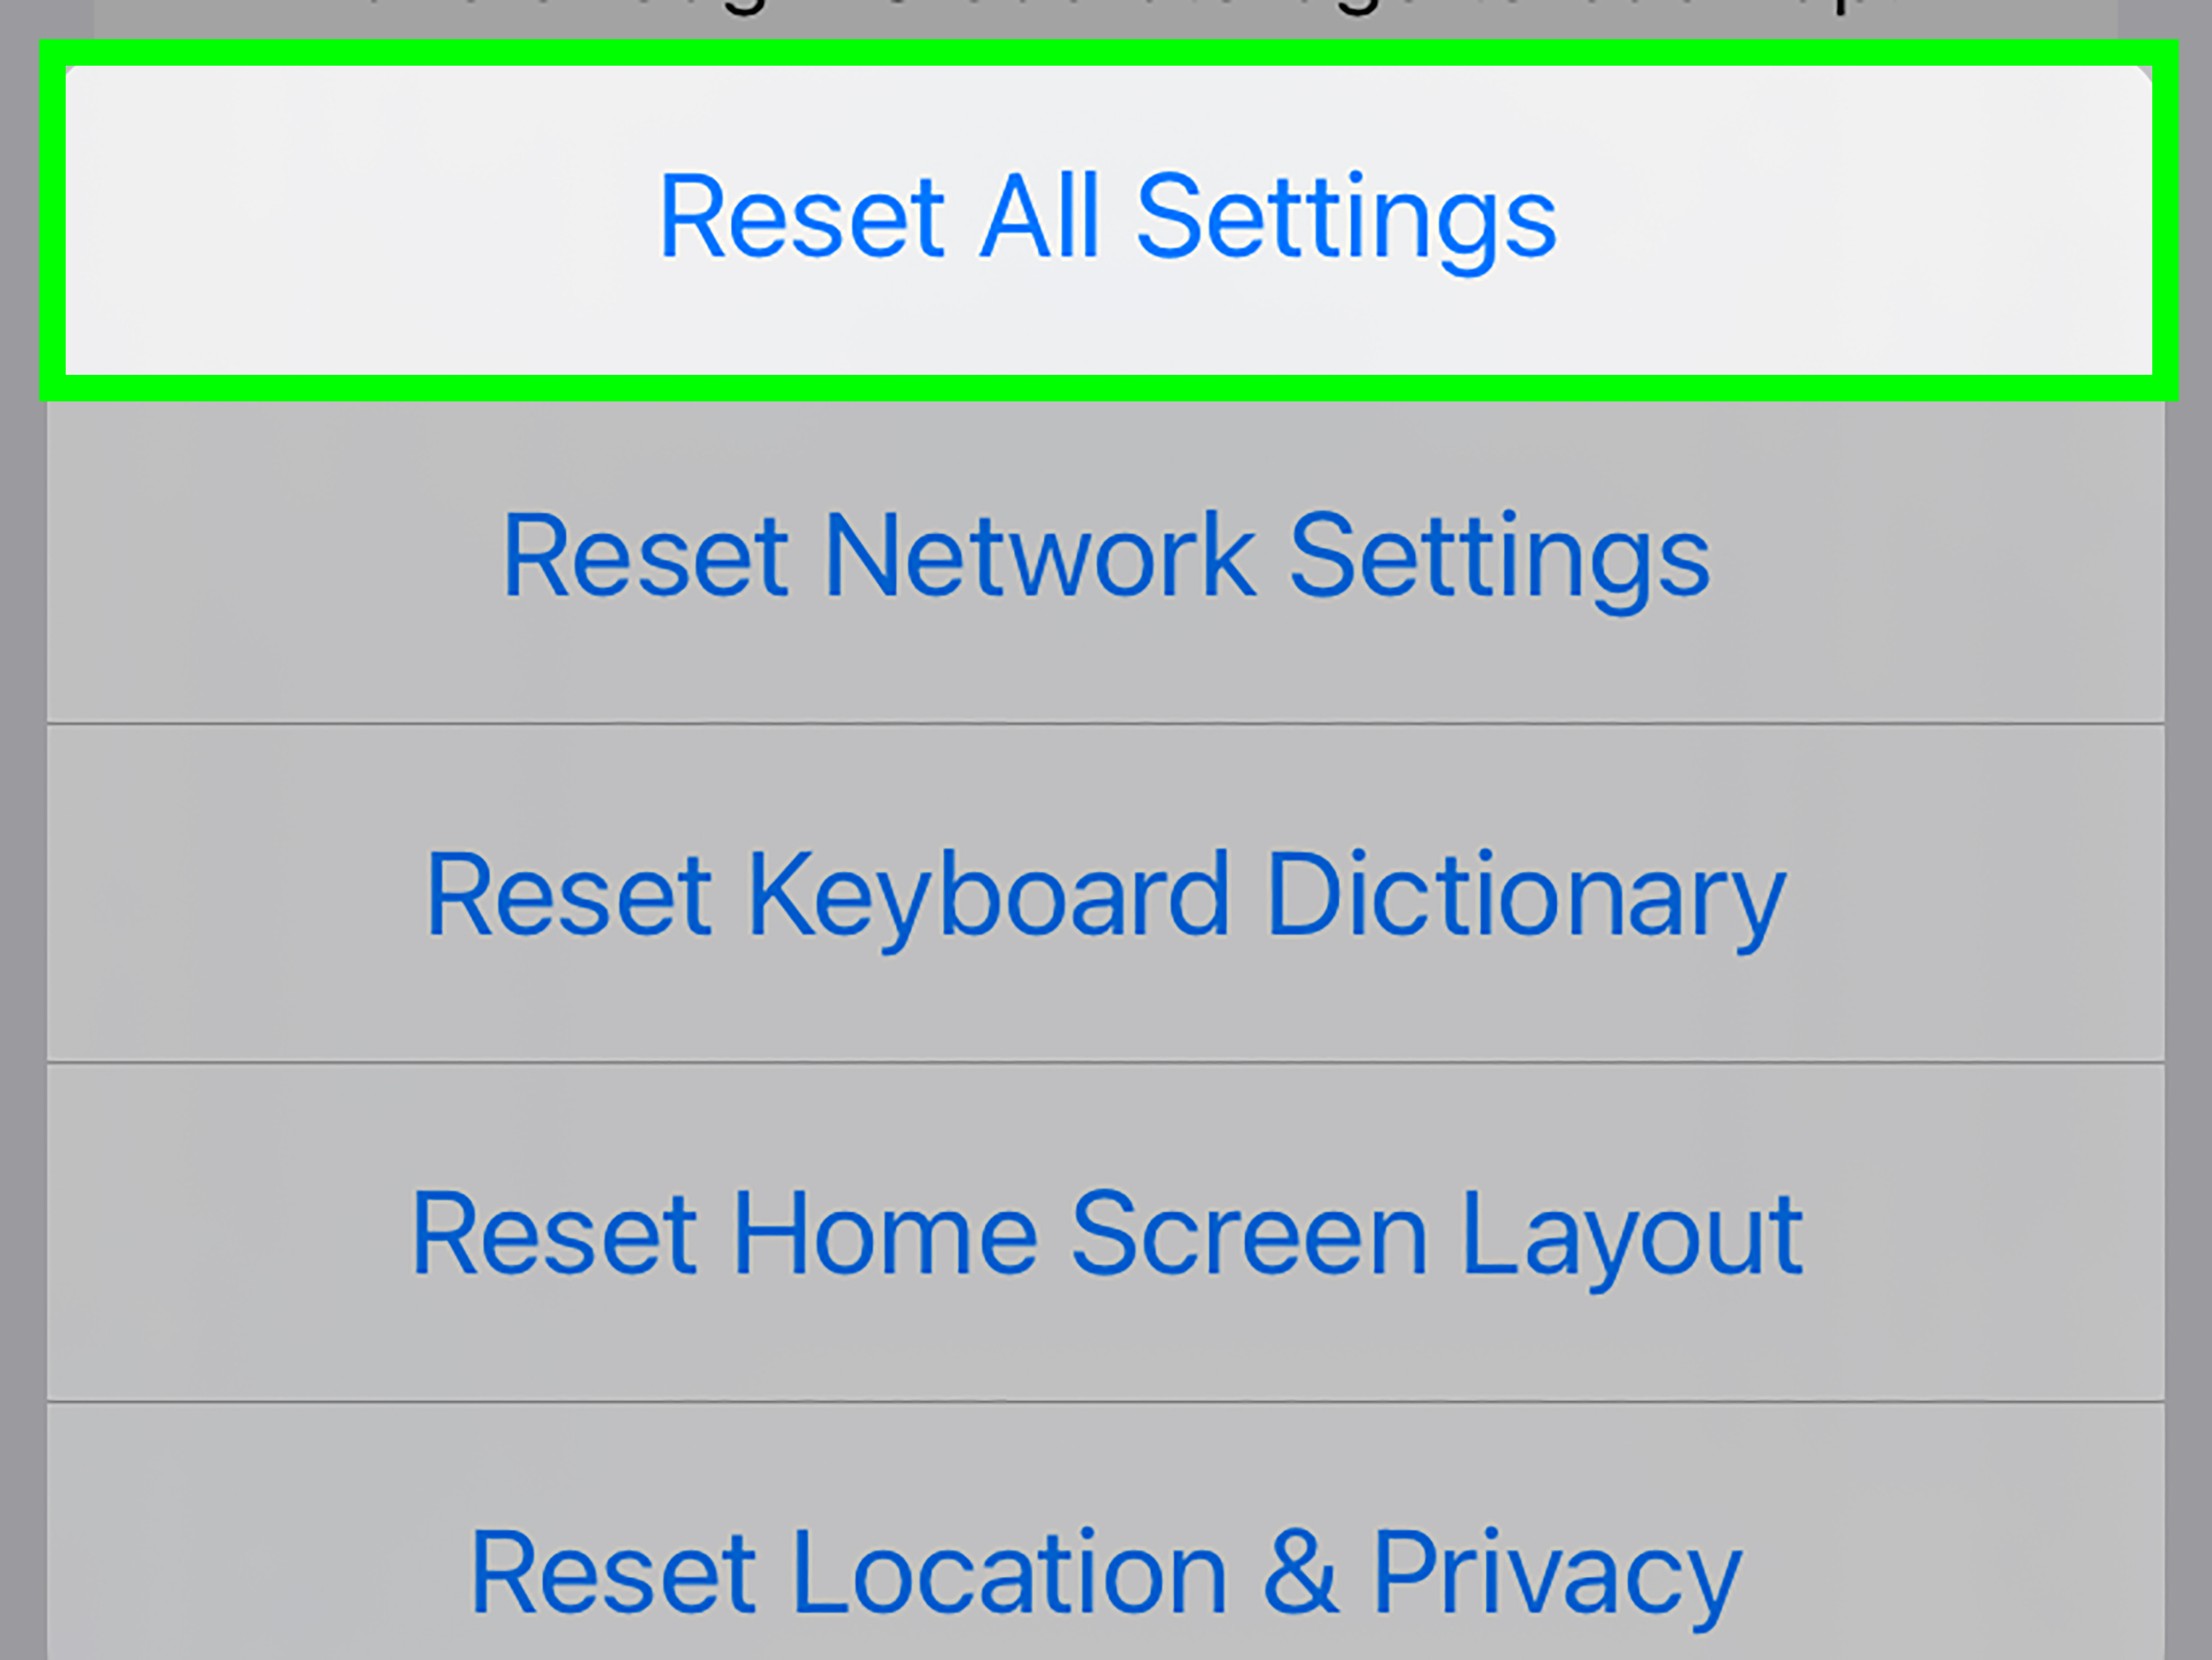
If updates do not help, consider resetting settings. Go to Settings > General > Transfer or Reset iPhone > Reset > Reset All Settings. This does not erase your photos, messages, apps, or personal media, but it does reset system settings such as network settings, privacy settings, location settings, keyboard dictionary, and Apple Pay cards. You may need to reconnect Wi-Fi, reconfigure preferences, and grant permissions again.
Be careful not to choose Erase All Content and Settings unless you intentionally want to wipe the phone after backing it up. Reset All Settings is a troubleshooting step. Erase All Content and Settings is the digital equivalent of moving out of your house.
If the microphone is still not working after cleaning, testing, permissions, Bluetooth checks, restarts, updates, and resets, it may be time for professional service. Hardware damage can happen after drops, liquid exposure, dust buildup, failed repairs, aging parts, or internal component failure. Contact Apple Support or visit an Apple Store or authorized service provider for diagnostics.
Quick Troubleshooting Checklist
- Record a Voice Memo to test the primary microphone.
- Record front and rear camera videos to test other microphones.
- Remove the case, screen protector, lens protector, and accessories.
- Gently clean microphone openings with a dry, soft brush.
- Restart the iPhone and reopen the affected app.
- Check Settings > Privacy & Security > Microphone.
- Turn off Bluetooth and disconnect headsets, cars, and speakers.
- Update iOS and consider Reset All Settings if needed.
- Seek service if the microphone remains silent or distorted everywhere.
Real-World Experience: What Usually Fixes an iPhone Microphone Problem
In real life, iPhone microphone problems usually fall into two categories: “that was embarrassingly easy” and “okay, this needs a technician.” The easy group is much larger than people think. A surprising number of microphone issues come from cases, screen protectors, Bluetooth devices, and privacy settings. These problems feel serious because the symptom is dramaticnobody can hear youbut the fix can be simple.
One common scenario is the “new case problem.” Someone buys a sturdy case online, installs it, and suddenly every phone call sounds like they are speaking through a sock. The case looks fine, the buttons work, and the camera is uncovered, but one tiny microphone opening is partially blocked. Removing the case instantly fixes the issue. This is especially common with very thick protective cases, cheap cases with imperfect cutouts, or cases designed for a slightly different iPhone model.
Another common experience is the Bluetooth trap. You answer a call expecting the iPhone microphone to work, but the phone is still connected to earbuds in another room, a car system in the driveway, or a speaker that has no useful microphone at all. The caller hears silence, echo, or distant audio. Turning off Bluetooth immediately reveals whether the iPhone microphone is actually the problem. This is one of the fastest tests you can do, and it saves a lot of unnecessary stress.
App permissions also cause plenty of confusion. A person may say, “My microphone is broken,” but Voice Memos works perfectly. Then it turns out only one app cannot hear them because microphone access was denied. This often happens after installing a new app or changing privacy settings. The fix is usually as simple as turning on microphone access under Privacy & Security. It feels too easy, but phones are full of tiny permission gates, and sometimes one gate is closed while the rest of the neighborhood is open.
Cleaning is another practical fix, especially for people who keep their phones in pockets. Pocket lint is basically the glitter of clothing: it gets everywhere and refuses to leave politely. A clogged bottom microphone can make calls sound muffled while videos still sound normal, which makes the problem seem mysterious. Gentle brushing often improves the sound. The key word is gentle. Do not stab the microphone holes with a needle, pin, SIM tool, or toothpick. Your iPhone does not need acupuncture.
When software is the culprit, a restart or iOS update often helps. Audio features rely on system services, app permissions, Bluetooth routing, and background processes. If one of those gets stuck, the microphone may behave strangely until the phone is restarted. Updating iOS can also fix known bugs that affect calls, FaceTime, Bluetooth, or app performance. For persistent weirdness, Reset All Settings can clean up broken preferences without deleting personal content.
The harder cases usually involve physical damage. If your iPhone was dropped, exposed to water, repaired with low-quality parts, or has one microphone that never records sound in any app, service may be necessary. A technician can test each microphone, check the charging-port assembly, inspect internal connectors, and determine whether a repair is realistic. At that point, continuing to poke settings is like arguing with a toaster that has no heating element.
The best approach is calm and methodical: test, remove accessories, clean, restart, check permissions, disconnect Bluetooth, update, reset settings, and then seek service. That order gives you the highest chance of fixing the issue without spending money first. Your iPhone microphone may not be brokenit may just be blocked, confused, muted, or connected to headphones hiding somewhere under a couch cushion.
Conclusion
An iPhone microphone not working can be annoying, especially when it ruins calls, voice messages, FaceTime chats, videos, or meetings. But the fix is often simpler than expected. Start by testing the microphone in Voice Memos and Camera, then remove anything that could block the mic, clean the openings gently, restart the phone, check app permissions, disconnect Bluetooth accessories, review call controls, update iOS, and reset settings only when needed.
If every test fails and your voice still sounds muffled, crackly, or completely silent, the problem may be hardware-related. In that case, getting professional diagnostics is the smartest move. Until then, do not assume the worst. Sometimes the mighty iPhone is defeated not by advanced technology, but by lint.
Note: If your iPhone has recent liquid damage, visible corrosion, or microphone failure across every app after all troubleshooting steps, avoid further cleaning attempts and get professional service.