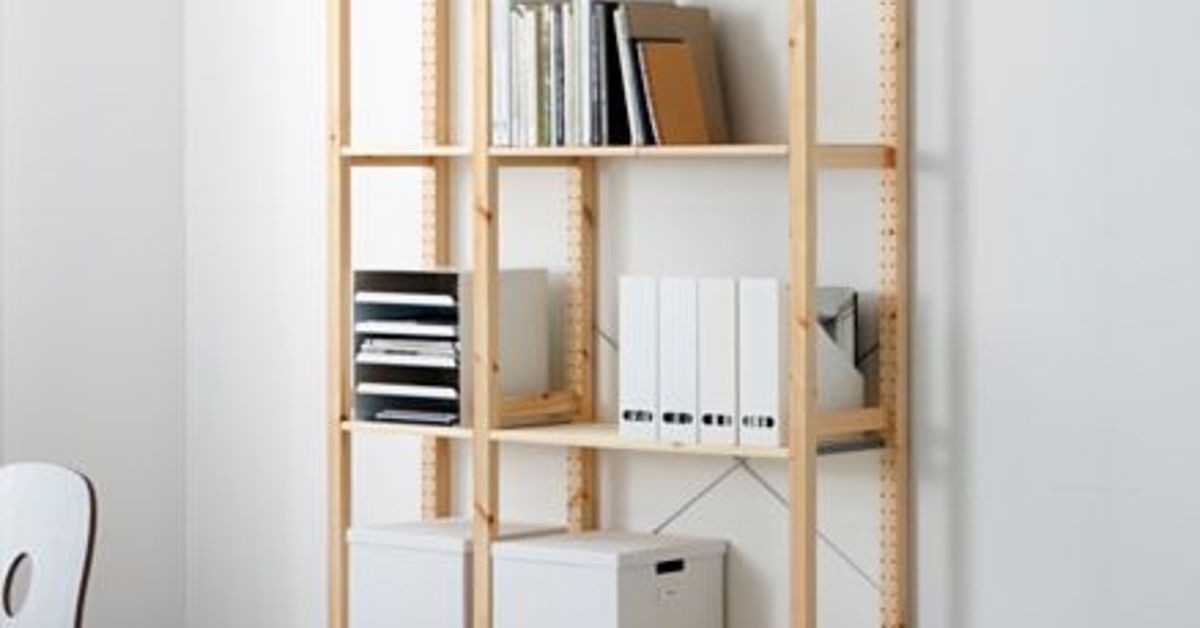
There are two types of people in the world: people who buy an IKEA shelving unit, assemble it, and leave it exactly as the instruction booklet intendedand people who look at the same flat-pack box and think, “What if this became a mudroom command center, toy garage, pantry wall, media console, craft station, and emotional support furniture all in one?” This article is for the second group, though the first group is welcome too. We have snacks, storage bins, and a cordless drill.
An IKEA hack is not just about making furniture look expensive. It is about making a basic piece work harder for real life. A simple shelving unit can become hidden storage, a built-in wall, a home office organizer, a kids’ toy zone, a kitchen island, a hallway drop spot, or a display cabinet that quietly whispers, “Yes, I do have my life together.” The best part? You do not need a mansion, a contractor, or a dramatic HGTV reveal budget. You need a plan, a measuring tape, the right inserts, and the patience to not start drilling before lunch.
Why IKEA Shelving Units Are Perfect for Hacking
IKEA shelving units are popular because they are modular, affordable, easy to personalize, and available in familiar sizes. The BILLY bookcase is a classic choice for book walls and faux built-ins, while the KALLAX cube unit is famous for flexible storage using baskets, drawers, doors, and open cubbies. These pieces are simple enough to modify but structured enough to become the foundation for a bigger custom project.
The secret is their predictability. Once you know the dimensions of your shelving unit, you can plan around it. You can add trim to make it look built-in, doors to hide clutter, legs to create height, wallpaper to add personality, lighting to create ambiance, baskets to sort everyday items, or a countertop to transform it into a work surface. It is furniture with a starter-pack personality: useful on day one, surprisingly glamorous by day three.
Start With Function Before Style
Before choosing paint colors, brass pulls, cane webbing, or any decorative detail that makes your Pinterest board feel emotionally seen, ask one boring but essential question: What do I need this shelving unit to do?
A good IKEA shelving hack begins with function. Maybe you need more toy storage in a living room. Maybe your entryway has become a shoe migration zone. Maybe your books are stacked like geological layers on every surface. Maybe your home office supplies are breeding in drawers. Once you identify the problem, the design becomes easier.
Common Storage Goals
For a living room, the goal may be to combine open display shelves with closed storage for remotes, board games, blankets, and cables. In a bedroom, a shelving unit might become a wardrobe extension with bins, drawers, and labeled compartments. In a kitchen, a KALLAX unit can work as a small island or pantry station when reinforced and topped with a durable surface. In a kids’ room, cubbies make cleanup easier because children understand “put the dinosaur in the square” better than “restore visual order to your environment.”
For a home office, adjustable shelves, file boxes, doors, and cable management can turn a basic unit into a productivity zone. For a hallway or mudroom, adding hooks, baskets, a bench cushion, and shoe storage creates a landing spot for bags, coats, keys, and the mysterious receipts that appear in every household.
Choosing the Right IKEA Shelving Unit
Not all shelving units are ideal for the same hack. The right choice depends on your room, storage needs, weight requirements, and desired look.
BILLY Bookcase: Best for Built-In Looks
The BILLY bookcase is one of the most hackable IKEA pieces because of its simple shape and adjustable shelves. It works beautifully for faux built-ins, library walls, dining room storage, craft cabinets, and display shelving. Add multiple units side by side, secure them properly, fill gaps with trim, and paint everything the same color as the wall for a custom cabinetry effect.
To make BILLY look less “fresh from the flat-pack forest,” add baseboards, crown molding, side panels, cabinet doors, or decorative hardware. Glass or solid doors can help balance display and concealed storage. Books and ceramics can stay visible; tax documents and tangled charger cords can politely disappear.
KALLAX: Best for Flexible Cube Storage
The KALLAX unit is a storage chameleon. Its cube layout works well for baskets, fabric bins, drawers, doors, vinyl records, toys, craft supplies, shoes, and office materials. It can stand vertically, sit horizontally, function as a room divider, or become a bench with the right planning and support.
KALLAX is especially useful in family spaces because each cube can have a job. One cube for blocks, one for books, one for art supplies, one for “tiny plastic objects with no known origin.” Add labels, and the unit becomes even more functional.
Other IKEA Options Worth Considering
Depending on the room, you might also consider modular IKEA systems, wall-mounted shelves, cube storage, or cabinet combinations. The best unit is the one that fits your wall, supports your items, and can be safely anchored or installed. Always check product measurements, shelf load limits, and wall-anchoring requirements before customizing.
Planning the Hack: Measure Twice, Regret Less
Every successful IKEA shelving hack begins with careful measuring. Measure the wall width, ceiling height, baseboard depth, outlet location, floor slope, and any doors or windows nearby. Older homes especially enjoy surprising DIYers with walls that are technically vertical but spiritually abstract.
If you are creating a built-in look, leave room for trim and filler pieces. If your shelving unit will sit against a wall with baseboards, decide whether you will remove the baseboard, notch the furniture, or build a platform that allows the unit to sit flush. If the project includes doors, confirm they can open fully without hitting furniture, curtains, or a nearby light switch.
Create a Simple Design Map
Sketch your shelving unit on paper or use a digital planner. Decide which areas will be open and which will be closed. Put heavy items low, everyday items at hand height, and decorative pieces higher up. A good storage system should not require climbing, crouching, or negotiating with gravity every morning.
Functional Add-Ons That Make a Big Difference
The right add-ons can turn a basic shelving unit into a custom storage solution. Here are practical upgrades that improve both function and appearance.
1. Add Doors for Hidden Storage
Open shelving looks great when styled carefully, but real life includes batteries, pet toys, paperwork, and one lonely screwdriver that never returns to the toolbox. Doors solve this problem. IKEA offers compatible doors for some systems, and DIYers often customize plain doors with cane webbing, fluted trim, fabric, wallpaper, or paint.
Use doors on the bottom half of a unit to hide bulkier items while keeping upper shelves open for books, plants, art, and baskets. This creates a balanced look: practical below, pretty above.
2. Use Baskets and Bins
Baskets are the fastest way to make a shelving unit more functional. They group small items, reduce visual clutter, and make cleanup faster. Choose matching baskets for a clean look or mix textures for a relaxed, collected feel.
For kids’ rooms, fabric bins are lightweight and easy to pull out. For entryways, sturdy woven baskets work well for scarves, hats, dog leashes, and reusable shopping bags. For offices, lidded boxes can hide documents while keeping shelves neat.
3. Install Drawer Inserts
Drawers are excellent for items that do not stack nicely. Think craft tools, cords, notebooks, makeup, small electronics, or accessories. Drawer inserts can make a cube unit feel more like real cabinetry without the cost of custom furniture.
4. Add Legs or a Base
Adding legs changes the entire personality of a shelving unit. Short legs can make it feel lighter and more like furniture. A solid wood base can make it feel built-in and substantial. For a mid-century look, try tapered legs. For a modern cabinet feel, use a simple plinth base.
If you add legs, make sure the unit remains stable and is properly anchored when needed. Storage furniture can become top-heavy, especially when loaded with books, dishes, or heavy bins.
5. Add a Countertop or Work Surface
A sturdy top can turn a low shelving unit into a buffet, craft table, desk extension, laundry folding station, or kitchen island. Butcher block, finished plywood, laminate, or painted wood can all work depending on the room.
For kitchens and laundry rooms, choose a surface that can handle moisture and frequent wiping. For craft rooms, choose something durable enough to survive scissors, glue, and the occasional glitter incident. Glitter is not a material; it is a lifestyle consequence.
6. Upgrade the Back Panel
The back panel is a great place to add style. Paint it a contrasting color, apply peel-and-stick wallpaper, install beadboard, or add thin plywood for a sturdier custom look. This simple change gives open shelves depth and makes decorative items pop.
7. Add Lighting
LED strip lights, puck lights, or picture lights can make a shelving unit feel expensive. Lighting is especially effective on built-ins, display shelves, bar cabinets, and office storage. Use warm lighting for a cozy feel and hide cords with clips, raceways, or cable channels.
How to Make an IKEA Shelving Unit Look Built-In
The built-in IKEA hack is popular because it offers a custom look for a fraction of the cost. The basic process is simple: line up multiple shelving units, secure them, fill gaps, add trim, paint, and style.
Step 1: Build a Level Base
A level base helps the units sit straight and gives them a more permanent look. Use lumber to create a platform that fits your wall and raises the shelves slightly, especially if you want to add baseboard trim across the front.
Step 2: Secure the Units
Attach the shelving units to each other and anchor them to the wall according to safety instructions. This step is not optional, especially for tall bookcases or units in homes with children or pets. The prettier the hack, the more heartbreaking it would be if it tipped over because someone skipped the safety hardware.
Step 3: Fill the Gaps
Use filler strips or trim to close gaps between the furniture and the wall. Caulk small seams for a polished finish. This is where the magic happens. Suddenly, separate bookcases begin to look like they were born there, raised there, and possibly included in the original floor plan.
Step 4: Add Molding
Crown molding at the top and base molding at the bottom make the unit look architectural. Vertical trim can hide seams between shelves. If your room already has traditional trim, match the profile as closely as possible.
Step 5: Prime and Paint
IKEA laminate surfaces usually need proper prep. Light sanding, a bonding primer, and durable paint will create a better finish. Do not skip primer unless you enjoy watching paint peel like a bad sunburn. Use a smooth roller for flat areas and a brush for corners and trim.
Room-by-Room IKEA Shelving Hack Ideas
Living Room Media Wall
Use low horizontal shelving units as a media console and surround the TV with taller bookcases or floating shelves. Add doors on the lower sections for electronics, games, and cables. Use open shelves above for books, framed art, and plants. Cable management is crucial here. Nothing ruins a beautiful media wall faster than a jungle of cords staging a rebellion.
Entryway Drop Zone
Turn a cube unit into a mudroom bench by placing it horizontally, adding a cushion, and using baskets for shoes. Add wall hooks above for coats and bags. A narrow shelf can hold keys, sunglasses, and mail. This setup is especially helpful in apartments or homes without a formal mudroom.
Home Office Organizer
Combine open shelves, document boxes, drawer inserts, and doors to create an office storage wall. Use labeled bins for printer paper, tech accessories, notebooks, and supplies. Add a small desktop between two shelving units for a built-in desk effect.
Kids’ Toy Storage
KALLAX-style cube shelving is excellent for toy organization. Use soft bins for plush toys, clear boxes for small sets, and open cubes for books. Keep the most-used toys low so children can access and return them independently. Add picture labels for younger kids.
Kitchen or Pantry Station
A shelving unit can create extra pantry storage when cabinet space is limited. Use baskets for snacks, jars for dry goods, and doors for less attractive essentials. A countertop on a low unit can provide extra prep space. Always consider weight and stability when storing dishes, appliances, or pantry staples.
Craft Room Command Center
Craft supplies are small, numerous, and extremely talented at becoming chaos. A customized shelving unit can organize paper, fabric, yarn, tools, paint, and machines. Add drawers for tiny items, magazine holders for paper, pegboard nearby for tools, and a worktop for projects.
Safety and Durability Tips
A beautiful IKEA shelving hack should also be safe. Anchor tall furniture to the wall. Use the correct hardware for your wall type. Drywall, plaster, brick, and studs require different anchors and screws. When in doubt, ask a hardware store expert or hire a professional for installation.
Place heavy items on lower shelves to improve stability. Avoid using furniture for purposes it was not designed to handle unless you have reinforced it properly. For bench hacks, confirm the unit can safely support seated weight or build a separate load-bearing frame. For kitchen island hacks, consider moisture protection, food-safe finishes, and easy-to-clean surfaces.
Budget-Friendly Ways to Make the Hack Look Expensive
You do not need luxury materials to get a high-end look. Small upgrades make a big visual impact.
Replace basic knobs with brass, matte black, leather, or wood hardware. Add trim to plain doors. Paint the unit the same color as the wall for a seamless built-in effect. Use matching storage bins for a cleaner appearance. Add books, framed art, ceramics, and greenery to open shelves. Leave some empty space so the shelves can breathe. Yes, shelves need breathing room. No, your collection of 47 novelty mugs does not agree.
Another trick is repetition. Matching baskets, repeated colors, and consistent spacing make even inexpensive furniture look intentional. The goal is not to hide that the piece came from IKEA. The goal is to make it look like IKEA went to finishing school.
Common Mistakes to Avoid
The first mistake is skipping measurements. The second is forgetting baseboards. The third is overloading shelves. The fourth is painting without prep. The fifth is starting with style instead of function.
Another common mistake is using too many open shelves. Open shelving is lovely, but only if the items on display are attractive or neatly organized. If your storage includes paperwork, chargers, board game pieces, cleaning supplies, or seasonal clutter, include closed storage. A good hack is honest about real life.
Finally, avoid rushing the finishing details. Trim, caulk, paint, and hardware are what turn a simple shelving unit into a custom-looking piece. The difference between “I assembled this last night” and “This came with the house” is often one weekend of finishing work.
Personal Experience: What IKEA Shelving Hacks Teach You About Real Storage
The best thing about customizing an IKEA shelving unit is that it forces you to understand your own habits. You may think you need more storage, but what you often need is better storage. There is a big difference. More storage means buying another shelf and hoping the clutter becomes shy. Better storage means deciding where things actually belong and designing a system that makes sense on a tired Tuesday night.
One practical lesson from IKEA hacking is that open shelves are great for motivation but terrible for denial. If a shelf is open, you will see everything. That is wonderful for books, baskets, plants, framed photos, and objects with decent manners. It is less wonderful for receipts, tangled cables, mystery batteries, and the instruction manual from a toaster you no longer own. This is why the best shelving hacks usually mix open and closed storage. The open shelves make the room feel styled. The closed sections do the emotional labor.
Another experience many DIYers discover quickly is that small upgrades change the whole feeling of a unit. A plain cube shelf with fabric bins looks useful. The same shelf with wood legs, matching baskets, a stained top, and matte hardware looks intentional. Add wall trim around it, and suddenly visitors are asking if you hired someone. At that moment, you may choose humilityor you may point dramatically at your drill and say, “I am the contractor now.”
Painting IKEA furniture also teaches patience. Laminate surfaces are not like raw wood. They need cleaning, scuff sanding, primer, and curing time. The project may look finished before the paint is fully hardened, but treat it gently. If you shove baskets back in too early, you may scratch the surface and say words not found in the assembly manual.
One of the most useful IKEA shelving hacks for everyday life is the entryway bench. A horizontal cube unit with baskets below and hooks above can change the rhythm of a household. Shoes stop spreading across the floor like wildlife. Bags have a home. Keys stop playing hide-and-seek. Even if the system is not perfect, it creates a landing zone, and landing zones are what keep busy homes from turning into obstacle courses.
For families, a cube shelving unit can be a sanity-saving toy system. The trick is to avoid over-organizing. Children are more likely to use broad categories: cars, blocks, dolls, costumes, books. Tiny categories may look beautiful on labels, but they often collapse during actual cleanup. A good toy shelf should be simple enough that a child can use it without a lecture, a flowchart, or a parent whispering, “That dinosaur does not belong with the farm animals.”
For renters, IKEA hacks are especially valuable because they offer custom function without permanent construction. You can create a faux built-in look with freestanding units, removable wallpaper, battery-powered lights, and baskets. If you cannot drill into walls, choose lower, stable units and avoid tall arrangements that require anchoring. Safety still matters, even when the lease agreement is glaring at you from a drawer.
The biggest takeaway is that an IKEA shelving hack does not need to be complicated to be successful. Sometimes the best customization is simply adding doors to hide clutter, baskets to group items, and a top surface to create a useful landing spot. Function first, beauty second, and perfection somewhere near the bottom of the list. The goal is not to create furniture that looks untouched by human life. The goal is to create storage that supports the way you actually live.
Conclusion
An IKEA shelving unit is more than a basic storage piece. With thoughtful planning, the right add-ons, and a few finishing details, it can become a custom-looking solution for almost any room. Whether you are building a library wall from BILLY bookcases, turning KALLAX cubes into a mudroom bench, or adding doors and baskets to hide everyday clutter, the key is to design around real needs.
Start with the problem, choose the right unit, measure carefully, anchor safely, and finish the piece with trim, paint, lighting, or hardware. The result is storage that looks better, works harder, and makes your home feel more organized without draining your budget. That is the beauty of a great IKEA hack: it gives ordinary furniture a promotion.