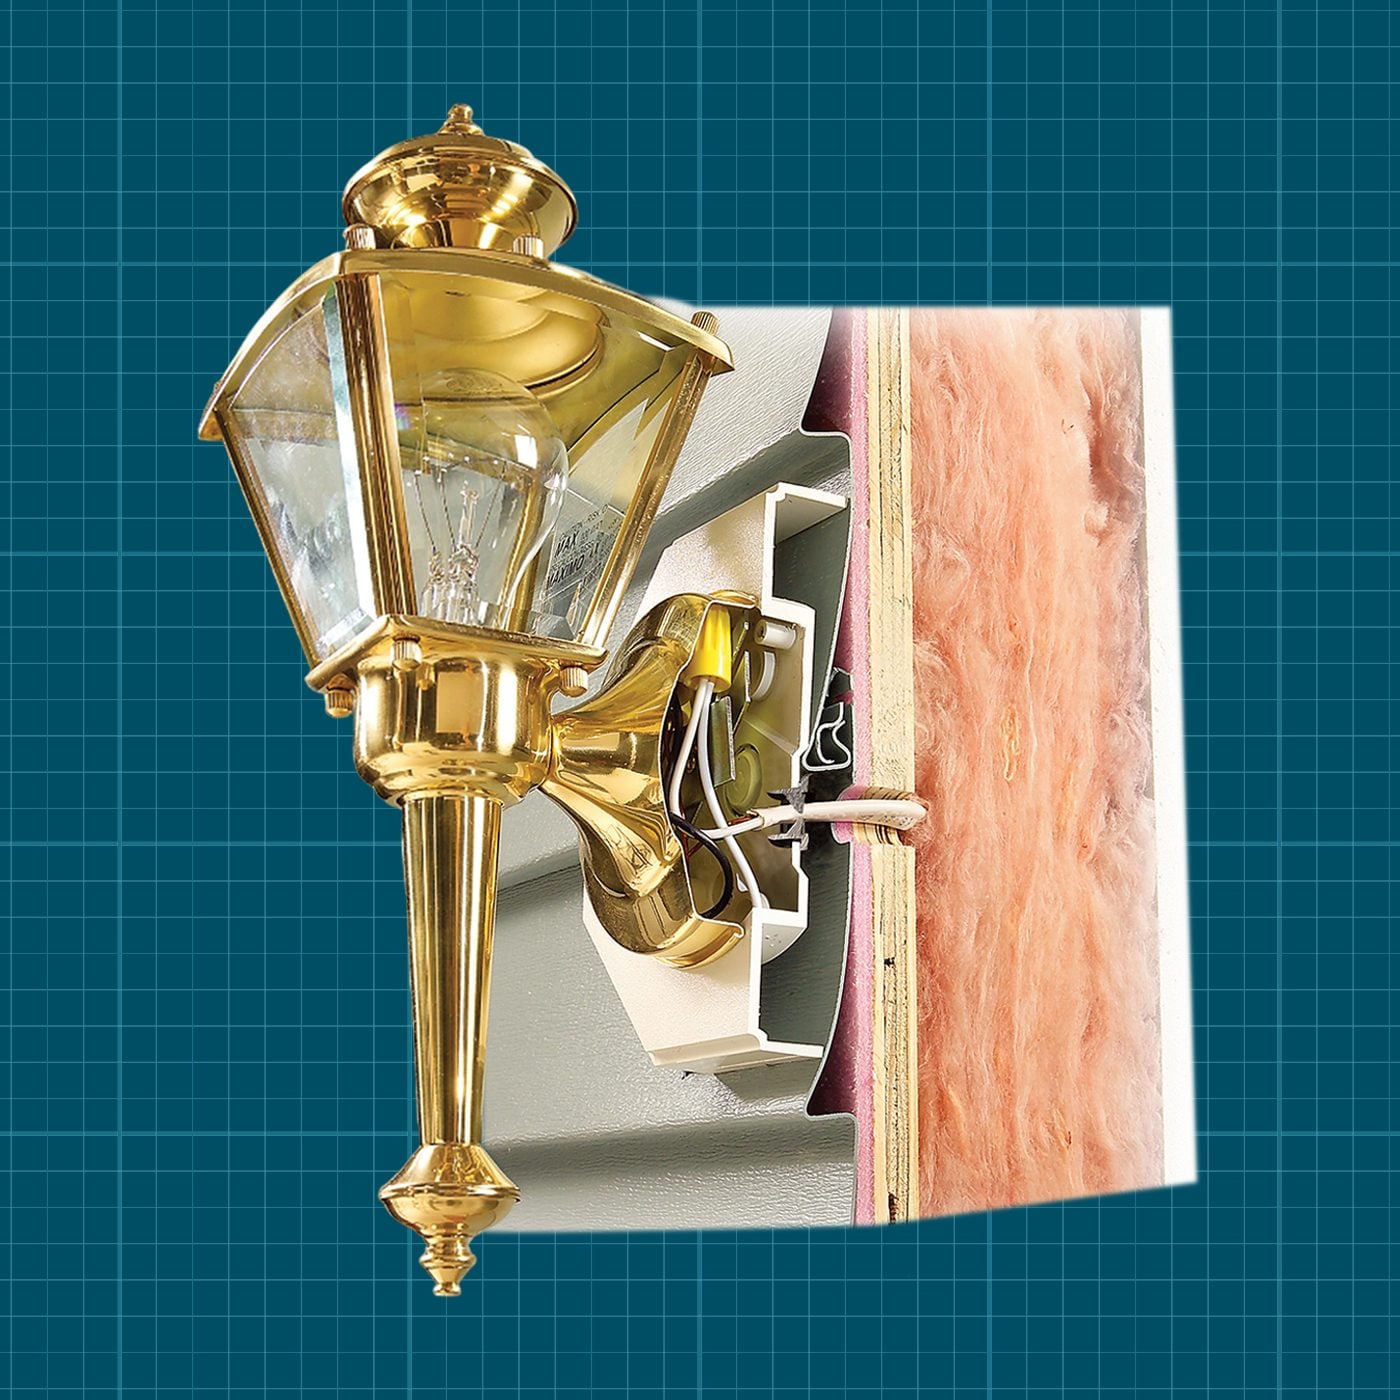
Mounting an exterior light on vinyl siding looks simpleright up until the fixture tilts sideways, the siding buckles, or rainwater discovers a suspicious new entrance into your wall. Vinyl siding is durable and low-maintenance, but it is not designed to support a porch lantern, security light, or oversized decorative sconce by itself.
The professional solution is to install a vinyl siding mounting block that creates a flat, stable surface for the fixture. The block must connect to solid backing or an approved electrical box behind the siding. In other words, the vinyl provides the outfit; the framing and electrical box do the heavy lifting.
This guide explains how to mount lights on vinyl siding safely, how to choose the correct mounting block, which mistakes cause leaks and loose fixtures, and when the job should be handed to a licensed electrician.
Research basis:
Why You Should Not Mount a Light Directly to Vinyl Siding
Vinyl siding expands and contracts as outdoor temperatures change. Its panels are intentionally installed with room to move, which is why siding fasteners should not clamp the material tightly against the wall. A hardwired light fixture, however, needs a rigid base that does not shift, bend, or pull away.
Screwing a fixture directly through the vinyl creates several problems:
- The uneven siding profile may leave the light crooked.
- Tight screws can crush or distort the siding.
- Loose screws may allow the fixture to wobble in the wind.
- Open gaps can admit rain, insects, and debris.
- The fixture may not be properly supported by an electrical box.
- Future siding movement can crack caulk or stress the fixture.
A mounting block solves these issues by bridging the contours of the siding and creating a smooth vertical face. Many blocks also include trim rings, built-in flashing features, or integrated electrical boxes. They make the installation look intentional instead of suggesting that the porch light lost an argument with gravity.
Research basis:
Choose the Right Vinyl Siding Mounting Block
Mounting blocks are not one-size-fits-all products. Before buying one, identify the siding profile, lap depth, fixture dimensions, and type of electrical box already in the wall.
Surface Mounting Blocks
A surface mounting block fits over existing vinyl siding. This is often the easiest choice when replacing a small exterior light and the electrical box behind the siding is already secure and correctly positioned.
The back of the block is shaped to match common siding profiles, while the front creates a level platform. Some models are designed for standard lap siding, while others fit Dutch lap, insulated siding, or deeper profiles.
Split Mounting Blocks
A split block comes in sections that fit around existing wires, pipes, or fixtures. It can be useful when the siding has already been installed and you do not want to disconnect or remove more material than necessary.
Split blocks are convenient, but the seams and perimeter must be assembled and sealed according to the manufacturer’s instructions. A hurried installation can create a handsome little funnel aimed directly at the wall sheathing.
Mounting Blocks With Built-In Electrical Boxes
Some mounting kits combine a siding block and a listed electrical box into one unit. These products can simplify retrofit installations because the fixture bracket attaches to the integrated box rather than to a thin decorative cover.
Built-in-box models are available for several siding depths and profiles. Check the fixture’s mounting footprint and the box capacity before buying. Large lanterns, floodlights, and camera lights may require an oversized block or deeper box.
Nailing-Flange Mounting Blocks
Nailing-flange blocks are commonly installed before or during siding installation. Their flanges fasten to solid wall backing, and the siding is trimmed around them. This approach usually delivers the cleanest integration and best water-management details.
For an existing home, installing one may require unlocking or temporarily removing several siding panels. That sounds dramatic, but vinyl siding can often be unlocked with an inexpensive siding-removal tool and reattached afterward.
Research basis:
Tools and Materials You May Need
- Vinyl siding mounting block sized for the fixture
- Exterior-rated light fixture
- Approved exterior electrical box, if one is not already present
- Noncontact voltage tester or appropriate electrical tester
- Phillips and flathead screwdrivers
- Drill and suitable drill bits
- Vinyl siding removal tool
- Utility knife or oscillating tool, where appropriate
- Tape measure, pencil, and level
- Exterior-rated fasteners
- Fixture gasket or manufacturer-approved sealant
- Exterior-grade flashing tape, when required
- Wire connectors approved for the conductors and location
- Safety glasses and a stable ladder
Read the instructions supplied with both the mounting block and the light. The correct cutting dimensions, fastening points, gaskets, sealants, and box requirements vary by product.
How to Mount a Light on Vinyl Siding
Step 1: Select a Safe Location
Choose a position that provides useful light without interfering with a door, window, downspout, vent, or siding seam. Beside an exterior door, wall lights are commonly positioned slightly above eye level so they illuminate the lock and entry area without shining directly into people’s eyes.
Confirm that the fixture canopy fits completely on the mounting block. A block that is technically wide enough but leaves the fixture hanging over its edges will look awkward and may be difficult to seal.
Step 2: Turn Off the Circuit
Switch off the correct breaker at the electrical panel. Do not rely only on the wall switch. Verify that the wires are de-energized with an appropriate tester before touching conductors or removing wire connectors.
If you cannot confidently identify the circuit, confirm that the power is off, or understand the existing wiring, stop and contact a licensed electrician. Electricity is famously unwilling to accept “I thought the switch was off” as a defense.
Electrical safety basis:
Step 3: Remove the Existing Fixture
Support the light while removing its mounting screws. Cut old caulk carefully, pull the fixture away from the wall, and photograph the wiring before disconnecting it. Remove the wire connectors and detach the mounting bracket.
Inspect the existing electrical box. It should be firmly attached, suitable for the location, accessible, and capable of supporting the fixture. Do not assume that a plastic siding accessory is an electrical box simply because wires are poking through it.
Step 4: Inspect the Wall and Backing
Look for rotten sheathing, loose framing, water stains, damaged house wrap, cracked siding, or an unsupported box. A secure installation requires solid backing behind the mounting assembly.
Manufacturers generally instruct installers not to attach exterior fixtures directly to vinyl siding. Fasteners should reach structural backing, framing, or a properly installed electrical box. If the existing box moves when gently pushed, repair or replace it before proceeding.
Step 5: Test-Fit the Mounting Block
Place the block over the siding without fastening it. Check that its profile matches the siding and that the front surface is vertical. Confirm that the fixture base sits flat against it.
A block made for a half-inch lap may not fit a deeper profile, Dutch lap, or insulated vinyl siding. Measure rather than guessing. “Close enough” is an excellent philosophy for estimating the number of cookies left in a package, but not for creating a weather-resistant wall penetration.
Step 6: Mark and Cut the Opening
Use the manufacturer’s template or the back of the mounting block to mark the opening. If siding must be cut, avoid making the opening larger than necessary. Protect the water-resistant barrier behind the siding and inspect it after cutting.
Some mounting systems require clearance around the fixture or block to accommodate movement. Others install directly over the siding with little cutting. Follow the dimensions supplied with the exact product rather than copying a measurement from a different block.
Step 7: Install or Secure the Electrical Box
For a hardwired light, electrical connections belong inside an approved box. Install the box according to its listing and instructions, and make sure it is solidly supported. A mounting block with an integrated box can be convenient when its depth, capacity, and siding profile suit the application.
Do not bury an existing electrical box behind another box or block unless the assembly is specifically approved for that configuration. Junctions generally need to remain accessible, and stacking random components can create wiring-space and support problems.
Step 8: Flash and Fasten the Mounting Block
Position the block over the box and wiring opening. If the system includes a nailing flange, integrate it with the wall’s water-resistant barrier as directed. Use exterior-rated fasteners long enough to reach solid backing.
Tighten the block until it is secure, but do not crush the vinyl siding or distort the block. The siding around it should retain any movement clearance required by the siding manufacturer.
Use the supplied gasket, flashing components, or approved exterior sealant. Some assemblies call for sealing around particular edges, while others include drainage paths that should remain open. Do not automatically fill every gap with a heroic tube of caulk. Follow the block and fixture instructions so water is directed outward rather than trapped behind the assembly.
Installation basis:
Step 9: Attach the Fixture Bracket
Fasten the fixture’s mounting bracket to the electrical box, not merely to the decorative face of the siding block. Center the bracket and confirm that it can carry the fixture without flexing.
For an unusually heavy lantern, verify the fixture weight against the support rating of the box and mounting system. Additional framing or a different box may be necessary.
Step 10: Connect the Wiring
Follow the light manufacturer’s wiring diagram. In a typical installation, the equipment grounding conductors connect together, the neutral conductors connect together, and the switched hot conductor connects to the fixture’s hot lead. Wire colors and arrangements can vary, especially in older homes, so never identify a conductor by color alone when the wiring is uncertain.
Use approved wire connectors, keep all splices inside the electrical box, and avoid pinching conductors between the fixture and bracket. Carefully fold the wires into the box instead of forcing them into a tiny electrical bird’s nest.
Step 11: Install the Fixture and Weather Seal
Place the fixture gasket between the fixture canopy and mounting surface if one is supplied. Attach the fixture to the bracket and tighten the hardware evenly. The canopy should sit flat without rocking or bending the mounting block.
Apply exterior-rated sealant only where directed by the fixture or block manufacturer. Many installers seal the upper and side edges while preserving a lower drainage route, but the correct detail depends on the product. Manufacturer instructions take priority over universal caulking folklore.
Step 12: Restore Power and Test the Light
Install the bulb if required, restore power at the breaker, and test the wall switch, motion sensor, photocell, timer, or camera functions. View the fixture from several angles to confirm that it is straight.
After the next heavy rain, inspect the area for moisture, loose caulk, fogging inside the lens, or movement around the block. A five-minute inspection can catch a small problem before it becomes an expensive wall repair.
Weather and fixture basis:
Common Mistakes to Avoid
Attaching the Fixture Only to the Siding
Vinyl siding is cladding, not structural support. The fixture bracket should be secured to an approved electrical box or solid backing.
Buying the Wrong Block Profile
A standard lap block may sit poorly on Dutch lap or insulated siding. Measure the lap height and depth, and compare them with the product specifications.
Using an Undersized Mounting Block
The fixture canopy should fit comfortably within the block’s flat face. Leave room for fasteners, gaskets, sealant, and future maintenance.
Overtightening Fasteners
Overtightening can bow the block, crack plastic components, pinch wiring, or prevent the surrounding siding from moving naturally.
Leaving Electrical Splices Outside a Box
Wire connectors tucked behind siding are neither a clever shortcut nor a charming surprise for the next homeowner. Keep all connections inside an approved, accessible electrical enclosure.
Using an Indoor Fixture Outdoors
Select a fixture listed for the conditions where it will be installed. A protected porch may have different exposure than a wall that receives direct rain, snow, or sprinkler spray.
Sealing Without Considering Drainage
Caulk is part of a water-management system, not a substitute for one. Incorrectly sealing the bottom of an assembly can trap water that would otherwise drain away.
Can You Hang String Lights From Vinyl Siding?
Lightweight string lights are different from hardwired wall fixtures. Vinyl siding clips can hook into panel seams without drilling holes, making them useful for seasonal decorations and lightweight cords.
Do not use siding clips to support heavy fixtures, tightly tensioned cable, or long unsupported spans. Secure outdoor string lights according to their instructions, use products and extension cords rated for outdoor service, avoid damaging cord insulation, and keep connections away from standing water.
Temporary-light basis:
When to Hire a Professional
Replacing a basic fixture on an existing, correctly installed box may be manageable for an experienced homeowner. Professional help is the safer choice when:
- No electrical box is present.
- The box is loose, corroded, damaged, or undersized.
- A new circuit, switch, or cable route is required.
- The wiring is old, unidentified, or damaged.
- The wall shows rot or water intrusion.
- The fixture is unusually large or heavy.
- The mounting location is high or difficult to reach.
- Local rules require a permit or licensed electrical work.
A siding contractor can also help when several panels must be removed and reinstalled or when the water-resistant barrier needs repair.
Experience-Based Lessons From Real-World Installations
The most useful lessons about mounting lights on vinyl siding often appear after someone removes the old fixture. From the sidewalk, the light may look perfectly normal. Behind it, however, there may be a cracked plastic block, a loose electrical box, several mystery screws, and enough caulk to qualify as modern sculpture.
Lesson 1: Inspect Before Shopping
A common homeowner experience is buying a handsome new porch light first and discovering later that its canopy is wider than the existing mounting block. The fixture may technically cover the electrical box but extend beyond the flat surface, leaving gaps against the sloped siding.
The better approach is to remove or carefully measure the old fixture before purchasing the replacement. Record the mounting-block dimensions, siding profile, box shape, screw spacing, and available clearance around doors and trim. A few measurements can prevent multiple return trips to the home-improvement storethe traditional migration pattern of the weekend DIYer.
Lesson 2: “There Is a Block” Does Not Mean “There Is a Box”
Another frequent surprise is finding a decorative siding block with no approved electrical box behind it. Wires may pass through a small hole while the fixture is held by screws driven into sheathing or thin plastic.
The lesson is simple: verify what actually supports the light. A decorative block provides a flat surface, but it does not automatically provide electrical containment or structural support. When the existing assembly is questionable, replacing it with a mounting block that includes a properly installed electrical box can turn a sketchy installation into a clean, serviceable one.
Lesson 3: The Correct Siding Profile Matters
Homeowners regularly report that a mounting block labeled for “vinyl siding” still does not fit their wall. That is usually because vinyl siding comes in different lap heights, depths, shapes, and insulated configurations.
A block made for standard clapboard siding may rock on Dutch lap siding. One designed for a shallow profile may pinch deeper panels. Taking a profile measurementor bringing a clear side-view photograph to the storecan save considerable frustration.
Lesson 4: Bigger Fixtures Reveal Small Installation Errors
A compact porch lantern may hide a slightly crooked block. A large modern sconce will announce the problem to the entire neighborhood. Long fixtures exaggerate tiny alignment errors, especially when mounted beside a straight door frame.
Before drilling final holes, temporarily hold the mounting block and fixture in place. Step back, check the height, and use a level. It is much easier to move a pencil mark than a hole through siding and sheathing.
Lesson 5: Water Problems Usually Begin Quietly
A poorly sealed mounting block may not produce an immediate indoor leak. Instead, small amounts of water can enter behind the siding, dampen the sheathing, and dry slowly. Months or years later, the first visible clues may be swollen trim, discoloration, insects, or a loose fixture.
Experienced installers treat flashing, gaskets, and sealant as a coordinated system. They inspect the house wrap, use the manufacturer’s drainage design, and avoid relying on a thick surface bead of caulk to solve every problem.
Lesson 6: Do Not Force an Existing Problem to Fit a New Fixture
When the electrical box is off-center, recessed too deeply, or barely attached, it can be tempting to use extra-long screws and spacers until the new light stays on the wall. That may produce a temporary victory, but the underlying defect remains.
Repairing the box and backing takes longer, yet it makes future fixture replacement easier and safer. A good installation should allow the next person to remove the light, access the wiring, and understand how everything is supported without conducting an archaeological excavation.
Lesson 7: A Final Rain Check Is Worth the Effort
After installation, many people test only whether the light turns on. That confirms the electrical portion but says nothing about the wall’s weather resistance.
Inspect the fixture after rain and again after a season of temperature changes. Look for gaps, movement, cracked sealant, trapped water, or condensation. Exterior materials move over time, and an installation that receives a quick follow-up inspection is more likely to remain secure and dry.
Experience patterns synthesized from:
Conclusion
The best way to mount lights on vinyl siding is to treat the siding as a finish material, not as the fixture’s support. Use a properly sized mounting block, secure the assembly to solid backing or an approved electrical box, protect the wall’s water-management layers, and follow the instructions supplied with the block and light.
Careful measurements and a proper test fit prevent crooked fixtures. Correct flashing and sealing help keep water outside. Most importantly, verifying that the circuit is de-energized and the electrical box is sound keeps a straightforward home upgrade from becoming a much more exciting project than anyone requested.
Note: Product designs, electrical requirements, permits, and accepted installation methods vary by location. Follow the current instructions supplied by the siding, mounting-block, electrical-box, and light manufacturers. Consult a licensed electrician or qualified siding professional when the existing wiring, structural backing, or moisture barrier is uncertain.