A backless dress can make you feel elegant, confident, and approximately 37 percent more glamorous. Unfortunately, it can also create one awkward question: What are you supposed to wear underneath it?
That is where a backless bra earns its place in the lingerie drawer. Whether it is an adhesive bra, a strapless backless bra, a deep-plunge design, or a pair of supportive sticky cups, the right product can provide coverage and shaping without sending ordinary bra straps marching across your open-back outfit.
The secret is not simply buying a sticky bra and slapping it on five minutes before leaving the house. Proper sizing, skin preparation, positioning, and aftercare all affect how securely it stays in place. This guide explains how to wear a backless bra in 12 practical steps, including tips for creating cleavage, avoiding visible edges, protecting sensitive skin, and keeping a reusable bra sticky for future events.
What Is a Backless Bra?
A backless bra is an undergarment designed to remain hidden beneath clothing with an open or very low back. Unlike a traditional bra, it may not have a standard band or shoulder straps. Many models use skin-safe adhesive inside the cups, on side wings, or along lifting tabs to stay in position.
The term covers several different products:
- Adhesive cup bras: Two self-sticking cups joined by a front clasp.
- Adhesive wing bras: Molded cups with sticky side panels for additional stability.
- Deep U-plunge bras: Low-center designs made for plunging necklines as well as low backs.
- Low-back bustiers: Structured bras with a band that sits lower than a conventional bra band.
- Breast lift tape: Flexible adhesive strips arranged to suit unusual necklines and dress shapes.
- Nipple covers: Minimal products that provide coverage but usually little or no lift.
No single option works for every outfit or body shape. A lightweight adhesive bra may disappear under a satin slip dress, while a structured wedding gown may work better with sewn-in cups or a low-back bustier. The outfit gets a vote, too.
How to Wear a Backless Bra in 12 Steps
1. Match the Bra to Your Outfit
Begin by putting on the dress or top without a bra and examining its neckline, sides, back, and fabric thickness. This reveals exactly how much coverage you have available.
A clasped adhesive bra works well beneath many backless and strapless styles. Choose a deep U-plunge bra for a low-cut front, adhesive wings when the sides of the garment provide enough coverage, or nipple covers when you need smoothing rather than lift. A low-back bustier may provide better support beneath a structured gown, provided its band remains below the garment opening.
Also consider the fabric. Thin silk, satin, and fitted jersey can reveal thick cup edges, while lined or textured clothing is usually more forgiving.
2. Choose the Correct Size
Do not assume that every backless bra uses the same sizing system as your everyday bra. Some are sold by cup size, others use small-through-extra-large sizing, and certain brands provide their own conversion charts.
The cup should cover the breast without cutting across tissue or leaving a large empty pocket. A cup that is too small may create spillage and visible ridges. One that is too large can wrinkle, gap, or lose contact with the skin.
People with fuller busts should look for designs made specifically for larger cup sizes, wider adhesive coverage, reinforced side wings, or structured support. A sticky bra can provide useful shaping, but it will not always deliver the same support as a well-fitted traditional bra with a secure band.
3. Read the Product Instructions
Yes, the tiny instruction card matters. Different adhesives have different limits, application methods, wear times, and cleaning requirements. Some reusable silicone bras should be washed only with mild soap and water. Certain disposable adhesive products may permit oil during removal, while oil can damage the sticking surface of other designs.
Check whether the manufacturer advises against use during pregnancy, on highly sensitive skin, or for longer than a specified number of hours. Following the product-specific directions is safer than improvising based on a 14-second social media video filmed by someone who appears to own industrial-strength skin.
4. Perform a Skin Patch Test
If you have sensitive skin, eczema, a history of reactions to bandages, or uncertainty about the adhesive, test a small section before the event. Place a small amount of the adhesive material on an inconspicuous area according to the manufacturer’s directions and monitor the skin.
Do not apply an adhesive bra over cuts, rashes, sunburn, broken skin, or irritated areas. Remove it promptly if you develop intense itching, burning, swelling, blistering, or significant redness. Persistent or severe symptoms deserve medical attention.
A patch test cannot guarantee that a larger application will cause no reaction, but it may reveal an obvious sensitivity before your outfit and your skin enter a highly public disagreement.
5. Wash and Completely Dry Your Skin
Clean skin is the foundation of a secure fit. Wash your chest with mild soap and water to remove body oil, sweat, and skin-care residue. Rinse thoroughly and dry the area with a clean, lint-free towel.
Do not apply lotion, body oil, sunscreen, perfume, powder, deodorant, or moisturizer where the adhesive will touch. Even a light layer can weaken the bond and cause the edges to lift. Save the body shimmer for areas that are not holding up your bra.
Allow your skin to cool and dry fully after showering. Applying an adhesive bra while your skin is warm, damp, or already sweaty can reduce its staying power.
6. Stand in Front of a Mirror and Unfasten the Cups
Apply a front-clasp adhesive bra one cup at a time. Before removing the protective film, unfasten the center clasp and determine which cup belongs on each side. Make sure the adhesive is clean and free of lint.
Stand upright in front of a well-lit mirror. Keep your shoulders relaxed and position yourself as naturally as possible. Applying the bra while leaning, twisting, or lifting one shoulder can produce uneven results once you straighten up.
For your first attempt, practice well before dressing for the event. Adhesive bras often have a short learning curve, and “the rideshare is outside” is not an ideal emotional environment for lingerie engineering.
7. Position the First Cup
Remove the protective backing from one cup without touching the adhesive more than necessary. Hold the cup by its edges. With your other hand, gently lift and center the breast into the desired position.
Place the cup over the breast and press from the center outward. Many designs create better lift when the cup begins slightly lower than the final desired position and is then smoothed upward. However, follow the placement diagram supplied with your product because cup shapes differ.
Avoid placing the center edge too close to the nipple or too far toward the armpit. The cup should feel secure, comfortable, and centered rather than stretched across the body.
8. Apply the Second Cup Symmetrically
Repeat the process on the other side. Use the first cup as a visual guide, comparing the height, angle, and distance from the center of your chest.
Do not panic if the cups are not perfectly symmetrical on the first try. Natural breasts are rarely identical, and a good result is about balanced appearance rather than mathematical duplication. Reposition only when the product instructions allow it. Repeated peeling and reapplying during the same session can weaken some adhesives and irritate the skin.
Once both cups are placed, press each one firmly against the skin for several seconds, paying particular attention to the outer edges.
9. Fasten the Front Clasp
Bring the cups together and close the center clasp. This step can create cleavage and improve the overall shape. For a more natural separation, position the cups slightly farther apart before fastening. For stronger cleavage, place them closer together, provided the cups still cover the breast tissue comfortably.
Do not force the clasp to compensate for poor placement or an incorrect size. Excessive tension can pull the cups away from the skin, create puckering, or make the bra uncomfortable.
If the design uses a drawstring instead of a clasp, tighten it gradually while watching the shape in the mirror. Stop when the result looks smooth and feels secure.
10. Smooth the Edges and Put On Your Outfit
Run your fingers around the edges of the cups to remove air pockets and confirm full contact. Pay close attention to the lower and outer edges, where lifting often begins.
Carefully pull on your dress or top without rolling or disturbing the cups. Look at the outfit from the front, sides, and back. Check for visible bra edges, uneven cleavage, cup outlines, or adhesive wings peeking beyond the fabric.
If an edge is visible under thin material, a larger, thinner cup may blend better than a small thick one. You can also test nipple covers, sewn-in cups, or a smoother adhesive style. Do not trim a reusable bra unless the manufacturer specifically says that modification is safe.
11. Perform a Movement Test
Before leaving home, move as you expect to move during the event. Raise your arms, sit down, bend gently, twist, walk quickly, and perform a small dance test. You do not need to recreate an entire wedding reception, but a cautious shoulder shimmy can reveal useful information.
Confirm that the bra remains hidden and that the garment does not pull the cups away from your skin. If you will be outdoors, dancing, or spending time in hot weather, remember that heavy perspiration may affect some adhesives differently.
Carry a small emergency kit containing fashion tape, spare nipple covers, tissues, and the bra’s storage film. These items will not take up much room, and they are more helpful than staring sternly at a lifting edge in a restroom mirror.
12. Remove, Wash, and Store the Bra Properly
At the end of the day, unfasten the front clasp and slowly peel off one cup at a time. Begin at an outer edge and support the skin with your free hand. Never rip the bra away quickly, especially after several hours of wear.
If the product is difficult to remove, stop and consult its instructions. Some adhesive tapes can be loosened with oil, but oils may harm reusable silicone adhesive. Use only a removal method approved for that particular product.
Wash a reusable bra after each wear if directed. Use lukewarm water and a small amount of mild soap, gently cleaning the adhesive with your fingers. Do not scrub it with a brush, wring it, use harsh detergent, or dry it with a towel that may leave fibers behind.
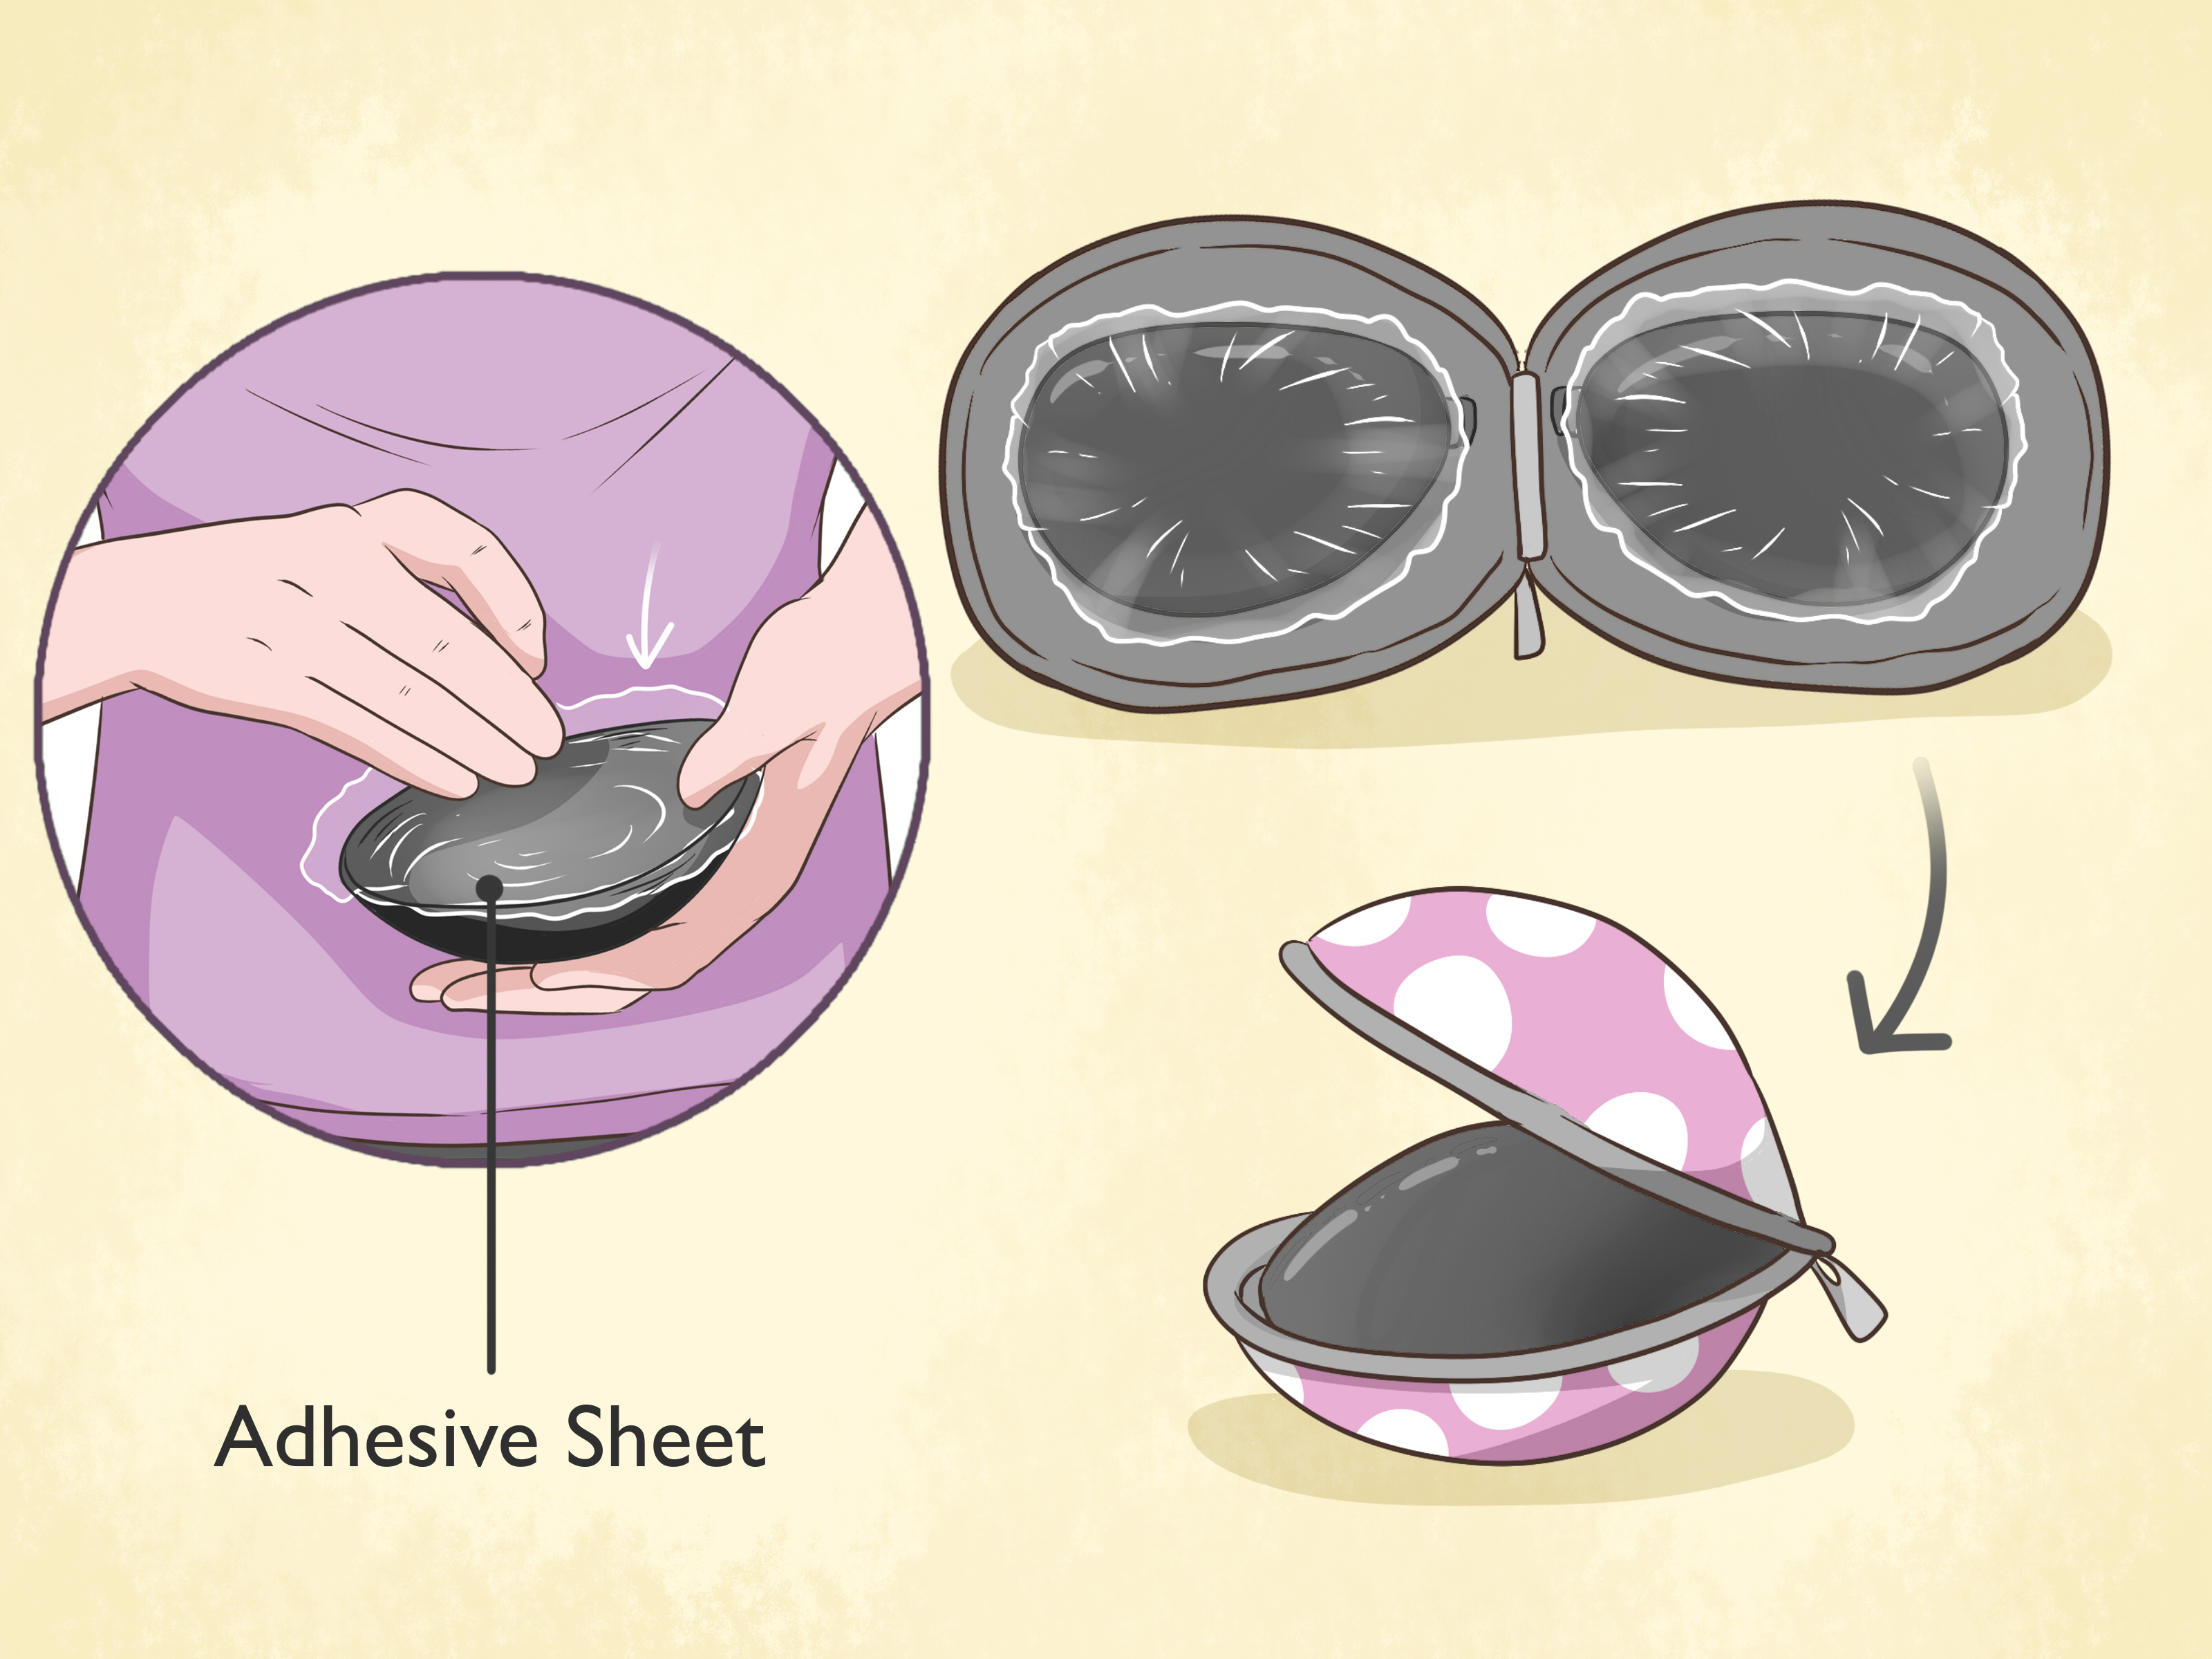
Allow it to air-dry with the adhesive facing upward. Once completely dry, replace the original protective film and store the bra in its case. Proper storage protects it from dust, lint, pet hair, and the mysterious crumbs that apparently occupy every drawer in the house.
Common Backless Bra Problems and Solutions
The Bra Will Not Stick
Oil, lotion, moisture, and dust are the most common culprits. Wash and dry both your skin and, when permitted, the reusable bra. If the adhesive is old, damaged, or covered in lint that cleaning cannot remove, replacement may be necessary.
The Edges Keep Lifting
Check the cup size and placement. Small cups may be stretched too tightly, while oversized cups can wrinkle. Clothing that rubs against the edge may also loosen it. Reapply only according to the manufacturer’s directions rather than adding household glue or random tape.
The Cups Look Uneven
Apply each cup separately in front of a mirror and compare the bottom edge before fastening the clasp. Marking the intended position mentallyor with the edge of the garment as a referencecan make the second application easier.
The Bra Does Not Provide Enough Lift
Try a style with larger lifting tabs, adhesive wings, underwire, or a stronger structural design. Breast lift tape can offer more customizable positioning, although it also requires careful application and removal. For formalwear, a tailor may be able to sew supportive cups or a bra foundation directly into the garment.
The Bra Is Visible Through the Dress
Select thinner, seamless cups in a shade close to your skin tone. Test the outfit under natural light and camera flash because dressing-room lighting can be suspiciously forgiving. A lined dress may conceal edges better than a single layer of thin fabric.
How Long Can You Wear an Adhesive Backless Bra?
Wear time varies by product, skin type, temperature, activity level, and sensitivity. Follow the maximum duration given by the manufacturer. Adhesive bras are generally better suited to special outfits and events than to daily, extended wear.
Remove the bra earlier if it becomes painful, unusually tight, itchy, or irritating. Longer wear is not automatically better, and a bra staying attached does not mean your skin is happy about the arrangement.
Real-World Experiences and Lessons From Wearing a Backless Bra
The most useful lessons about backless bras often appear after someone has worn one through an actual dinner, wedding, photo session, or humid summer evening. Product descriptions explain what a bra is designed to do; real situations reveal how much preparation matters.
Experience 1: The Last-Minute Application
A common first attempt begins about ten minutes before departure. The wearer has already applied moisturizer, the bathroom is steamy from a shower, and the adhesive bra is being positioned while the dress is half on. One cup lands higher than the other, both are peeled off repeatedly, and the center clasp begins carrying the emotional weight of the entire evening.
The lesson is simple: practice earlier. Test the bra with the complete outfit several days before the event. That trial reveals whether the cups show, whether the neckline hides the clasp, and whether the product provides the expected lift. It also gives you time to choose an alternative instead of negotiating with silicone while someone honks outside.
Experience 2: The Warm Outdoor Wedding
A backless bra may feel perfectly secure in an air-conditioned bedroom but behave differently during an outdoor ceremony. Heat, humidity, dancing, and natural perspiration can challenge the adhesive. Results vary by brand and wearer, which is why a movement and temperature test is valuable.
For a warm-weather event, apply the bra only after your skin has cooled and dried. Travel to the venue in a cool environment when possible, and keep fashion tape or backup nipple covers in your bag. A structured dress with fitted cups can also share some of the support instead of forcing the adhesive bra to do every job alone.
Experience 3: Expecting Traditional-Bra Support
Another common disappointment comes from expecting two adhesive cups to feel exactly like a full-support bra with straps and a firm band. Traditional bras obtain much of their stability from the band around the torso. Removing that structure changes what the undergarment can realistically accomplish.
Some fuller-busted wearers achieve excellent results with carefully sized adhesive bras, lifting tape, or side-wing designs. Others prefer a low-back bustier, a dress with built-in support, or professionally sewn cups. None of these choices represents failure. The best solution is the one that lets you enjoy the outfit without spending the evening checking whether everything is still in the same zip code.
Experience 4: Removing It Too Quickly
After a long event, it is tempting to pull off a sticky bra like a price label. That approach can leave the skin irritated and turn an otherwise successful evening into a surprisingly dramatic bedtime routine.
Slow removal is more comfortable. Unfasten the cups, peel from the outer edge, and support the skin as the adhesive releases. If resistance is strong, use only the removal method recommended for that product. Afterward, gently cleanse the skin and apply a fragrance-free moisturizer once you are sure there is no reaction.
Experience 5: Neglecting Aftercare
A reusable adhesive bra frequently seems less sticky on its second wear because the first night’s body oil and perspiration were never washed away. Throwing the cups uncovered into a drawer introduces lint, dust, and at least one hair of unknown origin.
Cleaning the bra promptly, air-drying it adhesive-side up, and replacing the protective film can preserve its performance. The exact number of uses varies by product and care, so focus less on a promised number and more on the condition of the adhesive. When it no longer sticks securely after proper cleaning, it has reached retirement age.
The Biggest Practical Lesson
The best backless-bra experience begins before the day of the event. Select the bra according to the garment, confirm the size, test your skin, practice the placement, and check the complete look while moving. These steps are not glamorous, but neither is trying to discreetly reattach a cup beside the coat-check counter.
Once you understand how your chosen product behaves, a backless bra becomes much less mysterious. It is simply another styling toolone that works best when clean, correctly positioned, and treated with more patience than a stubborn jar lid.
Conclusion
Learning how to wear a backless bra is mostly a matter of choosing the correct design, preparing clean and dry skin, and positioning each cup carefully. The front clasp can shape the bust and create cleavage, but secure adhesion begins long before the clasp is fastened.
Practice with your outfit before the event, respect your skin’s limits, and remove the bra slowly. After wearing a reusable style, wash and store it exactly as directed. With a little preparation, you can enjoy your backless dress instead of spending the night wondering whether your invisible bra is planning a visible escape.