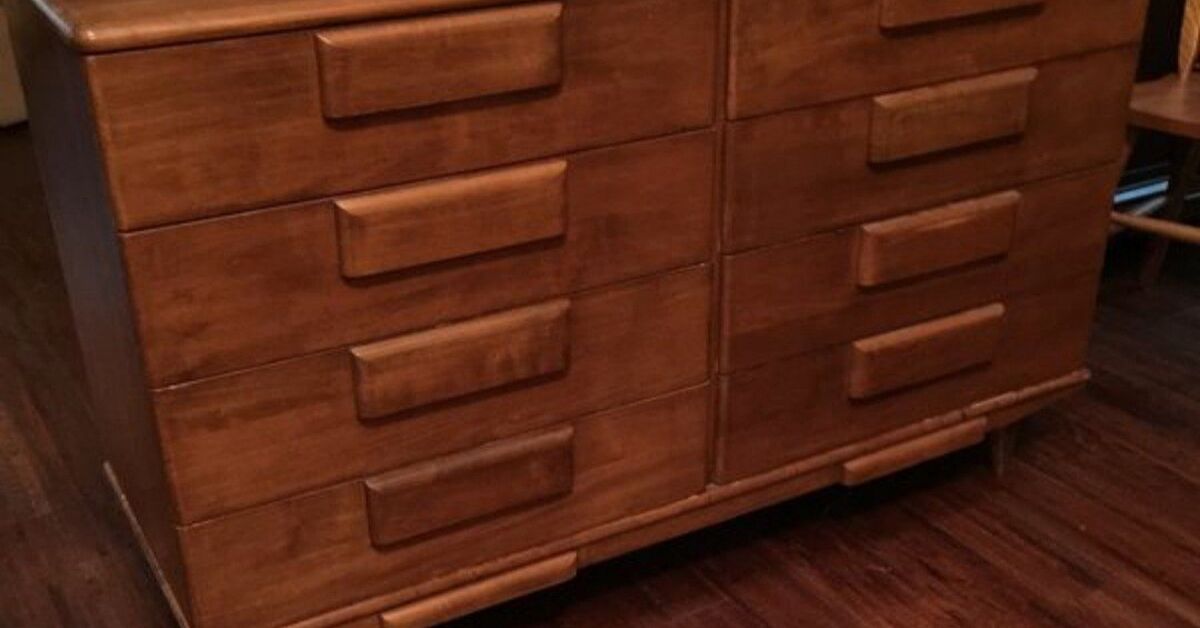
Some dressers age gracefully. Others sit in the corner looking like they know too much about the 1990s. If yours has good bones but a tired finish, white washing may be the perfect weekend rescue mission. This simple DIY furniture makeover softens dark wood, highlights natural grain, and gives a dresser that relaxed, coastal-farmhouse-meets-modern-cottage look without making it appear like it was dunked in a bucket of white paint.
White washing a dresser is different from painting it solid white. Instead of hiding the wood, you thin white paint or use a transparent white stain so the grain still peeks through. The result feels lighter, airier, and more custom. It can work beautifully in bedrooms, nurseries, guest rooms, entryways, and anywhere your furniture needs a fresh start without losing all its character.
The best part? You do not need a giant workshop, a professional sprayer, or a mysterious uncle named Gary who “knows finishes.” With basic supplies, patience, and a willingness to sand just enough, you can update your dresser by white washing it yourself.
What Is White Washing a Dresser?
White washing is a finishing technique that uses diluted white paint, white wood stain, or a white color wash to create a semi-transparent finish on wood. Unlike opaque paint, a whitewash finish allows the texture, knots, and grain patterns to remain visible. Think of it as giving your dresser a linen shirt instead of a winter coat.
This DIY technique is often confused with limewashing, pickling, and color washing. Limewash traditionally uses lime-based material and is more common on masonry or walls. Pickling usually refers to a pale stain effect that sits in open wood grain, especially on oak, ash, or pine. Color washing is a broader decorative technique where thinned paint or glaze is applied and wiped back. For a dresser, most homeowners use either a latex paint-and-water mixture or a pre-tinted whitewash stain.
Why White Washing Works So Well for Dressers
A dresser is the ideal candidate for white washing because it has large flat surfaces, visible drawer fronts, edges, and hardware that can all contribute to the final look. A dark, heavy dresser can suddenly feel calm and bright. A plain pine dresser can look more textured and charming. A flea-market find can become the piece everyone assumes came from a boutique shop with a candle named “Ocean Linen Morning.”
White washing is especially useful when you want to:
- Brighten a dark bedroom without buying new furniture.
- Keep visible wood grain instead of covering it completely.
- Create a farmhouse, coastal, rustic, Scandinavian, cottage, or shabby-chic style.
- Update a dresser on a budget.
- Blend mismatched furniture pieces more naturally.
- Rescue a dresser that is structurally solid but visually exhausted.
Before You Start: Know What Your Dresser Is Made Of
Not every dresser behaves the same way under sandpaper and whitewash. Solid wood is usually the easiest and most forgiving. Veneer can also work, but you must sand gently because the decorative wood layer may be thin. MDF, laminate, or particleboard may require a different approach because they do not absorb stain like natural wood.
Solid Wood Dressers
Solid wood dressers are the best candidates for a true whitewash finish. Pine, oak, maple, ash, and birch can all be whitewashed, though each absorbs the mixture differently. Oak has open grain and often shows dramatic texture. Pine can look soft and rustic but may absorb unevenly, so testing is important.
Veneer Dressers
Wood veneer can be whitewashed if the surface is real wood and in good condition. The key is gentle preparation. Do not attack veneer with a power sander as if it owes you money. Light sanding by hand is safer, especially around corners and drawer edges.
Laminate or MDF Dressers
Laminate and MDF usually need primer and paint rather than traditional whitewash stain. You can still create a whitewashed look with dry brushing, watered-down paint, or layered paint techniques, but the result sits on top of the surface instead of soaking into wood grain.
Supplies You Will Need
Gather your tools before you begin. Nothing ruins DIY confidence faster than standing in the garage with one glove, a wet brush, and no clean rags.
- Drop cloth or plastic sheeting
- Screwdriver for removing hardware
- Mild soap or degreasing cleaner
- Clean lint-free cloths
- 120-grit and 220-grit sandpaper
- Sanding block or orbital sander
- Tack cloth or vacuum with brush attachment
- Painter’s tape
- White latex paint, chalk paint, or whitewash wood stain
- Water for thinning paint
- Paint tray or small container
- Synthetic paintbrush or foam brush
- Stain pad or clean rag for wiping
- Water-based polyurethane, furniture wax, or clear topcoat
- Protective gloves, mask, and eye protection
Step 1: Remove Drawers and Hardware
Start by taking out the drawers and removing all knobs, pulls, and decorative hardware. Place screws and small parts in a labeled bag. You may believe you will remember where everything goes, but future you will be holding a random screw and whispering, “Where did you come from?”
If you plan to reuse the hardware, clean it while the dresser is drying between steps. If the hardware looks dated, swapping it for matte black, brushed brass, antique bronze, or simple wood knobs can completely change the finished piece.
Step 2: Clean the Dresser Thoroughly
Cleaning is not glamorous, but it is where a good finish begins. Dressers collect dust, furniture polish, hand oils, makeup residue, and mystery grime from years of daily use. Whitewash will not adhere evenly if the surface is dirty or greasy.
Use a mild soap-and-water solution or a furniture-safe degreasing cleaner. Wipe every surface you plan to finish, including drawer fronts, top, sides, legs, and trim. Avoid soaking the wood. After cleaning, wipe again with a damp cloth and let the dresser dry completely.
Step 3: Sand the Surface
Sanding helps remove gloss, smooth rough patches, and open the wood slightly so the whitewash can grip. For most dressers, start with 120-grit sandpaper to scuff the old finish. If you need to remove a shiny varnish or dark stain, you may need a little more effort. Follow with 220-grit sandpaper for a smoother feel.
Always sand with the grain, not against it. Sanding across the grain can leave scratches that become more visible once the whitewash settles in. Use a sanding block for flat areas and folded sandpaper for curves, trim, and edges.
If the dresser is old and may have been painted before 1978, test for lead paint before sanding. Lead dust is not a DIY souvenir anyone wants. If the test is positive, follow proper lead-safe procedures or consult a professional.
Step 4: Remove Every Bit of Dust
After sanding, vacuum the dresser with a brush attachment. Then wipe it with a tack cloth or slightly damp lint-free cloth. Dust left on the surface can create bumps, streaks, and a finish that looks more “barn after a windstorm” than “tasteful vintage charm.”
Let the surface dry fully before moving on. Whitewash likes clean, dry wood. It is picky like that.
Step 5: Test Your Whitewash Mixture
Before covering the entire dresser, test your mixture on the back, underside, or inside of a drawer front. Wood species, old stain, and sanding depth can all change the final color. A test patch lets you adjust before committing.
Basic Paint-and-Water Whitewash Ratio
A common starting ratio is one part white latex paint to one part water. This creates a translucent wash that can be brushed on and wiped back. For a stronger white effect, use two parts paint to one part water. For a softer, barely-there wash, use one part paint to two parts water.
Stir the mixture well. It should look like thin cream, not chunky soup. If it drips too aggressively, add a little more paint. If it hides the grain completely, add more water.
Using Whitewash Stain
Pre-made whitewash or pickling stains are another good option. These are designed to create a transparent white finish on interior wood surfaces. They can be more predictable than homemade mixtures, especially for beginners. Follow the manufacturer’s directions for application, drying time, and topcoat compatibility.
Step 6: Apply the Whitewash
Work in small sections so the wash does not dry before you can wipe it back. Brush the mixture on in the direction of the wood grain. Use long, even strokes and avoid overloading the brush.
After applying the wash, immediately wipe away excess with a clean lint-free cloth. The more you wipe, the more wood grain shows through. The less you wipe, the whiter and more opaque the finish becomes. This is where the magic happens. It is also where people accidentally invent six new shades of “almost white,” so step back often and check your progress.
For drawer fronts, complete one drawer at a time. For the dresser top, work from one side to the other in long passes. On carved details or grooves, use a small brush to push the wash into recessed areas, then soften the surface with a rag.
Step 7: Build the Finish Slowly
White washing looks best when built in light layers. One coat may give you a subtle weathered effect. Two coats can create a brighter farmhouse look. Three coats may become closer to painted furniture while still keeping some grain visible.
Let each coat dry according to the product or paint directions. If the surface feels rough after drying, lightly sand with 220-grit sandpaper, then remove dust before the next coat. This quick sanding step can make the final dresser feel smoother and more professional.
Step 8: Add Distressing If You Want Character
Distressing is optional, but it can make a whitewashed dresser look naturally aged rather than freshly attacked by a craft brush. Focus on areas that would receive normal wear: corners, drawer edges, legs, raised trim, and around hardware.
Use fine or medium-grit sandpaper and work slowly. Sand a little, step back, and check the balance. The goal is believable age, not “this dresser survived a raccoon fight.”
Step 9: Seal the Dresser
A dresser gets touched, bumped, dusted, and decorated, so sealing is important. A clear water-based polyurethane is a popular choice because it protects the finish while keeping the color from yellowing as much as some oil-based products can. Furniture wax can create a soft, matte feel, but it may need occasional maintenance and is not always as durable on high-use surfaces.
Apply the topcoat in thin, even layers. Avoid thick puddles, especially on the top and drawer fronts. Let the clear coat dry fully between coats, and allow the final finish to cure before placing heavy decor, lamps, trays, or jewelry boxes on the dresser.
Step 10: Reattach Hardware and Style the Piece
Once the finish is dry and cured, reattach the hardware. This is the moment your dresser stops looking like a project and starts looking like furniture again. Add a mirror, lamp, framed art, woven tray, ceramic vase, or stack of books to complete the look.
If you kept the original hardware, the piece may feel vintage and charming. If you replaced it, the dresser may lean modern, coastal, or boutique. Either way, white washing gives you a flexible base that works with many decorating styles.
Best Whitewash Looks for Different Decor Styles
Coastal Whitewashed Dresser
Use a soft whitewash over natural wood, then pair it with brushed nickel or simple wood knobs. Style it with pale blue, sandy beige, linen textures, and maybe a shell or two. Not twenty-seven shells. Restraint is coastal; clutter is a gift shop.
Farmhouse Whitewashed Dresser
Choose a slightly heavier whitewash and lightly distress the edges. Add black cup pulls or antique bronze knobs. This look pairs well with woven baskets, cotton stems, vintage mirrors, and warm neutral bedding.
Modern Rustic Dresser
Keep the wash subtle and let the natural grain show. Use sleek hardware in matte black or brass. Style with clean lines, neutral art, and simple ceramics for a room that feels warm but not overly decorated.
Shabby Chic Dresser
Apply a brighter whitewash and distress more noticeably around edges and details. Glass knobs, floral accents, and soft pastels can make the piece feel romantic and vintage without requiring you to live inside a teacup.
Common White Washing Mistakes to Avoid
Skipping the Cleaning Step
Whitewash over grime creates uneven color and poor adhesion. Clean first, even if the dresser looks fine. Dust is sneaky.
Using Too Much Paint
If your mixture is too thick, you will end up painting the dresser white instead of white washing it. Start thin. You can always add another coat.
Not Testing First
A whitewash mixture can look different on oak, pine, maple, stained wood, raw wood, or veneer. Test before you commit to the whole piece.
Over-Sanding Veneer
Veneer can be beautiful, but it is thin. Sand gently and avoid lingering on corners. Once you sand through veneer, there is no magic undo button.
Applying a Topcoat Too Soon
If the whitewash is not fully dry, a clear coat can smear it or trap moisture. Follow drying times and give the finish room to breathe.
How Long Does This DIY Dresser Makeover Take?
Most whitewashed dresser projects take one weekend, depending on the dresser size, finish condition, drying times, and how many coats you apply. A simple dresser with light sanding may be completed in a day, while a glossy or dark dresser may need extra prep and drying time.
A realistic timeline looks like this:
- Cleaning and hardware removal: 30 to 60 minutes
- Sanding and dust removal: 1 to 3 hours
- Testing the wash: 15 to 30 minutes
- Whitewash application: 1 to 2 hours per coat
- Drying time: varies by product and room conditions
- Topcoat: 1 to 2 hours plus drying and curing time
Budget: How Much Does It Cost to Whitewash a Dresser?
If you already own basic supplies, this project can be very affordable. A quart of paint or whitewash stain, sandpaper, brushes, and a clear topcoat usually cost far less than buying a new dresser. Expect the cost to vary depending on product quality, dresser size, and whether you replace the hardware.
Budget-friendly tip: look for leftover white latex paint from another project. As long as the paint is still good and compatible with your surface, it can be diluted into a whitewash mixture. Just avoid old paint that smells strange, has separated permanently, or appears chunky. Your dresser deserves better than expired wall soup.
Maintenance Tips for a Whitewashed Dresser
Once your dresser is finished, treat it gently for the first few weeks while the topcoat cures. Avoid placing heavy objects on the surface too soon. Use coasters under water glasses, trays under perfume bottles, and felt pads under decor.
For regular cleaning, dust with a soft cloth. Avoid harsh chemical cleaners that can dull the topcoat. If the dresser gets a scuff, try wiping it gently with a damp cloth first. For deeper marks, you may be able to lightly sand and touch up the whitewash, then reseal the area.
Experience-Based Tips: What I Wish Every Beginner Knew Before White Washing a Dresser
The first lesson of white washing furniture is that the dresser always has an opinion. You may arrive with a plan, a perfect inspiration photo, and the confidence of someone who watched three tutorials before breakfast. Then the wood grain absorbs the wash differently on the left drawer than on the right, and suddenly you are negotiating with furniture like it is a tiny wooden landlord.
That is normal. White washing is not meant to look factory-perfect. Its charm comes from variation. The goal is not to erase every streak or force the dresser into total uniformity. The goal is to create a soft, layered finish that feels intentional. If one area looks too white, wipe it back with a damp cloth before it dries. If another area looks too dark, add a second thin coat. Work gradually. A whitewashed dresser rewards patience far more than speed.
Another practical experience: lighting changes everything. A finish that looks bright white in the garage may look creamy in a bedroom. A dresser that looks rustic in natural light may look streaky under a harsh overhead bulb. Check your work from different angles and, if possible, in the room where the dresser will live. This helps you avoid overcorrecting a finish that only looks odd because the lighting is being dramatic.
Do not underestimate the top of the dresser. Drawer fronts get most of the attention, but the top takes the most abuse. It holds lamps, books, keys, candles, water glasses, and occasionally a laundry pile pretending to be temporary. Use a durable topcoat on the top surface, even if you choose a softer wax finish elsewhere. If you want the dresser to stay pretty, protect the area that works the hardest.
Hardware can make or break the makeover. White washing gives the dresser a fresh surface, but the knobs and pulls decide the personality. Old brass hardware can look beautiful against a soft whitewash if cleaned well. Matte black pulls can make the same dresser feel modern. Wood knobs can keep it casual and Scandinavian. If your dresser still looks “almost done,” the hardware is usually the missing sentence at the end of the design story.
Finally, give yourself permission to stop. Many beginners keep adding coats because they are chasing perfection, but too many layers can turn a translucent whitewash into a flat paint job. After each coat, step back. Take a photo. Walk away for ten minutes. When you return, you may realize the dresser is already finished and you were simply in DIY tunnel vision. The best whitewashed dresser should still look like wood, just brighter, calmer, and significantly less haunted by its old orange-brown finish.
Conclusion
Updating your dresser by white washing DIY is one of the most satisfying ways to refresh furniture without losing the beauty of the wood. With proper cleaning, light sanding, a tested whitewash mixture, careful wiping, and a protective topcoat, an outdated dresser can become a bright, stylish focal point. The process is beginner-friendly, budget-conscious, and flexible enough to suit coastal, farmhouse, rustic, cottage, or modern bedrooms.
The secret is to work slowly and let the wood guide the finish. White washing is not about covering every mark; it is about softening, highlighting, and giving your dresser a second life. And honestly, any project that can rescue old furniture, save money, and make you feel like a weekend design wizard deserves a spot on the DIY list.