“`
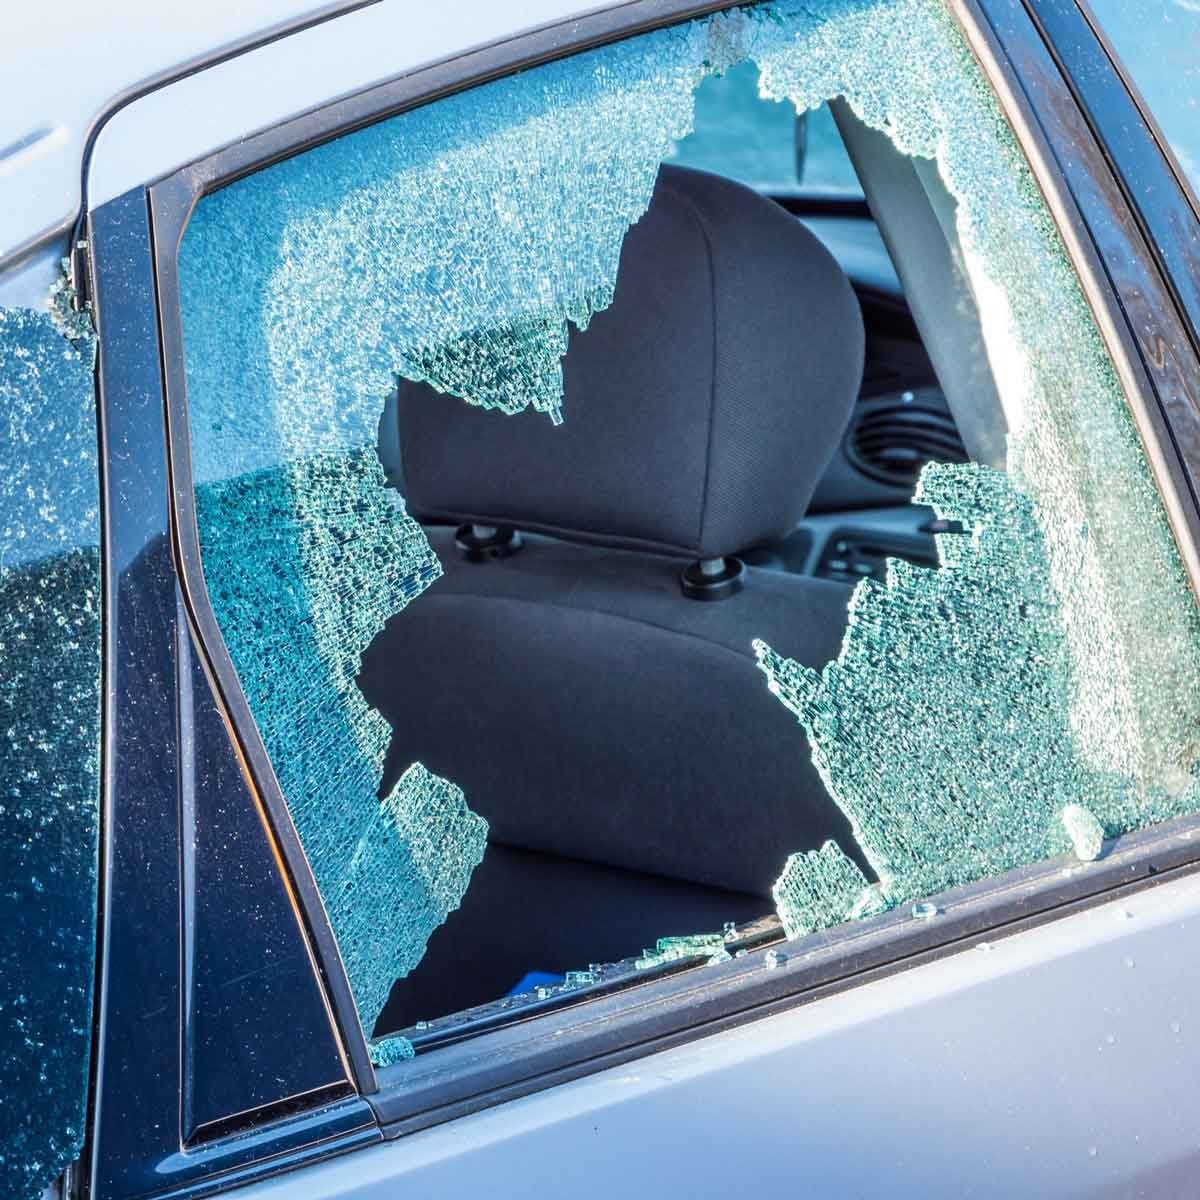
A broken car window has a special talent for ruining your day in record time. One minute your car is minding its own business; the next, it has the weather protection of a beach cabana and the security profile of an open snack drawer. Whether the damage came from a break-in, a flying rock, a falling branch, or that mysterious parking-lot incident nobody saw, the first goal is simple: protect the interior, reduce mess, and keep the car safe until the glass can be replaced.
This guide explains how to temporarily cover a broken car window using common DIY materials such as clear plastic sheeting, packing tape, painter’s tape, and temporary window film. It is not a permanent repair, and it is not a magic invisibility cloak for thieves, rain, or wind noise. But done correctly, a temporary car window cover can keep out water, dust, leaves, bugs, and the occasional curious squirrel while you schedule professional auto glass replacement.
Before you grab the first trash bag in sight and start taping like you are wrapping a birthday present for a raccoon, take a few minutes to do it safely. Broken glass is sharp, tiny glass crumbs hide everywhere, and the wrong tape can damage paint or leave adhesive behind. A smart temporary fix is clean, tight, weather-resistant, and easy to remove when the repair technician arrives.
First, Decide Whether the Car Is Safe to Drive
A temporary cover is useful when a side window or rear passenger window is broken and you need to protect the cabin while the vehicle is parked or carefully driven a short distance. It is not a safe fix for every kind of glass damage. If the windshield is cracked across your field of vision, if the driver-side visibility is badly blocked, or if loose glass is still falling, do not treat plastic wrap as a driving solution.
Windshields are part of a vehicle’s safety structure. They help with visibility, cabin protection, and in many modern cars, sensor systems that support driver assistance features. Side windows are usually replaced rather than repaired once shattered. If the damage blocks your view, affects mirrors, or makes the car unsafe in traffic, park it and arrange a proper repair instead of gambling with a DIY patch.
Tools and Materials You Will Need
The best temporary cover for a broken car window is usually clear, heavy-duty plastic. Clear plastic is important because it lets in light and preserves as much visibility as possible. A black trash bag may keep out rain, but it also turns your blind spot into a mystery novel. For a parked car, a heavy-duty garbage bag can work in a pinch. For any situation where visibility matters, choose clear plastic sheeting or a temporary auto window film kit.
Recommended Supplies
- Thick work gloves to protect your hands from broken glass
- Safety glasses if loose glass is still present
- A small vacuum, shop vacuum, or handheld car vacuum
- Microfiber cloths or paper towels
- Clear plastic sheeting, clear contractor bag, or temporary car window film
- Clear packing tape for sealing plastic to plastic or interior trim
- Painter’s tape or automotive-safe masking tape for painted surfaces
- Scissors or a utility knife
- Rubbing alcohol or mild cleaner for non-painted trim areas
Avoid using duct tape directly on painted exterior panels unless you have no other option. Duct tape is strong, but it can leave stubborn adhesive or lift weak paint. It is the muscle car of tapes: powerful, dramatic, and occasionally a little too intense for delicate situations. Painter’s tape is gentler on paint, while clear packing tape usually creates a better seal on plastic.
Step-by-Step: How to Temporarily Cover a Broken Car Window
Step 1: Move the Car to a Safe, Dry Place
If possible, park in a garage, under a carport, or in a well-lit area away from traffic. A dry workspace helps tape stick better. If it is raining, wipe the door frame and trim as dry as possible before applying tape. Water, dust, and road grime are the sworn enemies of adhesive.
If the window was broken during a theft or vandalism incident, take photos before cleaning. Photograph the broken window, the interior, any missing items, and the surrounding area. These pictures can help with a police report or insurance claim. Once the evidence is documented, you can safely start cleanup.
Step 2: Put On Gloves and Remove Large Glass Pieces
Wear thick gloves before touching anything near the damaged window. Carefully remove large pieces of loose glass from the seat, floor, door pocket, and window channel. Do not press your bare hands into fabric or carpet because small glass fragments can hide there like tiny transparent ninjas.
If jagged pieces remain along the edge of the window opening, do not force them out with your fingers. Use a gloved hand and gentle pressure only when the glass is already loose. If glass is stuck inside the door or trapped in the window mechanism, leave it for the auto glass technician. The goal is to make the area safer, not to perform door surgery in your driveway.
Step 3: Vacuum the Interior Thoroughly
Use a vacuum to remove glass from the seats, floor mats, carpets, center console, cup holders, and door storage pockets. Slide the seat backward and forward to reach hidden areas. If the window shattered while the car was parked, glass may have bounced much farther than you expect.
Pay special attention to the lower door area and weather stripping. Small pieces of tempered glass can remain lodged in rubber seals. If you hear glass rattling inside the door later, that is another reason to schedule replacement promptly. A professional can remove the door panel, clean out debris, and check the regulator.
Step 4: Clean the Window Frame and Tape Area
Tape sticks best to clean, dry surfaces. Wipe the interior trim, rubber seal, and surrounding frame with a microfiber cloth. If the area is oily or dusty, use a mild cleaner or a little rubbing alcohol on interior trim only. Be careful with painted exterior surfaces, leather, soft-touch trim, and older plastics, which may react poorly to harsh cleaners.
For most DIY temporary covers, applying the plastic from the inside of the door is better than taping all over the exterior paint. Interior placement helps protect the paint, makes the patch less likely to peel in wind, and keeps the cover tucked closer to the original window opening.
Step 5: Cut the Plastic Larger Than the Opening
Hold the plastic sheet over the broken window opening and cut it several inches larger than the frame on all sides. Extra overlap matters because it gives you room to tape securely. If you cut the plastic exactly to the window size, the first gust of wind may turn your careful repair into a sad little flag.
For a side window, open the car door and position the plastic on the inside. For a rear quarter window or fixed glass panel, you may need to work from both inside and outside, depending on the shape. The plastic should cover the entire opening with no gaps around the edges.
Step 6: Tape the Top Edge First
Start at the top of the window opening. Tape the plastic to the upper interior frame or trim, keeping it straight and slightly taut. Use long strips of tape rather than many tiny pieces. Overlap each strip for a better seal.
Once the top is secure, gently pull the plastic downward and tape the sides. Keep the material smooth but not stretched to the breaking point. A little tension prevents flapping, but too much tension can cause the tape to peel or the plastic to tear.
Step 7: Seal the Sides and Bottom
Work around the window opening, sealing the sides and bottom with overlapping tape. The bottom edge is especially important because water can run down the plastic and sneak into the door panel. Try to angle the plastic so rain flows away from the interior rather than pooling along the seal.
If you are using a plastic bag instead of a flat sheet, cut it open so it becomes a single layer. A doubled-up bag may seem stronger, but trapped air between layers can flap loudly at speed. Clear plastic sheeting or a dedicated temporary window film usually looks cleaner and performs better.
Step 8: Add a Second Layer of Tape for Weather Resistance
After the first seal is complete, add a second layer of tape around the edges. This reinforces the patch and helps block rain. For the cleanest result, use painter’s tape on any painted areas and clear packing tape where tape touches plastic or interior trim.
Do not tape over sensors, mirror controls, door handles, locks, or airbag labels. Do not run tape across the outside of the door in a way that prevents it from opening normally. A temporary car window cover should protect the car, not turn the door into an escape room.
Alternative Temporary Covering Methods
Clear Packing Tape Lattice
If you do not have a plastic sheet, clear packing tape can be layered across the opening in overlapping strips. This method works best for small side windows or when you need a quick cover in dry weather. Apply the tape from the inside, overlapping each strip like shingles. The finished result should look like a clear tape window, not a spiderweb created during a panic attack.
This method can offer decent visibility, but it uses a lot of tape and may not handle heavy rain as well as plastic sheeting. It is also more time-consuming to remove. Still, in an emergency, it can be better than leaving the cabin completely exposed.
Temporary Auto Window Film Kit
Temporary car window film kits are sold at many auto parts stores and online retailers. These kits often include clear film and adhesive designed for short-term use. They are usually cleaner than homemade plastic-and-tape setups and may resist rain better when installed correctly.
The key is surface preparation. Clean and dry the frame before applying the film. Smooth out wrinkles and press edges firmly. Even with a kit, remember that this is a temporary solution. It will not restore security, impact protection, or factory-level weather sealing.
Cardboard: Only for Parked Cars and Emergencies
Cardboard can block rain for a short time if covered with plastic, but it is not ideal. It absorbs water, blocks visibility, and looks like your car lost a fight with a moving box. Use cardboard only if the car is parked and you have no clear plastic available. Replace it with a better cover as soon as possible.
What Not to Do When Covering a Broken Car Window
Do not use flimsy kitchen plastic wrap. It tears easily and usually cannot handle wind. Do not rely on newspaper, towels, or blankets, because they soak up water and invite mildew. Do not leave sharp glass in the seat and simply cover the window, unless you enjoy surprise glitter with consequences.
Do not tape directly across painted surfaces with aggressive tape unless absolutely necessary. If tape must touch paint, test a small area first and remove it slowly later. Warm, sunny weather can bake adhesive onto the finish, making cleanup harder.
Most importantly, do not treat the temporary cover as a theft-proof barrier. Plastic is not glass. It will not stop a determined person from reaching inside. Remove valuables from the vehicle, park in a secure location, and arrange permanent repair quickly.
Can You Drive With a Temporary Car Window Cover?
Sometimes, but only with caution. If the cover blocks your view, interferes with mirrors, flaps violently, or makes the vehicle difficult to control, do not drive. A covered rear passenger window may be manageable for a short trip to a repair shop. A covered driver-side window is more problematic because it can limit side visibility and make lane changes dangerous.
If you must drive a short distance, keep speeds low, avoid highways, and listen for flapping or tape failure. Wind pressure increases quickly at higher speeds. What seems secure in your driveway may sound like a helicopter made of grocery bags once you reach 45 mph.
Before driving, check mirrors, blind spots, and door operation. Make sure the plastic is not touching hot surfaces, moving parts, or the window regulator. If the cover comes loose while driving, pull over safely before adjusting it.
How Long Can a Temporary Cover Last?
A well-installed temporary cover may last a few days in mild weather, but it should not be trusted for weeks. Sun, rain, wind, temperature changes, and door movement can weaken tape. Adhesive can also become harder to remove the longer it sits.
Plan to schedule auto glass replacement as soon as possible. Side windows and rear windows typically need replacement rather than repair. A professional repair shop can remove remaining glass, clean the door cavity, install new glass, test the window regulator, and make sure the seal works properly.
Should You File an Insurance Claim?
Broken car windows are often handled under comprehensive coverage when the damage is caused by theft, vandalism, weather, falling objects, or other non-collision events. Coverage varies by policy and state, and deductibles may apply. If the repair cost is close to or below your deductible, paying out of pocket may be simpler. If the damage is part of a break-in or larger loss, a claim may make more sense.
Before filing, gather photos, a police report if needed, your policy information, and a repair estimate. Many insurers allow glass claims online or through an app. If personal items were stolen, remember that auto insurance may not cover belongings inside the vehicle; renters or homeowners insurance may be involved depending on your policy.
DIY Broken Car Window Cover: Practical Example
Imagine your rear passenger window is smashed during a break-in. The car is parked outside, rain is expected overnight, and the glass shop cannot replace the window until tomorrow afternoon. Here is a sensible DIY plan:
- Take photos of the damage before moving anything.
- Put on gloves and remove large glass pieces from the seat and floor.
- Vacuum the interior, especially the door pocket and floor mat.
- Wipe the interior window frame until it is clean and dry.
- Cut clear plastic several inches larger than the window opening.
- Tape the top edge inside the door frame with clear packing tape.
- Pull the plastic smooth and seal the sides and bottom.
- Add a second tape layer around the edges for rain protection.
- Remove valuables and park in a visible, protected spot.
- Confirm the glass replacement appointment.
This setup is not glamorous. Nobody will mistake it for factory engineering. But it can keep the seat dry, reduce wind noise, and prevent the car from becoming a rolling terrarium overnight.
Extra Tips for Rain, Snow, and Hot Weather
In rainy weather, use wider overlap and double-seal the top and sides. Park so water runs away from the broken side when possible. In snow, brush accumulation off the cover instead of letting weight stretch the plastic. In hot weather, avoid leaving tape on paint longer than necessary because heat can make adhesive residue worse.
If the plastic fogs or traps moisture inside, open another door briefly when parked in a safe place to let humidity escape. After the glass is replaced, clean the area gently to remove adhesive residue. Use an automotive-safe adhesive remover only on surfaces approved by the product label.
500-Word Experience Section: Real-World Lessons From Covering a Broken Car Window
The first lesson most people learn after a broken car window is that glass travels farther than logic says it should. You may think the mess is limited to the door and seat, then later find sparkling crumbs in the cup holder, under the floor mat, and somehow inside a jacket pocket that was zipped shut. Take cleanup seriously. A rushed vacuum job can leave behind tiny pieces that scratch skin, damage upholstery, or keep rattling inside the cabin for days.
The second lesson is that tape choice matters more than expected. In theory, any tape seems useful when rain clouds are arriving and your car has a window-shaped hole in it. In practice, aggressive tape can create a second problem after the first one is solved. Duct tape may hold firmly, but it can leave residue that laughs at ordinary soap. Painter’s tape is kinder to painted surfaces, while clear packing tape works well on plastic and interior trim. The best results often come from using both: gentle tape where the car finish matters, stronger clear tape where the seal matters.
Another common experience is underestimating wind. A cover that looks neat while parked can become noisy once the car moves. Loose plastic flaps, buzzes, and pops. It may not damage the car, but it can make a five-minute drive sound like you are towing a haunted shower curtain. The fix is to pull the plastic smooth, use large overlaps, and tape all four edges securely. If the cover still balloons outward, it is not ready for driving.
People also learn quickly that visibility is not optional. A black trash bag can protect the interior while parked, but it can make driving risky if it blocks side vision. Clear plastic is worth the extra effort. Even when the covered window is not directly beside the driver, light and peripheral awareness help. A temporary cover should never turn a lane change into a guessing game.
Weather adds its own personality. Rain finds gaps like it has a map. A tiny opening at the top edge can send water behind the plastic and into the door. That is why the top seal deserves special attention. Snow adds weight. Heat softens adhesive. Cold makes plastic stiff and tape less cooperative. If the repair appointment is delayed, check the cover each day and reinforce it before the weather tests it.
Finally, the biggest real-world lesson is emotional: a broken window feels urgent because it is. It exposes the car, makes the interior vulnerable, and creates a security concern. But panic repairs are usually messy repairs. Take photos, clean safely, cover carefully, remove valuables, and book the replacement. The DIY cover is just a bridge between “Oh no” and “fixed.” Build that bridge well, but do not move in and start decorating it.
Conclusion
Knowing how to temporarily cover a broken car window is a useful DIY skill for any driver. The best method is simple: protect your hands, clean up the glass, dry the frame, use clear heavy-duty plastic, tape it securely from the inside when possible, and treat the result as a short-term weather shield rather than a real window. Avoid blocking visibility, avoid damaging paint with harsh tape, and do not delay professional repair longer than necessary.
A good temporary car window cover can keep rain, dust, bugs, and debris out of your vehicle while you wait for replacement glass. It can also make an annoying situation feel more controlled. Just remember that plastic is not security glass, and tape is not engineering. Use the DIY fix wisely, drive only if visibility and safety are not compromised, and schedule proper auto glass replacement as soon as you can.
“`