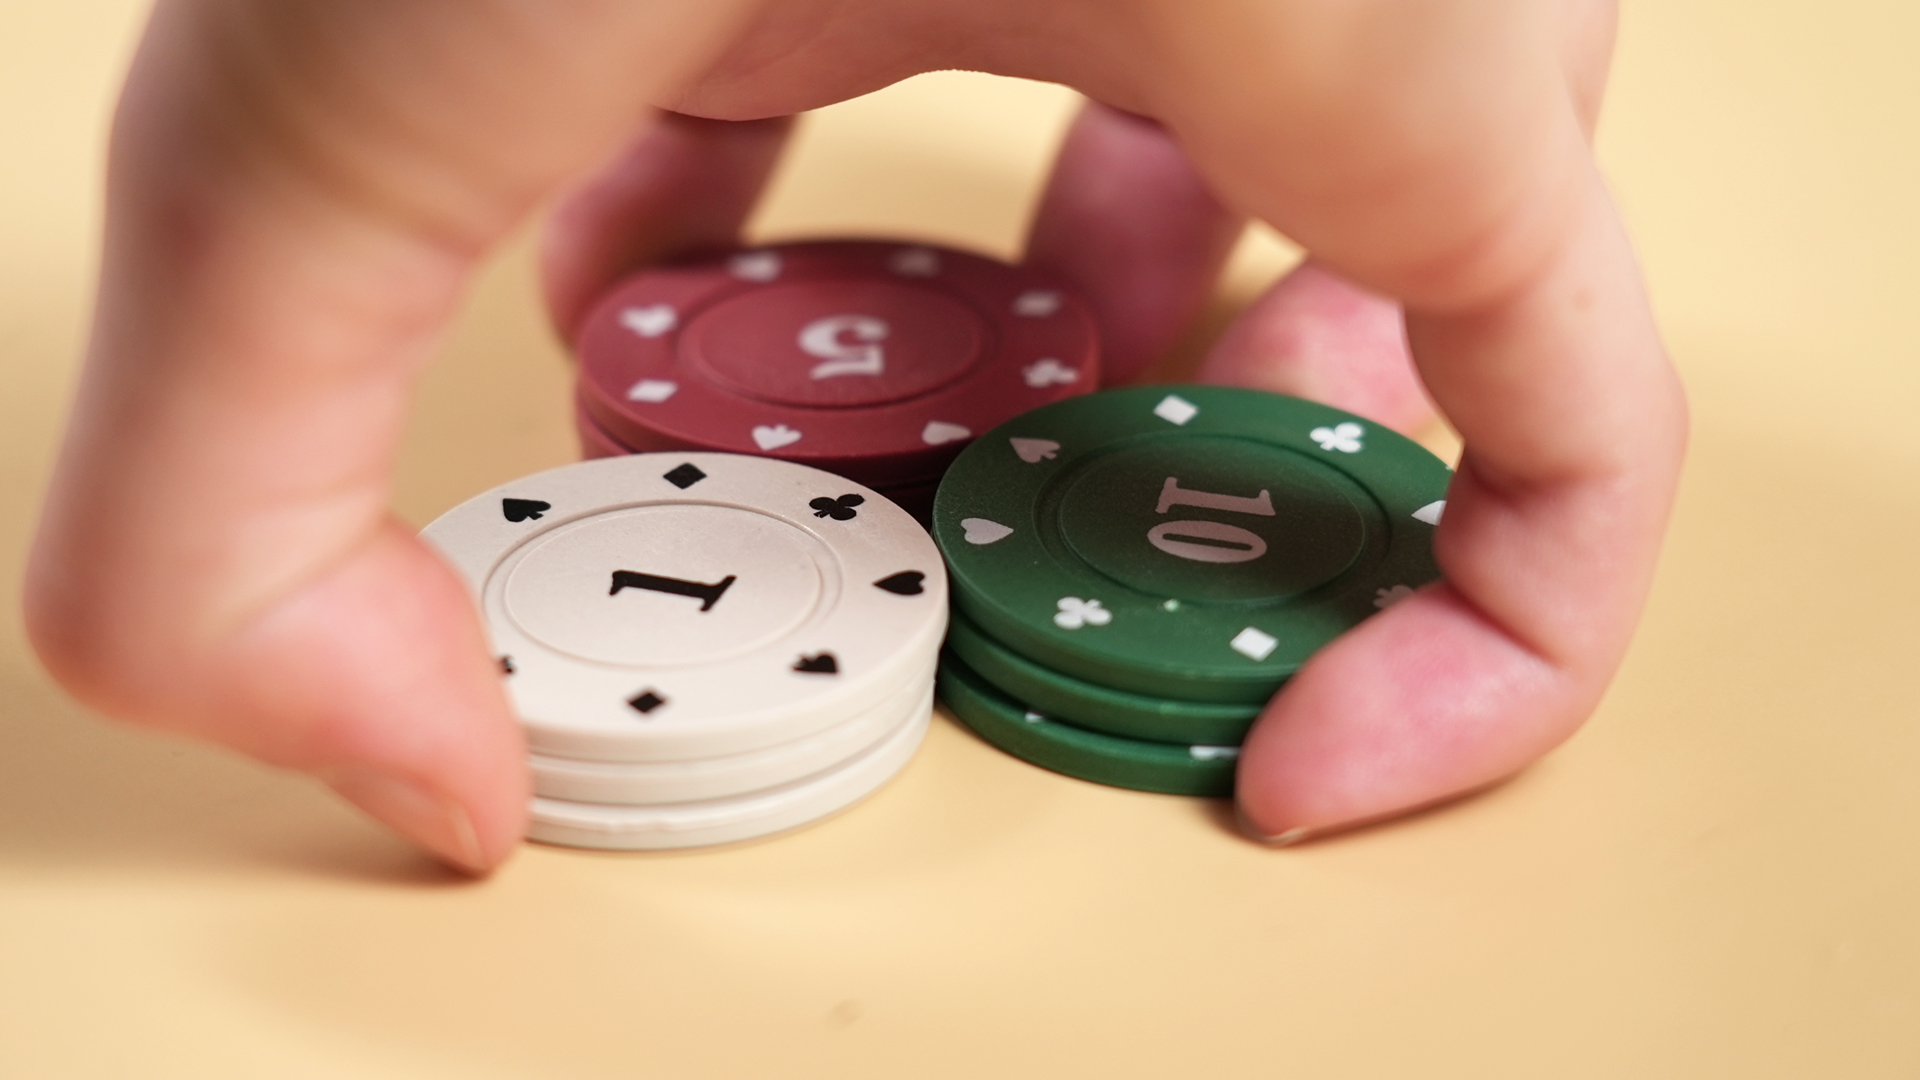
Note: This guide teaches poker chip shuffling as a manual dexterity trick, fidget skill, and tabletop accessory move. It is not gambling advice. Use chips responsibly, follow local rules, and enjoy the satisfying click-clack without turning your coffee table into a dramatic movie scene.
Learning how to shuffle poker chips is one of those tiny skills that looks wildly impressive while being surprisingly simple once your fingers understand the assignment. At first, the chips behave like stubborn dinner plates. They slide, wobble, lean, and occasionally launch themselves across the room as if they have somewhere better to be. But after a few practice sessions, the movement becomes smooth, quiet, and almost automatic.
The classic poker chip shuffle, also called a chip riffle, is the trick where two small stacks of chips are pressed together, lifted slightly in the middle, interlaced, and collapsed into one neat stack. It is part coordination, part touch, and part patience. You do not need magician hands, professional-table confidence, or a suspiciously expensive set of custom chips. You just need a few chips, a flat surface, and the willingness to pick them up every time they roll away like tiny escape artists.
In this step-by-step guide, you will learn the full method in 13 easy steps, plus common mistakes, practice tips, troubleshooting advice, and real-world experience notes to help you improve faster.
What Is a Poker Chip Shuffle?
A poker chip shuffle is a one-handed chip trick that combines two equal stacks of chips into one stack by interlacing them. Think of it like a tiny version of shuffling two halves of a deck of cards, except the “cards” are round, heavier, and much more interested in falling over.
The move is popular because it is visually satisfying and physically calming. The chips make a soft clicking sound, the motion keeps your hands busy, and the finished shuffle looks cleaner than it has any right to look. Many people practice it as a fidget move, a party trick, or a way to get comfortable handling chips during friendly card nights.
What You Need Before You Start
Use the Right Chips
Standard-size poker chips work best. Heavier clay-composite or casino-style chips are easier to control than very light plastic chips because they have more weight and grip. Lightweight chips can still work, but they tend to slide around more, especially when your fingers are still learning the technique.
Start With Fewer Chips
Beginners should start with six chips total: three chips in one stack and three chips in another. Once you can shuffle six chips smoothly, move to eight, ten, twelve, and eventually more. Jumping straight to twenty chips is like trying to learn piano by playing jazz with mittens on. Technically possible? Maybe. Helpful? Absolutely not.
Practice on a Soft Surface
A felt table, mouse pad, card mat, or soft cloth gives the chips just enough grip. A hard glass or wooden table can make chips slide too easily. The goal is controlled movement, not tabletop hockey.
How to Shuffle Poker Chips: 13 Steps
Step 1: Choose Six to Eight Poker Chips
Begin with six chips if you are brand-new. Use eight chips if you already have decent finger control. The stacks should be equal, so six chips become two stacks of three, and eight chips become two stacks of four.
If possible, use two different colors. For example, place three red chips in one stack and three white chips in another. Different colors make it easier to see whether the chips are interlacing properly. When the shuffle works, the colors should alternate like a tiny striped tower of victory.
Step 2: Split the Chips Into Two Equal Stacks
Place the two stacks side by side on your practice surface. Keep them close enough that they almost touch, but do not smash them together yet. The stacks should be vertical, balanced, and aligned.
This setup matters more than beginners think. If the stacks are crooked before you start, they will become even more crooked during the shuffle. A clean start gives your fingers a fighting chance.
Step 3: Place Your Hand Over the Chips
Rest your dominant hand over both stacks. Your palm should hover slightly above the chips, not crush them. The hand position should feel relaxed, like you are gently covering a computer mouse.
A tense hand makes the shuffle harder. If your wrist feels locked or your fingers look like they are gripping a cliff edge, pause and reset. Poker chip shuffling is about controlled pressure, not heroic squeezing.
Step 4: Position Your Thumb on One Side
Place your thumb along the outside edge of one stack. The thumb acts as a stabilizer, keeping the chips from sliding away when pressure is applied.
Do not push too hard. Your thumb should guide the stack, not flatten it into the table. Light, steady contact is enough.
Step 5: Use Your Ring Finger or Pinky on the Opposite Side
Place your ring finger, pinky, or both along the outside edge of the other stack. These fingers balance the pressure from your thumb. Together, the thumb and outer fingers create a gentle “wall” around the chips.
This is where many beginners struggle. If the chips shoot outward, your side pressure is uneven. If they refuse to move, you are probably pressing too hard.
Step 6: Put Your Middle Finger Between the Two Stacks
Your middle finger is the magic lever. Place it in the small gap between the two stacks, near the lower center of the chips. The fingertip should touch the inner edges where the stacks meet.
Some people use the index finger instead, but the middle finger usually gives better lift and control. Experiment later if you want. For now, use the middle finger because it naturally sits in the center of your hand.
Step 7: Keep Your Index Finger Lightly on Top or Front
Your index finger can rest lightly on the front or top area of the chips to help guide them. It should not dominate the move. Think of the index finger as a quiet assistant, not the manager who keeps scheduling unnecessary meetings.
If the top chips pop forward, your index finger may need to provide a little more control. If the chips feel pinned down, lighten the touch.
Step 8: Apply Gentle Inward Pressure
Slowly press the two stacks toward each other using your thumb and outer fingers. The pressure should be firm enough to keep the stacks together but soft enough that the chips can still move.
This is the most important feeling to learn. Too little pressure and the stacks separate. Too much pressure and they lock up. The sweet spot feels like holding a sandwich without squeezing the filling out. A strange image, yes, but your chips will understand.
Step 9: Lift Slightly With Your Middle Finger
Now gently lift upward with your middle finger from between the stacks. You are not trying to pick the chips off the table completely. You only need to raise the inner edges slightly so the chips can begin to overlap.
The lift is small. If the chips jump, you lifted too much. If nothing happens, add a tiny bit more upward pressure while keeping the side pressure steady.
Step 10: Let the Chips Interlace
As you lift and press inward, the chips should begin sliding into each other. One chip from the left stack moves between two chips from the right stack, then the pattern continues. This interlacing is the heart of the poker chip shuffle.
Do not rush this step. Beginners often try to force all the chips together at once. Instead, let the chips feed into each other naturally. A slow successful shuffle is better than a fast chip explosion.
Step 11: Squeeze the Interlaced Chips Into One Stack
Once the chips are interlaced, gently squeeze the sides inward and let the stack settle. The two stacks should collapse into one vertical stack. Keep your hand steady until the chips stop moving.
If the stack comes out uneven, do not worry. Even experienced shufflers occasionally produce a lopsided tower. Square it up, split it again, and repeat.
Step 12: Split the Stack and Repeat
After one successful shuffle, divide the stack into two equal piles again. Repeat the process: position your fingers, press inward, lift with the middle finger, interlace, and close the stack.
Repetition builds muscle memory. At first, you will think about every finger. Later, your hand will do most of the work while your brain enjoys the clicky soundtrack.
Step 13: Add More Chips Gradually
When six chips feel easy, move to eight. When eight feels easy, try ten. As the stack grows, the shuffle becomes more impressive but also less forgiving. Taller stacks require smoother pressure, better alignment, and a calmer hand.
A good goal for casual practice is ten to twelve chips. More advanced chip shufflers may handle sixteen, twenty, or more, but bigger is not always better. A clean shuffle with eight chips looks better than a chaotic avalanche with twenty.
Common Mistakes Beginners Make
Pressing Too Hard
The most common mistake is using too much pressure. If your chips feel stuck, your grip is probably too tight. Relax your hand and focus on guiding the chips instead of overpowering them.
Lifting Too High
The middle finger should create a small lift, not a dramatic launch. If chips pop out of formation, reduce the upward motion. The trick works because the chips slide together, not because they fly.
Starting With Too Many Chips
Starting with a huge stack may look ambitious, but it slows progress. Six chips teach the core motion quickly. Once your fingers understand the movement, adding chips becomes much easier.
Using a Slippery Table
If the chips keep sliding away, change the surface. A mouse pad, felt mat, or folded cloth can make an immediate difference.
How Long Does It Take to Learn?
Most people can understand the basic movement in one short practice session. Getting it smooth may take a few days of casual practice. Making it automatic can take a couple of weeks, depending on how often you practice and how coordinated your fingers already are.
The good news is that practice does not need to be intense. Five minutes here and there is enough. Keep a small stack of chips on your desk, and practice while taking breaks. Just be warned: the sound is satisfying to you, but possibly less satisfying to anyone trying to watch a quiet movie nearby.
Tips to Make the Poker Chip Shuffle Easier
Use Alternating Colors
Different chip colors help you see whether the shuffle is working. If the final stack alternates colors, your timing and pressure are improving.
Keep the Chips Close Together
The stacks should begin almost touching. If the gap is too wide, your middle finger has to do too much work, and the chips are more likely to tip.
Practice Slowly First
Speed comes naturally after control. A slow, clean shuffle builds better habits than a fast, messy one.
Listen to the Sound
A smooth chip shuffle has a soft, even click. A loud clatter usually means the chips are dropping unevenly or being forced together.
Troubleshooting: Why Your Chips Will Not Shuffle
The Chips Keep Falling Over
Your stacks may be too tall, too far apart, or poorly aligned. Reduce the number of chips and reset the stacks carefully.
The Chips Refuse to Interlace
You may not be lifting enough with the middle finger. Add a slight upward motion while maintaining gentle inward pressure.
The Chips Slide Away
Your table may be too slick, or your side pressure may be uneven. Switch to a softer surface and focus on keeping both stacks supported.
Only the Top Chips Move
Your fingers may be pressing too high on the stacks. Try guiding the chips closer to the middle and lower edges so the entire stack moves as one unit.
Practice Routine for Faster Improvement
Try this simple routine for one week. On day one, use six chips and practice slowly for five minutes. On day two, keep using six chips but focus on making the final stack straighter. On day three, try eight chips for a few minutes, then return to six if the move gets messy. On day four, practice with alternating colors and check your final pattern. On day five, work on keeping your hand relaxed. On day six, try ten chips only after you can shuffle eight cleanly. On day seven, record your hand from above and watch where the chips lose alignment.
This routine works because it trains accuracy before speed. The chip shuffle is not a strength trick. It is a timing trick. Once your fingers learn the rhythm, the motion starts to feel easy.
Experiences and Practical Lessons From Learning Poker Chip Shuffling
The first experience most people have with chip shuffling is not elegance. It is confusion. You watch someone merge two stacks with one casual motion, then you try it yourself and immediately discover that poker chips have personalities. One chip leans left. Another one slips forward. The bottom chip stays behind like it has unpaid rent. This is normal. The trick looks simple because the visible motion is small, but the hidden part is pressure control.
One useful lesson is that your fingers need time to become less dramatic. Beginners often attack the chips with too much force. They press inward, lift sharply, and expect the stacks to obey. The better approach is softer. Let the chips tell you what is happening. If they lock up, loosen your grip. If they scatter, add support. If they lean, square the stacks before trying again. The trick improves when you stop fighting the chips and start guiding them.
Another practical experience is that the surface changes everything. Practicing on a slick dining table can make you think you are terrible at the trick. Then you move to a felt pad or mouse pad and suddenly the chips behave like they attended a manners class. A slightly soft surface lets the bottom chips stay in place while the inner edges lift. That tiny bit of traction makes the difference between “smooth shuffle” and “why is there a chip under the couch?”
Chip quality also matters. Cheap, feather-light plastic chips are harder to control because they slide and bounce easily. Heavier chips feel more stable. They respond better to small pressure changes and produce a cleaner sound. That does not mean you need expensive chips, but if you are serious about learning, a basic weighted set can make practice more enjoyable.
The most satisfying breakthrough usually happens when you stop staring at the top of the stacks and start feeling the middle. The middle finger does not need to lift much. It simply creates enough space for the inner edges to overlap. Once you feel that small lift-and-slide motion, the entire trick starts making sense. The chips no longer seem random. They begin to feed into each other in a predictable way.
It also helps to practice in short sessions. Ten minutes of relaxed practice is better than one hour of annoyed practice. When your hand gets tired, your grip becomes clumsy. Chips fall more often, and frustration builds. Step away, come back later, and the movement often feels easier. Muscle memory continues developing even when you are not actively practicing.
Finally, remember that style comes after consistency. You do not need to shuffle loudly, quickly, or with a giant stack. A clean six-chip shuffle is already a win. Add chips only when the current number feels controlled. Over time, the move becomes smoother, quieter, and more natural. Eventually, you may find yourself shuffling chips absentmindedly while thinking, reading, or waiting for water to boil. Congratulations: your fingers have learned a tiny, clicky dance.
Conclusion
Learning how to shuffle poker chips is a small skill with a big payoff. It improves finger coordination, gives your hands something satisfying to do, and looks much cooler than tapping a pen until everyone nearby questions your life choices. Start with six chips, use two equal stacks, place your middle finger between them, apply gentle inward pressure, lift slightly, and let the chips interlace. Keep the motion slow, relaxed, and controlled.
The secret is not speed. It is touch. Once you understand the balance between side pressure and middle-finger lift, the poker chip shuffle becomes smoother with every repetition. Practice on a soft surface, use alternating colors, and add more chips only when you are ready. Before long, you will turn a clumsy stack of chips into a polished little rhythm that feels as good as it looks.