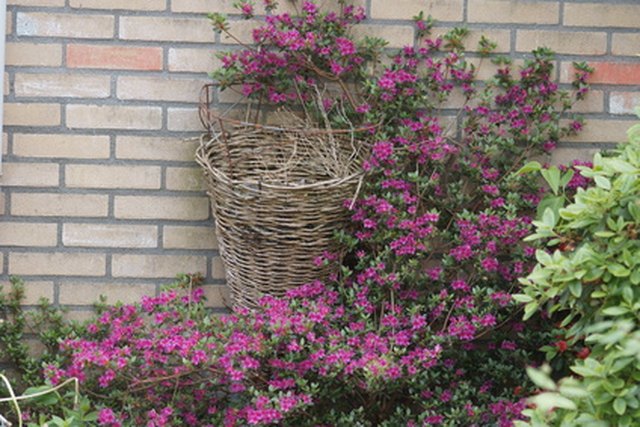
Old azaleas have a flair for drama. One year they’re the belle of the spring garden, covered in pink, white, lavender, coral, or red blooms. A few years later, they look like a tired green octopus trying to escape the foundation bed. The good news? In many cases, an old azalea is not “done.” It is simply overgrown, underfed, shaded too heavily, planted too deeply, mulched like a volcano, or exhausted from years of polite neglect.
Learning how to restore old azaleas is less about one heroic chop and more about a thoughtful rescue plan. These shrubs have shallow roots, specific soil preferences, and a strong dislike for soggy feet. Treat them well, and they can rebound with fresh foliage, better shape, and improved flowering. Treat them like a hedge trimmer’s punching bag, and they may sulk harder than a teenager asked to weed the garden.
This guide walks through the full process: diagnosing the plant, pruning correctly, improving soil, watering wisely, managing pests, and rebuilding a healthy azalea over several seasons.
Why Old Azaleas Decline Over Time
Before grabbing pruners, it helps to understand why an old azalea looks rough in the first place. Azaleas rarely decline for just one reason. Usually, it is a combination of age, competition, poor pruning, soil changes, drought stress, pests, and shade patterns that have shifted over the years.
Common signs of an aging or stressed azalea
An old azalea may need restoration if it has long bare stems, flowers only on the outer tips, yellowing leaves, dead branches, thin growth, reduced blooms, or an awkward shape that makes the whole shrub look like it got dressed in the dark. Some plants become open in the center because sunlight no longer reaches the interior branches. Others grow too tall and woody after years of light shearing.
Azaleas are naturally shallow-rooted shrubs. That means they can suffer quickly when soil dries out, when grass competes with their roots, or when mulch is piled too deeply around the stems. They also prefer acidic, well-drained soil rich in organic matter. If the soil pH becomes too high, nutrients such as iron may become less available, often leading to yellow leaves with greener veins.
Step 1: Decide Whether the Azalea Is Worth Restoring
Not every old azalea deserves a second act. Some are excellent candidates for renewal. Others are in the wrong location, badly diseased, or too far gone to justify years of work. Start with a practical inspection.
Check for living wood
Use the scratch test on several branches. Gently scrape the bark with a thumbnail or clean knife. If the layer underneath is green, that branch is alive. If it is brown, dry, and brittle all the way down, it is dead. A shrub with several live lower stems may respond well to restoration. A shrub with a mostly dead crown and no healthy shoots near the base may be better replaced.
Inspect the planting site
Azaleas generally perform best in partial shade, especially where they receive morning sun and protection from harsh afternoon heat. Too much deep shade can reduce flowering and create thin, stretched growth. Too much hot sun can scorch leaves and increase water stress. Also check drainage. If water puddles around the plant after rain, the roots may be struggling in wet soil.
Look for serious disease symptoms
Branch dieback, peeling bark near the base, wilting despite moist soil, or widespread root decline can point to problems beyond simple old age. If the plant sits in heavy, compacted, poorly drained soil, restoration may fail unless the drainage problem is corrected.
Step 2: Prune at the Right Time
Timing matters with azaleas because most traditional spring-blooming azaleas form next year’s flower buds during summer. If you prune too late, you may remove next spring’s show. That does not kill the plant, but it does create the classic gardener’s mystery: “Why didn’t my azalea bloom?” Spoiler alert: the answer is often “because the flower buds are in last July’s yard waste bag.”
Best time to prune old azaleas
The best time to prune azaleas is shortly after they finish blooming. This allows the plant time to produce new growth and set buds for the following year. For many spring-blooming azaleas, avoid major pruning after early summer. Light removal of dead, broken, or diseased wood can be done when noticed, but heavy shaping should wait until after bloom.
What about winter pruning?
Winter pruning can be useful for some shrubs, but with spring-blooming azaleas it often removes flower buds. However, if an azalea is severely overgrown and you are willing to sacrifice one season of flowers for long-term recovery, late winter or very early spring rejuvenation can be used. The goal then is not immediate beauty. The goal is survival, structure, and fresh growth.
Step 3: Choose the Right Restoration Pruning Method
There are two main ways to restore old azaleas: gradual renewal pruning and hard rejuvenation pruning. The best choice depends on plant health, size, location, and how much bloom you are willing to lose.
Option 1: Gradual renewal pruning
Gradual renewal is the safer method for valuable old azaleas. Instead of cutting everything at once, remove about one-third of the oldest, tallest, or weakest stems near the base. This opens the plant, allows light to reach the interior, and encourages new shoots without shocking the shrub too severely.
Repeat this process over two or three years. Each year, remove another portion of old wood while preserving healthy younger stems. This method keeps the shrub looking decent during recovery and usually preserves at least some flowers.
Option 2: Hard rejuvenation pruning
For azaleas that are wildly overgrown, bare at the bottom, or blocking windows like they are guarding a castle, hard rejuvenation may be appropriate. This involves cutting the shrub back close to the ground, often to about 6 to 12 inches, depending on the size and condition of the plant.
Hard pruning can stimulate vigorous new shoots from the base or lower stems. But it is not magic. The plant must have enough root strength to recover. Older, stressed, drought-damaged, or diseased azaleas may respond slowly or unevenly. Expect reduced flowering for at least one season, sometimes longer.
Use clean, sharp tools
Use hand pruners for small stems, loppers for medium branches, and a pruning saw for thick old wood. Avoid electric hedge shears for restoration work. Shears create a shell of twiggy outer growth while leaving the inside dark and bare. That may work for a formal hedge, but old azaleas usually need selective cuts, not a haircut from a lawn mower with opinions.
Step 4: Remove Dead, Diseased, and Crossing Branches First
Always start with cleanup pruning. Remove dead wood back to living tissue or to the base of the branch. Cut out broken branches, stems that rub against each other, and weak shoots growing awkwardly into the center of the plant.
If a branch shows disease symptoms, cut several inches below the visibly affected area when possible. Clean your tools between cuts if disease is suspected. This simple habit helps reduce the chance of spreading pathogens from one part of the shrub to another.
Step 5: Improve the Soil Around Old Azaleas
Pruning gets most of the attention, but soil care is often what determines whether an old azalea actually recovers. Azaleas prefer acidic, moist, well-drained soil with plenty of organic matter. They are not fans of compacted clay, standing water, alkaline soil, or being planted under a thick mat of hungry turfgrass.
Test the soil before fertilizing
A soil test is one of the smartest restoration steps. It tells you the soil pH and nutrient levels, so you are not guessing. Azaleas generally prefer acidic soil. If the pH is too high, they may show chlorosis, a yellowing of the leaves caused by poor nutrient availability.
Do not assume more fertilizer will fix every yellow leaf. If the soil pH is wrong or roots are damaged, fertilizer alone may not help. In fact, overfertilizing a stressed azalea can make things worse by pushing tender growth before the roots are ready to support it.
Add organic matter carefully
Because azaleas have shallow roots, avoid deep digging around the plant. Instead, improve the soil from the top down. Add compost, pine bark fines, leaf mold, or similar organic material as a light topdressing. Over time, this helps improve soil structure and supports beneficial soil life.
Step 6: Mulch the Right Way
Mulch is a restoration superhero when used correctly. It helps conserve moisture, moderates soil temperature, reduces weeds, and protects shallow roots. But mulch can also become a villain if piled against the trunk or stems.
Best mulch for azaleas
Pine straw, pine bark, shredded leaves, and fine bark mulch are commonly used around azaleas. Apply a layer about 2 to 3 inches deep over the root zone. Keep mulch pulled several inches away from the main stems. The goal is a wide, breathable blanket, not a mulch volcano.
If the old azalea has years of compacted mulch piled around its base, gently pull it back and expose the natural stem flare. Constant moisture against bark can invite decay and pest problems.
Step 7: Water Deeply but Do Not Drown the Plant
Restored azaleas need consistent moisture, especially after heavy pruning. New growth requires water, and shallow roots dry out faster than deep-rooted plants. That said, azaleas hate soggy soil. The trick is even moisture, not swamp life.
How to water old azaleas during recovery
Water deeply when the top few inches of soil become dry. A slow soak is better than a quick splash. During hot, dry weather, check soil moisture regularly under the mulch. If the root zone is dry, water. If it is still moist, wait.
Avoid frequent shallow watering because it encourages roots to remain near the surface. Also avoid watering late in the evening if foliage stays wet overnight, since extended leaf wetness can increase disease pressure.
Step 8: Fertilize Lightly After Growth Begins
Fertilizer should support recovery, not bully the plant into growth. After pruning, wait until new growth begins before applying fertilizer. Use a product labeled for acid-loving plants, such as azaleas, camellias, and rhododendrons, and follow label directions carefully.
In many landscapes, azaleas do not need heavy feeding. Too much nitrogen can create lots of leaves with fewer flowers and weaker growth. If a soil test shows no major nutrient shortage, compost and mulch may be enough for an established plant.
Step 9: Watch for Lace Bugs and Other Pests
Old azaleas under stress are more vulnerable to pest problems. One of the most common azalea pests is the azalea lace bug. Damage often appears as pale speckling or whitening on the upper leaf surface, while the undersides may show dark spots or insect debris.
How to reduce pest pressure naturally
Healthy plant placement is the first defense. Azaleas stressed by too much sun, drought, or poor soil are often more attractive to pests. Check leaves regularly, especially the undersides. If infestations are light, a strong spray of water or insecticidal soap may help. Severe or recurring infestations may require more targeted treatment based on local extension recommendations.
Also watch for scale insects, spider mites, caterpillars, stem borers, and signs of root rot. Restoration is not just about making the shrub pretty. It is about catching problems while they are still manageable.
Step 10: Train the New Growth
After renewal or hard pruning, old azaleas often produce a burst of new shoots. This is exciting, but do not let the plant turn into a chaotic twig festival. When new shoots reach about 6 to 12 inches, pinch or lightly prune the tips to encourage branching and a fuller shape.
Select the strongest, best-placed shoots and remove weak or crowded ones. The goal is an open, natural form with good airflow and balanced growth. A restored azalea should look like a graceful shrub, not a green beach ball.
Step 11: Be Patient With Flowering
Restored azaleas may need time before they bloom heavily again. Gradual renewal pruning may preserve some flowers each year. Hard rejuvenation pruning can reduce or eliminate flowers for one or two seasons while the plant rebuilds its framework.
Do not panic if the first year after pruning is mostly leaves. Leaves are the plant’s solar panels. The shrub is rebuilding energy. Once the structure improves and new stems mature, flowering should gradually return if the site, soil, and timing are right.
Common Mistakes When Restoring Old Azaleas
Pruning too late in the season
Late-season pruning often removes next year’s flower buds. If blooms matter, prune soon after flowering.
Shearing instead of thinning
Shearing creates dense outer growth and bare interiors. Use selective pruning cuts for a healthier, more natural plant.
Overfertilizing a stressed plant
Fertilizer is not plant coffee. More is not always better. Test soil first and feed lightly.
Piling mulch against the stems
Mulch should cover the root zone, not hug the trunk. Keep it away from stems to reduce rot and pest problems.
Ignoring drainage
No amount of pruning will fix roots sitting in soggy soil. If drainage is poor, correct that first or consider replacing the shrub with a plant better suited to the site.
A Simple Year-by-Year Azalea Restoration Plan
Year 1: Diagnose and begin cleanup
Inspect the plant, test soil, remove dead wood, correct mulch, improve watering, and choose either gradual renewal or hard rejuvenation. If using gradual renewal, remove about one-third of old stems after bloom.
Year 2: Encourage new structure
Continue removing old wood, lightly tip-prune new shoots to encourage branching, and monitor pests. Keep the root zone mulched and evenly moist.
Year 3: Refine shape and maintain health
Remove remaining awkward old stems, preserve strong young growth, and prune only as needed after bloom. By this stage, the azalea should look fuller, healthier, and more balanced.
Experience Notes: What Restoring Old Azaleas Teaches You
Restoring old azaleas is one of those garden projects that teaches patience faster than any motivational quote ever could. The first lesson is that plants do not care about your weekend schedule. You may want instant results, but an old azalea works on shrub time. It needs a season to respond, another season to rebuild, and sometimes a third season to look like it finally read the renovation plan.
One common experience is discovering that the “ugly” azalea is not actually dying. It is often just buried under old mulch, crowded by weeds, shaded by a maturing tree, or trimmed into a stiff green box for too many years. Once the dead stems are removed and light reaches the center, little shoots may appear from areas that looked hopeless. This is the gardening version of finding cash in an old coat pocket.
Another practical lesson is that hard pruning feels scary. Cutting a large azalea down to short stems can make a homeowner question every life choice that led to that moment. The plant may look worse before it looks better. But if the roots are healthy and the timing is right, new growth often appears with surprising energy. The key is aftercare. A hard-pruned azalea should not be abandoned like a bad DIY project. It needs mulch, steady moisture, pest monitoring, and protection from stress.
Gradual renewal often feels more comfortable. Removing a third of the oldest stems gives the shrub breathing room without making the landscape look empty. This method is especially useful for azaleas near front entries, patios, or windows where appearance matters year-round. The tradeoff is time. Gradual renewal is less dramatic, but it rewards consistency.
Restoration also teaches the difference between pruning and shaping. Many people want to make azaleas perfectly round. But old azaleas usually look best when allowed to keep a natural, layered form. Selective pruning creates depth, movement, and better airflow. Constant shearing may look tidy for a few weeks, but it often leads to twiggy outer growth and bare inner branches.
Soil care is another eye-opener. Gardeners sometimes focus so much on the top of the plant that they forget the roots are running the show. An azalea with compacted soil, high pH, or poor drainage cannot be pruned into happiness. Once the root zone is improved with proper mulch, careful watering, and organic matter, the plant often responds more strongly than expected.
Finally, restoring old azaleas teaches realistic optimism. Some shrubs return beautifully. Some improve but never become showpieces. A few reveal that replacement is the wiser choice. That is not failure. Good gardening is part science, part observation, and part knowing when to stop arguing with a shrub. If an old azalea still has healthy roots, living wood, and a suitable site, it is often worth restoring. And when it blooms again after a thoughtful rescue, it feels less like maintenance and more like a small spring miracle.
Conclusion
Restoring old azaleas is a step-by-step process: inspect the plant, prune at the right time, remove dead wood, improve soil, mulch properly, water consistently, feed lightly, and watch for pests. The most important ingredient is patience. Old azaleas can recover, but they rarely do it overnight.
For the best results, match your pruning method to the plant’s condition. Use gradual renewal for valuable shrubs that still have decent shape. Use hard rejuvenation for severely overgrown plants that need a full reset. Then support the roots, because healthy roots are what turn pruning cuts into fresh new growth.
Note: This article is based on real horticultural guidance commonly recommended by U.S. extension services, botanical garden resources, and professional landscape care practices. Adjust timing and care to your local climate, azalea variety, and soil conditions.