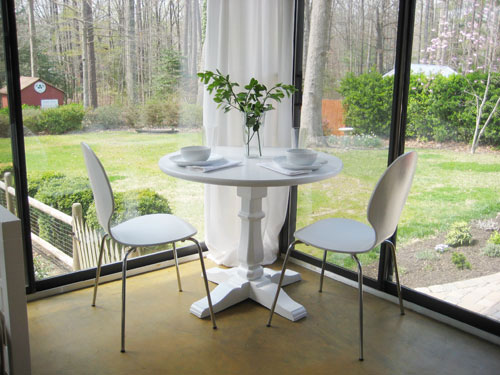
Painting furniture is one of the most satisfying home projects because it gives you the joy of a makeover without the financial drama of buying a brand-new piece. A tired dresser, a scratched coffee table, a thrift-store nightstand, or a dining chair with “I survived the 1990s” energy can become something fresh, stylish, and surprisingly expensive-looking with the right prep, paint, and patience.
The secret is not magic. It is not a $40 brush blessed by a design influencer under a full moon. The real secret is surface preparation. If you clean well, sand smartly, choose the right primer, apply thin coats, and let the finish cure, your painted furniture can look smooth, durable, and intentional instead of rushed, streaky, and emotionally complicated.
This guide walks you through how to paint furniture like a careful DIYer, not like someone panic-painting a bookshelf the night before guests arrive. You will learn what tools to use, how to prep different surfaces, when to prime, how to avoid brush marks, and how to protect the final finish so your furniture can handle real life.
Why Painting Furniture Is Worth It
Painting furniture is budget-friendly, creative, and practical. It allows you to reuse pieces you already own, rescue secondhand finds, and customize your home without waiting for the perfect item to appear in a catalog. A solid wood dresser with an outdated stain can become a modern statement piece. A basic side table can become a cheerful accent. A mismatched chair can suddenly look like it belongs in the room instead of apologizing from the corner.
It is also a smart option when the furniture has good bones. If the piece is sturdy, useful, and the shape works for your space, paint can solve a lot of cosmetic problems. Scratches, faded finishes, yellowed varnish, and awkward colors are usually fixable. Wobbly legs, water-swollen particleboard, deep rot, or drawers that fight you like tiny wooden enemies may require repair before painting.
Best Types of Furniture to Paint
Wood furniture is the easiest and most popular candidate for painting. Dressers, bookcases, tables, desks, bed frames, and chairs can all be transformed with paint. Laminate and MDF furniture can also be painted, but they need stronger prep and a bonding primer because slick surfaces do not naturally love paint. Metal furniture, such as patio chairs or filing cabinets, can be painted too, especially with spray paint or enamel products designed for metal.
Some items are better left alone or handled carefully. Do not paint surfaces that come into direct contact with food unless you are using a product specifically rated as food-safe. Avoid painting moving hardware such as hinges, locks, and drawer slides because paint can gum them up. Upholstered furniture is a special category and usually needs fabric paint or dye, not regular wall paint.
Tools and Materials You Will Need
Before you begin, gather everything in one place. Nothing ruins a peaceful project faster than realizing your screwdriver is missing while your wet primer is drying and your dog is considering walking through the drop cloth.
- Drop cloth or plastic sheeting
- Screwdriver or drill for removing hardware
- Mild soap, degreaser, or cleaner
- Clean rags or microfiber cloths
- Sandpaper or sanding sponges in medium and fine grits
- Tack cloth or damp cloth for dust removal
- Wood filler for holes or dents
- Painter’s tape
- Primer suitable for your surface
- Furniture paint, enamel, chalk-style paint, acrylic paint, or cabinet paint
- Paintbrush, foam roller, mini roller, or sprayer
- Clear topcoat, wax, polyurethane, or protective sealer if needed
- Mask, gloves, and eye protection
Step 1: Inspect the Furniture
Start by looking closely at the piece. Check whether it is solid wood, veneer, laminate, MDF, or metal. Look for peeling finish, greasy spots, loose veneer, deep scratches, damaged corners, rust, or old paint. This quick inspection tells you how much prep you need.
If the furniture has a shiny surface, paint will need help sticking. That usually means cleaning, deglossing, sanding, and priming. If the piece has loose or flaking paint, you need to remove unstable areas before applying anything new. Paint sticks to the surface underneath it. If the surface underneath is peeling, your beautiful new color may peel right along with it.
Step 2: Check for Lead Paint on Older Pieces
If you are working with vintage, antique, or unknown painted furniture, pause before sanding. Older painted surfaces may contain lead-based paint. Sanding, scraping, or disturbing lead paint can create hazardous dust. This is especially important for pieces that may have been painted decades ago or came from an older home, attic, garage, flea market, or estate sale.
Use a lead test kit or consult a professional if you are unsure. If lead is present, do not sand it casually in your garage while pretending dust is just “vintage confetti.” Follow lead-safe practices or hire a qualified professional. Safety is part of a good paint job, not a boring footnote.
Step 3: Remove Hardware, Drawers, and Doors
Take off knobs, handles, hinges, drawer pulls, removable shelves, doors, and drawers. Label hardware in small bags if the piece has many parts. This makes painting cleaner and prevents hardware from getting accidental paint freckles.
Removing drawers also helps you paint edges evenly and avoid stuck seams. If you are painting a dresser, paint the drawer fronts separately and keep them flat while drying. If you paint them while they are installed, drips can sneak into corners and create little ridges that announce your impatience forever.
Step 4: Clean the Surface Thoroughly
Cleaning is not optional. Furniture collects hand oils, polish, dust, cooking grease, wax, pet hair, mystery residue, and sometimes the faint spiritual presence of a garage sale. Paint will not bond well to grime. Use mild soap and water for lightly dirty pieces, or a degreaser for kitchen furniture, cabinets, dining chairs, and anything that has lived near food.
After cleaning, wipe the piece with a clean damp cloth and let it dry completely. Do not paint over damp wood or trapped cleaner. Moisture can interfere with primer and paint adhesion, and nobody wants a bubbling finish after doing all that work.
Step 5: Repair Holes, Dents, and Damage
Fill unwanted holes, dents, and deep scratches with wood filler. Let it dry according to the product directions, then sand it smooth. If you plan to change hardware, measure the new pulls before filling old holes. A common DIY heartbreak is filling holes, painting beautifully, and then discovering the new handles need the exact holes you just erased.
For loose veneer, glue and clamp it before painting. For missing veneer corners, use wood filler or epoxy filler and shape it carefully. For rusty metal furniture, remove loose rust with a wire brush or sandpaper before priming.
Step 6: Sand for Better Adhesion
Sanding helps paint grip the surface. You do not always need to strip furniture down to bare wood. In many cases, you only need to scuff the existing finish so primer has something to hold onto. For glossy furniture, use medium-grit sandpaper first, then finish with fine-grit paper for a smoother surface.
Sand in the direction of the wood grain when working with wood. Use a sanding sponge for curves, legs, trim, and carved details. For flat surfaces, a sanding block or orbital sander can speed things up, but be gentle around veneer because it is thin and easy to damage.
After sanding, remove all dust. Vacuum the surface if needed, then wipe with a tack cloth or slightly damp cloth. Dust left behind can create a gritty finish, and gritty furniture is not charming unless you are decorating a haunted beach house.
Step 7: Choose the Right Primer
Primer improves adhesion, blocks stains, creates a more even base, and helps paint last longer. Use a bonding primer for laminate, slick factory finishes, glossy varnish, or previously painted furniture. Use stain-blocking primer for wood that may bleed tannins, such as oak, mahogany, cherry, or knotty pine. Use rust-inhibiting primer for metal furniture.
Primer is especially important when painting dark furniture a light color, painting over stained wood, working with laminate, or switching from an oil-based finish to a water-based paint. Some chalk-style paints and all-in-one furniture paints advertise minimal prep, but even then, the surface should be clean and stable.
Step 8: Apply Primer in Thin, Even Coats
Apply primer with a brush, foam roller, mini roller, or sprayer depending on the shape of the piece. Use a brush for corners, trim, and edges. Use a small roller for broad, flat areas like tabletops, drawer fronts, and cabinet sides.
Thin coats are better than thick coats. A thick coat may look efficient, but it can dry unevenly, leave brush marks, and create drips. Let the primer dry fully. Once dry, lightly sand with fine-grit sandpaper if the surface feels rough. Wipe away the dust before painting.
Step 9: Pick the Best Paint for Furniture
The best furniture paint depends on the look and durability you want. Cabinet and furniture enamel is great for high-use pieces because it dries to a hard, durable finish. Acrylic paint is easy to work with and available in many colors. Chalk-style paint gives a soft matte look and is popular for vintage or farmhouse-style furniture. Milk paint can create a natural, layered, old-world effect. Spray paint is useful for metal, wicker, small tables, chairs, and detailed shapes.
For tabletops, desks, chairs, and children’s furniture, choose a durable paint that can handle touching, wiping, and daily use. For decorative pieces that will not be handled much, you can focus more on finish and color. For outdoor furniture, choose paint rated for exterior use and consider weather resistance, UV exposure, and moisture.
Step 10: Paint the First Coat
Stir the paint well before using it. Do not shake it aggressively unless the label says to, because bubbles can end up in your finish. Start with detailed areas, corners, grooves, and edges using a brush. Then paint large flat areas with a foam roller or mini roller.
Work in thin coats. Brush with the grain on wood surfaces and avoid overworking the paint. Once paint begins to set, repeatedly brushing over it can create texture and drag marks. If you see a small flaw, resist the urge to poke at it like it owes you money. Let it dry, then fix it during light sanding before the next coat.
Step 11: Sand Lightly Between Coats
For a smoother professional-looking finish, lightly sand between coats with fine-grit sandpaper after the paint is dry. This removes tiny bumps, dust nibs, and brush texture. Wipe the surface clean before applying another coat.
Most furniture projects need two coats of paint. Dark colors over dark primer may cover quickly, while light colors over dark wood may need extra coats. Again, thin layers win. Several light coats usually look better and last longer than one heroic, gloopy coat.
Step 12: Seal or Protect the Finish
Not every painted piece needs a separate topcoat, especially if you use durable enamel or cabinet-grade paint. However, a protective finish is wise for tabletops, dressers, nightstands, desks, dining chairs, coffee tables, and any surface that will be touched often.
Choose the topcoat based on the paint and desired finish. Water-based polyurethane or polycrylic can protect painted furniture while keeping the color clearer. Wax is common over chalk-style paint and gives a soft hand-rubbed feel, though it may need reapplication over time. Oil-based topcoats can be durable but may amber over light colors.
Always test the topcoat in an inconspicuous area. Some sealers can change sheen or slightly deepen the color. Apply thin coats and let each coat dry according to the label.
Step 13: Let the Paint Cure
Dry and cured are not the same. Paint may feel dry to the touch within hours, but curing takes longer. During curing, the finish hardens and becomes more resistant to scratches, dents, and cleaning. This can take days or even weeks depending on the paint type, humidity, temperature, and thickness of coats.
Be gentle with freshly painted furniture. Do not immediately stack books on a painted shelf, place a lamp on a nightstand, or slide a vase across a new tabletop. Give the finish time to harden. Your patience will be rewarded with fewer scratches and less regret.
How to Paint Different Furniture Surfaces
How to Paint Wood Furniture
Clean the surface, sand lightly, repair damage, prime if needed, and apply two thin coats of furniture paint. Wood is forgiving, but it can bleed through light paint if it has tannins or old stain. Use a stain-blocking primer when painting wood white, cream, pale gray, or pastel.
How to Paint Laminate Furniture
Laminate is slick, so adhesion is the challenge. Clean it thoroughly, scuff sand lightly, use a high-quality bonding primer, and allow proper drying time. Do not skip primer unless your paint product specifically says it is suitable for laminate without primer.
How to Paint MDF Furniture
MDF absorbs moisture, especially along raw edges. Sand gently, seal edges with primer, and use thin coats. Avoid soaking the surface with water-based products. A good primer helps prevent swelling and creates a smoother painted finish.
How to Paint Metal Furniture
Remove rust, sand rough spots, clean well, and use a primer designed for metal. Spray paint is often convenient for metal furniture because it reaches curves and thin parts evenly. Apply several light coats instead of one heavy coat to prevent drips.
How to Paint Wicker Furniture
Wicker has endless tiny spaces, so spray paint is often the easiest option. Clean it well, let it dry completely, and spray from multiple angles to reach the woven areas. Use light coats and avoid flooding the surface, which can fill the texture and look clumpy.
Common Furniture Painting Mistakes to Avoid
The most common mistake is rushing the prep. If you paint over dirt, gloss, wax, or loose finish, the paint may chip or peel. Another mistake is applying paint too thickly. Thick coats can create drips, ridges, sticky spots, and long drying times.
Skipping primer is another risky move, especially on laminate, glossy surfaces, raw wood, stained wood, or furniture that gets heavy use. Using the wrong paint can also cause trouble. Wall paint may work on some low-touch decorative pieces, but furniture usually needs a harder, more durable finish.
Finally, many DIYers use the furniture too soon. Letting paint cure is not glamorous, but it is the difference between a finish that survives and a finish that collects scratches before the room makeover photos are even taken.
Color Ideas for Painted Furniture
White and cream are classic choices for dressers, sideboards, and cottage-style pieces, but they require good prep because stains can bleed through. Black furniture looks dramatic and modern, especially with brass hardware. Navy blue, forest green, and charcoal gray are excellent choices for a refined look. Soft sage, dusty blue, warm taupe, and muted terracotta work well in cozy interiors.
For a playful accent, try coral, mustard, teal, or bright red on a small piece like a nightstand or chair. If you are nervous about bold color, paint only the drawer fronts, the inside of a bookcase, or the legs of a table. Furniture is a great place to experiment because the commitment is smaller than painting an entire room.
Finishing Touches That Make Painted Furniture Look Expensive
New hardware can completely change the final look. Swap dated knobs for matte black pulls, brass handles, ceramic knobs, or simple modern hardware. Line drawers with peel-and-stick paper for a polished surprise. Add furniture feet to a basic dresser for height and personality. Use painter’s tape to create stripes, color blocking, or a dipped-leg effect.
For vintage charm, lightly distress edges after painting, then seal the piece. For a smooth modern style, skip distressing and focus on flawless sanding, sleek hardware, and a satin or semi-gloss finish. The best painted furniture looks intentional from every angle, not just from the side facing the camera.
Real-Life Experience: What You Learn After Painting Furniture
The first thing you learn from painting furniture is that prep takes longer than painting. At first, this feels unfair. You bought paint, you picked a color, you are emotionally ready for transformation. Then the furniture quietly demands cleaning, sanding, filling, taping, priming, more sanding, and dust removal. It is like the piece has a tiny project manager inside it, saying, “Great enthusiasm, but where is your tack cloth?”
One useful experience is learning to respect old finishes. A glossy nightstand might look harmless, but if you paint it without sanding or priming, the finish can chip at the corners within days. A laminate bookcase can look smooth and modern after paint, but only if you use a bonding primer and give each coat enough dry time. A wood dresser may seem clean, yet after wiping it with a degreaser, the cloth can reveal years of polish, dust, and hand oils. That moment is humbling. Furniture has a memory, and apparently it is sticky.
Another lesson is that thin coats are your best friend. Beginners often want full coverage immediately. The first coat looks patchy, and panic arrives wearing work gloves. But patchy first coats are normal. The second coat brings confidence. Sometimes the third coat brings glory. Thick paint may seem faster, but it usually leaves brush marks, drips, and soft spots that take too long to cure. A thin coat looks unimpressive at first, but it dries better, sands smoother, and builds a stronger finish.
Brush choice also matters more than expected. A cheap brush can shed bristles into wet paint like it is donating hair to the project. A quality angled brush makes edges cleaner and detail work easier. Foam rollers are excellent for flat drawer fronts and tabletops, but they can leave tiny bubbles if overloaded. The trick is to load the tool lightly, spread the paint evenly, and stop fussing once the coat is laid down.
Hardware can make or break the makeover. Painting a dresser and reinstalling the same dull handles can feel like buying a new suit and wearing muddy sneakers. Fresh hardware does not need to be expensive, but it should match the new personality of the piece. Matte black pulls can make a simple dresser look modern. Brass knobs can warm up navy or green paint. Wood knobs can soften white or cream finishes.
You also learn that drying time is not the same as “ready for life.” A tabletop may feel dry the next day, but placing a heavy lamp or stack of books on it too soon can leave marks. Painted shelves need extra patience before loading them with decor. Chairs should cure before being dragged across the floor or grabbed by the back every morning. The hardest part of painting furniture is often not the work itself; it is leaving the finished piece alone long enough to become durable.
Finally, painted furniture teaches you that perfection is overrated, but care is not. A tiny brush mark hidden near the back leg is not a crisis. A slight texture on an old dresser can add character. What matters is that the piece is clean, stable, smooth enough, properly primed, painted in thin coats, and protected for how it will be used. A good furniture makeover should look beautiful, function well, and make you smile every time you walk past it. If it also makes guests ask where you bought it, feel free to smile mysteriously and say, “Oh, this old thing?”
Conclusion
Learning how to paint furniture is one of the most useful DIY skills for refreshing your home on a budget. The process is simple, but the details matter. Clean the piece thoroughly, repair damage, sand for adhesion, use the right primer, apply thin coats of paint, protect the finish when needed, and give everything enough time to cure.
Whether you are updating a family dresser, rescuing a thrift-store table, or giving outdoor chairs a second chance, the best results come from patience and preparation. Paint can absolutely transform furniture, but prep is what makes the transformation last. Treat the process like a small renovation, not a quick cover-up, and your finished piece can look stylish, durable, and proudly custom.