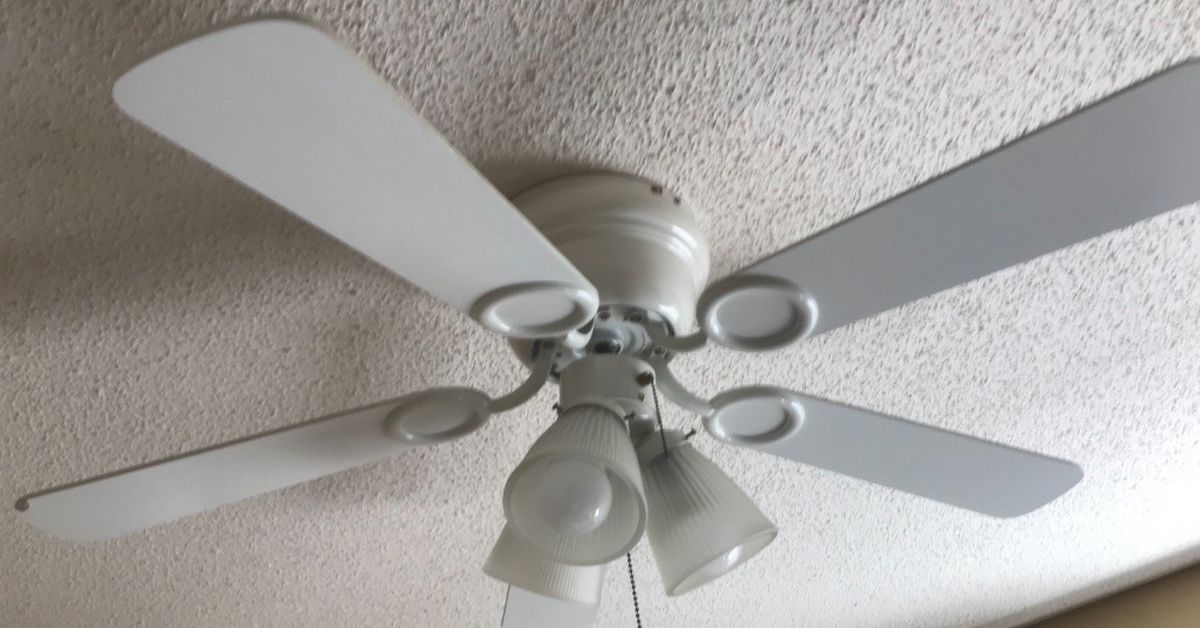
An old white ceiling fan has a special talent: it can make an otherwise lovely room look like it has been quietly collecting dust since the dial-up internet era. The blades may be yellowed, the metal may look tired, and the whole fixture might scream, “I came with the house, and nobody asked questions.” Good news: you do not always need to replace it. With the right prep, paint, patience, and a healthy respect for ladders, you can paint an old white ceiling fan and give it a fresh DIY update for a fraction of the cost of a new fixture.
This guide walks you through the full process: cleaning, sanding, priming, painting, reassembling, and avoiding those little mistakes that turn a weekend project into a dramatic home improvement documentary. Whether your goal is matte black, soft brass, crisp white, warm wood-look blades, or a modern two-tone ceiling fan makeover, this DIY ceiling fan painting project can completely change the feel of a room.
Why Paint an Old White Ceiling Fan Instead of Replacing It?
Ceiling fans are practical. They move air, help rooms feel cooler, and can reduce how often you reach for the thermostat. Unfortunately, many older white fans are not exactly design icons. They often fade, yellow, collect greasy dust, or clash with updated decor. Painting an old ceiling fan is a smart middle ground between living with the eyesore and buying a brand-new fan.
A DIY ceiling fan update is especially useful when the fan still works well, the blades are not warped, the motor is quiet, and the fixture is properly installed. In that case, the problem is mostly cosmetic. Paint can refresh the fan housing, blade brackets, pull chains, and blades so the fan looks intentional instead of forgotten.
Painting also gives you control over style. A black ceiling fan can add contrast in a modern room. White-on-white can help a fan disappear against the ceiling. A soft bronze or brushed nickel finish can coordinate with door hardware, light fixtures, or curtain rods. In other words, your ceiling fan does not have to look like it lost a fight with a dusty marshmallow.
Before You Start: Safety Comes First
Before you grab a screwdriver, turn off the fan and the wall switch. For extra safety, shut off power at the breaker if you will be removing parts near wiring or working around the motor housing. A ceiling fan is an electrical fixture, not a decorative piñata. Treat it with care.
Use a sturdy step ladder, not a swivel chair, laundry basket, or “this looks stable enough” invention. If the fan is high, awkward to reach, or connected to old wiring, consider removing only the blades and painting the motor housing in place with careful masking. If the fan has loose wiring, burning smells, heavy wobble, damaged blades, or unusual noises, pause the cosmetic makeover and address the mechanical or electrical issue first.
Tools and Materials You Will Need
Gather everything before you begin so you are not standing halfway up a ladder wondering where the painter’s tape went. For most old white ceiling fan painting projects, you will need:
- Drop cloth or old sheet
- Screwdriver or drill with the correct bit
- Painter’s tape
- Plastic bags or small containers for screws
- Marker for labeling parts
- Mild dish soap and warm water
- Degreaser if the fan is in a kitchen or greasy area
- Microfiber cloths
- 220-grit sanding sponge or sandpaper
- Tack cloth or lint-free cloth
- Primer suitable for metal, wood, plastic, or laminate
- Spray paint or brush-on enamel paint
- Respirator or mask rated for painting
- Gloves and eye protection
- Cardboard, scrap wood, or painting stands for blade drying
For the best finish, choose paint based on the surface. Many ceiling fan blades are wood, MDF, laminate, or plastic-coated material. Fan housings and blade arms are usually metal. A paint-and-primer product may work for some surfaces, but separate primer is often better when the fan is glossy, stained, greasy, or changing from white to a dark color.
Step 1: Take Photos Before Disassembly
Before removing anything, take clear photos of the fan from several angles. Photograph how the blades attach, where screws go, how the brackets sit, and how any light kit or pull chain is arranged. Future you will be grateful. Future you has no interest in playing “mystery hardware puzzle” at 9:47 p.m.
Label each blade and blade bracket with painter’s tape. Write numbers such as Blade 1, Blade 2, Blade 3, and so on. Keeping the same blade with the same bracket can reduce the chances of wobbling after reassembly. Put screws in labeled bags or cups. This small step can save a surprising amount of frustration.
Step 2: Remove the Fan Blades and Hardware
Most ceiling fans allow you to remove the blades by unscrewing the blade brackets from the motor housing or by removing the blades from the brackets. Place each blade on a protected surface. If you are painting the brackets, remove them as well.
You can paint the motor housing while it is still mounted, but you must mask carefully. Cover the ceiling around the canopy, protect the floor and furniture, and avoid spraying near electrical openings. If you are uncomfortable working near the motor or wiring, paint only the removable parts or ask a qualified professional to take down the fan.
Step 3: Clean Like the Paint Depends on It, Because It Does
The biggest secret to painting an old white ceiling fan is not the paint. It is cleaning. Fan blades collect dust, skin oils, cooking residue, humidity grime, and mystery fuzz that seems to be manufactured by the fan itself. Paint will not stick well to dirt, grease, or waxy buildup.
Wash the blades with warm water and mild dish soap. For kitchen fans, use a gentle degreaser and wipe thoroughly. Avoid soaking MDF or particleboard blades, because too much moisture can cause swelling. Wipe both sides of every blade, the edges, the blade brackets, the housing, the canopy, and any decorative caps you plan to paint.
After cleaning, rinse with a damp cloth and dry completely. The surface should be clean, dry, and dull before paint touches it. If the fan still feels slick or greasy, clean it again. Paint is loyal, but it is not loyal to grime.
Step 4: Sand the Surface Lightly
Once the pieces are clean and dry, lightly sand them with 220-grit sandpaper or a sanding sponge. The goal is not to remove every bit of old finish. You simply want to scuff the glossy surface so primer and paint can grip.
Sand with even pressure. Pay attention to blade edges, corners, and any shiny spots on metal brackets. If there are chips, peeling paint, or rough patches, smooth them out. Wipe away all sanding dust with a tack cloth or lint-free cloth. Dust left behind can create a gritty finish, and nobody wants a ceiling fan that looks like it was painted at the beach during a windstorm.
Step 5: Choose the Right Paint Finish
The best paint for a ceiling fan depends on the look you want and the material you are painting. Spray paint gives metal brackets and housings a smooth, factory-like finish when applied in light coats. Brush-on enamel or trim paint can work well for blades, especially if you prefer more control indoors.
Popular Ceiling Fan Paint Ideas
Matte black: Great for modern, industrial, farmhouse, or high-contrast rooms. It hides small imperfections and makes the fan feel updated fast.
Fresh white: Best when you want the fan to blend into a white ceiling. Use this if you love a clean, quiet look.
Oil-rubbed bronze: A warm, classic choice that pairs nicely with traditional lighting and wood furniture.
Soft brass or champagne gold: Stylish but should be used carefully. Too shiny can look flashy; satin metallic usually feels more expensive.
Two-tone: Try black housing with wood-tone blades, white housing with natural-look blades, or bronze brackets with dark blades.
For durability, satin, semi-gloss, and gloss finishes are easier to wipe clean than flat paint. However, satin is often the sweet spot because it looks smooth without showing every tiny flaw.
Step 6: Prime the Fan Parts
Primer helps paint stick, improves coverage, and creates a more even finish. Use a primer designed for the surface you are painting. Metal primer works well for blade arms and housings. Bonding primer is useful for slick laminate or glossy factory finishes. Wood primer works for bare wood or exposed areas where the old finish has worn away.
Apply primer in thin, even coats. If using spray primer, keep the can moving and hold it at the distance recommended on the label. Start spraying slightly before the object and continue past it to avoid heavy spots. Heavy coats can drip, wrinkle, or take forever to dry. Thin coats may feel slower, but they are the fast way to a better result.
Let the primer dry according to the product instructions. If the primed surface feels rough, lightly sand it once dry and wipe away dust before painting.
Step 7: Paint the Ceiling Fan Blades
Lay the blades flat on cardboard, painter’s pyramids, cups, or scrap wood so the edges are slightly raised. Paint one side at a time. Apply thin coats and let each coat dry before adding the next. Two or three light coats are better than one thick coat that looks like frosting on a cake nobody asked for.
If using spray paint, work in a well-ventilated area, ideally outdoors or in a garage with airflow. Avoid windy conditions because dust, leaves, and one suspiciously determined mosquito can land in fresh paint. If brushing or rolling, use a high-quality brush or small foam roller to reduce marks.
Paint the blade edges too. Old white edges can show when the fan spins or when viewed from below. Once the first side is dry, flip the blades and paint the other side. Keep paint thickness consistent on all blades to help maintain balance.
Step 8: Paint the Metal Brackets and Fan Housing
Metal brackets usually look best with spray paint because it reaches curves and corners smoothly. Place the brackets on cardboard and spray them from multiple angles using light passes. Do not forget screw heads if they will be visible. Push screws into cardboard so the heads stay upright while you spray them.
If painting the motor housing in place, mask thoroughly. Cover the ceiling, light bulbs, sockets, vents, openings, and any area you do not want painted. Use a brush for tight indoor work if spray paint would create too much overspray. Never spray paint directly into electrical openings or the motor vents.
Let everything cure longer than it merely takes to feel dry. Dry paint can still be soft underneath. If you rush reassembly, screws and brackets may scratch the finish. Patience is cheaper than repainting.
Step 9: Reassemble the Fan Carefully
Once the paint has dried and cured according to the paint label, reattach each blade to its original bracket and location. Tighten screws firmly, but do not over-tighten and strip them. Check that every blade sits evenly and that all brackets are secure.
Turn the fan by hand before restoring power. Make sure nothing rubs, scrapes, or catches. Then turn the power back on and test the fan on low speed first. Watch for wobble, clicking, scraping, or uneven motion. If everything looks good, test medium and high speeds.
Step 10: Fix Wobble After Painting
If your freshly painted ceiling fan wobbles, do not panic. Wobble can happen if screws are loose, blades were reattached in a different order, paint coats are uneven, dust remains on one blade, or a blade was slightly warped before the makeover.
First, turn off the fan and check every screw. Make sure the blades are clean and firmly attached. Confirm that the brackets are not bent. If the fan still wobbles, use a ceiling fan balancing kit. These kits usually include a temporary clip and small adhesive weights. You test the clip on different blades until the wobble improves, then place a weight on the problem blade.
A minor wobble can often be corrected. A severe wobble, sagging mount, or visibly warped blade should be taken seriously. A ceiling fan spins overhead, which means “probably fine” is not the inspection standard we are aiming for.
Common Mistakes to Avoid
Skipping the Cleaning Step
Paint over dust and grease, and the finish may peel, bubble, or look blotchy. Clean first, brag later.
Using Thick Coats
Thick paint coats create drips, uneven drying, and balance issues. Thin coats are smoother, stronger, and more professional-looking.
Painting Without Ventilation
Spray paint fumes need proper airflow. Use a respirator when appropriate and follow label directions. Open windows, work outside when possible, and avoid painting near flames or heat sources.
Forgetting to Label the Blades
Ceiling fans are balanced systems. Labeling blades and brackets helps you put everything back where it came from.
Reassembling Too Soon
Paint that feels dry may still be curing. Waiting longer helps prevent fingerprints, dents, and scratches.
How Long Does This DIY Ceiling Fan Makeover Take?
The hands-on work can often be done in a day, but drying and curing time may stretch the project over a weekend. Cleaning and disassembly may take one to two hours. Sanding and priming may take another hour or two. Painting depends on the number of coats and drying time between coats. Reassembly is usually quick if you labeled everything.
Plan for patience. A rushed ceiling fan painting project can look messy, while a slow and careful one can look like you bought a new fan and casually forgot to mention your clever budget victory.
Best Rooms for a Painted Ceiling Fan Update
A painted ceiling fan works beautifully in bedrooms, living rooms, home offices, guest rooms, sunrooms, and covered porches if the fan and paint are rated for the location. For bathrooms, laundry rooms, and outdoor spaces, make sure the fan is damp-rated or wet-rated as needed, and choose products suitable for moisture exposure.
In a bedroom, a white fan painted matte black can become a stylish anchor. In a coastal room, a fresh white housing with pale wood-look blades can feel breezy and clean. In a farmhouse-style kitchen, bronze or black brackets can coordinate with cabinet hardware. The key is to match the fan finish to the room’s existing design language so the update feels planned.
Experience Notes: What This Project Teaches You
After painting an old white ceiling fan, you learn very quickly that small DIY projects are rarely just about paint. They are about observation, patience, and accepting that dust has been living above your head rent-free for years. The first big experience is realizing how much grime a ceiling fan can collect without looking truly dirty from the floor. Once the blades are down and sitting under bright light, the truth appears. It is humbling. It is also slightly gross.
The second lesson is that preparation makes the final finish. Many beginners want to jump straight to the exciting part: the color. That is understandable. Nobody posts dramatic before-and-after photos of themselves wiping blade edges with a damp microfiber cloth. But cleaning, sanding, and priming are the invisible heroes of the project. When the paint goes on smoothly and stays there, those boring steps deserve applause.
Another useful experience is learning how color changes the personality of a room. An old white ceiling fan often fades into the ceiling, but not always in a good way. Sometimes it disappears because everyone is politely ignoring it. Paint it black, bronze, or a warm neutral, and suddenly the fan looks intentional. Paint it fresh white, and the room feels cleaner. Even a subtle change can make the ceiling feel more finished.
You also learn that spray paint is both wonderful and dramatic. It can create a smooth finish on metal brackets and curved housings, but it demands respect. Too close, and you get drips. Too far, and the texture can feel dusty. Too windy, and your project may develop a decorative layer of airborne nature. The sweet spot is light, even passes with enough drying time between coats. Spray paint rewards calm people. It humbles impatient people. Occasionally, it does both in the same afternoon.
Reassembly brings its own tiny victory. There is something satisfying about putting the blades back, tightening the screws, stepping down from the ladder, and seeing a fan that no longer looks old and forgotten. The moment you turn it on is the final exam. If it spins smoothly, you feel like a home improvement genius. If it wobbles, you learn one more lesson: balance matters. Checking screws, blade order, and paint consistency can usually solve the problem.
The biggest takeaway is that painting an old white ceiling fan is one of those DIY updates that looks more impressive than it costs. It does not require a full renovation, a huge tool collection, or a contractor’s schedule. It requires careful prep, the right materials, and enough patience to let paint dry before touching it. The result can refresh an entire room and make an old fixture feel custom. Not bad for a project that starts with looking up and saying, “Wow, that fan has seen things.”
Conclusion
Painting an old white ceiling fan is a budget-friendly DIY update that can make a room feel cleaner, newer, and more thoughtfully designed. The process is simple, but the details matter: turn off the power, label the parts, clean thoroughly, sand lightly, prime correctly, paint in thin coats, and reassemble with care. When done right, an outdated fan can become a stylish feature instead of a dusty distraction.
Whether you choose matte black, classic white, bronze, or a creative two-tone finish, the goal is the same: give your ceiling fan a second life without sending your wallet into emotional distress. With a weekend, a few supplies, and a little patience, your old fan can go from “builder-grade blah” to “wait, is that new?”
Note: Always follow the paint manufacturer’s label instructions and the ceiling fan manufacturer’s safety guidance. If the fan has electrical issues, severe wobble, damaged blades, or an unsafe mount, repair or replace those components before focusing on appearance.