Some storage solutions look like they came straight from a catalog. Others look like they came from a garage, got lost at a flea market, joined a beach cottage, and somehow became fabulous. Teal and coral wooden crate storage cubbies belong proudly in the second category. They are practical, colorful, slightly nostalgic, and charming enough to make clutter look like it has finally gotten its life together.
This shabby chic DIY project turns ordinary wooden crates into a cheerful storage system for books, craft supplies, shoes, toys, blankets, bathroom towels, pantry goods, or that mysterious pile of “important things” everyone has but no one can explain. With a few crates, paint, sandpaper, screws, and a little patience, you can create a custom cubby unit that feels beachy, vintage, cottage-inspired, and handmade in the best possible way.
The beauty of wooden crate storage cubbies is flexibility. Stack them vertically, arrange them horizontally, make a low bench-style organizer, or build a small wall of open shelves. Teal brings a calm coastal vibe, coral adds warmth and personality, and the distressed shabby chic finish makes every tiny imperfection look intentional. Finally, a DIY project where “oops” can be rebranded as “rustic character.”
Why Teal and Coral Work So Well for Shabby Chic Crate Storage
Teal and coral are a classic color pairing because they balance each other beautifully. Teal feels cool, relaxed, and slightly coastal, while coral feels warm, playful, and sunny. Together, they create contrast without yelling across the room. This makes them perfect for wooden crate cubbies in bedrooms, craft rooms, laundry areas, nurseries, dorm spaces, entryways, and small apartments.
Shabby chic design often mixes soft color, worn finishes, vintage textures, and practical pieces that look collected over time. Wooden crates fit naturally into that style because they already have a casual, rustic shape. When painted, lightly distressed, and sealed, they become storage that looks decorated rather than purely functional.
Materials and Tools You Will Need
Basic Materials
- 4 to 8 unfinished wooden crates, depending on the size of your cubby unit
- Teal paint and coral paint, preferably low-VOC interior furniture or craft paint
- White, cream, or light gray paint for dry brushing or highlighting
- Primer suitable for bare wood
- Clear protective topcoat, wax, or water-based polyurethane
- Wood screws or small brackets for joining crates
- Wall anchors or anti-tip hardware if the cubbies will stand tall
- Wood filler for rough knots, gaps, or dents
- Optional peel-and-stick wallpaper, fabric, or scrapbook paper for crate backs
Tools
- Sandpaper in medium and fine grits
- Sanding sponge or sanding block
- Tack cloth or microfiber cloth
- Paintbrushes and small foam rollers
- Drop cloth
- Screwdriver or drill, used with proper safety precautions
- Measuring tape
- Pencil
- Clamps, optional but helpful
If you are new to DIY, choose preassembled unfinished pine crates. They save time and reduce the need for cutting wood. For a teen-friendly or beginner-friendly version, ask an adult to help with drilling, anchoring, or any tool step that feels difficult. The goal is storage, not a dramatic episode of “DIY Gone Sideways.”
Step 1: Choose the Right Wooden Crates
Before buying paint, decide where the crate cubbies will live. A bathroom organizer may need fewer crates and a moisture-resistant topcoat. A craft room cubby can be wider and more playful. An entryway shoe organizer should be sturdy, low, and easy to clean. A bedroom display shelf can be taller, but it should be secured to the wall if there is any chance it could tip.
Look for crates with solid corners, smooth slats, and minimal splitting. Unfinished pine crates are popular because they are lightweight, affordable, and easy to paint. Avoid crates that wobble badly or have loose staples. A little rustic texture is great; a crate that feels like it survived a pirate shipwreck may need more repair than it is worth.
Step 2: Plan the Cubby Layout Before Painting
Lay the crates on the floor and experiment with arrangements. Try a simple rectangle, a stair-step design, or an asymmetrical pattern with some crates vertical and others horizontal. This is the fun puzzle stage. Take pictures of your favorite layouts so you do not forget the winning version after moving everything around seventeen times.
For a balanced teal and coral design, alternate colors by crate. Another option is to paint the outside of every crate teal and the inside coral. You can also paint the sides teal, the backs coral, and dry brush white over the edges for a soft aged finish. If your room already has a lot of color, use more teal and treat coral as an accent. If the room feels neutral, let coral take the spotlight.
Step 3: Sand the Crates Smooth
Wooden crates often have rough spots, tiny splinters, and uneven edges. Sand every crate before painting, especially the corners, handles, front edges, and inside surfaces where hands will reach. Start with medium-grit sandpaper to smooth rough areas, then finish with fine-grit sandpaper for a cleaner painting surface.
Always wipe away sanding dust with a tack cloth or slightly damp microfiber cloth. Paint does not love dust. It treats dust the way cats treat closed doors: personally and dramatically. Removing dust helps primer and paint adhere better and gives the finished cubbies a smoother look.
Step 4: Prime for Better Color and Durability
Primer may not be glamorous, but it is the quiet hero of painted wood projects. Bare wood can soak up paint unevenly, especially pine. A thin coat of primer helps create a more consistent base, improves adhesion, and makes teal and coral look brighter. Apply primer in light coats rather than one thick coat. Thick primer can collect in corners and hide the natural texture that makes crates attractive.
After the primer dries according to the product label, lightly sand the surface with fine-grit sandpaper and remove the dust. This extra step helps the paint glide on more evenly. It may feel fussy, but it is the difference between “handmade charm” and “I painted this during a windstorm.”
Step 5: Paint the Teal and Coral Base Coats
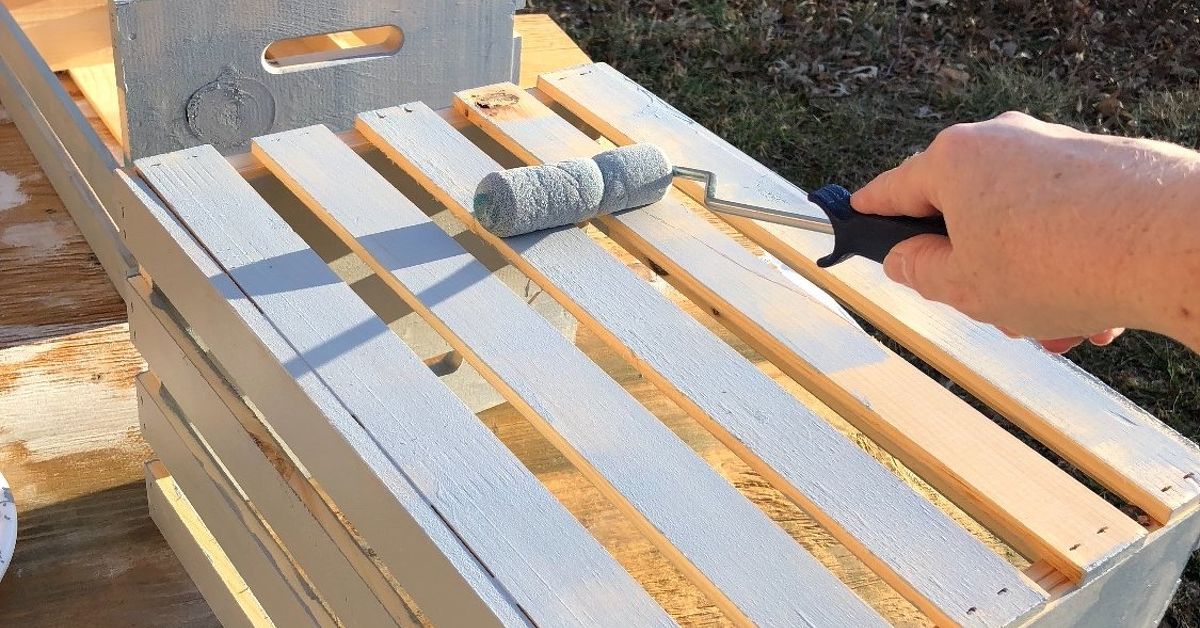
Now the personality arrives. Paint each crate with your chosen teal and coral colors. A brush works well for corners and slats, while a small foam roller can help cover flat surfaces quickly. Apply two thin coats instead of one heavy coat. Thin coats dry better, look smoother, and are less likely to drip.
For a soft shabby chic palette, choose muted teal and dusty coral. For a bolder beach-house look, choose turquoise teal and brighter coral. You can also blend custom shades by adding a little white paint to soften the color. Test your colors on the bottom of a crate or scrap wood before committing to the entire project.
Step 6: Add a Shabby Chic Distressed Finish
Once the paint is fully dry, distress the crates lightly. Use a sanding sponge on corners, edges, raised slats, and handle openings. Focus on areas that would naturally wear over time. The goal is not to make the crates look like they were dragged behind a truck. Think “vintage cottage,” not “furniture survival challenge.”
For a layered effect, apply a small amount of white or cream paint with a dry brush. Dip the brush lightly, wipe most of the paint off on a rag, then drag it gently across the wood grain and edges. This technique adds softness and gives the teal and coral a weathered, sun-kissed finish.
Optional Antiquing Trick
If you want a more aged look, use a very light brown glaze or wax in corners and seams. Apply sparingly and wipe back quickly. Too much dark glaze can make cheerful coral look muddy, so test first. Shabby chic should whisper “found treasure,” not shout “basement mystery.”
Step 7: Decorate the Crate Backs
Adding detail to the inside backs of the crates makes the cubbies look custom. Peel-and-stick wallpaper, floral paper, vintage-style fabric, or painted stencil patterns can all work. A coral crate with a cream floral backing looks sweet in a bedroom. A teal crate with a subtle striped backing feels coastal. For a craft room, mix patterns like polka dots, gingham, or tiny botanical prints.
Keep patterns simple if the cubbies will hold colorful items. Busy wallpaper behind busy storage can create visual chaos. The shelves may start looking less “shabby chic” and more “craft tornado with excellent branding.”
Step 8: Assemble the Wooden Crate Storage Cubbies
When all paint and decorative backing are fully dry, return to your layout plan. Place the crates on a flat surface and check alignment. If you are making a low horizontal unit, connect the crates side by side with screws or small brackets. If you are stacking crates, secure each crate to the neighboring crate so the unit acts as one piece.
Pre-drilling small pilot holes can reduce splitting in thin crate wood. Work slowly and avoid placing screws too close to the edge of a slat. If the crates are lightweight, use small brackets inside the corners for extra stability. For tall crate cubbies, use anti-tip hardware to secure the unit to wall studs or appropriate wall anchors. This is especially important in homes with children, pets, or enthusiastic adults who believe shelves are also ladders. They are not.
Step 9: Seal the Painted Crates
A protective topcoat helps your teal and coral wooden crate storage cubbies survive daily use. For a matte shabby chic look, choose clear wax or a matte water-based topcoat. For areas with heavier use, such as entryways or kids’ rooms, a satin water-based polyurethane offers more durability while still keeping the finish soft.
Apply the sealer in thin coats and let each coat dry fully. Avoid heavy application, especially in corners, where topcoat can pool and dry cloudy. Once sealed, allow the cubbies to cure before loading them with books, baskets, shoes, or decor.
Best Places to Use Teal and Coral Wooden Crate Cubbies
Entryway Drop Zone
Use low crate cubbies for shoes, dog leashes, umbrellas, and reusable bags. Add small labels so everyone knows where things belong. Will they follow the labels? That depends on your household, but at least the labels will look adorable.
Craft Room Organizer
Teal and coral are perfect for craft spaces because they feel cheerful without being too chaotic. Store yarn, paper, paints, ribbons, glue sticks, and unfinished projects. Add baskets inside some cubbies to hide smaller supplies.
Bathroom Storage
Use crate cubbies for rolled towels, jars of cotton balls, hair tools, and extra soap. Choose a moisture-resistant topcoat and avoid placing unfinished wood directly where it will get soaked.
Kids’ Room or Teen Room Storage
Crate cubbies can hold books, stuffed animals, art supplies, accessories, or school items. Keep the unit low for safety and easy access. For taller units, anchoring is a must.
Living Room Display
Mix practical storage with decor. Use some cubbies for books and others for plants, candles, framed photos, or small baskets. The teal and coral colors can brighten a neutral living room without requiring a full makeover.
Styling Tips for a Polished Shabby Chic Look
To make your cubbies look intentionally designed, repeat materials. For example, use three woven baskets, two ceramic vases, and a few wood-framed photos. Repetition calms the eye. Balance open display cubbies with closed storage baskets so the unit does not become a museum of random cords, receipts, and one lonely glove.
Use labels, but keep them pretty. Chalkboard tags, kraft paper labels, brass label holders, or small painted wood tags all fit the shabby chic style. If you want a coastal cottage feel, add rope handles to baskets. If you prefer farmhouse charm, use galvanized bins. If you like romantic vintage style, add lace trim or floral paper to the crate backs.
Common Mistakes to Avoid
Skipping Sanding
Rough crate edges can snag fabric and scratch hands. Sanding also helps paint adhere better, so do not skip it.
Using Too Much Paint
Heavy paint fills gaps, creates drips, and can make slatted crates look clunky. Thin coats are your friend.
Over-Distressing
A little distressing looks charming. Too much can look accidental. Step back often and stop before the crates look exhausted.
Forgetting Stability
Crates are lightweight, which is convenient, but stacked storage must be secured properly. Join crates together and anchor taller units to the wall.
Ignoring Function
Pretty storage still has a job. Measure what you plan to store before building. If your favorite baskets do not fit, the cubbies become decorative frustration boxes.
Budget-Friendly Variations
If you want to save money, start with four crates instead of eight and build a small unit. Use leftover wall paint if it is suitable for wood and still in good condition. Check thrift stores, yard sales, or craft stores for crates, but inspect them carefully for damage. Use fabric scraps or leftover wallpaper for the backs. A beautiful DIY project does not need to empty your wallet and then ask for a tip.
You can also create an ombré version by mixing teal with white for lighter shades and coral with white for peachier tones. Another option is a two-tone finish: teal outside, coral inside, cream dry brushing on the edges. For a more subtle look, paint most crates white and use teal and coral only on the backs.
Personal Experience: What This Project Teaches You Along the Way
Making teal and coral wooden crate storage cubbies is one of those DIY projects that looks simple on the surface but quietly teaches you half the rules of good home decorating. The first lesson is that planning matters. Before paint ever touches wood, the layout decides whether the finished piece will feel balanced or awkward. Laying crates on the floor, flipping them vertically, turning them horizontally, and taking photos of different arrangements can save a lot of regret later. It is much easier to change your mind before the screws come out.
The second lesson is that color changes everything. Teal and coral may look bold in the paint can, but once they are brushed onto wood and softened with distressing, they become much more livable. Teal gives the cubbies structure and calmness. Coral gives them energy. Together, they create a happy contrast that works especially well in bright rooms, beach-inspired spaces, craft corners, and children’s areas. If the first coat looks too intense, do not panic. Paint often settles visually after the second coat, distressing, and sealing.
The third lesson is patience. Waiting for primer, paint, and sealer to dry is not thrilling. No one throws a party called “Watching Paint Cure.” But rushing creates fingerprints, sticky surfaces, smudges, and uneven distressing. The best results come from letting each layer dry properly before moving to the next step. A slow project usually looks more expensive than a rushed one.
The fourth lesson is that imperfections are not the enemy. In many DIY projects, a dent or uneven brush mark feels like failure. With shabby chic style, those little quirks can become part of the charm. A slightly uneven dry-brushed edge looks handmade. A sanded corner feels vintage. A tiny knot in the wood gives character. This project is forgiving, which makes it excellent for beginners who want a result that looks stylish without needing professional workshop skills.
The fifth lesson is that storage should match real life. Open cubbies are beautiful, but they also reveal everything. If you are storing colorful craft supplies, shoes, cables, or bathroom extras, baskets are your best friends. Use open crates for attractive items and baskets for the things that do not need a public appearance. A good cubby system should make daily cleanup easier, not become another place where clutter holds a meeting.
Finally, this project proves that small DIY upgrades can change how a room feels. A plain corner can become a cheerful storage nook. A messy entryway can become a drop zone with personality. A craft room can feel more inspiring simply because the supplies have a home. Teal and coral wooden crate storage cubbies are not just painted boxes; they are proof that organization can have color, humor, and a little vintage soul.
Conclusion
Teal and coral wooden crate storage cubbies are a smart, affordable, and creative way to add storage with personality. By choosing sturdy crates, sanding carefully, priming properly, painting in thin coats, distressing with restraint, and sealing the finish, you can create a shabby chic DIY piece that looks custom without requiring advanced woodworking skills.
Use your cubbies in an entryway, bedroom, bathroom, craft room, nursery, laundry area, or living room. Style them with baskets, labels, patterned backs, and a mix of practical and decorative items. Most importantly, build them safely, especially if the unit is tall or placed where children or pets may be nearby.
This project is colorful, useful, beginner-friendly, and wonderfully forgiving. In other words, it is exactly the kind of DIY that makes your home prettier while giving clutter a polite but firm eviction notice.