If pie and eggs had a very elegant, very brunchy baby, it would be quiche. Rich but not too rich, fancy-looking but surprisingly doable, quiche is one of those dishes that makes people think you’ve got your life together. Meanwhile, you’re in the kitchen wearing mismatched socks and whispering, “Please don’t let the crust get soggy.”
The good news? Learning how to make quiche is much easier than its French reputation suggests. At its core, quiche is simply a savory custard baked in a crust. Once you understand the basic formula, you can make a classic Quiche Lorraine, a veggie-packed brunch version, or a clean-out-the-fridge masterpiece that still tastes intentional.
In this guide, you’ll learn exactly how to make quiche step by step, what ingredients matter most, how to avoid the usual mistakes, and how to customize it without turning dinner into a science experiment. Let’s make a quiche that is creamy, sliceable, flavorful, and gloriously free from the dreaded wet bottom.
What Is Quiche?
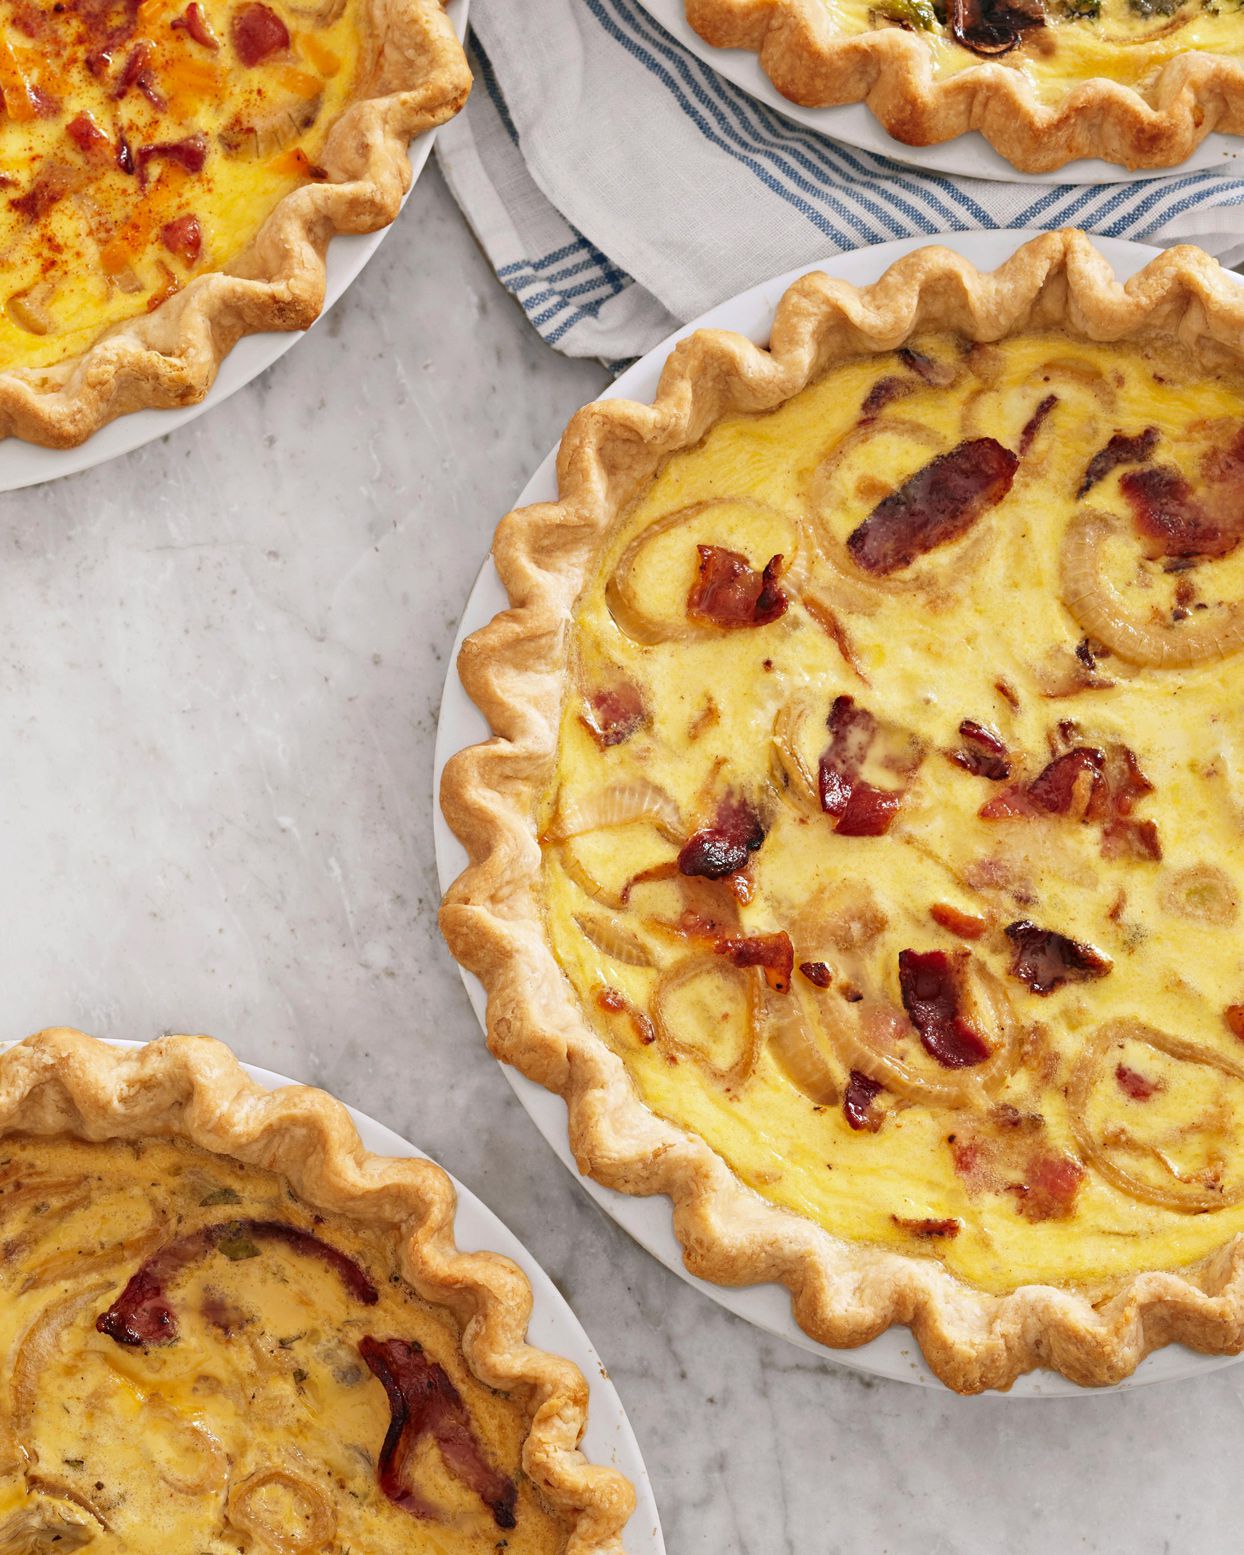
Quiche is a savory egg custard baked in a pastry crust. The filling usually includes eggs, dairy, cheese, and cooked add-ins like bacon, ham, mushrooms, spinach, onions, or herbs. The texture should be tender and creamy, not rubbery, not watery, and definitely not like a breakfast casserole that got lost on the way to the oven.
While Quiche Lorraine is the classic version most people know, the real beauty of homemade quiche is flexibility. Serve it for breakfast, brunch, lunch, or a lazy dinner with a salad and suddenly everyone thinks you run a charming little café out of your kitchen.
The Basic Formula for a Great Quiche
Before you start tossing random vegetables and cheese into a pie shell like a hopeful wizard, it helps to know the structure of a good quiche.
1. The Crust
You can use homemade pie dough, refrigerated pie crust, or even a deep-dish frozen crust. Homemade gives you bragging rights. Store-bought gives you sanity. Both are acceptable.
2. The Custard
The filling is built from eggs plus dairy. A dependable range for a 9-inch quiche is about 4 to 6 large eggs with roughly 1 to 1 1/2 cups of milk, half-and-half, cream, or a combination. More dairy creates a softer, silkier filling. More eggs create a firmer slice. You want that happy middle ground where the quiche holds together but still feels luxurious.
3. The Flavor Add-Ins
This is where the fun begins. Cheese, cooked meat, sautéed vegetables, herbs, and aromatics all belong here. The key word is cooked. Raw vegetables release water as they bake, which can turn your gorgeous quiche into an accidental swamp.
4. The Bake
A quiche is done when the edges are set and the center still has a slight jiggle. Not a slosh. Not a wave pool. Just a gentle wobble. It continues to set after it comes out of the oven.
Ingredients for a Classic, Easy Quiche
Here is a reliable ingredient list for a basic 9-inch quiche that you can riff on forever:
- 1 9-inch pie crust, homemade or store-bought
- 5 large eggs
- 1 cup half-and-half
- 1/2 cup whole milk
- 1 to 1 1/2 cups shredded cheese, such as Swiss, Gruyère, cheddar, or Monterey Jack
- 1 cup cooked filling ingredients, such as bacon, ham, sautéed mushrooms, spinach, onions, broccoli, or leeks
- 1/2 teaspoon salt
- 1/4 teaspoon black pepper
- Pinch of nutmeg, optional but classic
- 1 teaspoon chopped herbs, such as chives, parsley, or thyme
You do not need all the bells and whistles. A quiche with eggs, cheese, and a good crust can already be excellent. Quiche has range.
How to Make Quiche Step by Step
Step 1: Preheat the Oven and Prepare the Crust
Preheat your oven to 375°F if you’re baking a straightforward quiche. Some recipes start hotter for the crust and then lower the temperature, but 375°F is a comfortable sweet spot for many home kitchens.
Fit your dough into a 9-inch pie plate. Chill it for 15 to 20 minutes if it has become soft. Then line it with parchment or foil and fill it with pie weights, dried beans, or rice.
This brings us to one of the most important rules in quiche-making: par-bake the crust. Bake it for about 10 to 15 minutes with weights, then remove the weights and bake a few minutes more until it looks lightly set and just beginning to color. This helps prevent sogginess once the custard goes in. It is not glamorous, but it is powerful.
Step 2: Cook the Fillings First
Whether you’re using bacon, sausage, mushrooms, onions, spinach, or broccoli, cook them before adding them to the quiche. This does three important things:
- Builds flavor
- Removes excess moisture
- Prevents undercooked filling inside a fully baked custard
For example, mushrooms should be sautéed until they give up their water and start to brown. Spinach should be wilted and squeezed dry. Bacon should be cooked crisp and drained. Onions become sweeter and more mellow when sautéed. Basically, your fillings need to behave before they enter the pie shell.
Step 3: Whisk the Custard
In a large bowl, whisk together the eggs, half-and-half, milk, salt, pepper, nutmeg, and herbs. Whisk until fully blended, but do not beat it like you’re trying to win a cardio contest. You just want a smooth mixture with no streaky whites.
If you want an extra-rich quiche, use more cream or half-and-half. If you want a lighter version, use more milk. Just remember that lower-fat dairy can make the final texture a little less velvety. Still tasty, just a little less “I brunch at charming inns.”
Step 4: Layer the Fillings
Sprinkle the cheese and cooked fillings into the par-baked crust. Distribute them evenly so every slice gets a little love. Then slowly pour the egg mixture over the top.
Do not overfill the shell. Quiche puffs as it bakes, and overfilling can lead to spills, uneven baking, or a sad oven-floor incident that smells like burnt dairy and regret.
Step 5: Bake Until Just Set
Place the quiche on a baking sheet and bake for about 35 to 45 minutes, depending on the depth of your pie plate and how full it is. The edges should look set, the top may be lightly golden, and the center should jiggle slightly when nudged.
If the crust starts browning too fast, loosely shield the edges with foil. If you use a thermometer, the center of the quiche should reach 160°F for food safety.
Step 6: Let It Rest
This part is very important and very annoying if you’re hungry. Let the quiche rest for at least 10 to 15 minutes before slicing. Resting allows the custard to finish setting so you get clean slices instead of cheesy egg lava.
Best Cheese and Filling Combinations
One of the reasons people love easy quiche recipes is that they are wildly adaptable. Here are a few combinations that work beautifully:
Classic Quiche Lorraine
- Bacon
- Sautéed onion or shallot
- Gruyère or Swiss cheese
- Pinch of nutmeg
Ham and Cheese Quiche
- Diced ham
- Swiss or cheddar
- Chives
Vegetable Quiche
- Sautéed mushrooms
- Spinach, squeezed dry
- Goat cheese, feta, or Gruyère
Broccoli Cheddar Quiche
- Steamed or sautéed broccoli
- Sharp cheddar
- Black pepper
Fancy but Still Manageable Quiche
- Smoked salmon
- Dill
- Goat cheese
The one rule? Keep watery ingredients under control. Tomatoes, zucchini, and mushrooms can be delicious, but only if cooked down first.
Common Quiche Mistakes and How to Avoid Them
Skipping the Pre-Bake
If you pour custard into a raw crust, you are making a bold gamble. Sometimes it works. Often, the crust stays pale and soggy. Par-baking gives the pastry a head start.
Using Raw Vegetables
Vegetables release moisture as they cook, and quiche does not enjoy surprises. Sauté or steam them first, then drain well.
Adding Too Much Filling
Yes, quiche is forgiving. No, it is not a storage unit. Too many mix-ins can crowd the custard and create a dense, messy texture.
Overbaking
Overbaked quiche turns rubbery and sad. Pull it when the center still has a slight wobble. It will finish setting as it rests.
Slicing Too Soon
Fresh from the oven, quiche smells amazing and tests your patience. Resist. Give it time to settle so the slices hold their shape.
Can You Make Quiche Ahead?
Absolutely, and quiche is one of the great make-ahead heroes of brunch. You can:
- Prepare and chill the pie dough in advance
- Par-bake the crust a day ahead
- Cook the fillings ahead of time
- Bake the full quiche and reheat it later
Many people actually prefer quiche after it has had time to cool slightly or even chill and rewarm. The flavors settle in, the slices are neater, and you get to look suspiciously calm when guests arrive.
How to Store and Reheat Quiche
Once cooled, refrigerate leftover quiche covered for up to 3 to 4 days. To reheat, place slices in a 300°F oven until warmed through. The microwave works in a pinch, but the crust will lose some of its crispness and may become a little soft. Still edible, just less glamorous.
You can also freeze baked quiche. Wrap it tightly and freeze for up to a few months for best quality. Thaw overnight in the refrigerator before reheating for the best texture.
What to Serve with Quiche
Quiche is rich, so it loves a fresh, bright sidekick. Good pairings include:
- A green salad with tangy vinaigrette
- Fresh fruit
- Roasted potatoes
- Tomato soup
- Asparagus or simple sautéed greens
For brunch, add coffee, juice, and something pastry-adjacent if you want people to assume you’ve mastered adulthood.
Easy Quiche Recipe Example
If you want the short version, here’s the full process in one practical recipe:
- Preheat oven to 375°F.
- Fit 1 pie crust into a 9-inch pie plate. Chill, then par-bake with weights for 12 minutes. Remove weights and bake 4 more minutes.
- Cook 4 slices chopped bacon until crisp. Sauté 1/2 cup onion in the drippings until soft. Drain.
- Whisk 5 eggs, 1 cup half-and-half, 1/2 cup milk, 1/2 teaspoon salt, 1/4 teaspoon pepper, and a pinch of nutmeg.
- Add 1 cup shredded Gruyère or Swiss and the bacon-onion mixture to the crust.
- Pour in the custard carefully.
- Bake 35 to 40 minutes until the edges are set and the center jiggles slightly.
- Rest 15 minutes before slicing.
That’s it. That’s the whole magic trick. It looks sophisticated, tastes like comfort, and makes leftovers that feel oddly luxurious on a Wednesday.
Real-World Quiche Experiences: What Home Cooks Learn After the First Few Tries
Anyone can follow a quiche recipe once. The real education starts when you make it a few times and discover that quiche has opinions. Strong ones. The first big experience many home cooks have is the soggy-bottom incident. You confidently skip par-baking because you are feeling efficient, only to discover that the crust underneath is pale, limp, and deeply unromantic. After that, you become a par-baking evangelist. You tell friends. You tell strangers. You probably tell the pie crust itself.
Another common experience is overconfidence with vegetables. It feels wholesome and responsible to add spinach, mushrooms, tomatoes, and onions all at once. Then the quiche bakes up with a suspicious amount of liquid, and you realize vegetables are not just flavor; they are also tiny water balloons. That is the moment many people learn that sautéing is not optional. Draining is not optional. Paper towels are not optional. Quiche is delicious, but it appreciates boundaries.
Then there is the cheese lesson. The first time you use a mild cheese and wonder why the flavor feels flat, you understand why stronger cheeses like sharp cheddar, Gruyère, Swiss, feta, or goat cheese get so much attention. Quiche does not need a mountain of cheese, but it does need cheese with personality. Otherwise, the eggs take center stage, and eggs alone are not always the party you had in mind.
Many home cooks also discover that quiche is one of the best “looks fancy, feels easy” dishes ever invented. You can serve it at brunch and people act like you’ve been studying in a Parisian culinary school. In reality, you used leftover ham, one heroic handful of spinach, and a pie crust you found in the refrigerator section five minutes before checkout. Quiche is generous like that. It rewards basic competence with dramatic presentation.
There is also the experience of learning patience. Fresh from the oven, quiche puffs up beautifully and smells so good it should come with emotional support. Slicing it too early, however, teaches a quick life lesson. The center slumps, the filling runs, and your beautiful wedges look more like savory landslides. Once you learn to let it rest, your slices become cleaner, your confidence rises, and your brunch photos improve dramatically.
Perhaps the best experience related to learning how to make quiche is discovering how flexible it is over time. One week it is bacon and Gruyère for weekend guests. The next week it is broccoli cheddar for family lunch. Then it becomes mushroom goat cheese because you found one lonely log of chèvre in the fridge and decided to become inventive. Quiche meets you where you are. It works for holidays, meal prep, lazy dinners, and “I have eggs and feelings” afternoons.
That’s why quiche sticks with people. It teaches technique without being too fussy, feels impressive without requiring restaurant-level drama, and turns ordinary ingredients into something that tastes a little special. Once you’ve made a good one, you stop seeing quiche as a recipe and start seeing it as a kitchen superpower.
Final Thoughts
Once you know how to make quiche, you unlock one of the most useful recipes in home cooking. It can be classic, casual, elegant, budget-friendly, make-ahead, vegetarian, meaty, simple, or dressed up for company. The keys are straightforward: par-bake the crust, cook and drain your fillings, keep the custard balanced, and bake until just set.
Do that, and you’ll get a quiche with a flaky crust, creamy center, bold flavor, and slices that make you look like you absolutely planned this whole thing from the start. Even if you didn’t. Especially if you didn’t.