Some houseplants are perfectly happy spilling over the edge of a pot like green waterfalls. Others are natural climbers trapped in a world of bookshelves, curtain rods, and increasingly nervous furniture. A moss pole gives those ambitious vines a safe, attractive route upward.
Making your own moss pole is inexpensive, customizable, and surprisingly simple. With a sturdy core, long-fiber sphagnum moss, mesh, and a few basic tools, you can create a support that helps plants such as Monstera, pothos, climbing philodendron, and Rhaphidophora grow vertically. A properly maintained pole also gives aerial roots a moisture-retentive surface into which they can attach.
This guide explains how to make a moss pole, install it without wrecking your plant’s roots, attach vines correctly, and maintain the finished support. No engineering degree is required, although you may feel strangely accomplished when your plant begins scaling it like a tiny botanical mountaineer.
What Is a Moss Pole?
A moss pole is a vertical plant support covered with or filled with moisture-retentive moss. It is primarily used for tropical climbing plants that naturally attach themselves to trees and other surfaces using aerial roots.
In nature, climbing aroids use trunks as structural support while growing toward brighter light. Inside a home, a moss pole performs a similar job. It keeps long stems from sprawling across the floor, encourages organized vertical growth, and creates a surface that aerial roots can grip.
Not every product sold as a moss pole contains genuine moss. Many inexpensive commercial poles are wrapped in coco coir, a coarse fiber made from coconut husks. Coir poles provide good physical support, but they usually dry quickly and are difficult for roots to penetrate. A true sphagnum moss pole holds more moisture and is generally better when the goal is active aerial-root attachment.
What a Moss Pole Can Do for Your Plant
- Support long, heavy, or top-heavy stems.
- Encourage vines to grow upward instead of outward.
- Provide a surface for aerial roots to grip.
- Help certain climbing plants develop more mature foliage.
- Keep large houseplants more manageable in limited spaces.
- Create a fuller, more intentional display.
A moss pole cannot compensate for poor light, unhealthy roots, compacted soil, or improper watering. Think of it as a climbing gym, not a botanical emergency room.
Which Vining Plants Benefit From a Moss Pole?
Moss poles are best suited to plants that climb naturally and produce aerial roots or root-like structures along their stems. Good candidates include:
- Monstera deliciosa
- Monstera adansonii
- Rhaphidophora tetrasperma
- Golden pothos and other Epipremnum species
- Heartleaf philodendron
- Philodendron micans
- Philodendron verrucosum and other climbing philodendrons
- Scindapsus pictus
- Syngonium varieties
- Some climbing Anthurium species
Self-heading plants, including many compact philodendrons, do not climb in the same way and usually gain little from a moss pole. Hoyas may climb a support, but a trellis is often more practical because their twining stems do not need continuously damp moss.
Materials Needed to Make a Moss Pole
The most useful DIY design is a mesh cylinder filled with sphagnum moss. Unlike a stake with moss tied around the outside, a mesh pole can hold a substantial volume of moss and gives aerial roots room to grow inward.
Basic Supplies
- Plastic-coated wire mesh or rigid plastic mesh
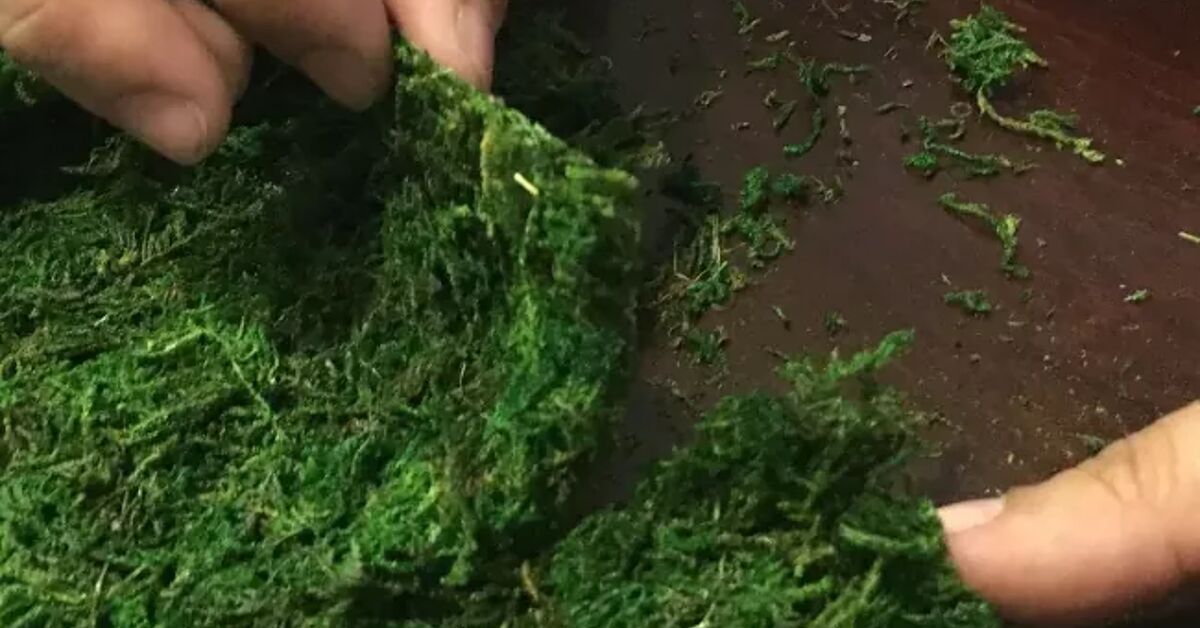
- Long-fiber sphagnum moss
- A PVC pipe, bamboo stake, wooden dowel, or coated metal stake
- Plastic zip ties or coated gardening wire
- Soft plant ties, hook-and-loop tape, or cotton twine
- Wire cutters or sturdy scissors
- A bucket or large bowl
- Gloves
- A stable planter with drainage holes
- Fresh, well-draining houseplant potting mix
Choosing the Right Mesh
Use mesh with openings large enough for aerial roots to reach the moss but small enough to keep the filling contained. Openings of approximately one-half inch to one inch work well for most houseplant poles.
Plastic-coated wire mesh is rigid and long-lasting. Plastic garden mesh is lighter and easier to cut, although it may need a strong internal stake to prevent bending. Avoid untreated metal that rusts quickly, sharp chicken wire, and materials coated with substances not intended for gardening.
Choosing Sphagnum Moss
Buy clean, packaged long-fiber sphagnum moss from a garden center or reputable horticultural supplier. Long strands interlock inside the mesh and are less likely to fall through the openings than finely milled peat.
Sphagnum moss and sphagnum peat moss are not interchangeable. Long-fiber sphagnum consists of recognizable moss strands and is suitable for filling a pole. Peat moss is finely decomposed material commonly used in potting mixes. If you fill a mesh cylinder with peat moss, your living room may receive a complimentary indoor dust storm.
Wear gloves when handling dry moss, particularly if you have cuts or irritated skin. Moisten it before use to reduce dust and make it easier to pack.
How Tall Should Your DIY Moss Pole Be?
Measure the depth of the pot and the height of the plant from the soil surface to its highest growing point. Add enough extra height for future growth.
For example, suppose your pot is 10 inches deep and your plant stands 22 inches above the soil. A pole measuring approximately 40 to 48 inches would provide room for insertion and several months of climbing growth.
Leave the bottom 6 to 12 inches of the internal stake bare so it can be anchored deeply in the potting mix. The exact length depends on the size of the container and the eventual weight of the plant.
Do not install an enormous pole in a tiny lightweight pot. Once the foliage becomes heavy, the arrangement may tip over with the theatrical commitment of a falling tree in a silent movie. Use a broad, stable pot and consider ceramic or terracotta for large specimens.
How to Make a Moss Pole Step by Step
-
Measure and Cut the Mesh
Determine the desired height and diameter of the moss-covered section. Cut a rectangular piece of mesh long enough to form a cylinder approximately 3 to 5 inches in diameter.
A narrow pole works for young pothos or philodendrons. A mature Monstera benefits from a wider, stronger support that can hold more moisture and resist bending.
-
Shape the Mesh Into a Cylinder
Roll the rectangle lengthwise until its edges overlap slightly. Fasten the seam with zip ties or coated wire every few inches. Trim the ends of the ties so no sharp pieces project outward.
Check the cylinder with your hands before adding moss. If it scratches you, it can also damage a stem or leaf.
-
Soak the Sphagnum Moss
Place the dry sphagnum moss in a bucket and cover it with lukewarm water. Allow it to absorb water for approximately 10 to 20 minutes.
Lift out a handful and squeeze it gently. The moss should feel evenly damp but should not pour water across the floor when lifted. Aim for the moisture level of a freshly wrung-out sponge.
-
Add the Internal Support
Place a sturdy stake inside the mesh cylinder. Position it so several inches extend below the moss-filled section. This bare portion will be pushed into the potting mix.
Secure the mesh to the stake with zip ties if necessary. A rigid internal support is especially important for tall poles and heavy plants.
-
Fill the Cylinder With Moss
Push damp sphagnum moss into the cylinder a handful at a time. Spread it evenly around the internal stake and press it firmly enough to eliminate large empty pockets.
Do not compress the moss into a solid brick. Aerial roots need a moist but airy structure. Excessive packing also makes the pole difficult to rehydrate.
-
Seal the Top
When the cylinder is full, fold the top edge inward or cover it with a small piece of mesh. Secure it with a zip tie. Closing the top prevents moss from escaping whenever the pole is moved or watered.
-
Inspect the Finished Pole
Confirm that the pole is straight, the moss is evenly distributed, and all fasteners are secure. Remove sharp edges and rinse away loose debris.
How to Install a Moss Pole Without Damaging Roots
The easiest and safest time to install a moss pole is while repotting. Once the plant is removed from its container, you can position the pole before arranging the roots around it.
- Add a shallow layer of fresh potting mix to the bottom of the container.
- Place the pole near the back of the pot rather than directly in the center.
- Hold the pole upright while positioning the plant in front of it.
- Arrange the roots gently around the bare base of the stake.
- Add potting mix and press it lightly around the pole.
- Water thoroughly and allow excess water to drain.
Position the back of the vine against the moss. On climbing aroids, aerial roots usually emerge from the rear of the stem, while leaves and petioles face forward. Installing the pole on the wrong side forces the plant into an awkward twist.
A pole can be added to an established pot, but proceed carefully. Slide a thin stake into the potting mix first to identify a path with minimal resistance. Never force a thick pole through a dense root ball. If the plant is root-bound, repotting is safer than conducting underground root demolition.
How to Attach a Vining Plant to a Moss Pole
Use soft, adjustable ties to hold the main stem against the pole. Place the ties around sturdy stem sections rather than around leaf stalks.
Leaves on many aroids connect to the main vine through petioles. Petioles need freedom to rotate toward light and should not be tied tightly to the support. Restricting them can bend, bruise, or snap them.
Correct Attachment Technique
- Place the back of the main stem against the moss.
- Align aerial roots and nodes with the damp surface.
- Use one tie every 4 to 8 inches, depending on the plant.
- Leave enough room for the stem to thicken.
- Guide new growth upward as it develops.
- Inspect ties monthly and loosen them when needed.
Do not wrap a thin plastic zip tie directly around a living stem. As the stem expands, the tie can cut into it. Soft hook-and-loop garden tape is reusable and easy to adjust.
Some plants attach within weeks, while others need several months. Root attachment depends on the plant species, growing season, light, humidity, pole moisture, and contact between the nodes and moss.
How to Keep a Moss Pole Moist
A true moss pole works best when it remains lightly and consistently damp. It should not stay waterlogged, drip continuously, or keep the plant’s potting mix permanently saturated.
Pour water slowly over the top of the pole, mist its surface thoroughly, or use a narrow-spout watering bottle. For tall poles, a bottle with a small hole in its cap can be placed temporarily at the top to release water gradually.
Check the moss with a finger rather than following a rigid watering schedule. Drying speed changes with temperature, airflow, humidity, pole diameter, and the amount of light the plant receives.
A narrow pole in a warm room may dry within two or three days. A thick pole in a humid environment may remain damp for a week or longer. Water according to actual conditions, not because Tuesday has been officially declared Moss Pole Day.
Do Not Confuse Pole Watering With Soil Watering
The pole and the potting mix may dry at different rates. A dry pole does not automatically mean the plant’s roots need water. Check the soil separately and make sure the container drains freely.
Constantly pouring water through the pole can oversaturate the pot, reduce oxygen around the roots, and increase the risk of root rot. When necessary, moisten the pole with a spray bottle or small measured amount of water rather than soaking the entire container.
Common Moss Pole Mistakes
Using Decorative Sheet Moss
Preserved sheet moss may look attractive, but it is not the same as long-fiber sphagnum. It often provides limited moisture retention and little depth for aerial roots.
Letting the Pole Dry Completely
A bone-dry pole becomes difficult to rehydrate and offers little incentive for roots to attach. Rewet very dry sphagnum slowly in several passes instead of pouring a large amount of water over it at once.
Keeping Everything Constantly Wet
Moisture supports root attachment, but permanent sogginess can encourage algae, unpleasant odors, and fungal growth. Improve airflow and reduce watering when the pole remains wet for long periods.
Using a Weak Core
A thin bamboo skewer may support a young cutting, but it will not reliably hold a mature Monstera. Build for the plant you expect to have, not only the plant you have today.
Tying Petioles Instead of Stems
This is one of the most common training errors. Secure the main vine while allowing leaves to move independently.
Installing the Pole on the Wrong Side
Identify where the aerial roots emerge and place that side against the moss. Leaves should generally face outward toward the room and the primary light source.
Expecting Instant Leaf Transformation
A support may encourage healthier climbing growth, but mature leaves require time, suitable genetics, strong indirect light, nutrients, water, and an established root system. A moss pole is useful, not magical.
Can You Extend a Moss Pole Later?
Yes. Modular poles can be extended by attaching another mesh cylinder to the top. Overlap the sections and secure them with several zip ties or coated wires. Add an internal connector, such as a narrower PVC pipe, if extra rigidity is required.
Install the extension before the growing tip reaches the top. Once a vine wanders beyond its support, redirecting it without cracking the stem becomes harder.
For very tall plants, consider air layering or propagating the upper portion instead of constructing a pole that threatens to introduce itself to the ceiling fan.
Moss Pole Alternatives
A sphagnum moss pole is not the only suitable support. The best choice depends on the plant, your indoor climate, and the amount of maintenance you are willing to perform.
- Coco coir pole: Durable and low-maintenance but less moisture-retentive.
- Wood plank: Excellent for some shingling and climbing plants; simple to clean and position.
- Bamboo stake: Affordable support for small or lightweight vines.
- Metal trellis: Decorative and useful for twining plants.
- Cedar board: Sturdy, natural-looking, and slower to deteriorate than untreated soft wood.
- Wall-mounted clips: Useful for trailing pothos, although aerial roots may mark painted surfaces.
Choose a dry support when you mainly want to organize stems. Choose a genuine moss pole when you want aerial roots to enter the support and form a more integrated climbing system.
Practical Experience: What Growers Learn After Building a Moss Pole
The most important practical lesson is that stability matters more than appearance. A beautiful, narrow moss pole may look perfect on the day it is installed, but a climbing plant becomes substantially heavier as new leaves unfold. A 36-inch pole placed in a lightweight 6-inch nursery pot may remain upright while the plant is young, then begin leaning once several mature leaves develop. Starting with a wider container, a deeper anchor, and a rigid internal stake prevents repeated rebuilding.
Growers also discover that plant orientation can determine whether attachment succeeds. Consider a Monstera with leaves facing a window and aerial roots extending toward the room. Placing a moss pole behind the leaves may look logical from the front, but the root-producing side of the stem may not touch the moss. Rotating the plant so its back rests against the pole allows roots to make direct contact while the leaves gradually turn toward the light.
Another common experience involves moisture. A newly filled pole appears damp for several days, leading its owner to assume it will always behave that way. After indoor heating or air conditioning begins, the same pole may dry within 48 hours. Smaller poles have less water-holding capacity, and exposed moss loses moisture quickly. Checking the pole by touch produces better results than relying on a fixed calendar.
At the opposite extreme, enthusiastic watering can soak the pot every time the pole is moistened. Yellowing lower leaves may then be blamed on low humidity or a nutrient deficiency when the real problem is saturated soil. Successful growers learn to evaluate the moss and root zone separately. They may mist the pole, water it in small portions, or use a slow-drip bottle while delaying soil irrigation until the potting mix actually needs it.
Ties require attention as well. Soft tape that seems loose during installation can become restrictive after several months of stem growth. Monthly inspections prevent girdling and give growers an opportunity to reposition new vines. Once aerial roots have entered the moss securely, some temporary ties can be removed.
Not every aerial root immediately burrows into the pole. A long root may travel beside the moss, turn away from it, or remain suspended in the air. Gently directing the root against a moist section can help, but forcing or sharply bending it may cause breakage. Consistent contact is more effective than aggressive manipulation.
Finally, a moss pole does not produce dramatic mature foliage by itself. A pothos climbing in dim light may remain small-leaved even when its roots attach successfully. When adequate light, regular nutrition, healthy roots, and vertical support are combined, the change becomes more noticeable. New leaves may emerge progressively larger, internodes may shorten, and the plant may look less like a loose collection of vines and more like a structured tropical specimen.
The most satisfying stage occurs when the plant no longer appears tied to the pole but genuinely connected to it. Roots enter the sphagnum, the stem follows the support naturally, and each new leaf unfolds above the previous one. At that point, the DIY project stops looking like hardware wrapped in moss and begins functioning like a miniature climbing habitat.
Conclusion
Making a moss pole is a straightforward project that can significantly improve the structure and presentation of climbing houseplants. The most reliable design uses a rigid internal stake, a mesh cylinder, and clean long-fiber sphagnum moss. Proper installation is just as important as construction: anchor the pole deeply, place it behind the plant’s main stem, align aerial roots with the moss, and secure the vine using soft adjustable ties.
Keep the moss lightly damp, monitor the potting mix separately, and inspect both the pole and ties as the plant grows. With good light and routine care, your once-sprawling vine can become an orderly vertical feature instead of a houseplant quietly attempting to occupy the entire room.