Note: Original publication-ready article based on synthesized best practices from reputable U.S. jewelry-making and craft resources.
Making a beaded necklace is one of those wonderfully deceptive crafts. At first glance, it seems almost suspiciously simple: put beads on a string, add a clasp, and declare yourself a jewelry designer. Then your first dozen beads roll under the couch, the clasp faces backward, and you discover that “string” is apparently an entire category of engineering materials.
Fortunately, a polished DIY beaded necklace does not require a professional studio or years of experience. With the right beading wire, a few basic jewelry-making tools, and a sensible plan, beginners can create a necklace that looks intentional, feels comfortable, and stays together when worn. The basic method is straightforward: design the pattern, secure one end, string the beads, check the fit, and finish the second end with a properly crimped clasp.
This step-by-step guide explains how to make a beaded necklace in 8 easy steps, including how to choose materials, arrange a balanced design, use crimp beads, attach a clasp, and avoid the beginner mistakes that turn a relaxing craft session into an unscheduled floor-bead scavenger hunt.
What You Need to Make a Beaded Necklace
Before opening every bead package you own and creating a tiny avalanche, gather your supplies. For a beginner-friendly strung necklace, flexible jewelry beading wire is usually easier to work with than ordinary craft wire. Multi-strand beading wire provides strength while remaining flexible enough to curve comfortably around the neck. A medium-flexibility 19-strand wire is a practical starting point for many general necklace projects, although the best diameter depends on the size of the holes in your beads.
Basic materials and tools
- Beads of your choice
- Flexible beading wire
- Two crimp beads or crimp tubes
- A clasp, such as a lobster clasp or toggle clasp
- A jump ring or closed ring, if required by the clasp design
- Crimping pliers
- Jewelry wire cutters
- A ruler or measuring tape
- A bead mat, towel, or tray
- Optional bead stopper or binder clip
- Optional wire guards and crimp covers
Choose a wire diameter that fits comfortably through the bead holes. Using the largest suitable diameter can improve durability, but do not force thick wire through tiny beads. Also match the crimp size to the wire according to the manufacturer’s recommendations. Crimps are small, but they are doing the structural work of keeping your handmade masterpiece from becoming confetti.
How to Make a Beaded Necklace in 8 Easy Steps
Step 1: Decide on the Necklace Length and Style
Start by deciding how you want the finished necklace to sit. A short necklace may rest close to the base of the neck, while an 18-inch necklace often falls around the collarbone on many adults. Longer designs can sit below the neckline or be layered with other jewelry. Body size, bead dimensions, clasp length, and personal preference all affect the final fit, so treat standard necklace lengths as starting points rather than laws carved into a gemstone tablet.
Measure an existing necklace that fits the way you like, or loosely place a soft measuring tape around your neck. Remember that large beads take up more physical space than tiny seed beads and can make a necklace feel shorter when worn.
Once you know the approximate finished length, cut the beading wire several inches longer. An extra 4 to 6 inches gives you enough working room for attaching the clasp and handling the wire without trying to crimp something while holding the final quarter-inch with your fingernails.
Step 2: Choose Your Beads and Plan the Design
This is the fun part, which also means it is the part where people accidentally spend three hours debating whether the blue bead should go before or after the slightly different blue bead.
You can make a beaded necklace with glass beads, gemstones, pearls, wood, acrylic beads, ceramic beads, metal spacers, seed beads, or a combination. For a first project, beads with reasonably sized holes are easier to string than extremely tiny seed beads.
Lay the beads on a bead mat or soft towel before stringing them. This allows you to rearrange the pattern without having to remove half the necklace every time inspiration changes its mind.
Common design approaches include:
- Symmetrical: The pattern mirrors itself from the center outward.
- Repeating: A sequence such as gemstone, spacer, glass bead repeats around the strand.
- Focal-point design: A pendant or large decorative bead sits at the center.
- Graduated: Larger beads are placed near the center and become smaller toward the clasp.
- Organic or asymmetrical: Colors and shapes vary intentionally without exact repetition.
For beginners, a symmetrical design is easy to balance. Place the focal bead in the middle, then build the pattern outward on both sides. Take a quick photo of the layout before stringing. That photograph becomes surprisingly valuable after a cat, child, sleeve, or mysterious gust of indoor wind rearranges everything.
Step 3: Cut the Beading Wire and Secure One End
Use proper jewelry wire cutters to cut your beading wire. Household scissors may struggle with steel-based beading cable and can become damaged or leave a messy cut.
Attach a bead stopper to one end of the wire. No bead stopper? A small binder clip can serve as a temporary solution if it grips gently without damaging the wire. You can also attach one half of the clasp before stringing, but many beginners find it easier to leave both ends unfinished until they have checked the complete design and length.
Whichever method you choose, make sure one end is blocked. Few crafting moments build character faster than lifting a nearly finished necklace and watching forty beads race toward the floor.
Step 4: String the Beads in Your Chosen Pattern
Begin sliding the beads onto the wire one at a time. Follow the pattern you arranged earlier, checking your reference photo when necessary.
If the design is symmetrical, consider starting with the center bead and working outward only if your construction method allows you to keep both wire ends controlled. Another simple method is to string from one end while checking the sequence carefully as you go.
Pay attention to bead holes. Some gemstone and handmade beads can have rough edges that may place extra wear on stringing material. Inspect questionable beads before using them, especially in a necklace intended for frequent wear.
As the strand grows, occasionally lift it by both ends and let the beads settle naturally. A pattern that looks perfect in a perfectly straight line can behave differently when curved around the neck. Large beads may rotate, pendants may flip, and oddly shaped beads sometimes reveal that they have their own artistic agenda.
Step 5: Check the Length, Drape, and Bead Spacing
Before attaching the clasp permanently, check the necklace against your planned measurement. Remember to include the length contributed by the clasp and any jump rings.
Also examine the drape. The beads should sit together without being packed so tightly that the necklace becomes stiff. A finished strand needs a tiny amount of freedom to curve naturally. At the same time, excessive slack can expose long sections of wire between beads.
Gently form the necklace into a circle similar to the shape it will take when worn. If the beads buckle inward or the strand refuses to curve, the design may be too tight. Remove a bead or create slightly more working room before finishing the ends.
This fitting check is especially important when using large round beads, chunky gemstones, or multiple bead sizes. Measuring only the straight strand on a table can be misleading because the necklace occupies three-dimensional space when worn.
Step 6: Attach the First Side of the Clasp
Now comes the technique that gives a strung necklace its secure finish: crimping.
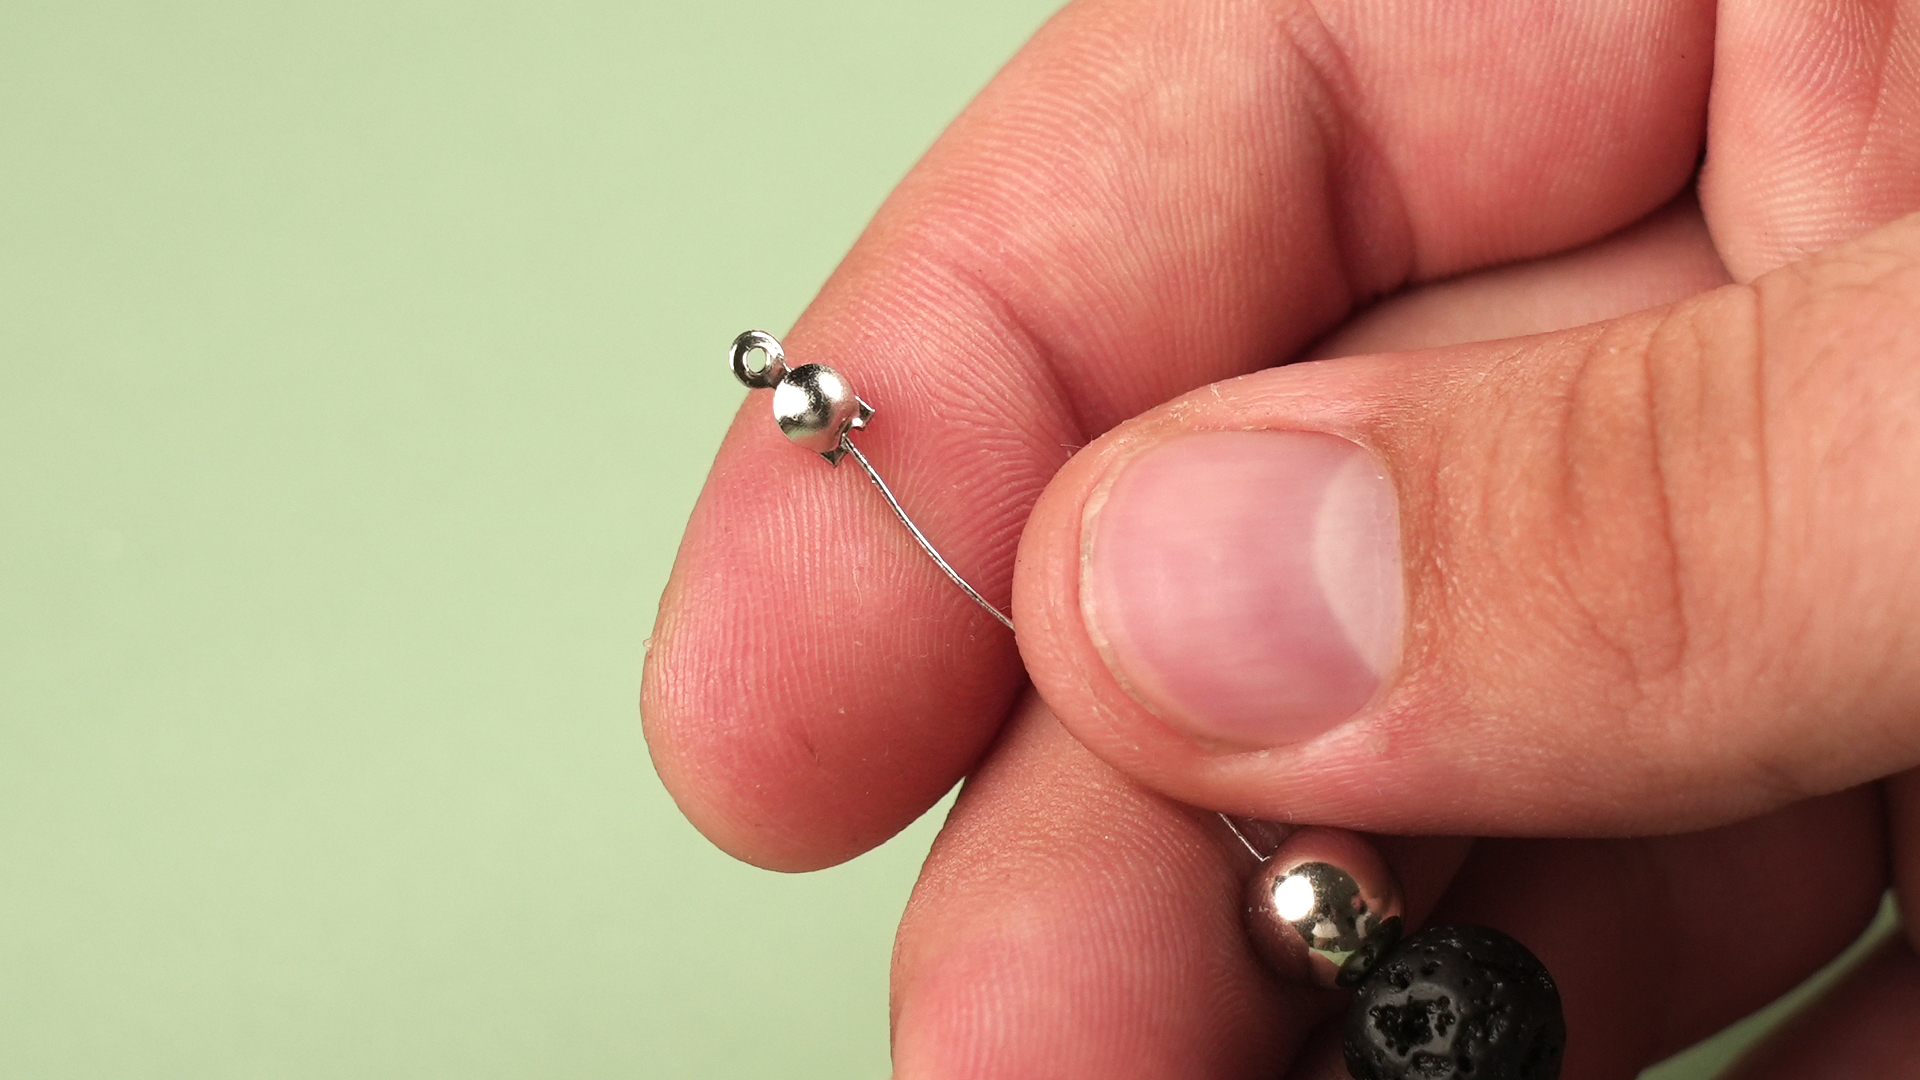
Slide a crimp tube onto one end of the beading wire. Next, pass the wire through the loop of the clasp or through a wire guard connected to the clasp. Bring the short tail of wire back through the crimp tube, forming a small loop.
Do not pull the loop so tight that the clasp is trapped rigidly against the crimp. A little movement helps the clasp sit naturally. Before compressing the crimp, make sure the two sections of wire inside it lie neatly side by side rather than crossing over each other.
Use the appropriate section of your crimping pliers to compress the crimp according to the tool’s design. With common two-stage crimping pliers, the first compression creates a central indentation, and the second folds or rounds the crimp into a compact shape.
Avoid repeatedly smashing the crimp with excessive force. More pressure is not automatically more secure. Correct sizing, wire placement, and technique matter more than attempting to intimidate the crimp into submission.
Step 7: Attach the Second Side and Adjust the Tension
Slide the second crimp tube onto the open end of the wire, then add the other half of the clasp or the appropriate connecting ring. Pass the wire tail back through the crimp.
Before crimping, arrange the necklace in a gentle curve on your work surface. Pull the wire until obvious gaps disappear, but do not make the strand rigid. This final tension adjustment is one of the most important steps in making a beaded necklace that hangs comfortably.
Check the clasp orientation before committing. A lobster clasp should connect naturally to its ring, and a toggle clasp must have enough room to function. This is your last easy opportunity to correct a backward clasp. After crimping, your options become considerably more educational.
When the tension looks right, keep the wire sections parallel inside the crimp and secure it with the crimping pliers. Trim the excess wire carefully with jewelry cutters. Be certain you are cutting only the short tail and not the main wire holding the necklace together.
Step 8: Test the Necklace and Add Finishing Touches
Before wearing or gifting the necklace, inspect both ends carefully. Gently tug near each clasp connection. You are testing the crimps, not auditioning the necklace for a tractor-pull competition, so use firm but reasonable pressure.
Open and close the clasp several times. Check that no sharp wire ends are exposed and that the necklace curves smoothly. Look for cracked beads, rough edges, or unexpected gaps.
For a more polished appearance, you can place crimp covers over the compressed crimps. These small metal covers close around the crimp and make it resemble a neat round bead. Wire guards can also be used where the beading wire loops around a clasp or finding, helping create a tidy, professional-looking connection.
Once everything passes inspection, your DIY beaded necklace is finished. Put it on, admire it, and casually prepare to answer the question, “Where did you buy that?” with the extremely satisfying words, “I made it.”
How to Choose the Best Beads for a Beginner Necklace
The easiest beads for a first necklace are generally large enough to handle comfortably and have smooth, consistent holes. Glass rounds, wood beads, acrylic beads, larger seed beads, and many gemstone beads can all work well.
Mixing materials creates visual interest, but try to establish some connection between them. Repeating a color, shape, metal finish, or spacer bead can make an eclectic combination feel deliberate rather than accidental.
Weight also matters. A strand made entirely from large stone or glass beads can become surprisingly heavy. Use appropriately strong beading wire and a secure clasp for heavier designs. For a lightweight everyday necklace, combine smaller beads with spacers or use focal beads selectively.
Common Beaded Necklace Mistakes to Avoid
Using the wrong stringing material
Ordinary sewing thread, elastic cord, craft wire, and flexible beading wire serve different purposes. For a basic clasped necklace made with moderate or heavy beads, flexible beading wire is often a practical beginner choice because it combines strength with flexibility.
Making the strand too tight
If the beads are compressed with no room to move, the necklace may kink instead of draping. Leave enough flexibility for the strand to curve naturally.
Using mismatched crimps
A crimp that is too large or too small for the wire can be difficult to secure properly. Match the crimp size, wire diameter, and crimping tool whenever possible.
Crossing the wires inside the crimp
The wire sections should generally sit parallel inside the crimp before it is compressed. A messy crossover can interfere with a clean, secure crimp.
Skipping the final inspection
Test the clasp and connections before wearing the necklace outside the house. Discovering a weak crimp over a clean bead mat is inconvenient. Discovering it in a grocery store parking lot is a very different craft project.
Easy Design Ideas for Your Next Beaded Necklace
Once you understand the basic stringing and crimping process, the same technique can support countless variations. Try a minimalist necklace with small gemstone beads and a single focal pendant. Make a colorful summer necklace from glass beads and contrasting spacers. Create a birthstone-inspired gift or a neutral design with wood, ceramic, and metal accents.
You can also experiment with asymmetry. Place a focal bead slightly off-center, group colors into irregular sections, or combine beads with short lengths of chain. The technical foundation remains similar even when the visual design becomes more adventurous.
The best beginner project is not necessarily the most complicated one. A simple necklace with a strong color palette, comfortable fit, and clean finishing can look far more sophisticated than a design containing every bead in the craft drawer.
Practical Experiences and Lessons From Making Beaded Necklaces
One of the most common experiences when learning how to make a beaded necklace is discovering that the design stage takes longer than the actual stringing. A beginner may expect to spend twenty minutes choosing beads and an hour assembling them. In practice, the opposite often happens. Once the pattern is settled, beads can slide onto the wire quickly. The real challenge is deciding when the arrangement is finished.
A useful lesson is to stop editing the design every thirty seconds. Lay out the necklace, step away for a few minutes, and look at it again with fresh eyes. Small changes become easier to judge after a break. Sometimes the bead you were convinced was “ruining everything” turns out to be perfectly fine once you stop staring at it from six inches away.
Another typical beginner experience involves underestimating the importance of the work surface. Beads placed on a hard table roll with astonishing confidence. A bead mat, felt sheet, folded towel, or shallow tray immediately makes the process calmer. Organization does not sound glamorous, but neither does crawling under a refrigerator with a flashlight.
Crimping usually creates the biggest learning curve. The first crimp may look bulky or uneven, and that is normal. Practice on a short scrap of beading wire before finishing a necklace made with expensive beads. Attach a spare crimp and ring, compress the crimp, and pull on the connection. A few practice attempts help you learn how the tool feels and how much pressure is needed.
Tension is another skill that improves through experience. Beginners often pull the wire extremely tight because a tight necklace seems more secure. The result can be a stiff strand that does not drape properly. The better approach is to remove visible gaps while still allowing the beads to move naturally around curves. Laying the necklace in a circle before securing the final crimp makes this easier to judge.
It is also common to learn that bead size changes the apparent necklace length. A strand of tiny seed beads and a strand of large 12-millimeter rounds can measure the same on a ruler yet fit differently around the neck. Chunky beads occupy more space toward the inside of the curve. Testing the actual fit before final crimping prevents disappointment.
Many jewelry makers also develop the habit of photographing a bead layout before stringing. This tiny step can save a surprising amount of frustration. If the pattern gets disturbed, the image becomes a map. It also lets you compare different versions of a design without relying on memory, which tends to become less reliable after staring at fifty nearly identical beads.
Another valuable experience is learning when to simplify. New jewelry makers often want to use all their favorite beads in one necklace. Unfortunately, five beautiful bead styles do not always become five times more beautiful when placed together. Choosing one focal element, one supporting bead, and perhaps a spacer can produce a stronger design.
Finally, handmade jewelry becomes more enjoyable when perfection is not the only goal. Slight variations in handmade beads, unexpected color combinations, and small design changes can give a necklace personality. Technical details such as secure crimps and comfortable tension matter because they affect durability and wearability. But creatively, there is room to experiment.
The first beaded necklace may not look exactly like the picture imagined at the beginning. That is part of the process. By the second necklace, bead spacing usually improves. By the third, crimping feels less intimidating. Soon, a small container of beads somehow becomes six storage boxes, three pairs of pliers, and a firm belief that every outfit needs a custom necklace. This is generally how the beads win.
Conclusion
Learning how to make a beaded necklace is an approachable introduction to handmade jewelry. The essential process is simple: choose a comfortable length, plan the bead pattern, cut suitable beading wire, string the design, check the drape, and secure both ends with properly sized crimps and a clasp.
The details make the difference. Matching the wire and crimps, keeping wire sections properly positioned during crimping, avoiding excessive tension, and testing the finished connections can turn a basic craft project into jewelry that looks polished and feels comfortable to wear.
Start with a simple pattern and inexpensive materials while learning the technique. Once the basic eight-step process becomes familiar, experiment with gemstones, pendants, asymmetric layouts, decorative spacers, and more elaborate color combinations. The possibilities are nearly endlessand fortunately, beads take up less room than most other creative obsessions. At least until you buy the third storage cabinet.