Important note: Always follow the service manual and torque specifications for your exact machine, engine, brake kit, motorcycle, race car, or aircraft assembly. Safety wire is a secondary locking method. It does not replace proper torque, correct hardware selection, or common sense.
If you have ever stared at two drilled head bolts, a spool of stainless wire, and a set of safety wire pliers while wondering why this job suddenly feels like mechanical origami, welcome to the club. Lock wiring drilled head bolts looks intimidating at first, but the idea is actually simple: route the wire so any attempt by the bolt to loosen is resisted by the wire pulling it in the tightening direction.
That is the entire magic trick. The rest is technique, patience, and resisting the urge to create a shiny bird’s nest where a clean wire run should be.
Whether you are wiring brake rotor bolts, engine hardware, race-bike fasteners, or any other vibration-prone assembly that uses drilled head bolts, the goal is the same. You want a neat, tight, properly twisted wire run that helps keep fasteners from backing out under vibration. The best jobs look almost boring. No slack, no random loops, no mystery directions, and definitely no tiny razor-like wire tails waiting to attack your knuckles later.
This guide breaks the process into 11 practical steps, explains the mistakes people make most often, and gives you a realistic feel for what good lock wiring should actually look like in the real world.
Why Lock Wiring Matters
Drilled head bolts are made for one reason: to accept lock wire, also called safety wire. In high-vibration environments, that extra mechanical retention matters. But here is the part many beginners miss: the wire is not there to rescue a badly installed fastener. First the bolt is tightened correctly. Then the wire is added so the assembly stays put.
Think of lock wire as a backup singer, not the lead vocalist. If the bolt was never torqued correctly, the wire is being asked to do a job it was never hired to do.
Good lock wiring also makes inspection easier. One quick glance can tell an experienced mechanic whether the wire is taut, routed in the correct direction, and likely to resist loosening. A bad job, on the other hand, practically waves a red flag and says, “Please inspect me before I do something expensive.”
Tools and Materials You’ll Need
Before you start, gather the right gear. You do not need a giant shop setup, but you do need the basics:
- Drilled head bolts in the correct size and grade for the assembly
- New stainless safety wire in the proper diameter for the fastener size
- Safety wire pliers, preferably reversible
- Side cutters or flush cutters
- A torque wrench
- Eye protection and gloves
- A service manual or torque chart for the exact application
- A flashlight for final inspection
For many medium-size fasteners, 0.032-inch stainless safety wire is a common choice. Smaller hardware may use thinner wire, while larger or hotter applications may call for different material or size. In plain English: do not guess. Match the wire to the job.
If your bolts are not already drilled, do not casually freestyle the drilling step with a wobbly bit and optimism. Use a proper drill jig, a drill press where appropriate, or simply buy pre-drilled hardware if that is available for your application. Your broken drill bits will thank you. So will your blood pressure.
How to Lock Wire Drilled Head Bolts in 11 Steps
Step 1: Confirm you have the right drilled head bolts
Start by checking that the fasteners are actually intended to be lock wired. The heads should be cleanly drilled, the holes should be free of burrs, and the bolts should match the application in size, thread, strength, and material. If the hardware looks chewed up, rusty, stretched, or suspiciously “close enough,” replace it. Lock wire is not a disguise for worn-out bolts.
Step 2: Install and torque the bolts first
Thread the bolts in, seat the parts properly, and torque everything to spec before the wire ever comes out of the spool. This is the most important habit in the whole process. The wire should secure a correctly tightened fastener, not pull a loose one into place. Also, never change the torque value just to get prettier wire alignment. Pretty is nice. Correct is nicer.
Step 3: Study the direction the wire needs to pull
Stand back and visualize the tightening direction of each bolt. On a standard right-hand thread, the bolt tightens clockwise. Your wire must be routed so that any tension on it tends to rotate the bolt clockwise, not counterclockwise. If the wire would help the bolt loosen, the job is backwards, no matter how tidy it looks.
A good mental check is this: if the bolt tries to unwind, the wire should immediately fight that motion. If it would cheerfully help it along, start over.
Step 4: Cut a fresh length of wire
Use new safety wire every time. Do not reuse a piece that has already been twisted, bent, or removed. Safety wire work-hardens, and reused wire is a terrible place to save pennies. Cut a manageable length with enough extra for routing, twisting, and finishing a pigtail. Too short and you will invent new vocabulary. Too long and you will wrestle spaghetti made of stainless steel.
Step 5: Thread the wire through the first bolt head
Pass the wire through the drilled hole in the first bolt head. Pull it through until you have the amount of wire you want on each side. The exact split depends on your layout, but the goal is to set up a clean run toward the second bolt without unnecessary slack. Keep the wire seated neatly in the hole and around the head, not perched awkwardly where it can lift into a sloppy loop later.
Step 6: Make your first even twists
Grab the two strands with safety wire pliers and begin twisting. The twist should be tight, even, and consistent, not mashed, kinked, or wildly overcooked. As a general rule, a neat safety wire job has about 6 to 8 twists per inch for many common applications. The wire should remain taut, but do not over-stress it. You want firm control, not a stress fracture audition.
Step 7: Route the twisted section toward the second bolt
Lead the twisted wire toward the next drilled head bolt in a path that will keep both fasteners loaded in the tightening direction. This is where planning pays off. The wire should take the shortest clean path that supports the correct pull. Avoid odd detours, dramatic loops, or routes that let the wire rub against sharp edges or moving parts.
If you are wiring two bolts as a pair, wire them as a pair. Do not keep stringing one continuous wire along a row unless the specific method and hardware arrangement call for it. Random daisy chains are how neat jobs turn into confusing ones.
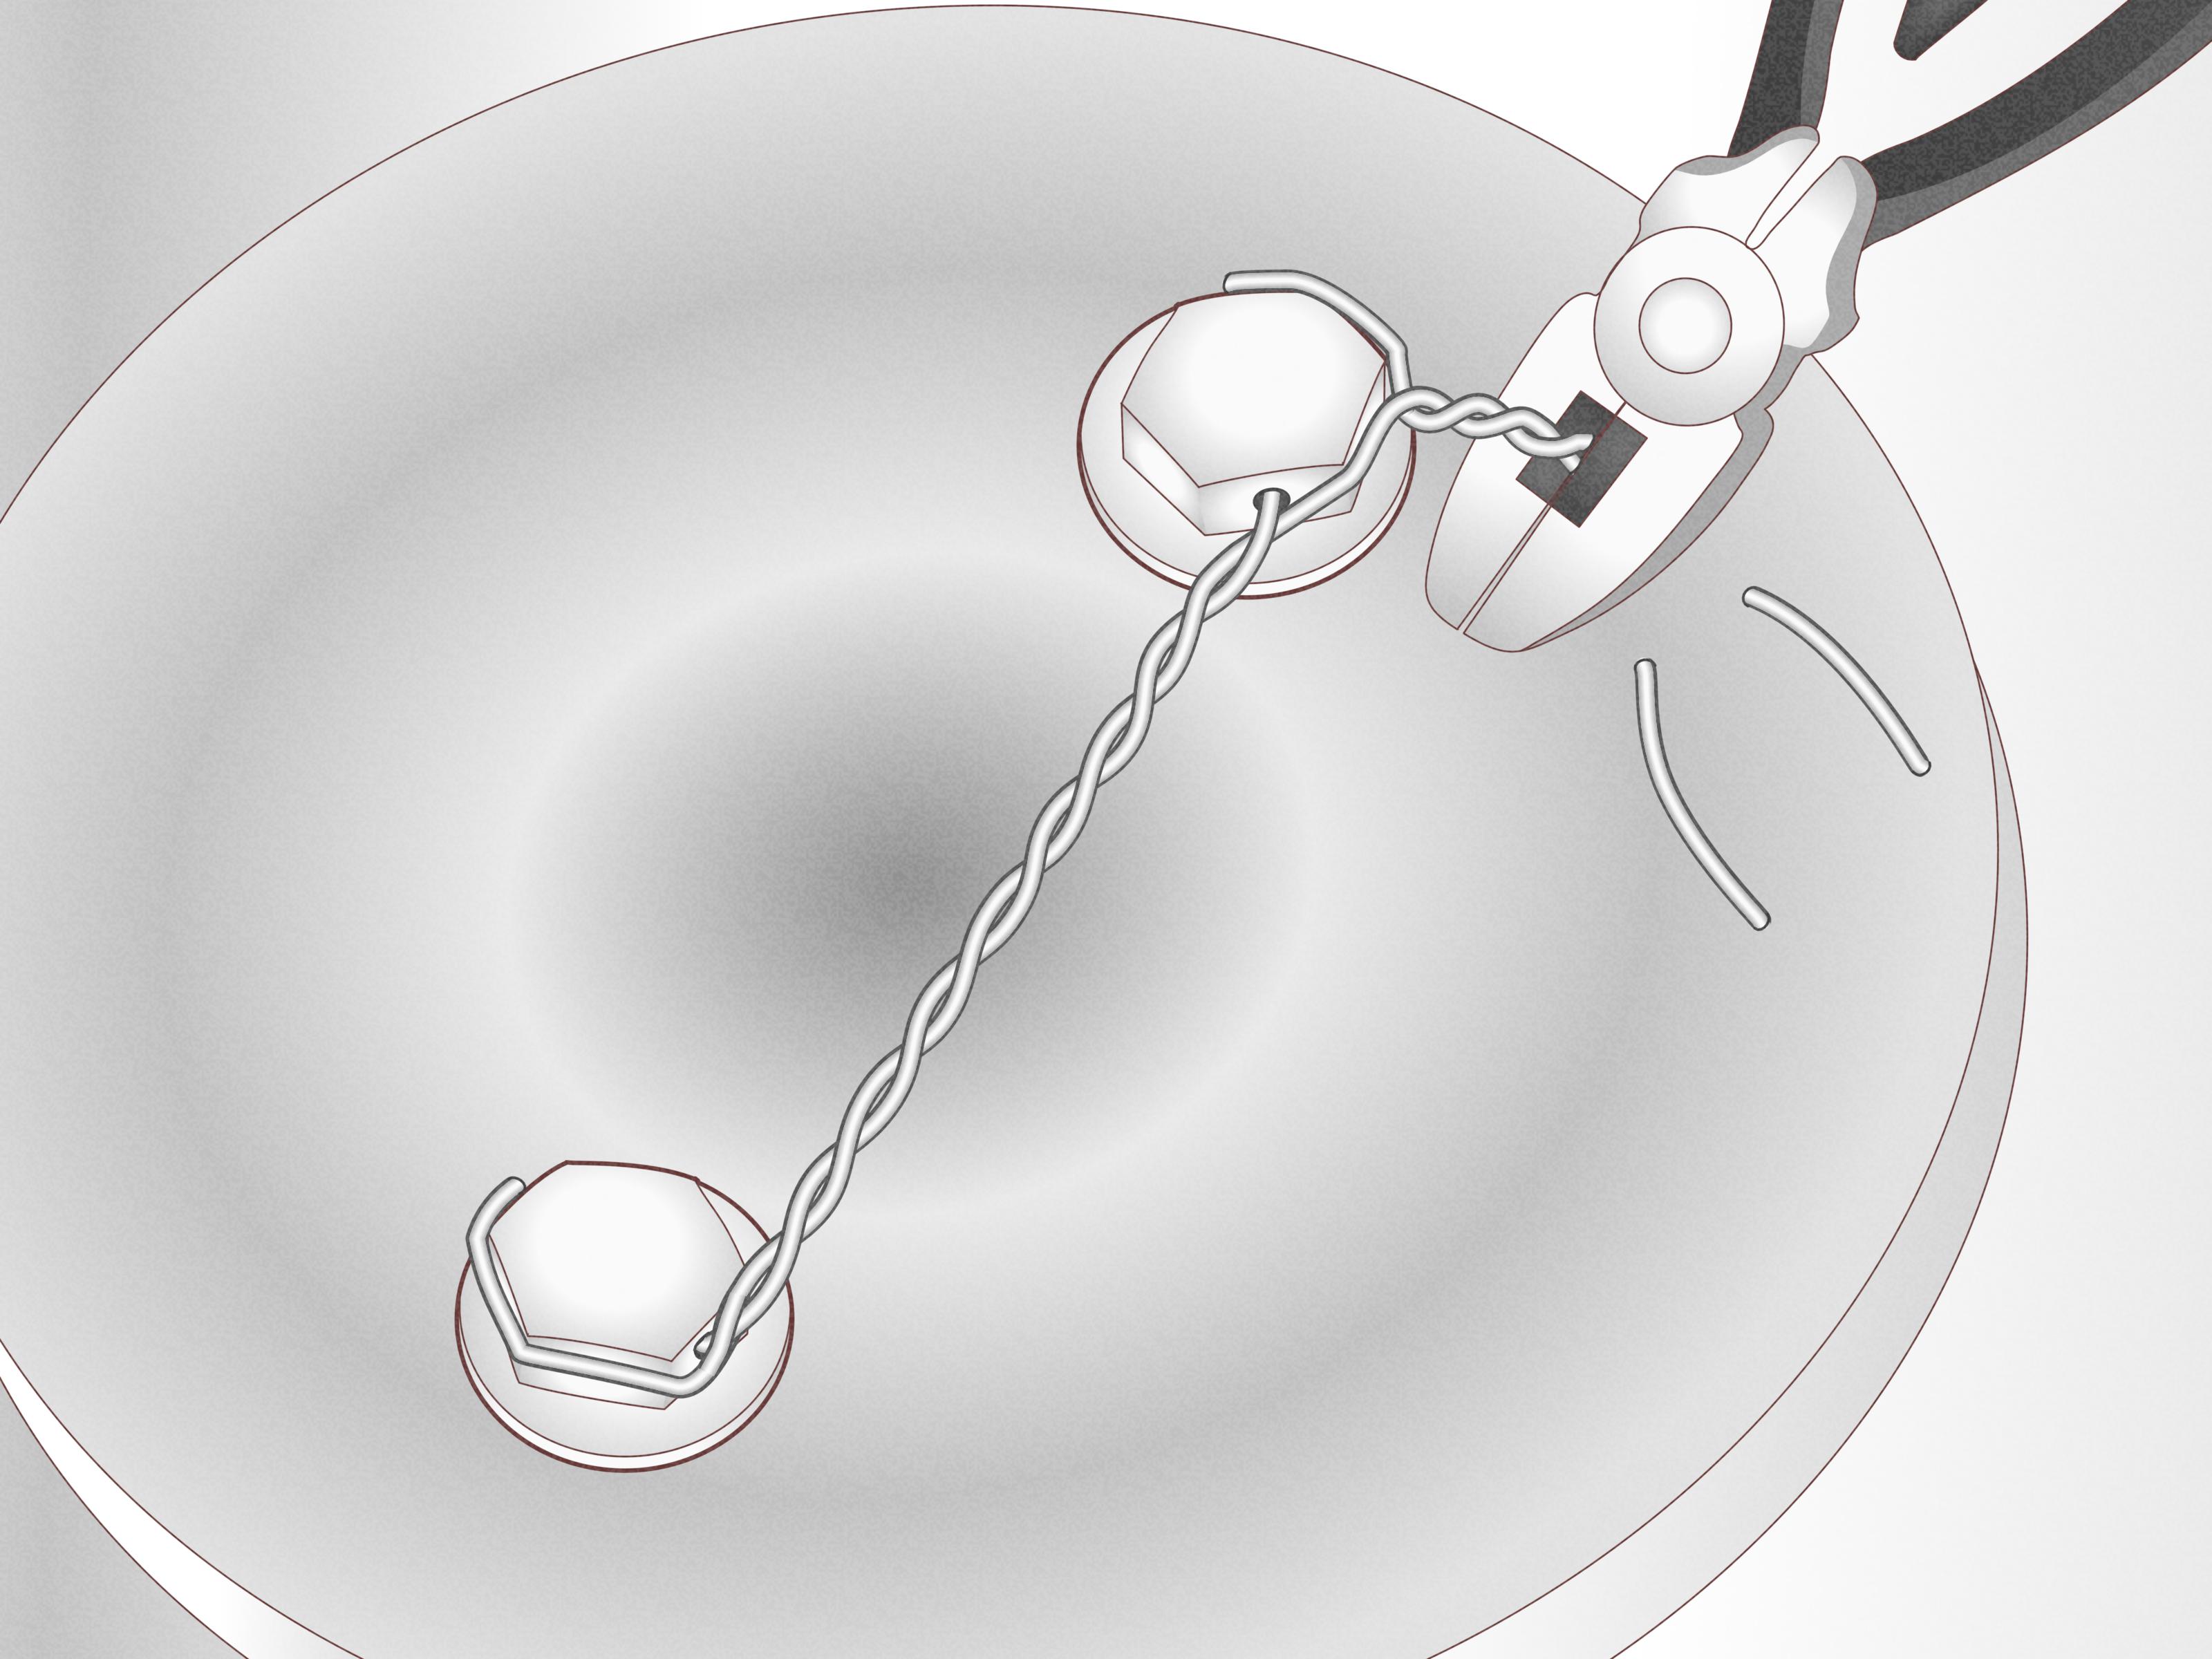
Step 8: Feed the correct wire leg through the second bolt
This step separates the tidy pros from the “well, technically it is attached” crowd. Feed the wire leg that creates the proper tightening pull through the drilled hole of the second bolt. The other leg typically wraps around the bolt head and rejoins the first strand. When you have done it correctly, the wire around the second bolt should stay low and snug, not ride up and create a loose-looking crown on top of the head.
If the loop around the bolt head wants to lift, or if the second bolt would be pulled in the loosening direction, back up and re-route it. A clean redo beats a clever mistake every time.
Step 9: Twist the tail into a short pigtail
Once the second bolt is secured, twist the remaining ends together to form a short pigtail. Keep it neat and controlled. You do not need a decorative tail worthy of a county fair. You need a short, secure finish that will not snag gloves, sleeves, or skin.
A short pigtail with several clean twists is the sweet spot. It should look deliberate, not like the wire gave up halfway through.
Step 10: Trim and tuck the end safely
Cut the pigtail to a safe length and bend it back or tuck it down so the sharp end is not exposed. This is one of those tiny finishing details that matters more than people think. Many a mechanic has learned that a beautiful wire job becomes much less beautiful when it slices the back of your hand during the next inspection.
If the end is sticking straight out like a tiny stainless porcupine quill, it is not finished yet.
Step 11: Inspect the whole run before calling it done
Now do a final check. Is the wire tight? Are the twists even? Does the routing clearly tend to tighten both bolts? Is the pigtail tucked away? Is there any slack, rubbing, over-twisting, or weird geometry? If something looks questionable, redo it. Good lock wiring is not about speed. It is about confidence during vibration, heat cycles, track use, flight time, or whatever punishment the assembly is about to endure.
A Simple Example of Correct Lock Wire Thinking
Imagine two drilled head hex bolts sitting side by side on a bracket. Both are standard right-hand thread fasteners, so both tighten clockwise. Your wire should leave the first bolt in a way that any tension between bolt one and bolt two tries to rotate bolt one clockwise. Then, at the second bolt, the routed leg passing through the hole should do the same thing for bolt two.
That is the whole logic model. Do not memorize shapes without understanding the pull direction. Once you understand the “wire must tighten the bolt” rule, the shapes start making sense.
Common Mistakes to Avoid
- Wiring the bolts backwards: The most common mistake, and the most dangerous one.
- Using lock wire instead of torque: Tighten first, wire second.
- Too few twists: A lazy-looking run with open sections is a bad sign.
- Too many twists: Over-twisting work-hardens the wire and makes it brittle.
- Reusing old wire: Fresh wire only.
- Leaving a sharp tail: Future-you deserves better.
- Choosing the wrong wire size: Match the wire to the fastener and application.
- Freehand drilling hardened bolt heads badly: Use a jig, the right bit, cutting fluid where appropriate, or buy pre-drilled bolts.
What a Good Lock Wire Job Looks Like
A proper job is tight, even, and calm-looking. The wire is taut but not tortured. The twists are uniform. The route is easy to understand at a glance. The loop around the bolt head stays down instead of ballooning upward. The pigtail is short, bent back, and out of harm’s way.
Most of all, a good lock wire job makes the intent obvious. Anyone inspecting it should be able to see immediately that the wire resists loosening. That visual clarity is part of the workmanship.
Final Thoughts
Learning how to lock wire drilled head bolts is one of those mechanical skills that feels fussy until it suddenly clicks. Once it does, you begin to notice the difference between a rushed job and a professional one in about half a second. The secret is not speed, flashy plier work, or some mystical knot-tying talent. It is simply understanding that the wire must stay taut and must always help tighten the fastener.
Start slowly, practice on a bench if you need to, and inspect your own work like someone else’s safety depends on it. Because in many applications, it does.
Shop Notes: Common Real-World Experiences with Lock Wiring Drilled Head Bolts
One of the most relatable experiences with lock wiring drilled head bolts is that the first attempt almost always looks worse in real life than it did in your head. On the bench, the plan seems elegant. In your hands, the wire suddenly develops opinions. It twists where you do not want it to twist, pokes you at the least convenient moment, and somehow turns a two-minute idea into a twenty-minute lesson in humility.
Beginners often report the same three surprises. First, it is harder than expected to keep the wire tight while also keeping the twist spacing even. Second, choosing the correct wire leg for the second bolt is not always obvious until you try it and realize you have routed the whole thing backwards. Third, the final pigtail has a remarkable ability to look harmless until it catches your glove or scrapes your wrist. That is usually the moment when the “trim and tuck the end” advice becomes permanently unforgettable.
Another common experience is discovering that lock wiring is more about setup than brute force. People new to the job often squeeze harder, pull harder, and twist harder, assuming the answer is more muscle. Usually it is not. Better results come from better planning: understanding the direction of pull, cutting a workable wire length, keeping the first loop low on the bolt head, and stopping the twist at the right time instead of treating the pliers like a slot machine.
If the bolts are not pre-drilled, the experience gets even more educational. Many mechanics and racers learn quickly that drilling hardened fasteners freehand is an excellent way to collect snapped drill bits. That is why so many experienced hands prefer pre-drilled hardware or a proper drill jig. It is not laziness. It is wisdom bought with tiny broken pieces of cobalt.
There is also a surprisingly satisfying side to the job. Once you have done a few correctly, you start to feel the rhythm of it. You can look at a pair of bolts and predict the route before the wire even leaves the spool. Your twists get cleaner. Your tails get safer. Your inspection time gets faster because the work itself is clearer. The job goes from frustrating to oddly satisfying, in the same way sharpening a chisel or lacing a wheel starts as a puzzle and ends as a craft.
And that is really the long-term experience people remember most. Lock wiring drilled head bolts teaches patience. It teaches planning. It teaches respect for tiny details that matter a lot once vibration, heat, speed, or repeated service enter the picture. A good wire job may not be glamorous, but it is one of those small signs that the person who assembled the machine actually cared about how it would stay together when the easy conditions disappeared.