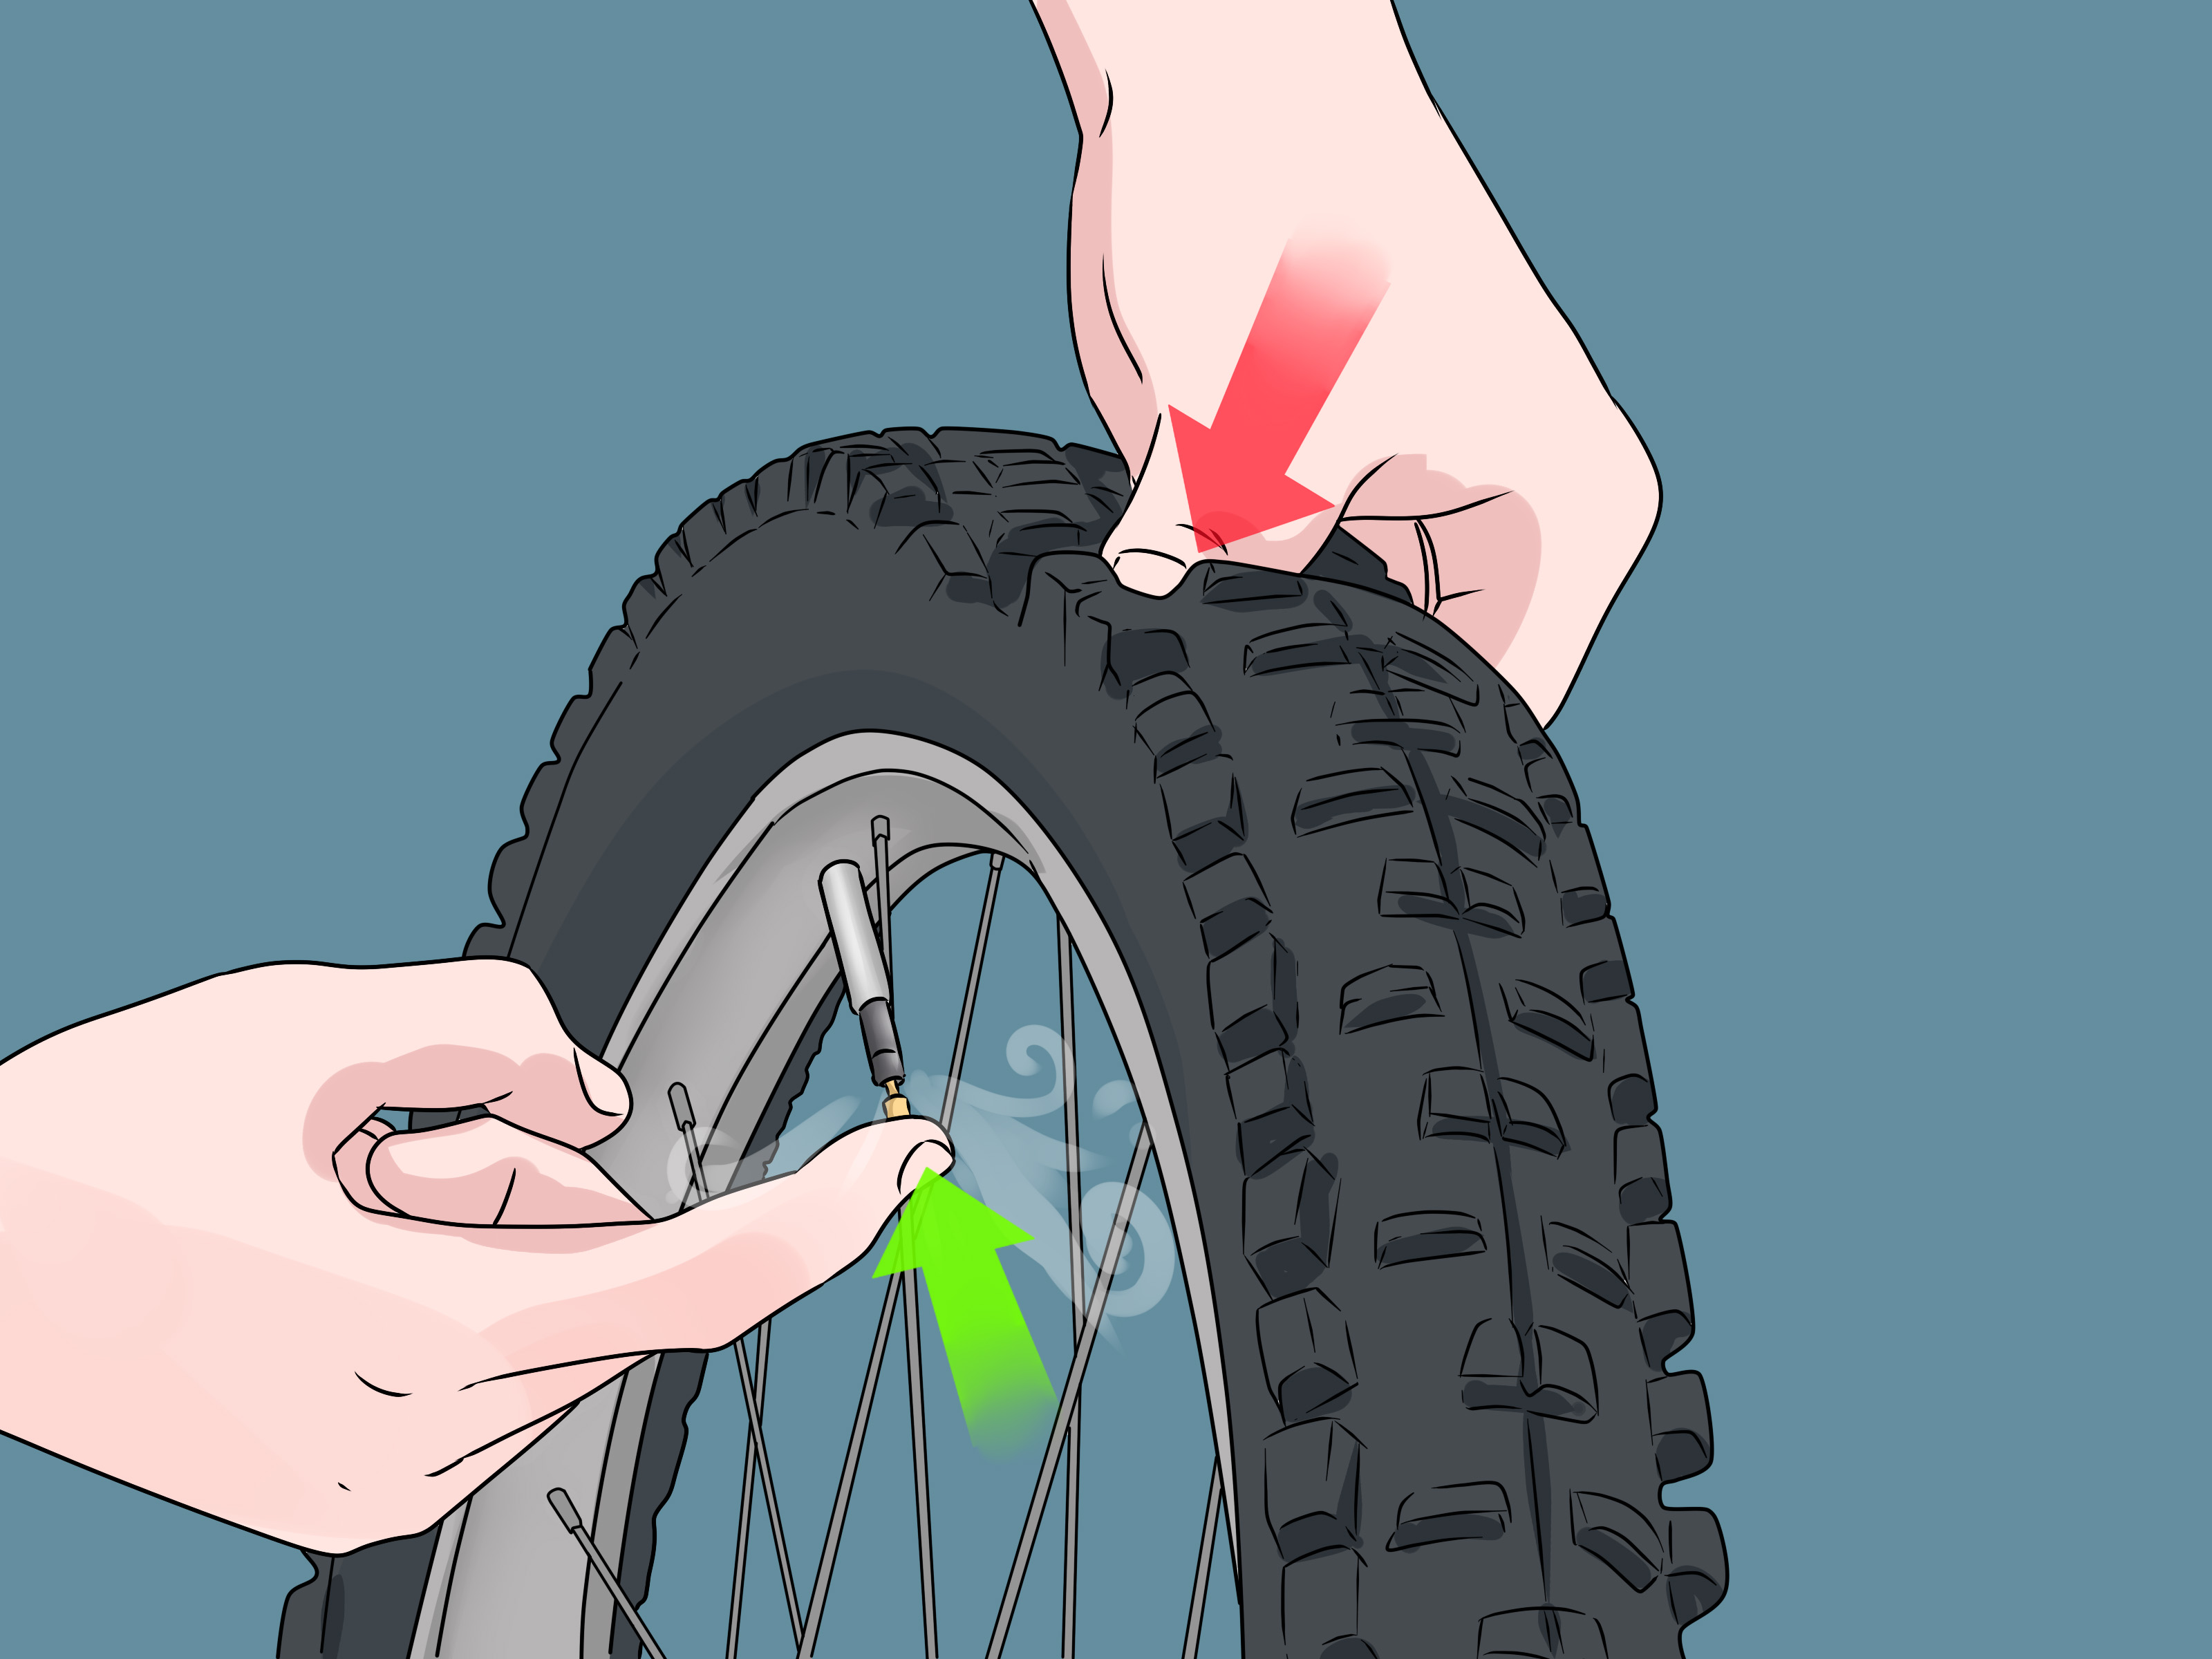
Learning how to let air out of a tire sounds almost too simple, like learning how to open a door or lose one sock in the dryer. But tire pressure affects ride comfort, fuel economy, tread wear, handling, and safety, so this tiny maintenance task deserves a little respect. The good news? You do not need a professional garage, a heroic toolbox, or a mechanic named Chuck who calls every car “buddy.” You mainly need a tire pressure gauge, the correct PSI number, and a calm finger.
This guide explains how to safely release air from a car tire in 11 practical steps. It also covers when you should reduce tire pressure, how to avoid common mistakes, and what real-world experience teaches drivers about overinflated tires. Whether your tire was overfilled at a gas station or your dashboard pressure reading looks a little dramatic, here is the safe, simple way to bring tire pressure back to the recommended level.
Why Tire Pressure Matters Before You Touch the Valve Stem
Tire pressure is measured in PSI, or pounds per square inch. Your vehicle’s recommended tire pressure is usually printed on a tire information placard inside the driver’s door jamb, and it may also appear in the owner’s manual. One important detail: the number molded into the tire sidewall is usually the tire’s maximum pressure, not the pressure your vehicle should normally use.
Too much air can make the ride feel harsh, reduce the tire’s contact patch, and cause the center of the tread to wear faster. Too little air can increase heat buildup, reduce fuel efficiency, make steering feel sloppy, and shorten tire life. In other words, tires are picky little balloons with responsibilities.
Letting air out of a tire is safe when you are correcting overinflation on your own vehicle or a vehicle you are authorized to maintain. Never deflate someone else’s tire as a prank or out of anger. That is not a “joke”; it is a safety risk with legal consequences.
Tools You Need to Let Air Out of a Tire
You do not need much. A reliable tire pressure gauge is the star of the show. Digital gauges are easy to read, while pencil-style gauges are inexpensive and compact. Dial gauges are also popular because they are simple and durable. Any of them can work as long as the gauge is accurate and fits securely on the valve stem.
Helpful items
- A tire pressure gauge
- The recommended PSI from your door jamb placard or owner’s manual
- A valve cap, if the old one is missing
- A small tool, key tip, or gauge with a built-in bleeder button
- An air compressor nearby, just in case you release too much air
That last item is not required, but it is comforting. Letting air out is easy. Putting it back in becomes a tiny adventure if you are standing in your driveway with no compressor and one tire suddenly looking like it regrets everything.
How to Let Air Out of a Tire: 11 Steps
Step 1: Park on a Safe, Level Surface
Park your vehicle on a flat, stable surface away from moving traffic. Set the parking brake and make sure the vehicle is secure. A driveway, garage, or quiet parking spot is ideal. Avoid working beside a busy road unless it is absolutely necessary.
A level surface helps you work comfortably and reduces the chance of the vehicle shifting. It also keeps you from crouching in a weird sidewalk yoga pose while trying to read a tire gauge.
Step 2: Let the Tires Cool Before Checking Pressure
Tire pressure is most accurate when tires are cold, meaning the vehicle has been parked for several hours or has been driven only a very short distance. Driving heats the tires, and heat increases pressure. If you check immediately after highway driving, the reading may be higher than the true cold tire pressure.
If the tire is only slightly above the recommended PSI after a long drive, do not rush to release air. Let the tires cool and check again. Releasing air from hot tires can leave them underinflated once they return to normal temperature.
Step 3: Find the Correct PSI for Your Vehicle
Open the driver’s door and look for the tire information placard on the door jamb. It usually lists the recommended cold tire pressure for the front and rear tires. Some vehicles use the same PSI on all four tires; others require different pressures for the front and rear.
Do not use the maximum PSI printed on the tire sidewall as your normal target. That number describes the tire’s upper pressure limit under specific conditions, not the ideal pressure for your car, truck, crossover, or minivan. The door placard is the boss here. The tire sidewall is more like the emergency rulebook.
Step 4: Remove the Valve Cap
Locate the valve stem on the tire. It is the small rubber or metal stem sticking out from the wheel. Unscrew the valve cap by turning it counterclockwise and place it somewhere safe, such as your pocket or the cupholder.
Valve caps help keep dirt, moisture, and road grime away from the valve. They are tiny, but they matter. Also, they love to roll under cars, so do not casually toss them onto the ground unless you enjoy crawling around like a detective searching for evidence.
Step 5: Check the Current Tire Pressure
Press the tire pressure gauge firmly onto the valve stem. You should hear little to no hissing if the gauge is seated correctly. If air hisses loudly, adjust the angle and press again. Read the PSI number on the gauge.
For best accuracy, check the pressure twice. If the readings are very different, reseat the gauge and try again. A crooked gauge can give a false reading, and nobody wants to make tire decisions based on a dramatic little puff of air.
Step 6: Compare the Reading to the Recommended PSI
Now compare the current tire pressure to the recommended cold PSI. For example, if your placard says 35 PSI and your gauge reads 40 PSI on a cold tire, you need to release about 5 PSI. If the tire is only 1 PSI over, you may decide to leave it alone, especially if the reading was taken while the tire was warm.
Precision matters, but perfection is not necessary. Tires naturally change pressure with temperature, weather, and driving conditions. Your goal is to get close to the recommended cold pressure, not to become the Michelangelo of tire inflation.
Step 7: Press the Valve Pin to Release Air
Inside the valve stem is a small metal pin. Pressing that pin releases air. Many tire gauges have a small nub or built-in bleeder button designed for this purpose. You can also use the tip of a small tool, but be gentle. Press the pin for one or two seconds at a time.
You will hear a short hiss as air escapes. That sound is normal. Do not hold the pin down for a long time unless the tire is severely overinflated. Small bursts give you better control and reduce the chance of going too low.
Step 8: Recheck the Pressure Often
After releasing a short burst of air, check the pressure again with your gauge. Repeat this pattern: release, check, compare. It may feel slightly repetitive, but it is much better than overshooting the target and having to hunt down an air pump.
If you need to lower the tire by several PSI, release air in stages. For example, if the tire is 6 PSI high, release air for a couple of seconds, check, then repeat. Tires do not all release air at the exact same rate, so guessing is not your best friend.
Step 9: Stop at the Recommended Pressure
When the gauge reads the recommended PSI, stop releasing air. If your placard says 32 PSI and your gauge reads 32 or 33 PSI, you are in good shape. If the tire is warm, remember that pressure may drop slightly after cooling, so avoid reducing it too aggressively.
If you accidentally release too much air, add air with a compressor and recheck the pressure. Most gas stations, tire shops, and auto service centers have air pumps. Many portable inflators also plug into a vehicle’s 12-volt outlet and are handy for home maintenance.
Step 10: Replace the Valve Cap
Once the pressure is correct, screw the valve cap back onto the valve stem. Tighten it by hand until it is snug. Do not use pliers or force it like you are sealing a submarine hatch.
A missing valve cap does not usually cause immediate air loss, but it can allow dirt and moisture to collect around the valve core. Over time, that can cause leaks or make the valve harder to service.
Step 11: Repeat on the Other Tires
Check all four tires, even if only one looked suspicious. Tire pressure can vary from tire to tire, and front and rear tires may have different recommended PSI values. Do not forget the spare tire if your vehicle has one. Spare tires are famous for being ignored until the exact moment they are needed, which is rude but predictable.
After all tires are set correctly, drive normally and watch for warning lights. If the tire pressure monitoring system, or TPMS, remains on, the system may need a short drive to update, or one tire may still be outside the recommended range. Check your owner’s manual for reset instructions if needed.
When Should You Let Air Out of a Tire?
You should release air when a cold tire is above the vehicle’s recommended PSI. This can happen after using a gas station compressor, after a shop sets pressures too high, or when seasonal temperature changes affect readings. Overinflation is also common when drivers mistakenly inflate tires to the maximum sidewall pressure instead of the vehicle placard pressure.
Common situations
- Your cold tire pressure is several PSI above the door placard recommendation.
- The ride feels unusually stiff or bouncy after adding air.
- The center of the tread is wearing faster than the edges.
- A tire shop or air pump overfilled the tires.
- You adjusted tire pressure for a load or trip and now need to return it to normal.
Do not release air just because the tire pressure looks higher after driving. Warm tires naturally read higher. Always use cold pressure as your main reference whenever possible.
Common Mistakes to Avoid
Using the tire sidewall number as the target
The sidewall number is commonly misunderstood. It is not the recommended everyday pressure for your vehicle. Use the door placard or owner’s manual instead.
Letting out air from hot tires
A tire may show extra PSI after driving because the air inside has warmed up. If you release air at that moment, the pressure may become too low after the tire cools.
Trusting your eyes instead of a gauge
Modern tires can look normal even when pressure is not ideal. A visual check is useful for spotting damage, but it cannot replace a pressure gauge.
Ignoring repeated pressure problems
If one tire keeps gaining or losing pressure compared with the others, have it inspected. There may be a valve issue, puncture, wheel problem, or tire damage.
Safety Tips for Better Tire Pressure Maintenance
Check tire pressure at least once a month and before long road trips. Temperature changes can affect PSI, especially when seasons shift. Cold weather often lowers tire pressure, while heat can increase readings. Keep a tire gauge in your glove box so you are not relying on public gauges that may be worn, dropped, or wildly optimistic.
Also inspect the tread and sidewalls while you are checking pressure. Look for nails, cuts, cracks, bulges, uneven wear, or anything that seems out of place. Tire pressure is only one part of tire safety, but it is one of the easiest parts to control.
Real-World Experiences: What Drivers Learn After Letting Air Out of Tires
Most people learn about tire pressure in one of three ways: a dashboard light appears, a tire looks suspiciously low, or a gas station air pump turns into a comedy sketch. Letting air out of a tire is not hard, but the experience often teaches a few practical lessons that instruction labels do not explain very well.
One common experience is the “oops, I overfilled it” moment. A driver pulls into a gas station, sees the air machine, and decides to be responsible. Excellent idea. But some machines fill quickly, and the built-in gauge may be awkward or inaccurate. The tire that needed a little boost suddenly reads 42 PSI when the door placard recommends 35 PSI. At that point, the driver discovers the small valve pin and learns that air comes out much faster than expected. The lesson is simple: check often, release in short bursts, and do not treat the valve stem like a soda fountain button.
Another familiar situation happens after a tire shop visit. A driver leaves with new tires or a rotation, and the car feels strangely firm on the road. Every bump suddenly has a personal message. Later, a gauge shows that all four tires are several PSI above the recommended pressure. This does not mean the shop is careless in every case; sometimes tires are adjusted while warm, sometimes equipment is preset, and sometimes human beings do what human beings do: make small mistakes while thinking about lunch. A quick cold-pressure check at home can solve the issue.
Seasonal changes also create memorable tire-pressure surprises. In cooler months, many drivers worry about low pressure warnings. In warmer months, some notice higher readings after driving or parking in the sun. The key is understanding that pressure changes with temperature. A tire that reads high after a hot commute may not actually be overinflated when cold. Experienced drivers usually check in the morning before the vehicle has been driven. That habit removes a lot of guesswork.
Drivers also learn that a good gauge is worth owning. The cheapest gauge in the bargain bin may work, but if it gives inconsistent readings, it can turn a two-minute job into a guessing contest. A reliable digital, dial, or pencil gauge helps you make confident adjustments. Keeping one in the glove box is like keeping an umbrella in the trunk: boring until the exact moment it becomes brilliant.
Another useful lesson is to stay near an air source when making a big adjustment. If a tire is only 2 PSI high, releasing air at home is easy. But if you are correcting a large overfill, or if you are new to the process, it is smart to do it near a compressor. That way, if you release too much, you can add air immediately instead of driving on an underinflated tire or staring at it with the emotional intensity of a person who just dropped toast jelly-side down.
Finally, many drivers realize that tire pressure affects how a vehicle feels. Overinflated tires can make the ride feel sharp and jittery. Properly inflated tires usually feel more balanced, predictable, and comfortable. The change may not feel dramatic, but it is noticeable. Correct PSI is not just about numbers; it is about helping the vehicle behave the way its engineers intended.
The best experience-based advice is this: make tire pressure a small routine instead of a rare emergency. Check it monthly, use the vehicle placard, adjust slowly, and replace the valve caps. Your tires will last longer, your car will ride better, and your future self will be less likely to meet the TPMS light at the worst possible time.
Conclusion
Knowing how to let air out of a tire is a simple but valuable maintenance skill. The process comes down to checking the recommended PSI, measuring the current pressure with a reliable gauge, pressing the valve pin in short bursts, and rechecking until the tire reaches the right level. The most important rule is to adjust pressure when the tires are cold whenever possible.
Proper tire pressure helps improve ride comfort, steering response, tread life, and fuel efficiency. It also reduces the risk of tire problems caused by overinflation or underinflation. A few minutes with a gauge can save money, prevent stress, and make your vehicle feel less like it is riding on four overexcited basketballs.
SEO Tags
Note: This article is for safe tire maintenance on your own vehicle or a vehicle you are authorized to service. Do not deflate tires as a prank or to damage another person’s property.