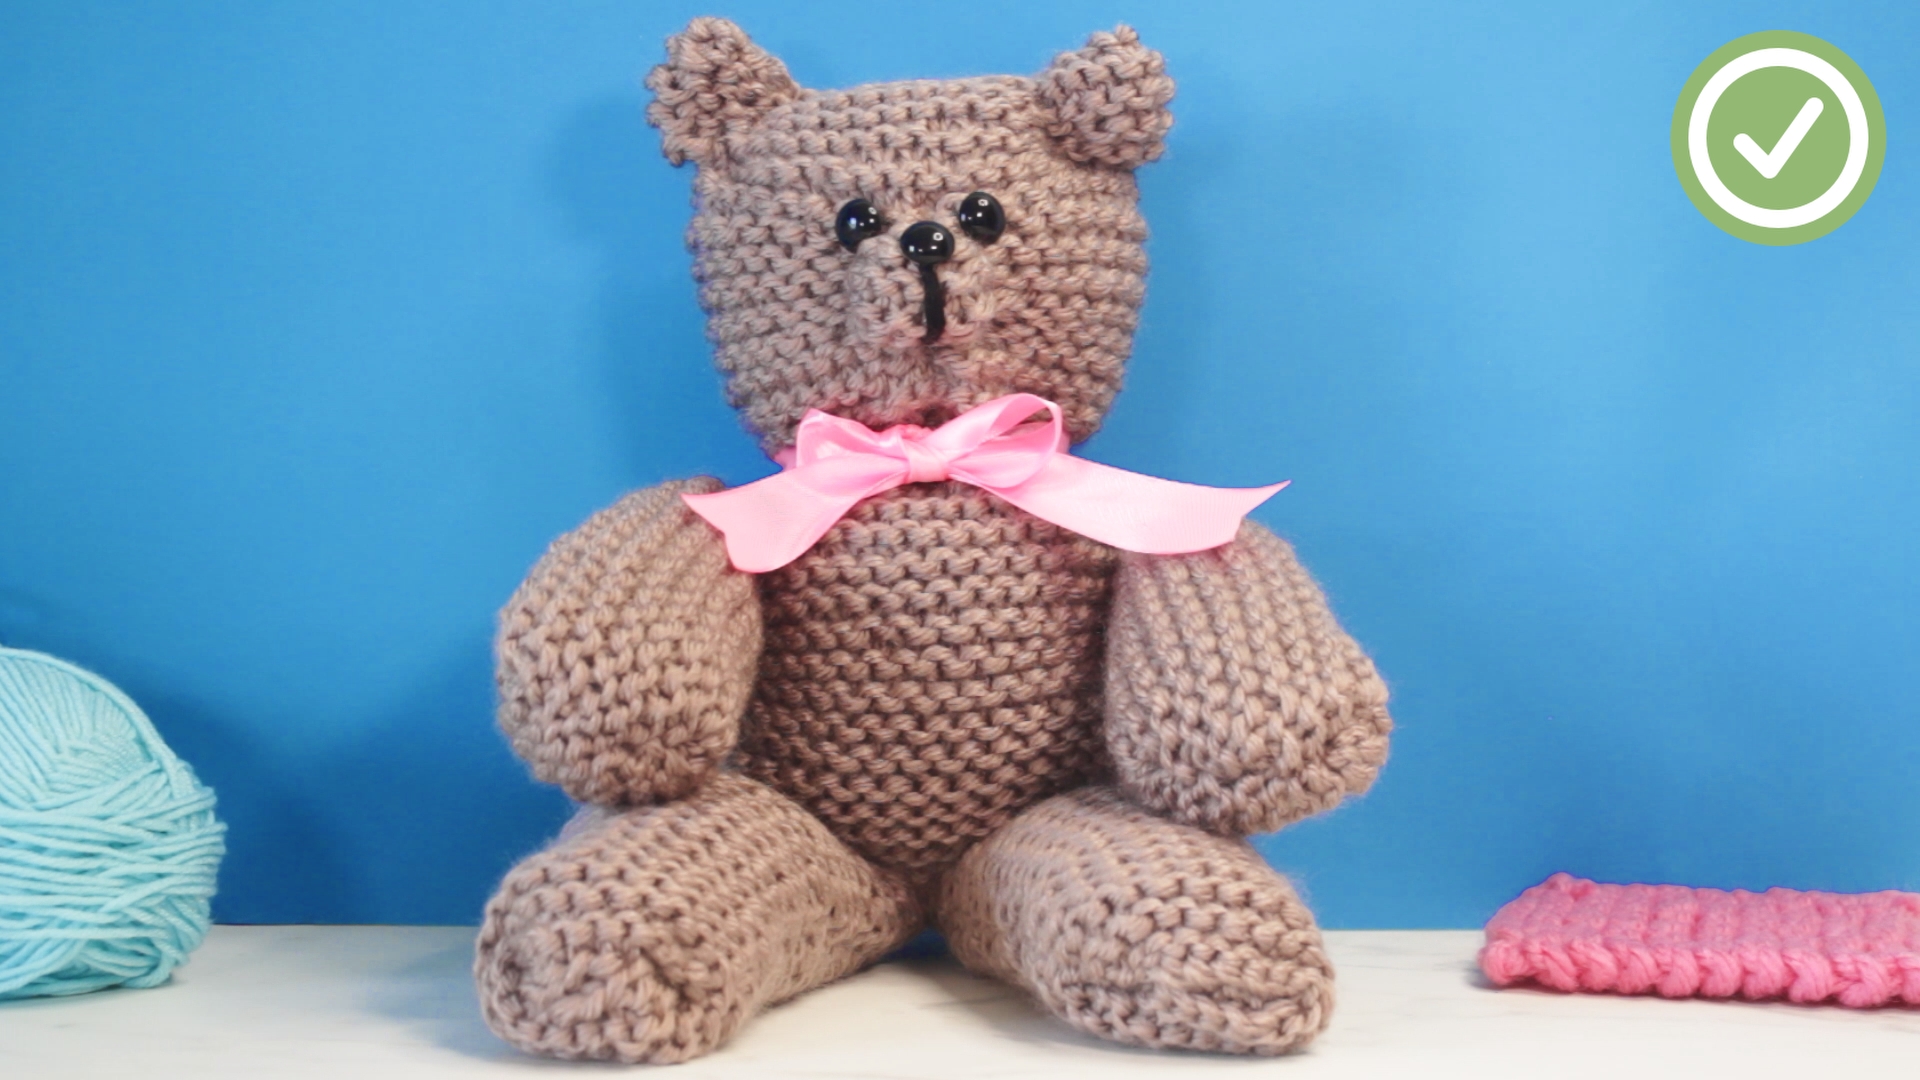
Note: This beginner-friendly guide is written for web publishing and synthesizes practical knitting, yarn, finishing, and toy-safety guidance from reputable U.S.-based craft and consumer-safety resources.
Learning how to knit a teddy bear sounds like something only a yarn wizard could do while sipping tea beside a fireplace. Good news: you do not need wizard credentials. You need yarn, needles, patience, and the ability to forgive a slightly lopsided ear. In fact, a handmade teddy bear is one of the sweetest beginner knitting projects because it teaches the basicscasting on, knitting rows, shaping, seaming, stuffing, and finishingwithout requiring a perfect sweater fit or a degree in geometry.
This tutorial walks you through a simple flat-knit teddy bear made from beginner-friendly shapes. Instead of complicated circular knitting, double-pointed needles, or tiny toy-engineering gymnastics, you will knit simple pieces, sew them together, add stuffing, and shape the bear with thread. The finished bear may not look like it came from a factory, and that is exactly the charm. A handmade teddy has personality. Sometimes too much personality. That is called “artisan character.”
Below, you will find a visual step-by-step guide, material recommendations, beginner knitting tips, safety notes, and an extra experience section at the end to help you avoid common mistakes. Whether you are making a keepsake gift, a nursery decoration, a memory bear, or your first knitted toy, this guide gives you a calm path from yarn ball to cuddle buddy.
Project Overview: Beginner Knitted Teddy Bear
| Skill Level | Beginner to confident beginner |
|---|---|
| Main Stitches | Knit stitch, optional purl stitch, basic seaming |
| Construction | Flat pieces sewn together |
| Estimated Finished Size | About 8 to 10 inches tall, depending on yarn and tension |
| Best Yarn | Medium worsted-weight yarn in a light color |
| Best Needles | US size 7 or 8 straight knitting needles |
Why This Teddy Bear Pattern Works for Beginners
A knitted teddy bear can be made in many ways. Some patterns use shaping, short rows, knitting in the round, or advanced increases and decreases. Those methods are wonderful, but they can feel like trying to assemble a spaceship when all you wanted was a bear. This version keeps things friendly by using flat rectangles and simple shaping.
The body and head are made from one knitted rectangle. The arms, legs, and ears are smaller pieces. Once everything is sewn and stuffed, the bear comes to life through shaping. A line of strong yarn or embroidery floss can define the neck, create rounded paws, and give the face expression. That means you can learn toy-making without wrestling with advanced pattern language on day one.
Materials You Will Need
- 1 skein medium worsted-weight yarn in brown, tan, cream, gray, or any bear-approved color
- US size 7 or 8 straight knitting needles
- Polyester fiberfill stuffing
- Tapestry needle for sewing seams
- Embroidery floss or black yarn for eyes, nose, and mouth
- Scissors
- Stitch markers or scrap yarn
- Measuring tape
- Pins or sewing clips for holding pieces in place
A Quick Safety Note
If the teddy bear is for a baby, toddler, or any child under age 3, avoid plastic safety eyes, buttons, beads, bells, ribbons, or anything that can detach. Embroidered features are safer and softer. Stuff the bear firmly but not rock-hard, sew every seam securely, and check that no yarn tails are loose. A teddy bear should be cute, not a choking-hazard goblin.
Basic Knitting Abbreviations
- CO: Cast on
- K: Knit
- P: Purl
- BO: Bind off
- Sts: Stitches
- RS: Right side of the work
- WS: Wrong side of the work
For the easiest version, use garter stitch, which means you knit every row. Garter stitch creates a soft, bumpy texture and lies flatter than stockinette stitch. It is forgiving, stretchy, and perfect for a first teddy bear. If you already know how to purl, you can use stockinette stitch for a smoother look, but remember that stockinette curls at the edges before sewing.
Step 1: Choose the Right Yarn and Needle Size
Start with medium worsted-weight yarn because it is easy to see, easy to hold, and widely available. Avoid very dark yarn for your first bear because black or deep brown stitches can be hard to read. Also avoid fuzzy novelty yarn on your first attempt. Fuzzy yarn can make a lovely plush bear, but it hides stitches like a magician hiding cards.
Use US size 7 or 8 needles. If your knitting is very tight, go up a needle size. If your stitches look loose and stuffing might peek through, go down a size. For knitted toys, slightly dense fabric is helpful because it keeps the stuffing inside where it belongs.
Step 2: Knit a Small Practice Swatch
Before making the bear, knit a small square about 4 inches wide. This is not busywork; it is your yarn’s job interview. The swatch shows whether your stitches are tight enough for a stuffed toy. Hold the swatch up and stretch it gently. If you can see large holes, use smaller needles or knit with a little more tension.
Visual check: The fabric should look flexible but not holey. Think cozy sweater, not fishing net.
Step 3: Knit the Body and Head Rectangle
Cast on 28 stitches. Knit every row until the rectangle measures about 10 inches long. This piece will become both the teddy bear’s body and head. Bind off loosely so the top edge does not pucker too much.
Lay the rectangle flat in front of you. Imagine it divided into two sections: the top third will become the head, and the bottom two-thirds will become the body. Do not worry if the edges are not perfect. Seaming and stuffing are very forgiving, and teddy bears are legally allowed to be round.
Visual check: You should have one soft rectangle that looks a bit like a tiny scarf. If you accidentally made a real scarf, congratulations, but keep going.
Step 4: Sew the Main Body Tube
Fold the rectangle in half lengthwise with the right sides facing out if using garter stitch. Use a tapestry needle and a length of matching yarn to sew the long side seam. Then sew the bottom edge closed. Leave the top edge open for stuffing.
If your seam looks bulky, do not panic. A firm seam is better than a delicate seam on a stuffed toy. Use small, even stitches, and pull the yarn snugly without strangling the fabric. The goal is secure, not armored.
Visual check: The piece should now look like a soft knitted pouch or tube with one open end.
Step 5: Stuff and Shape the Body
Add small pieces of stuffing gradually. Do not shove in one giant cloud of fiberfill unless you want a lumpy bear with the posture of a potato. Push stuffing gently into the bottom corners first, then fill the center.
When the body feels softly firm, sew the top edge closed. Now use a long strand of yarn or embroidery floss to create the neck. Wrap it around the upper third of the stuffed tube, pull gently to indent the fabric, and knot securely at the back. This separates the head from the body.
Visual check: You should see a rounded head on top and a larger rounded body below. At this stage, your bear may resemble a snowman in a sweater. That is perfectly normal.
Step 6: Knit Two Arms
Cast on 10 stitches. Knit every row until the piece measures about 3 inches. Bind off. Repeat for the second arm.
Fold each arm piece lengthwise and sew the long edge and one short end closed. Add a small amount of stuffing, then sew the top closed. Keep the arms slightly soft so they sit naturally against the body.
Visual check: Each arm should look like a tiny knitted sausage. This is a technical term in beginner toy-making, probably.
Step 7: Knit Two Legs
Cast on 12 stitches. Knit every row until the piece measures about 3.5 inches. Bind off. Repeat for the second leg.
Fold each leg lengthwise, sew the long edge and bottom edge, stuff lightly, and close the top. For rounder feet, add a little extra stuffing near the bottom. You can also use a few stitches across the end of each leg to shape a paw.
Visual check: The legs should be a little chunkier than the arms. If they look like matching breadsticks, you are on the right track.
Step 8: Knit Two Ears
Cast on 8 stitches. Knit 6 rows. Bind off. Repeat for the second ear.
To shape each ear, fold the small knitted square or rectangle slightly into a curve. Use a few stitches at the base to gather it. This creates a rounded teddy bear ear. Sew the ears to the top sides of the head, making sure they are even before stitching firmly.
Visual check: The ears should sit like small half-circles. If one ear is higher than the other, your bear simply looks curious.
Step 9: Attach Arms and Legs
Pin the arms to the sides of the body before sewing. This step helps you avoid placing one arm near the neck and the other near the bear’s hip, which gives the bear a dramatic but confusing backstory. Once you like the placement, sew around the top of each arm securely.
Next, attach the legs to the bottom front or lower sides of the body. You can position them straight down for a standing-style bear or angled forward for a sitting bear. A sitting teddy is usually easier for beginners because it hides small differences in leg length.
Visual check: Your teddy bear should now have a recognizable body, head, ears, arms, and legs. This is the moment when the project stops looking like knitted leftovers and starts looking adorable.
Step 10: Embroider the Face
Use black yarn or embroidery floss to stitch two small eyes. For a baby-safe bear, keep all features embroidered. Make a small triangle or oval for the nose, then add a short vertical line and a gentle smile. Keep the face simple. A teddy bear does not need eyeliner, cheek contour, or emotional complexityunless that is your artistic vision.
Place the eyes slightly above the center of the head. Put the nose below and centered between them. Before stitching permanently, you can use pins to test the expression. Tiny changes in eye placement can make the bear look sleepy, cheerful, surprised, or like it just remembered a deadline.
Visual check: The face should be balanced and friendly. If the smile is crooked, call it charm and move on proudly.
Optional Details to Make Your Teddy Bear Special
Add a Scarf
Cast on 6 stitches and knit until the strip wraps comfortably around the bear’s neck. Bind off and weave in the ends. A scarf is the easiest accessory and conveniently covers any neck-shaping weirdness. Practical and fashionable.
Add Paw Stitches
Use embroidery floss to stitch three short lines at the end of each arm or leg. This gives the bear simple paws. Keep stitches secure and avoid long loose loops.
Add a Belly Patch
Knit a small oval-like patch by making a tiny rectangle and rounding the corners with stitching. Sew it to the front of the body in a contrasting color. This is a great way to use scrap yarn.
Common Beginner Mistakes and Easy Fixes
The Stuffing Shows Through
If stuffing peeks through the stitches, your fabric is too loose. Use smaller needles next time, or add less stuffing. For this bear, gently remove some stuffing and reshape the body.
The Bear Looks Uneven
Handmade toys often look uneven before final shaping. Use small stitches to pull areas into place. A slightly uneven bear is not a failure; it is proof that a human made it, not a suspiciously efficient robot.
The Seams Are Bulky
Bulky seams usually come from using too much yarn or pulling stitches unevenly. Try mattress stitch or a simple whip stitch with consistent spacing. Choose matching yarn so seams blend into the fabric.
The Face Looks Strange
Faces are tiny but powerful. If the expression looks off, remove the embroidery and try again. Move the eyes closer together for a sweeter look. Place them farther apart for a more whimsical style. Keep the mouth small for a classic teddy expression.
Care Tips for a Hand-Knitted Teddy Bear
If the bear will be handled often, choose washable yarn and washable stuffing. Spot-clean gently with mild soap and cool water. If machine washing is necessary, place the bear in a mesh laundry bag and use a delicate cycle, but only if the yarn label allows it. Air drying is usually best because heat can distort stuffing and fabric.
For keepsake bears, store away from direct sunlight to prevent fading. If the bear is made for a child, inspect it regularly. Check seams, embroidered features, and any accessories. Handmade does not mean fragile, but it does mean the bear deserves the occasional wellness check.
Beginner-Friendly Visual Checklist
- Flat rectangle: Looks like a small knitted scarf.
- Sewn tube: Looks like a soft pouch.
- Stuffed body: Looks rounded and firm.
- Neck shaping: Creates a head and body.
- Arms and legs: Small stuffed tubes attached securely.
- Ears: Small curved pieces sewn to the head.
- Face: Embroidered eyes, nose, and smile.
- Final bear: Soft, secure, charming, and ready for admiration.
Extra Experience: What I Learned While Knitting Beginner Teddy Bears
The biggest lesson in knitting a teddy bear is that finishing matters just as much as knitting. Beginners often focus on the rows, counting stitches, and not dropping loops into the yarn abyss. That is understandable. But once the pieces are knitted, the real personality comes from stuffing, shaping, and sewing. A perfectly knitted rectangle can become a strange bear if it is stuffed unevenly. A slightly messy rectangle can become a lovable teddy if it is shaped with care.
One helpful experience is to stuff slowly. At first, I used to push in large chunks of fiberfill because I wanted the bear to become plump quickly. The result was a lumpy toy that looked like it had swallowed a bag of marshmallows whole. Small pieces of stuffing work much better. Add a little, press it into the corners, then add more. This gives the bear a smoother shape and helps the fabric stretch evenly.
Another useful trick is to pin every part before sewing. Arms, legs, and ears can shift while you work, especially if you are excited and sewing at full teddy speed. Pinning lets you check the bear from the front, side, and top. You may discover that one ear is wandering north or one leg is trying to leave the project. Fixing placement before sewing saves time and prevents dramatic seam removal later.
Face embroidery is also worth slowing down for. A teddy bear’s expression changes with tiny adjustments. Eyes placed low can look babyish and sweet. Eyes placed too high can look surprised. A long mouth can look goofy; a short mouth looks classic. Before committing, mark the face with pins or tiny scraps of yarn. Step back and look at it from a distance. If it makes you smile, stitch it permanently.
For beginners, light-colored yarn is a quiet blessing. It helps you see stitches, seams, and mistakes. Textured yarn may look tempting because plush bears are adorable, but save fuzzy yarn for your second or third bear. Smooth worsted-weight yarn teaches your hands what is happening. Once your confidence grows, you can experiment with chenille, boucle, or fluffy yarns for a softer toy.
I also learned that teddy bears do not need to be perfect to be loved. In fact, the handmade quirks often become the best part. A slightly tilted head can look thoughtful. A round belly can look extra cuddly. One ear placed a little differently can make the bear look alert, like it heard the cookie jar open. The goal is not factory precision. The goal is a soft, safe, handmade object with warmth in every stitch.
If you are making your first knitted teddy bear as a gift, give yourself extra time. The knitting may go quickly, but sewing and finishing deserve patience. Put on music, make tea or coffee, and treat the assembly like a relaxing craft session instead of a race. Your bear will look better, and you will enjoy the process more.
Finally, keep notes. Write down the yarn, needle size, number of stitches, and finished size. If you love the result, you can repeat it. If you want changes, your notes will tell you what to adjust. A teddy bear pattern becomes more personal each time you make it. The first bear teaches you the basics. The second bear teaches you control. By the third bear, you may be naming them before sewing on the ears, and honestly, that is when the hobby has fully adopted you.
Conclusion
Knitting a teddy bear is a beginner-friendly project that turns simple stitches into something warm, personal, and gift-worthy. By using flat pieces, basic garter stitch, careful stuffing, and secure embroidery, you can make a soft toy without advanced knitting techniques. The best part is that every bear comes out a little different. Some are neat and classic. Some are round and goofy. All of them carry the charm of being made by hand.
Start with smooth worsted-weight yarn, use needles that create a firm fabric, sew slowly, and embroider the face if the bear is intended for a young child. Once you understand the basic construction, you can customize your teddy bear with scarves, belly patches, paw details, stripes, or tiny sweaters. One skein of yarn can become a keepsake, a thoughtful handmade gift, or the beginning of a very small bear family taking over your craft shelf.