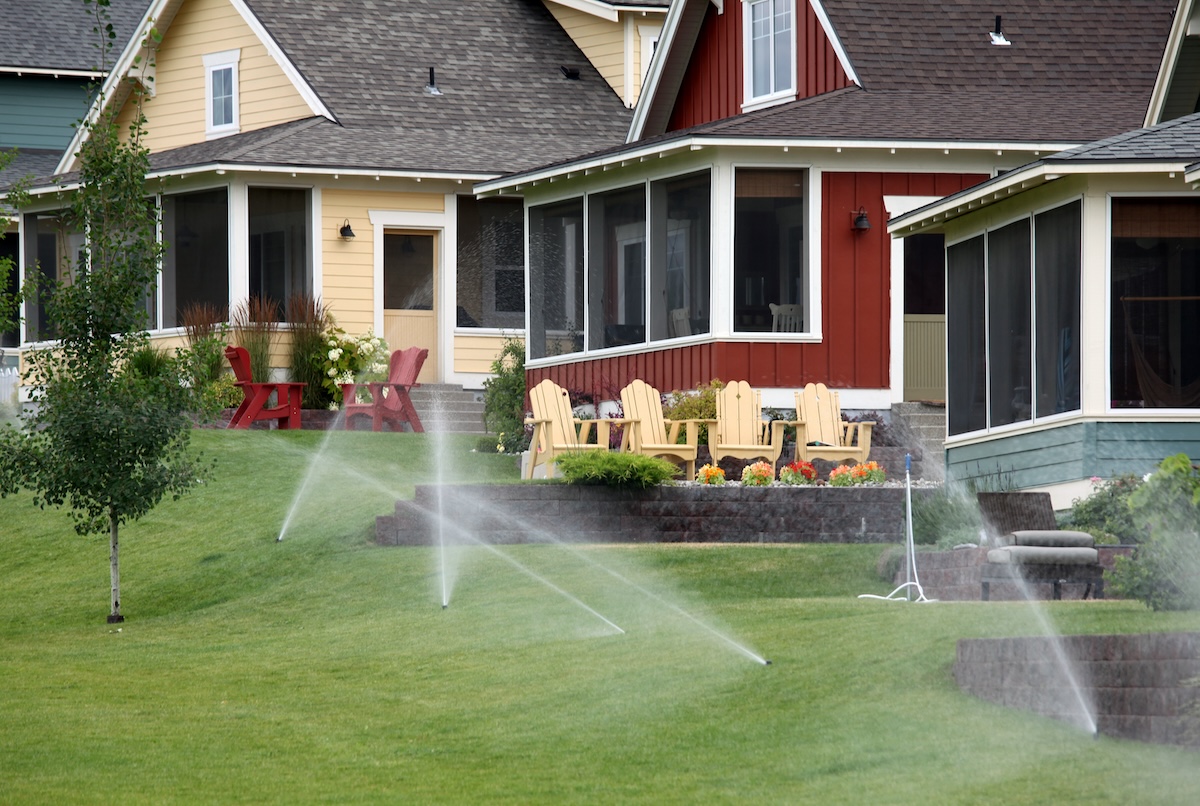
An underground sprinkler system can turn lawn care from a daily hose-dragging workout into a mostly automatic routine. Instead of moving a sprinkler every 20 minutesand inevitably watering the driveway more thoroughly than the grassyou can deliver controlled amounts of water exactly where the landscape needs them.
The installation is not technically mysterious, but it rewards careful planning. Water pressure, available flow, sprinkler spacing, zoning, backflow protection, local permits, soil conditions, and plant types all affect the final design. A system that is thoughtfully planned can provide even coverage and efficient watering. A system assembled through enthusiastic guesswork may create dry patches, miniature swamps, and one sprinkler that attacks the kitchen window every morning.
This guide explains how to install an underground sprinkler system from the initial property sketch through testing, programming, and long-term maintenance.
Research support:
Understand the Main Parts of an Underground Sprinkler System
Before buying several carts of fittings, it helps to understand how the system works. Water enters through a dedicated connection and passes through a shutoff valve and an approved backflow-prevention device. It then reaches a manifold containing individual zone valves.
When the controller activates a valve, water travels through underground lateral pipes to the sprinkler heads assigned to that zone. Pop-up heads rise under pressure, water the designated area, and retract when the valve closes. Low-voltage control wire connects the controller to each valve solenoid.
A typical residential system includes:
- A dedicated irrigation shutoff valve
- An approved backflow preventer
- An automatic irrigation controller
- A rain sensor, soil-moisture sensor, or weather-based control feature
- A valve manifold and protective valve box
- PVC or polyethylene irrigation pipe
- Direct-burial control wire
- Spray heads, rotary nozzles, rotors, or drip components
- Fittings, risers, swing pipe, clamps, primer, and pipe cement
Step 1: Check Permits, Codes, and Underground Utilities
Contact your local building department or water utility before doing any excavation. Some communities require a plumbing permit, an irrigation permit, an inspection, annual backflow testing, or installation by a licensed contractor. These requirements are not bureaucratic decoration: an irrigation system creates a potential cross-connection between landscape water and the household drinking-water supply.
Backflow protection prevents contaminated water containing soil, fertilizer, pesticides, or animal waste from being pulled into potable plumbing. Common residential devices include pressure vacuum breakers and reduced-pressure assemblies, but the acceptable type depends on local code, elevation, system configuration, and whether chemicals can enter the irrigation water.
Next, contact 811 or your state’s notification center several business days before digging. Utility owners will mark participating underground gas, electric, communication, water, and sewer lines. Private linessuch as landscape lighting, septic piping, pool equipment, or wiring beyond a metermay require a private locating service.
Research support:
Step 2: Draw a Scaled Property Plan
Measure the irrigated areas and draw the property on graph paper or with irrigation-design software. Include the house, driveway, sidewalks, patios, fences, trees, flower beds, slopes, utility markings, outdoor faucets, water meter, and proposed controller location.
Divide the landscape according to watering needs. Sunny turf, shaded turf, shrubs, vegetable beds, trees, and drought-tolerant plantings should not automatically receive the same schedule. A sunny front lawn may need substantially more water than a shaded bed of established native shrubs.
Starting with an accurate plan reduces unnecessary trenching and helps you estimate pipe, wire, valves, fittings, and sprinkler heads. It also becomes a valuable map when someone wants to install a fence five years later and asks, “Do you remember where the irrigation pipe runs?” Human memory will confidently say yes. The map will tell the truth.
Plan for Head-to-Head Coverage
Arrange lawn sprinklers so the spray from each head reaches the neighboring head. This is called head-to-head coverage. A sprinkler generally applies more water near itself and less near the outer edge of its pattern, so overlapping coverage improves uniformity.
Begin with quarter-circle heads at outside corners, half-circle heads along borders, and full-circle heads in open interior areas. Curved or narrow spaces may require adjustable nozzles or short-radius products. Keep water off buildings, pavement, fences, and public walkways as much as possible.
Research support:
Step 3: Measure Water Pressure and Available Flow
A sprinkler layout must be based on the water supply that actually existsnot the heroic water pressure you hope exists.
Measure Static Pressure
Attach a pressure gauge to an outdoor faucet supplied by the same plumbing that will feed the irrigation system. Turn off household water fixtures and open the faucet fully. The gauge reading is the approximate static pressure.
Operating pressure will be lower once water is moving through the meter, pipes, backflow assembly, valves, and fittings. Select sprinkler nozzles according to their recommended operating-pressure range. Excessive pressure can cause misting and wind drift, while inadequate pressure may shorten the spray radius or prevent heads from operating correctly.
Measure Flow Rate
A simple bucket test provides a rough flow estimate. Time how many seconds it takes to fill a five-gallon bucket, then use this formula:
Gallons per minute = 300 ÷ filling time in seconds
For example, if the bucket fills in 30 seconds, the estimated flow is 10 gallons per minute. Leave a safety margin rather than designing each zone to consume every available drop. Household demand, pressure fluctuations, elevation changes, and friction losses can reduce real-world performance.
For a direct connection to the service line, the water meter size, service-pipe diameter, pipe material, distance, and local utility limitations must also be considered. Ask a qualified professional for help if the calculations are uncertain.
Research support:
Step 4: Divide the Sprinklers Into Zones
Add the flow requirements of all heads proposed for a zone. The total must remain below the available design flow after accounting for pressure loss. If eight selected nozzles use 1.2 gallons per minute each, their combined demand is 9.6 gallons per minute. That would be too ambitious for a conservatively designed eight-gallon-per-minute supply.
Group heads by compatible application rates and landscape conditions. Do not casually mix traditional spray heads, large rotors, and drip irrigation on one valve. They apply water at different rates and require different run times. One area will usually be soaked while another remains thirsty.
Create separate zones for:
- Spray heads and rotary nozzles
- Large turf rotors
- Drip-irrigated shrubs or garden beds
- Slopes or areas prone to runoff
- Sunny and heavily shaded sections
- Plants with substantially different water requirements
Use matched-precipitation nozzles within each zone whenever possible. These nozzles are designed so quarter-, half-, and full-circle patterns apply comparable water depths across the same area.
Research support:
Step 5: Gather Tools and Materials
Your exact shopping list will depend on the approved design, but a typical installation may require:
- Trenching shovel, drain spade, mattock, or rented trencher
- Tape measure, marking flags, stakes, and landscape paint
- Pipe cutter, PVC saw, or polyethylene-pipe cutters
- Pressure gauge and five-gallon bucket
- PVC primer and solvent cement, if using PVC
- Poly insert fittings and stainless-steel clamps, if using poly pipe
- Waterproof wire connectors
- Wire strippers and a multimeter
- Valve boxes and gravel
- Swing pipe or flexible head connections
- Thread-seal tape approved for the fittings
- Safety glasses, gloves, hearing protection, and sturdy footwear
Purchase extra common fittings. A project can survive an unexpected elbow. It cannot survive discovering the hardware store closed six minutes ago.
Step 6: Mark the Layout in the Yard
Transfer the approved plan to the landscape using flags and marking paint. Mark every sprinkler, pipe route, valve box, wire path, sleeve, and crossing. Walk through the layout before digging and look for conflicts with roots, retaining walls, drains, utilities, and future landscaping.
Place heads near lawn edges but far enough from hardscape to protect them from vehicles, mower wheels, and edging equipment. Flexible swing connections make final positioning easier and help isolate the head from stress caused by soil movement or accidental impacts.
Step 7: Install the Water Connection and Backflow Protection
Shut off the water before modifying plumbing. Depending on the design and local regulations, the irrigation supply may connect to an outdoor faucet, a dedicated irrigation meter, or the home’s service line. A full permanent system commonly receives its own shutoff valve so it can be serviced without interrupting the entire house.
Install the approved backflow-prevention assembly in the required position, height, orientation, and accessible location. Some devices must remain above the highest downstream sprinkler or above grade, while others require drainage clearance and certified testing. Never improvise this portion based on what “looks about right.”
Because errors can affect drinking-water safety and cause expensive plumbing damage, hiring a licensed plumber for this connection is often the most sensible part of an otherwise DIY installation.
Research support:
Step 8: Install the Controller and Valve Manifold
Mount the controller in a dry, accessible location near an approved electrical supply. Outdoor controllers must be rated for exterior use. Follow electrical codes and manufacturer instructions, and use a qualified electrician when a new receptacle, circuit, or hardwired connection is needed.
Build the valve manifold where it can be reached for future repairs. Arrange the valves with enough space to remove solenoids, bonnets, or entire valve bodies. Install the manifold inside a valve box supported by compacted soil or gravel, with the lid flush with the finished grade.
Label each valve wire and document which zone it controls. Connect one controller station wire to each valve solenoid and use a shared common wire for the other solenoid leads. Make every underground connection with waterproof connectors specifically intended for irrigation wiring.
Step 9: Dig the Trenches
Follow utility markings and hand-dig carefully within the tolerance zone specified by your state’s 811 rules. Use a trencher only where the route is confirmed safe.
Many residential installation guides show relatively shallow trenches for lateral irrigation piping, often around 6 to 12 inches. However, required depth varies with climate, frost exposure, pipe material, manufacturer instructions, local code, soil conditions, and whether the pipe crosses an area carrying vehicles or heavy equipment.
Remove sod in reusable strips when possible and place excavated soil on tarps. At sidewalk crossings, install a larger sleeve beneath the pavement so irrigation pipe and wiring can pass through without being trapped directly in concrete or soil.
Research support:
Step 10: Assemble and Lay the Pipe
Lay pipe beside the trenches first and dry-fit the planned routes. This reveals missing fittings before everything is covered in dirt.
Working With PVC Pipe
Cut PVC squarely, remove burrs, clean the surfaces, and use the primer and solvent cement specified for the pipe. Apply cement evenly, insert the pipe fully into the fitting, twist it slightly, and hold it briefly to prevent pushout. Follow the product’s cure-time requirements before pressurizing the system.
Working With Polyethylene Pipe
Use insert fittings and the correct clamps. Warm the pipe only according to manufacturer instructions; excessive heat can weaken or deform it. Poly pipe is flexible and convenient in cold climates or curved layouts, while PVC offers rigid, orderly runs. Local practice and climate often influence the choice.
Route the direct-burial control wire along the mainline, leaving service loops near valves and the controller. Avoid unnecessary underground wire splices.
Step 11: Install Sprinkler Heads
Connect each sprinkler to the lateral line with a flexible swing assembly or an appropriate riser. Set the body vertically and position the top level with the final soil surfacenot the current bottom of the trench and not several inches above the grass like a tiny plastic monument.
Select the correct arc for each location: approximately 90 degrees for corners, 180 degrees for edges, and 360 degrees for open interior areas. Avoid installing final nozzles before flushing unless the manufacturer’s process specifically calls for them.
Use pressure-regulated sprinkler bodies where appropriate, especially when supply pressure exceeds the nozzle’s ideal range. Proper pressure reduces fogging, misting, uneven coverage, and water drifting into places that have never expressed an interest in irrigation.
Research support:
Step 12: Flush, Pressure-Test, and Adjust the System
Before replacing soil, open the irrigation supply slowly. Sudden pressurization can create water hammer or expose weak joints dramatically.
Remove the last head, flushing cap, or end fitting from each lateral. Operate one zone at a time until dirt, plastic shavings, and construction debris are expelled. Shut the zone off, install the final component, and inspect every joint under operating pressure.
Run each zone and check for:
- Leaking fittings, valves, or sprinkler connections
- Heads that fail to rise or retract
- Low pressure caused by excessive zone demand
- Spray blocked by plants, fences, or uneven grade
- Water striking buildings or pavement
- Dry areas between sprinkler patterns
- Ponding, erosion, or runoff on slopes
Adjust arcs and spray distance while the system operates at normal pressure. Complete a catch-can test by placing straight-sided containers throughout a zone, operating it for a measured period, and comparing the collected depths. Large differences indicate poor spacing, blocked heads, incorrect nozzles, pressure problems, or misalignment.
Research support:
Step 13: Backfill and Restore the Landscape
Photograph the open trenches and measure pipe locations from permanent landmarks before backfilling. Save the plan, nozzle chart, controller assignments, valve locations, wire routes, and product manuals together.
Place soil carefully around pipes and sprinkler bodies without moving them out of alignment. Remove rocks or construction debris that could concentrate pressure against the pipe. Lightly compact the soil in layers, replace the sod, and water the disturbed areas by hand until roots reestablish.
Recheck sprinkler height after the soil settles. A head that was perfectly aligned on installation day may sink enough to become the lawn mower’s next opponent.
Program the Controller for Efficient Watering
Program zones according to plant type, soil, sunlight, slope, sprinkler precipitation rate, and current weathernot one identical schedule for the entire yard.
Water during the early morning when wind and evaporation are commonly lower. Use cycle-and-soak programming on clay soil or slopes: divide a long run time into shorter cycles separated by soaking periods. This gives water time to enter the soil instead of running toward the storm drain.
A WaterSense-labeled weather-based controller or soil-moisture-based controller can reduce unnecessary watering by adjusting operation to actual conditions. A rain shutoff device is also preferable to the classic sight of sprinklers operating cheerfully during a thunderstorm.
Research support:
Common Underground Sprinkler Installation Mistakes
Designing Before Measuring Flow
Too many heads on one valve produce weak spray, incomplete patterns, and unreliable pop-up operation. Measure first and design conservatively.
Spacing Heads by Appearance
A layout can look symmetrical while leaving dry gaps. Base spacing on the selected nozzle’s performance under the expected operating pressure.
Mixing Incompatible Sprinklers
Sprays, rotors, and drip emitters generally require different run times. Keep them on separate zones unless specifically designed to deliver matched application rates.
Skipping Backflow Protection
A check valve or ordinary shutoff valve is not automatically an approved substitute. Install the assembly required by the authority having jurisdiction.
Burying Untested Connections
Pressure-test the complete system while every joint remains visible. Digging up a freshly restored lawn to find a leak is an excellent way to perform the same project twice.
Forgetting Future Maintenance
Leave valves accessible, create service loops in wiring, label zones, and keep an accurate map. Every component will eventually need inspection or repair.
Practical Installation Experiences and Lessons
The following composite experiences reflect recurring lessons from residential irrigation projects rather than one specific property.
Experience 1: The Flow Test Changed the Entire Plan
One common DIY scenario begins with a homeowner drawing six large zones based only on yard dimensions. The paper design looks beautiful, but a bucket test shows that the outdoor supply delivers less water than expected. The original zones would have required roughly 12 gallons per minute, while the dependable supply was closer to eight.
The solution is not a larger controller or more optimistic thinking. The layout must be divided into additional zones, and lower-flow rotary nozzles may be selected for appropriate areas. This adds valves and controller stations but produces stable pressure and consistent coverage. The experience demonstrates why hydraulic limits should shape the design from the beginning.
Experience 2: Extra Planning Saved a Mature Tree
Another installation encounters a proposed mainline running directly through the root zone of a large shade tree. Digging a straight trench would be convenient but could damage major roots. The route is shifted around the canopy, even though it requires extra pipe and two additional fittings.
The longer route creates slightly more work, but the tree remains protected and the line becomes easier to service. Straight is efficient only when straight does not pass through something valuable.
Experience 3: The First Pressure Test Found a Tiny Mistake
During testing, one PVC fitting develops a slow bead of water. The leak seems insignificantuntil the zone operates for several minutes and the surrounding trench begins filling. Because the connection is still exposed, the defective section can be cut out and rebuilt immediately.
Had the installer backfilled before testing, the leak might have remained hidden until a soft patch appeared in the lawn or the water bill became unusually creative. The lesson is simple: flush and test every zone while the pipe is visible, then test it again.
Experience 4: A “Dry Spot” Was Actually a Spacing Problem
A new system can appear to function perfectly while one section of turf gradually turns brown. Each sprinkler is spraying, pressure looks acceptable, and there are no leaks. A catch-can test reveals that the center of the area receives much less water than the edges.
The problem is not insufficient run time. The heads were spaced beyond their effective radius and lacked head-to-head overlap. Increasing the schedule would waste water everywhere else. Adding or repositioning a head solves the coverage problem without overwatering the entire zone.
Experience 5: Documentation Became the Most Valuable Tool
Several years after installation, a homeowner wants to add a walkway. Fortunately, the original installer photographed every open trench and recorded measurements from the foundation and fence corners. The contractor can identify the mainline and control-wire path before excavation begins.
Without documentation, locating irrigation components becomes a muddy guessing game. Photos, measurements, zone labels, valve-box locations, nozzle information, and wiring notes cost almost nothing to create, yet they can save hours of future troubleshooting.
Experience 6: Seasonal Preparation Prevented Freeze Damage
In a cold-winter climate, an otherwise excellent installation can fail if trapped water freezes inside valves, backflow components, or piping. Before the first hard freeze, the supply is shut off and the system is winterized using the method appropriate for its design.
Compressed-air blowouts require controlled pressure, adequate airflow, eye protection, and correct procedures. Excessive air pressure can damage components or create dangerous projectiles. Many homeowners wisely hire an irrigation professional for this annual service, especially when the system was not specifically designed for manual or automatic draining.
Research support:
Maintaining Your New Sprinkler System
Inspect the system at the beginning of each watering season and at least monthly while it is active. Run every zone manually and look for broken heads, clogged nozzles, crooked spray patterns, sunken bodies, valve leaks, wet areas, overspray, and plants blocking distribution.
Clean filters, adjust schedules as seasons change, and raise sprinkler heads as turf or mulch levels increase. Check the rain sensor or soil-moisture sensor, replace damaged waterproof wire connections, and arrange required backflow testing.
In freezing climates, winterize before sustained freezing weather. In spring, open the irrigation supply slowly and inspect each zone before returning the controller to automatic operation.
Conclusion
Learning how to install an underground sprinkler system is primarily an exercise in planning. The digging may be the most visible part, but accurate measurements, hydraulic calculations, proper zoning, head-to-head coverage, approved backflow protection, careful flushing, and thorough testing determine whether the finished system performs well.
Take time to create a scaled layout, confirm available pressure and flow, separate incompatible watering methods, and comply with local codes. Test everything before replacing the soil, document every underground route, and program the controller according to real landscape needs. The reward is an irrigation system that waters plants instead of pavementand lets you enjoy the yard without spending every evening wrestling a hose that seems personally offended by corners.