Orchids have a talent for making people feel dramatic. One month, your plant is a glamorous windowsill celebrity dripping with flowers. A few weeks later, the blooms fall, the spike looks suspiciously stick-like, and you start wondering whether you accidentally adopted a very expensive leaf arrangement. Good news: your orchid is probably not dead, offended, or plotting revenge. It is simply resting.
Learning how to get orchids to rebloom is less about secret potions and more about understanding what the plant needs after flowering. Most store-bought orchids are Phalaenopsis orchids, also called moth orchids, and they are among the easiest orchids to grow indoors. They can rebloom year after year when given the right mix of bright indirect light, careful watering, humidity, fertilizer, fresh potting mix, and a small nighttime temperature drop.
This guide focuses mainly on Phalaenopsis because that is the orchid most people bring home from grocery stores, garden centers, and “I deserve something pretty” shopping trips. However, many of the care principles also help other common orchid types, including Cattleya, Dendrobium, Oncidium, and Cymbidium. The trick is to stop treating an orchid like a disposable bouquet and start treating it like the long-lived houseplant it really is.
Why Orchids Stop Blooming
An orchid bloom cycle is naturally temporary. Flowers may last for several weeks or even months, but eventually they fade. After blooming, the plant shifts energy into roots and leaves. That quiet phase is not failure; it is the orchid recharging its batteries. Think of it as the plant version of putting on sweatpants after a fancy party.
When an orchid refuses to rebloom for a long time, the most common cause is not laziness. It is usually one of five problems: too little light, poor root health, improper watering, lack of nutrients, or temperatures that never signal the plant to produce a new flower spike. Indoor orchids can survive in less-than-perfect conditions, but blooming requires a little more precision.
Healthy leaves and roots are the foundation of repeat blooms. If the leaves are firm and medium green, and the roots are plump, silvery-green, or green after watering, your orchid has a good chance of blooming again. If the roots are mushy, brown, hollow, or smell unpleasant, the plant needs recovery before romance. Flowers are a luxury; roots are rent.
Step 1: Give Your Orchid Enough Bright, Indirect Light
Light is the number one reason many orchids do not rebloom. Phalaenopsis orchids like bright, indirect light. They do not want to bake in harsh afternoon sun, but they also do not want to live in a dim corner beside your Wi-Fi router. A bright east-facing window is often ideal. A shaded south or west window can also work if the light is filtered with a sheer curtain.
The leaf color can tell you a lot. Deep, dark green leaves may look lush, but they often mean the orchid is not getting enough light to flower. Yellowish leaves or burned patches may mean too much direct sun. The sweet spot is usually a healthy medium green. If your orchid has produced leaves for a year but no new spike, move it closer to a brighter window and observe it for several weeks.
Simple Light Test
Place your hand between the window and the plant during the brightest part of the day. If you see a soft, fuzzy shadow, the light is often suitable for Phalaenopsis orchids. If the shadow is sharp and intense, the sun may be too strong. If there is barely any shadow, your orchid may be living in the botanical equivalent of a basement apartment.
Step 2: Water Correctly, Not Constantly
Orchids do not grow in regular potting soil, and they should not be watered like peace lilies, pothos, or basil. Most common orchids grow in chunky bark, sphagnum moss, or another airy orchid mix. Their roots need moisture, but they also need oxygen. Sitting in water is one of the fastest ways to cause root rot.
For many indoor Phalaenopsis orchids, watering once every 7 to 10 days is a reasonable starting point, but the actual schedule depends on temperature, humidity, pot size, potting medium, and airflow. Bark dries faster than moss. Clay pots dry faster than plastic pots. A sunny kitchen dries faster than a cool bedroom. Your orchid does not care what day of the week it is; it cares whether its roots are ready.
How to Water an Orchid
Take the orchid to the sink and water thoroughly with room-temperature water until water runs freely through the drainage holes. Let it drain completely before putting it back in its decorative pot. Never let the inner pot sit in a puddle. Also, avoid leaving water in the crown, the center where the leaves meet. Water trapped there can encourage rot, especially in cool rooms.
If your orchid is in clear plastic, use the roots as a guide. Green roots usually mean they are still moist. Silvery or pale roots often mean it is time to water. If the pot feels unusually heavy, wait. If it feels light and the medium is dry, water. Congratulations, you are now using science instead of panic.
Step 3: Feed Lightly During Active Growth
Orchids are not heavy feeders, but they do need nutrients to support new leaves, roots, and future flower spikes. Use a balanced orchid fertilizer according to the label directions, usually diluted. Many growers prefer the “weakly, weekly” idea: feed lightly and regularly during active growth rather than dumping on a strong dose once in a while.
A practical approach is to fertilize every third or fourth watering during the growing season. Flush the pot with plain water occasionally to prevent fertilizer salts from building up in the potting mix. During darker winter months, when growth slows, reduce feeding. More fertilizer does not force blooms from a stressed orchid. It only creates a salty mess and possibly a plant that looks personally betrayed.
Step 4: Create a Nighttime Temperature Drop
Phalaenopsis orchids often need a temperature cue to initiate a new flower spike. In nature, seasonal changes tell the plant when it is time to bloom. Indoors, temperatures can be so steady that the orchid never receives the memo. A few weeks of cooler nights can help trigger reblooming.
For many moth orchids, daytime temperatures around 70 to 85 degrees Fahrenheit and nighttime temperatures around 55 to 65 degrees Fahrenheit can encourage spike formation. You do not need to freeze the plant. In fact, temperatures below 50 degrees Fahrenheit can damage many orchids. The goal is a gentle cool-down, not a survival challenge.
In fall, try placing the orchid near a bright window where nights are slightly cooler, but keep it away from cold drafts, heating vents, fireplaces, and doors that open to winter air. After several weeks, look for a new flower spike emerging from between the leaves. A new spike often looks like a small mitten-shaped growth, while roots tend to have rounded green tips.
Step 5: Prune the Flower Spike the Right Way
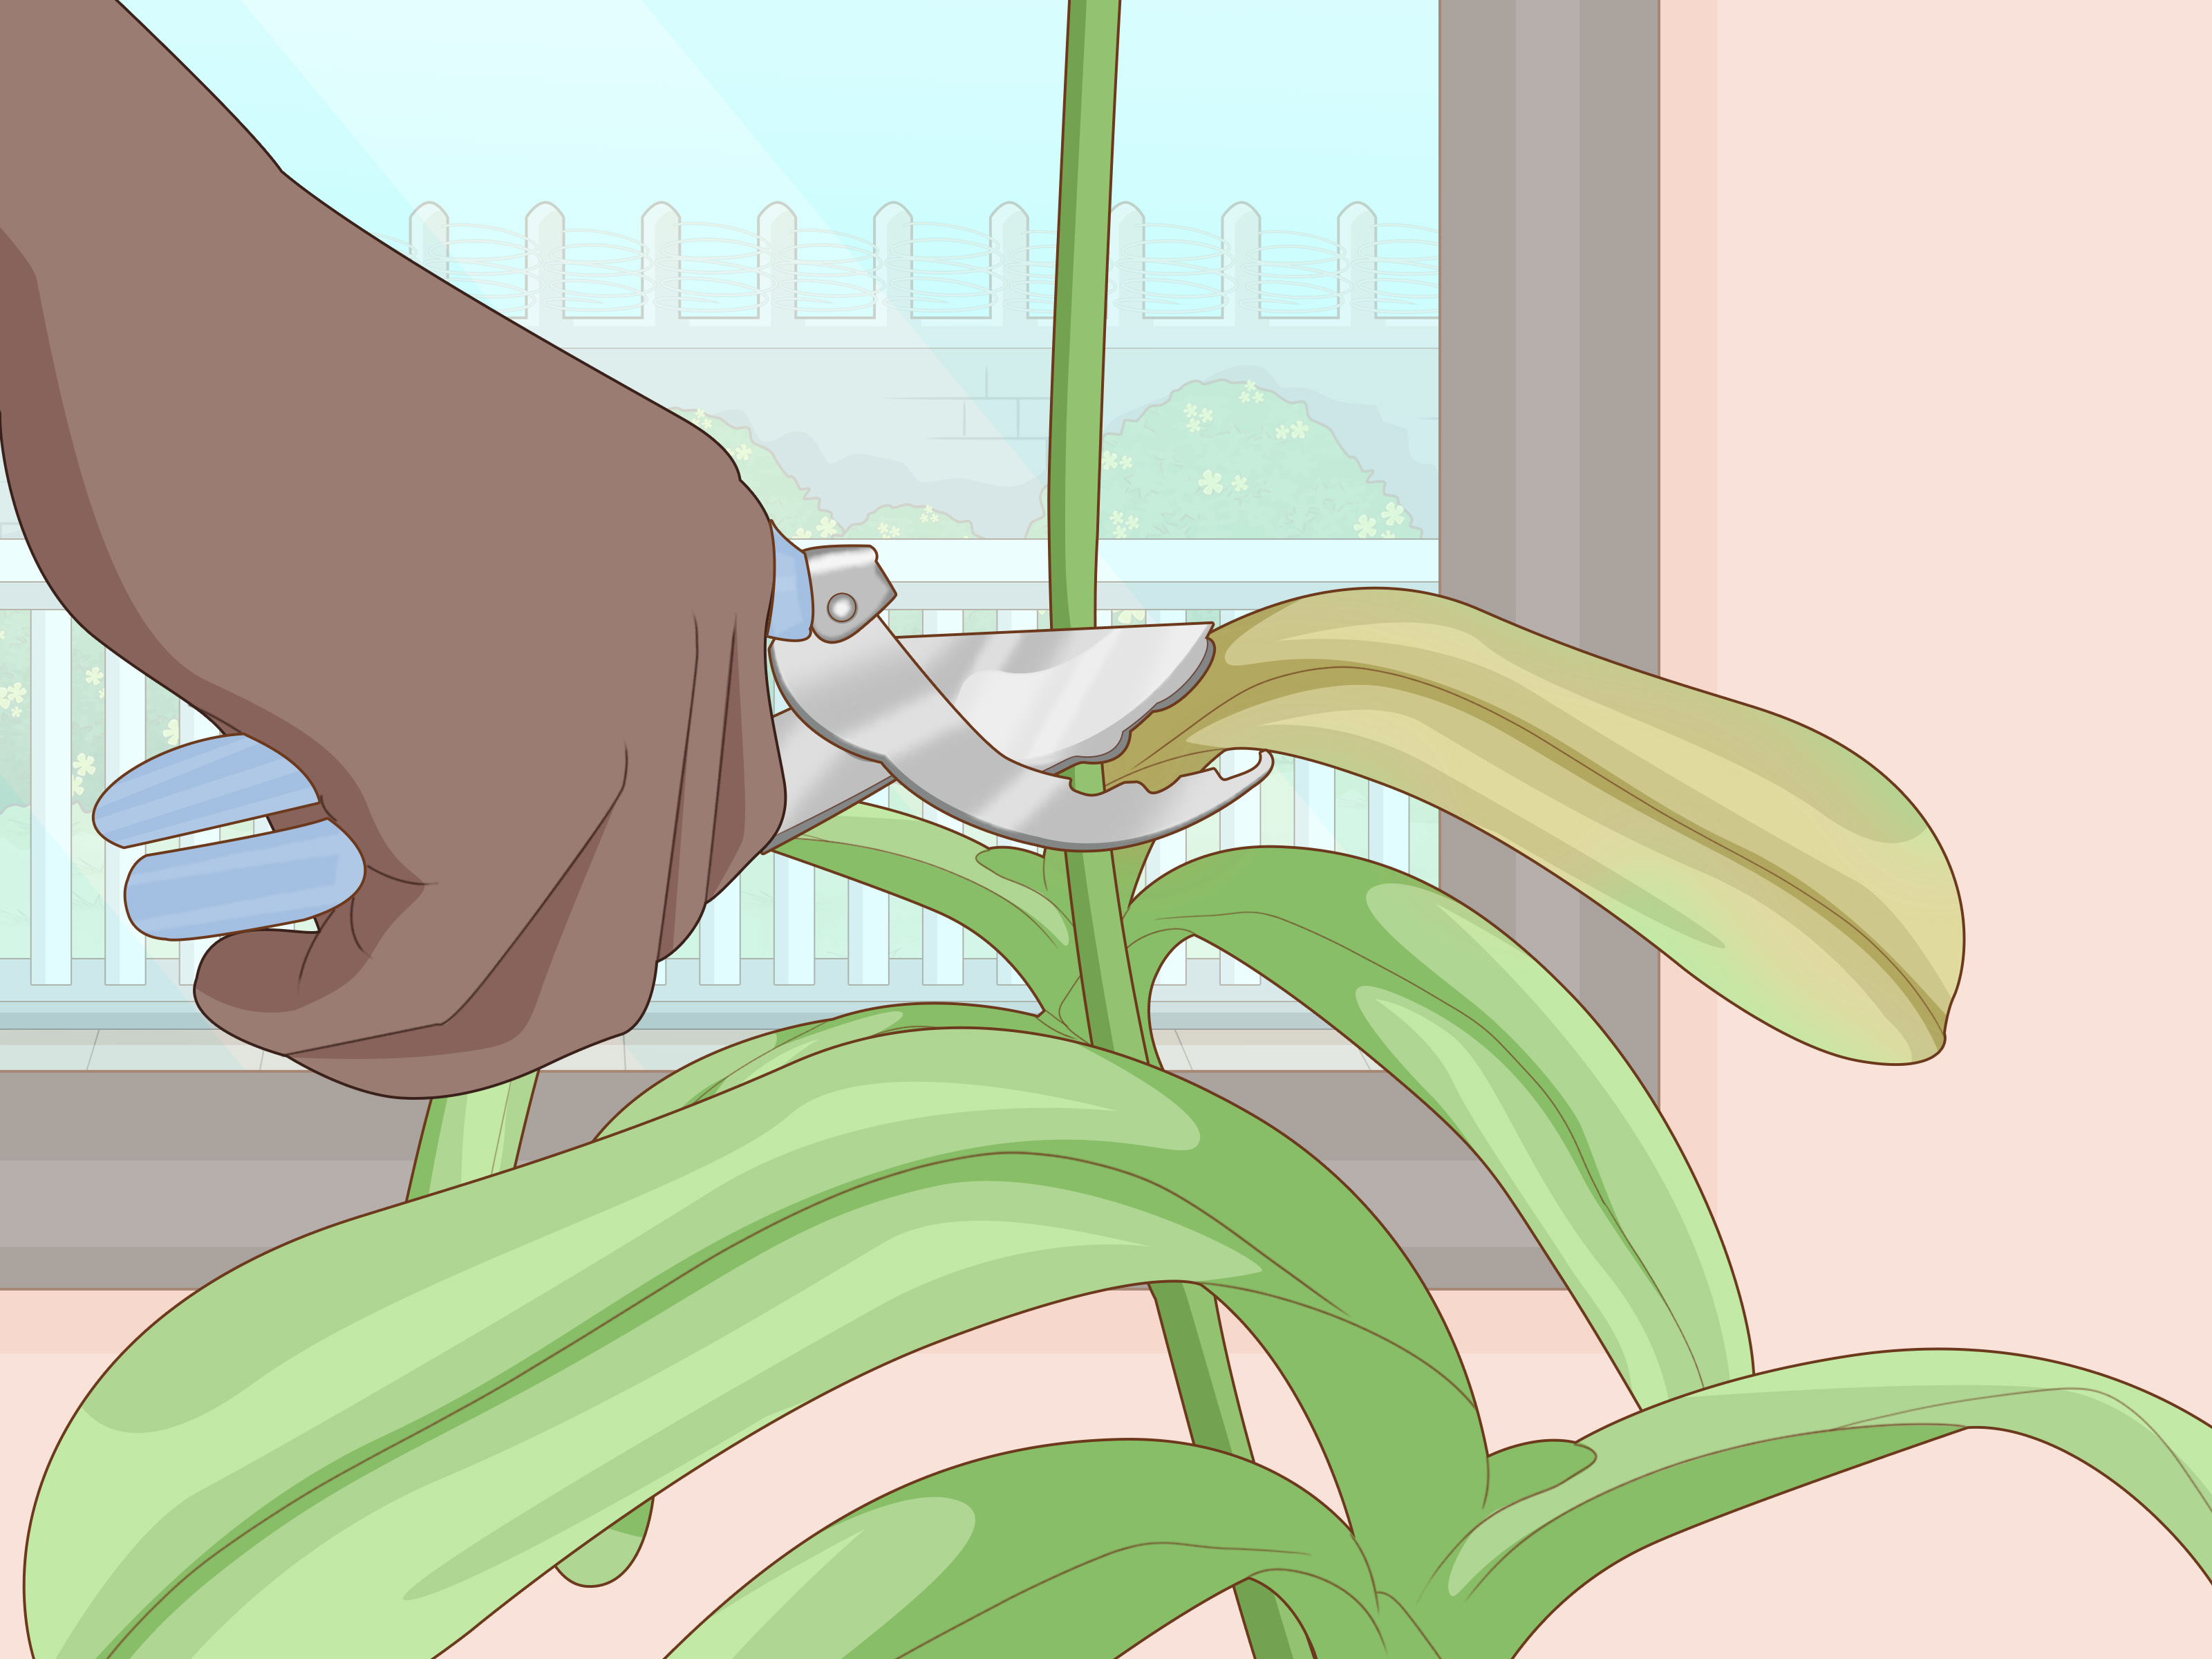
After the last flower falls, you have a choice. If the spike is brown, dry, or hollow, cut it near the base with clean, sterilized scissors or pruners. This helps the plant conserve energy and focus on stronger future growth. If the spike is still green and healthy, some growers cut it above a node to encourage a side branch and possible rebloom.
However, there is a trade-off. Reblooming from an old spike may produce flowers sooner, but it can also drain energy from a weak orchid. If your plant has small leaves, poor roots, or has been blooming for many months, cut the spike at the base and let it rest. A healthy orchid can produce a stronger new spike later. Patience may not be flashy, but it is often how you get the best flowers.
Step 6: Repot When the Mix Breaks Down
Orchid potting mix does not last forever. Bark breaks down over time, becoming compacted and soggy. Once that happens, air cannot move around the roots, and watering becomes risky. A Phalaenopsis orchid usually needs repotting every one to three years, especially if the potting medium smells sour, stays wet too long, or the roots are crowded and circling heavily.
The best time to repot is after flowering, when the orchid is not in bloom and new growth is beginning. Do not repot a healthy blooming orchid just because you are bored on a Saturday. Repotting during bloom can shock the plant and shorten the flower display.
Repotting Basics
Choose a pot with excellent drainage and use a fresh orchid mix, such as bark-based medium for Phalaenopsis. Remove old mix from around the roots, trim dead or mushy roots with sterile tools, and settle the plant into the new pot. Do not bury the crown. After repotting, water lightly and give the orchid time to adjust. It may sulk briefly, but most orchids recover well when the roots finally get fresh air.
Step 7: Keep Humidity Comfortable
Most orchids appreciate moderate humidity, often around 40 to 60 percent for common indoor types. Unfortunately, many homes become dry, especially in winter. Dry air can contribute to bud drop, wrinkled leaves, and slow growth. If your orchid develops buds that yellow and fall before opening, low humidity, sudden temperature swings, or inconsistent watering may be involved.
To raise humidity, group houseplants together, use a humidifier, or place the orchid on a pebble tray filled with water. The pot should sit on the pebbles, not directly in the water. Misting is less reliable because it raises humidity only briefly and can leave water sitting on leaves. A humidifier is less romantic than misting, but your orchid is interested in results, not spa theater.
Step 8: Provide Gentle Air Movement
Air movement helps keep orchid roots and leaves healthy. Stagnant air combined with wet potting mix can invite fungal and bacterial problems. You do not need a wind tunnel. A room with normal air circulation is usually fine. If you grow several orchids together or use a humidifier, a small fan running nearby can help, as long as it does not blow directly and constantly on the plants.
Step 9: Avoid Common Reblooming Mistakes
Many orchid problems come from good intentions delivered with too much enthusiasm. Overwatering is the classic mistake. The plant starts looking sad, so the owner waters more. The roots rot, the leaves wrinkle, and everyone blames the orchid for being “fussy.” In reality, many orchids die from too much love and not enough drainage.
- Do not use regular potting soil. Most orchids need an airy orchid mix, not dense soil.
- Do not let the pot sit in water. Drainage is non-negotiable.
- Do not hide the orchid in a dark room. Low light keeps orchids leafy but bloomless.
- Do not blast it with direct afternoon sun. Bright indirect light is the goal.
- Do not fertilize a sick orchid heavily. Fix roots, light, and watering first.
- Do not expect instant flowers. Reblooming can take several months.
How Long Does It Take an Orchid to Rebloom?
A healthy Phalaenopsis orchid may rebloom in six to nine months, though some bloom sooner and some take a full year. Once a new spike appears, it may take weeks or months for buds to develop and open. The timeline depends on the plant’s health, light levels, temperature, and care consistency.
If your orchid grows new roots and leaves but does not bloom, increase light gradually and provide cooler nights for a few weeks. If it does not grow roots or leaves, focus on recovery. A plant that is struggling to survive will not prioritize flowers, which is honestly relatable.
What About Other Orchid Types?
Not all orchids bloom the same way. Cattleya orchids generally need brighter light than Phalaenopsis and often bloom from new growth. Dendrobiums vary widely; some need a drier or cooler rest period, while others prefer warmer conditions. Cymbidiums often need bright light and cool nights to set buds. Oncidiums usually like bright filtered light and good moisture while actively growing.
Before applying Phalaenopsis rules to every orchid in your home, identify the type. The plant tag is your best friend. If the tag vanished sometime between the store and your kitchen counter, compare leaf shape, growth habit, and flower structure. A little identification can prevent a lot of confusion.
Troubleshooting: Why Your Orchid Still Will Not Rebloom
The Leaves Are Dark Green
Your orchid may need more light. Move it closer to an east-facing window or a bright filtered window. Make changes gradually to avoid sunburn.
The Leaves Are Wrinkled
Wrinkled leaves can mean dehydration, but the cause may be underwatering or root rot. Check the roots before watering more. If roots are dead or mushy, repot and trim damaged tissue.
The Buds Form, Then Drop
Bud drop can happen when the plant experiences sudden temperature changes, dry air, low light, inconsistent watering, or exposure to drafts. Keep conditions steady once buds appear.
The Orchid Has Lots of Roots Outside the Pot
Those may be aerial roots, and they are normal. Do not cut healthy aerial roots just because they look like the plant is trying to escape. Orchids enjoy being a little weird.
The Spike Is Green but No Flowers Appear
Give it time, improve light, and maintain consistent care. If the spike stalls for a long period and the plant seems weak, cut it back and let the orchid focus on leaves and roots.
A Simple Monthly Orchid Rebloom Care Plan
Month 1 after blooming: Remove dead flowers. Decide whether to cut the spike at the base or above a node if it remains green and the plant is strong. Check roots and potting mix.
Months 2 to 4: Focus on leaf and root growth. Provide bright indirect light, water only when the medium approaches dryness, and fertilize lightly during active growth.
Months 5 to 7: Increase light if needed and begin offering cooler nighttime temperatures for several weeks, especially in fall. Watch for a new spike emerging between the leaves.
Months 8 and beyond: Once buds appear, keep conditions steady. Avoid moving the plant repeatedly, protect it from drafts, and continue careful watering. The reward is a fresh round of blooms that feels like a tiny indoor parade.
Real-Life Experiences: What Actually Helps Orchids Rebloom
One of the most useful lessons from growing orchids is that they respond better to steady care than dramatic interventions. Many beginners treat reblooming like a magic trick. They try banana water, ice cubes, cinnamon ceremonies, motivational speeches, and the occasional guilty stare. Some of these habits are harmless, some are not helpful, and a few can cause real problems. The orchids that rebloom most reliably are usually the ones receiving ordinary care on a consistent schedule.
A common experience is the “beautiful but bloomless” orchid. The plant has shiny leaves, maybe a few new roots, but no flower spike. In many homes, this orchid is sitting too far from the window. It survives because Phalaenopsis orchids tolerate lower light, but it does not receive enough energy to bloom. Moving it to a brighter east window often changes the story. The plant may not spike immediately, but after several weeks of improved light and a mild nighttime temperature drop, new growth begins to look more purposeful.
Another familiar scenario is the orchid in a decorative pot with no visible drainage. It looks stylish, but inside, the roots may be sitting in old water. Many orchids are sold in a clear plastic liner tucked inside a ceramic cachepot. That setup is fine as long as the grower removes the liner to water and lets it drain completely before returning it. The trouble begins when water collects at the bottom of the outer pot. The leaves wrinkle, the owner assumes the orchid is thirsty, and more water is added. The roots rot quietly while the plant declines loudly.
Repotting can feel intimidating the first time, but it often becomes the turning point. A plant that has not bloomed in years may be trapped in broken-down bark or packed moss that stays wet too long. Once the dead roots are removed and the orchid is placed in fresh bark, the plant may begin producing healthy root tips within weeks. New roots are a very good sign. They are the orchid’s way of saying, “Fine, maybe I will cooperate.” Blooms may still take months, but root recovery is progress.
The nighttime temperature trick is another real-world reblooming favorite. Many people keep homes at nearly the same temperature day and night. That comfort is nice for humans but sometimes too monotonous for orchids. In fall, placing a healthy Phalaenopsis near a bright, slightly cooler window can encourage a spike. The key is moderation. A cool night is helpful; a freezing draft is not. If the window gets icy or the leaves touch cold glass, move the plant back a bit.
Patience is the hardest orchid skill. A plant may need months to rebuild energy after blooming. Cutting a weak spike, improving light, and caring for roots may feel less exciting than forcing quick flowers, but it usually leads to a stronger plant. The best orchid growers are not necessarily people with fancy greenhouses. They are people who notice small changes: a new root tip, a firmer leaf, a spike beginning to rise. Reblooming success is built from those small wins.
In the end, getting orchids to rebloom is not about perfection. It is about giving the plant the conditions that make blooming possible: bright indirect light, healthy roots, careful watering, gentle feeding, humidity, fresh potting mix, and a seasonal temperature cue. Do those things well, and your orchid may surprise you with flowers again just when you had started calling it “that green thing on the windowsill.”
Conclusion
Getting orchids to rebloom is absolutely possible, especially with Phalaenopsis orchids. The process begins after the last flower fades, when the plant enters a recovery phase. Instead of tossing it or hiding it behind the toaster, give it what it needs to rebuild: bright indirect light, proper watering, moderate humidity, light fertilizer, and fresh orchid mix when needed. Then, when the plant is healthy, use cooler nighttime temperatures to encourage a new flower spike.
The biggest secret is consistency. Orchids do not need constant fussing. They need the right environment and enough time. When roots are healthy and leaves are strong, blooms become much more likely. Treat your orchid like a long-term houseplant, not a temporary decoration, and it can reward you with elegant flowers for many years.
Note: This article was written in standard American English and synthesized from reputable orchid-care guidance, including university extension resources, botanical garden recommendations, and expert orchid society care practices.