Note: This guide focuses on practical, real in-game methods for earning easy rupees in The Legend of Zelda: A Link to the Past. Optional tricks, glitches, and modern emulator conveniences are clearly marked so you can choose whether you want a clean classic run or a “Link has discovered accounting fraud” run.
Why Rupees Matter More Than They Look
In The Legend of Zelda: A Link to the Past, rupees are not just shiny floor confetti. They are your ticket to key items, survival tools, upgrades, mini-games, and the occasional questionable transaction with a monkey. Hyrule may be cursed by dark magic, but it still runs on cash. Very realistic, unfortunately.
The good news is that getting easy rupees in A Link to the Past is not difficult once you know where the game hides its best money spots. Some methods are one-time treasure grabs, some are repeatable farming routes, and some are mini-games that reward either skill, luck, or the spiritual patience of someone waiting for toast to pop.
This guide breaks down the best ways to earn rupees fast, from early-game treasure routes to Dark World money-making tricks. Whether you need 500 rupees for Zora’s Flippers, extra cash for the Pond of Happiness, or just want to hit the 999 rupee cap because the number looks nice, here is how to fill Link’s wallet without turning Hyrule into a second job.
Rupee Basics: Know What You Are Picking Up
Before farming rupees, it helps to understand what each color is worth. In A Link to the Past, ordinary rupees are simple:
- Green rupee: 1 rupee
- Blue rupee: 5 rupees
- Red rupee: 20 rupees
The game also includes larger rewards from chests and special events, including 50, 100, and 300 rupee prizes. These are the real money-makers. A screen full of bushes may feel productive, but opening one 300 rupee chest is like Link receiving a tax refund from the Kingdom of Hyrule.
Also remember that Link can carry up to 999 rupees. That sounds generous until you start grabbing 300 rupee rewards while already near the cap. If your wallet is full, extra rupees disappear into the void, probably where all missing socks and dungeon keys go. Spend before opening big chests whenever possible.
The Best Early-Game Rupee Methods
1. Raid Kakariko Village Like a Responsible Hero
Kakariko Village is one of the easiest early places to collect rupees. Check houses, pots, chests, and hidden spots. You are not “stealing”; you are conducting emergency hero fundraising. The village contains useful early money, and it is also where you can buy an important Bottle for 100 rupees. That Bottle is worth the cost because it lets you carry fairies and potions, which is just a fancy way of saying “portable second chances.”
For a first-time player, Kakariko is a great place to build your first cash cushion. Do not rush through it. Explore buildings, lift pots, talk to people, and check suspicious areas. The early game rewards curiosity, and A Link to the Past loves hiding useful items behind ordinary-looking walls, shelves, and bushes.
2. Bomb the Wall Behind Sahasrahla
Once you have Bombs, visit Sahasrahla near the Eastern Palace area. Behind him is a cracked wall you can bomb open. Inside are chests with useful rewards, including two 50 rupee prizes. That is an easy 100 rupees, and it comes early enough to matter.
This is one of the best beginner money spots because it teaches an important Zelda rule: if a wall looks suspicious, introduce it to explosives. Hyrulean architecture is apparently built on the honor system.
3. Grab the Eastern Palace 100 Rupee Chest
Near the beginning of the Eastern Palace, there is a chest containing 100 rupees. It is not repeatable, but it is a strong early boost. If you are already exploring the dungeon, it is worth collecting before moving on. Small detours like this can help you afford important purchases without having to grind enemies outside like a tiny green debt collector.
4. Collect the Lake Hylia 300 Rupee Reward
One of the best early-to-mid game rupee grabs is near Lake Hylia. On the southwest side of the lake, between Lake Hylia and the Great Swamp area, look for a cracked wall in the rocky landscape. Bomb it open, defeat the Mini-Moldorms inside, and you can receive a huge 300 rupee reward.
This is one of the most efficient ways to build toward Zora’s Flippers. If you are short on cash, this single cave can do more for your finances than twenty minutes of grass-cutting. Link may be brave, but he should also be efficient.
Save 500 Rupees for Zora’s Flippers
One of the biggest early expenses in A Link to the Past is Zora’s Flippers, which cost 500 rupees at Zora’s Waterfall. Buy them as soon as you can reasonably afford them. They let Link swim in deep water, opening up shortcuts, exploration routes, and access to important locations.
The best approach is to treat 500 rupees as your first major savings goal. Instead of gambling everything away in mini-games, use guaranteed treasure routes: Kakariko Village, Sahasrahla’s hidden room, the Eastern Palace chest, and the Lake Hylia 300 rupee cave. Combine those, and you should reach 500 without much pain.
Once you buy the Flippers, more opportunities open up, including the Pond of Happiness in Lake Hylia. That is where rupees become upgrades, and upgrades become fewer moments of screaming at your screen because you ran out of arrows.
Use the Pond of Happiness for Bomb and Arrow Upgrades
The Pond of Happiness is located in a cave on the island in Lake Hylia, and you need the Flippers to reach it. Inside, you can toss rupees into the pond. After throwing in enough, a fairy appears and offers to upgrade either your Bomb capacity or Arrow capacity.
Each upgrade cycle requires 100 rupees. Bombs can eventually be upgraded from 10 to 50, and Arrows can eventually be upgraded to 70. Fully upgrading both costs a lot, but it is one of the most useful long-term investments in the game.
Do not feel pressured to max everything immediately. A smart strategy is to upgrade gradually. Add a few Bomb upgrades if you like exploring caves and cracked walls. Add Arrow upgrades if you depend on the Bow for enemies and bosses. If your wallet is nearly full, dumping money into the pond is better than wasting future chest rewards.
Best Dark World Rupee Methods
1. Village of Outcasts: Two 300 Rupee Prizes
Once you reach the Dark World, the Village of Outcasts becomes one of the best places to get easy rupees. There are two separate 300 rupee rewards in town. One is found in a northeastern house, while another is in a windowless hut toward the southwestern side that you can bomb open.
That is 600 rupees from one village. In financial terms, this is what experts call “absolutely worth it.” In Zelda terms, it is what Link calls “finally, I can afford to make bad decisions at mini-games.”
2. Plains of Ruin 300 Rupee Cave
In the Dark World’s Plains of Ruin, which corresponds to the Great Swamp area in the Light World, look for a cracked wall in the northeastern part of the region. Bomb it open and you can receive another 300 rupees from the creature inside. There are also extra chests beyond that point, making this one of the most rewarding Dark World stops.
This is a great route to combine with the Village of Outcasts rewards. If your wallet is not close to full, these Dark World treasures can quickly push you toward 999 rupees.
3. Dark World Shooting Gallery
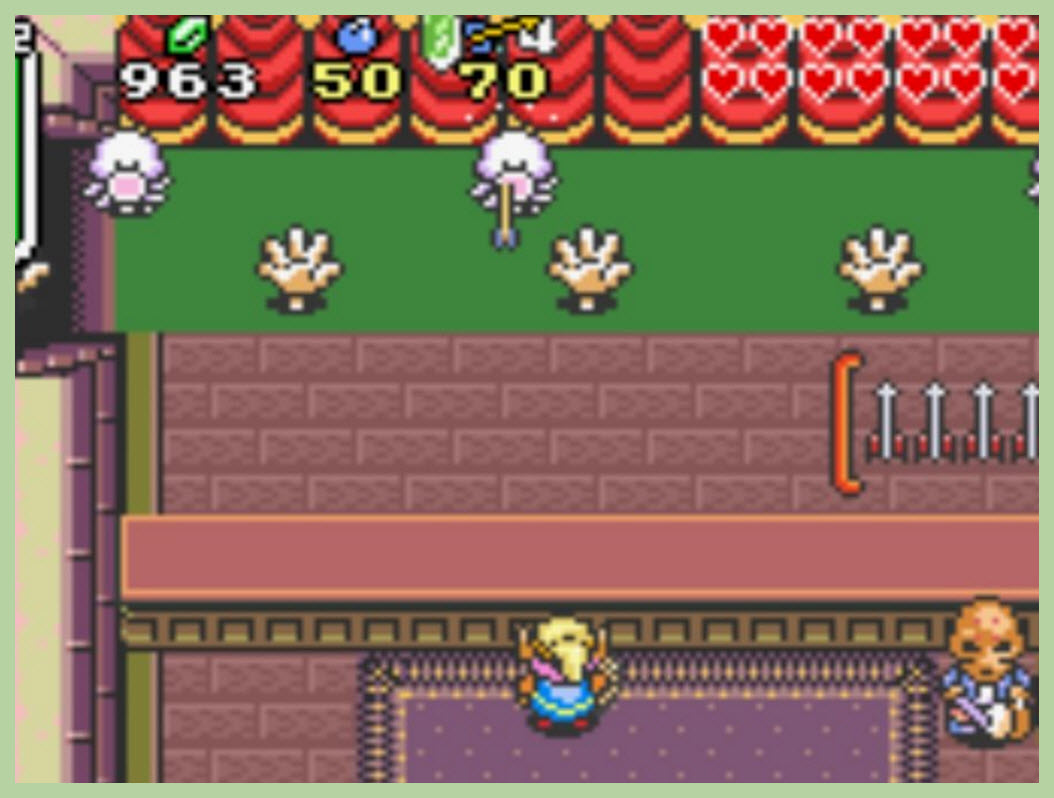
The Shooting Gallery is a skill-based mini-game in the Dark World. It costs 20 rupees to play, and you shoot targets with arrows. Consecutive hits increase the payout: 4, 8, 16, 32, and 64 rupees. Hit all five targets in a row and you can win 124 rupees, which means a 104 rupee profit after the entry fee.
This is one of the best repeatable rupee methods if you are good with the Bow. If you are not good with the Bow, it becomes a fast way to donate money to a man running an octopus-target carnival in the apocalypse. Practice a bit before relying on it.
4. The Digging Game
South of the Village of Outcasts is the Digging Game. It costs 80 rupees to play, and Link gets 30 seconds to dig for treasure. You can find rupees, magic, items, and eventually a Piece of Heart. As a pure rupee farm, it is inconsistent, but it often lets you earn back much of the cost while also chasing the Heart Piece.
The trick is simple: dig quickly, do not overthink the exact location, and accept that randomness is the real boss fight. The Digging Game is best when you already want the Heart Piece. Treat any profit as a bonus, like finding fries at the bottom of the bag.
The Lost Woods Treasure Chest Game: Big Reward, Big Risk
In the far northern Lost Woods, there is a Treasure Chest Game that costs 100 rupees to play. You choose one of three chests, and the possible prizes are 1 rupee, 20 rupees, or 300 rupees.
In a normal classic run, this is risky. You can win big, but you can also pay 100 rupees to receive 1 rupee, which is basically Hyrule’s most insulting business model. If you are playing on a modern version with rewind or save-state features, this mini-game can become much easier to exploit. In a pure SNES-style run, however, it is not the most reliable method.
Use the Lost Woods game when you have spare cash and feel lucky. Do not use it when you are desperately saving for Flippers unless you enjoy watching your savings vanish faster than Link falling into a pit.
The Chris Houlihan Room: Cool, Secret, and Optional
The Chris Houlihan Room is one of the most famous secrets in A Link to the Past. It contains 45 blue rupees, worth 225 rupees total. However, it is not a normal intended route. It is accessed through glitch behavior in the SNES version, and it is not available through normal play in some later versions.
Because of that, treat it as an optional curiosity, not a standard rupee route. If you are playing casually and want to see one of the game’s strangest secrets, it is fun. If you are writing your own “honorable hero of Hyrule” story, maybe skip the glitch and earn your money the old-fashioned way: bombing walls and taking treasure from strangers’ caves.
Best Repeatable Rupee Farms Ranked
Best for Consistency: Dark World Shooting Gallery
If your aim is strong, the Shooting Gallery is the best repeatable money method. A perfect round gives a major profit, and even three consecutive hits can put you ahead. It rewards skill rather than luck, which makes it feel fairer than chest games.
Best for Casual Play: Digging Game
The Digging Game is not always profitable, but it is relaxing and useful if you still need the Heart Piece. You can dig up enough rupees to soften the 80 rupee entry fee, and sometimes you will come out ahead.
Best for Fast One-Time Cash: 300 Rupee Chests and Caves
If you need rupees quickly, prioritize the 300 rupee rewards. Lake Hylia, Hyrule Castle Dungeon, Plains of Ruin, and Village of Outcasts all provide big payouts. These are not repeatable, but they are the fastest way to fill your wallet without gambling.
Best for Risk Lovers: Lost Woods Chest Game
The Lost Woods game can pay 300 rupees, but it costs 100 per attempt. In a normal run, it is more thrilling than reliable. Use it for fun, not financial planning.
Smart Spending: What to Buy First
Getting rupees is only half the job. Spending them wisely keeps you from grinding when you should be adventuring. Here is a practical priority order:
- Bottle: Buy the early Bottle so you can carry fairies or potions.
- Zora’s Flippers: Save 500 rupees as soon as possible because swimming unlocks major routes.
- Bomb and Arrow upgrades: Use the Pond of Happiness when your wallet is getting full.
- Quest expenses: Keep money ready for Kiki the Monkey, the Super Bomb, and other required costs.
- Potions: Buy them when preparing for difficult dungeons or boss fights.
The main rule is simple: do not walk around at 999 rupees unless you have already handled your important purchases. A full wallet sounds nice, but every extra rupee you find after that is wasted.
Common Rupee Mistakes to Avoid
Opening Big Chests While Near the Cap
If you have 850 rupees and open a 300 rupee chest, you only gain 149 before hitting the cap. Spend first, then loot. Link may not have a bank account, but he can still practice basic financial hygiene.
Gambling Too Early
The chest games are tempting, especially the Lost Woods version, but early in the game you need guaranteed money more than you need excitement. Save gambling for when losing 100 rupees will not ruin your plans.
Ignoring Bombable Walls
Many strong rewards hide behind cracked walls. Always carry Bombs, and always investigate suspicious cliffs and cave interiors. If the wall looks like it has been sneezing dust for thirty years, bomb it.
Not Planning for Zora’s Flippers
The 500 rupee cost is steep, but the Flippers are worth it. Plan for them early instead of spending everything on mini-games or potions you do not need yet.
A Simple Route to 500 Rupees for Flippers
If your immediate goal is buying Zora’s Flippers, try this route:
- Explore Kakariko Village and collect early rupees from houses, pots, and chests.
- Buy the Bottle only if you have enough money left to keep saving comfortably.
- After getting Bombs, open the hidden room behind Sahasrahla for 100 rupees.
- Collect the 100 rupee chest in Eastern Palace.
- Visit the Lake Hylia cave and claim the 300 rupee reward.
That combination should put you near or above 500 rupees without tedious farming. From there, head to Zora’s Waterfall, buy the Flippers, and enjoy the freedom of swimming like a tiny heroic trout.
A Simple Route to 999 Rupees in the Dark World
Once you reach the Dark World, filling your wallet becomes much easier. Start with the Village of Outcasts and collect the two 300 rupee prizes. Then visit the Plains of Ruin cave for another 300 rupees. If you are not capped yet, play the Shooting Gallery or Digging Game for extra income.
This route is especially useful before investing in Pond of Happiness upgrades. Fill your wallet, swim to Lake Hylia, dump rupees into upgrades, then return to Dark World money spots or repeatable games when needed. It is not glamorous, but neither is fighting Ganon with a tiny bomb bag.
Extra Experience: What Rupee Farming Actually Feels Like in A Link to the Past
The funny thing about rupee farming in A Link to the Past is that the game rarely feels like it is forcing you to grind. Instead, it quietly rewards the kind of player who cannot leave a cracked wall alone. If you are the type who walks into a room and immediately thinks, “That wall looks emotionally unstable,” congratulations: you are already halfway to being rich.
My favorite rupee experience is the first time you realize the Lake Hylia cave is not just another monster closet. You bomb the wall, deal with the Mini-Moldorms, and suddenly the game hands you 300 rupees. It feels enormous at that point. You go from “I hope I can afford swimming lessons from a fish monarch” to “Zora, prepare the premium flipper package.” That one cave changes the pace of the early game because it turns the 500 rupee goal from intimidating into very manageable.
The Dark World is where money starts to feel almost suspiciously available. The Village of Outcasts has the atmosphere of a place where no one files receipts, and the game proves it by hiding two 300 rupee rewards close together. It is one of those classic Zelda moments where exploration pays off so well that you start checking every building like Link is secretly a property inspector.
The Shooting Gallery, on the other hand, is where confidence goes to be humbled. In theory, it is beautiful: pay 20 rupees, hit five targets, walk away with 124. In practice, your first few rounds may involve one clean shot, three embarrassing misses, and one arrow that seems personally committed to disappointing you. But once you get the rhythm, it becomes one of the most satisfying repeatable rupee methods in the game. It feels earned, not random.
The Digging Game has a different personality. It is chaotic, silly, and mildly hypnotic. You pay 80 rupees, dig like your life depends on it, and hope the ground coughs up enough cash to justify the decision. Sometimes it does. Sometimes it gives you the emotional equivalent of pocket lint. Still, because you are also chasing a Piece of Heart, the Digging Game never feels completely pointless. It is less “efficient farming route” and more “Hyrule’s strangest cardio workout.”
The Lost Woods chest game is the most dangerous because it whispers, “Just one more try.” That is how it gets you. A 300 rupee prize sounds amazing, but the 1 rupee result feels like the game reaching through the screen and flicking your nose. If you are playing a pure run, it is better treated as entertainment than a reliable farm. If you are using modern rewind features, yes, it becomes much easier, but that also changes the spirit of the challenge.
The best overall experience comes from mixing methods. Grab big one-time chests when you are near them, use repeatable games only when convenient, and spend before you cap out. That way, rupees feel like part of the adventure instead of homework. And really, that is the secret: the easiest rupees in A Link to the Past are not always the fastest ones. They are the ones you collect naturally because you explored, experimented, bombed suspicious walls, and treated every pot in Hyrule with the respect it clearly did not deserve.
Conclusion
Getting easy rupees in Legend of Zelda: A Link to the Past is all about knowing when to chase guaranteed rewards and when to gamble for fun. Early on, focus on Kakariko Village, Sahasrahla’s hidden room, Eastern Palace, and the Lake Hylia 300 rupee cave. Save for Zora’s Flippers, then use the Pond of Happiness to turn extra cash into Bomb and Arrow upgrades.
In the Dark World, prioritize the Village of Outcasts and Plains of Ruin for huge one-time payouts. After that, use the Shooting Gallery if you are skilled, the Digging Game if you want a mix of rupees and Heart Piece hunting, and the Lost Woods chest game only if you are comfortable with risk. With smart routing, you can reach 999 rupees quickly without making Link spend his whole quest mowing lawns with a sword.