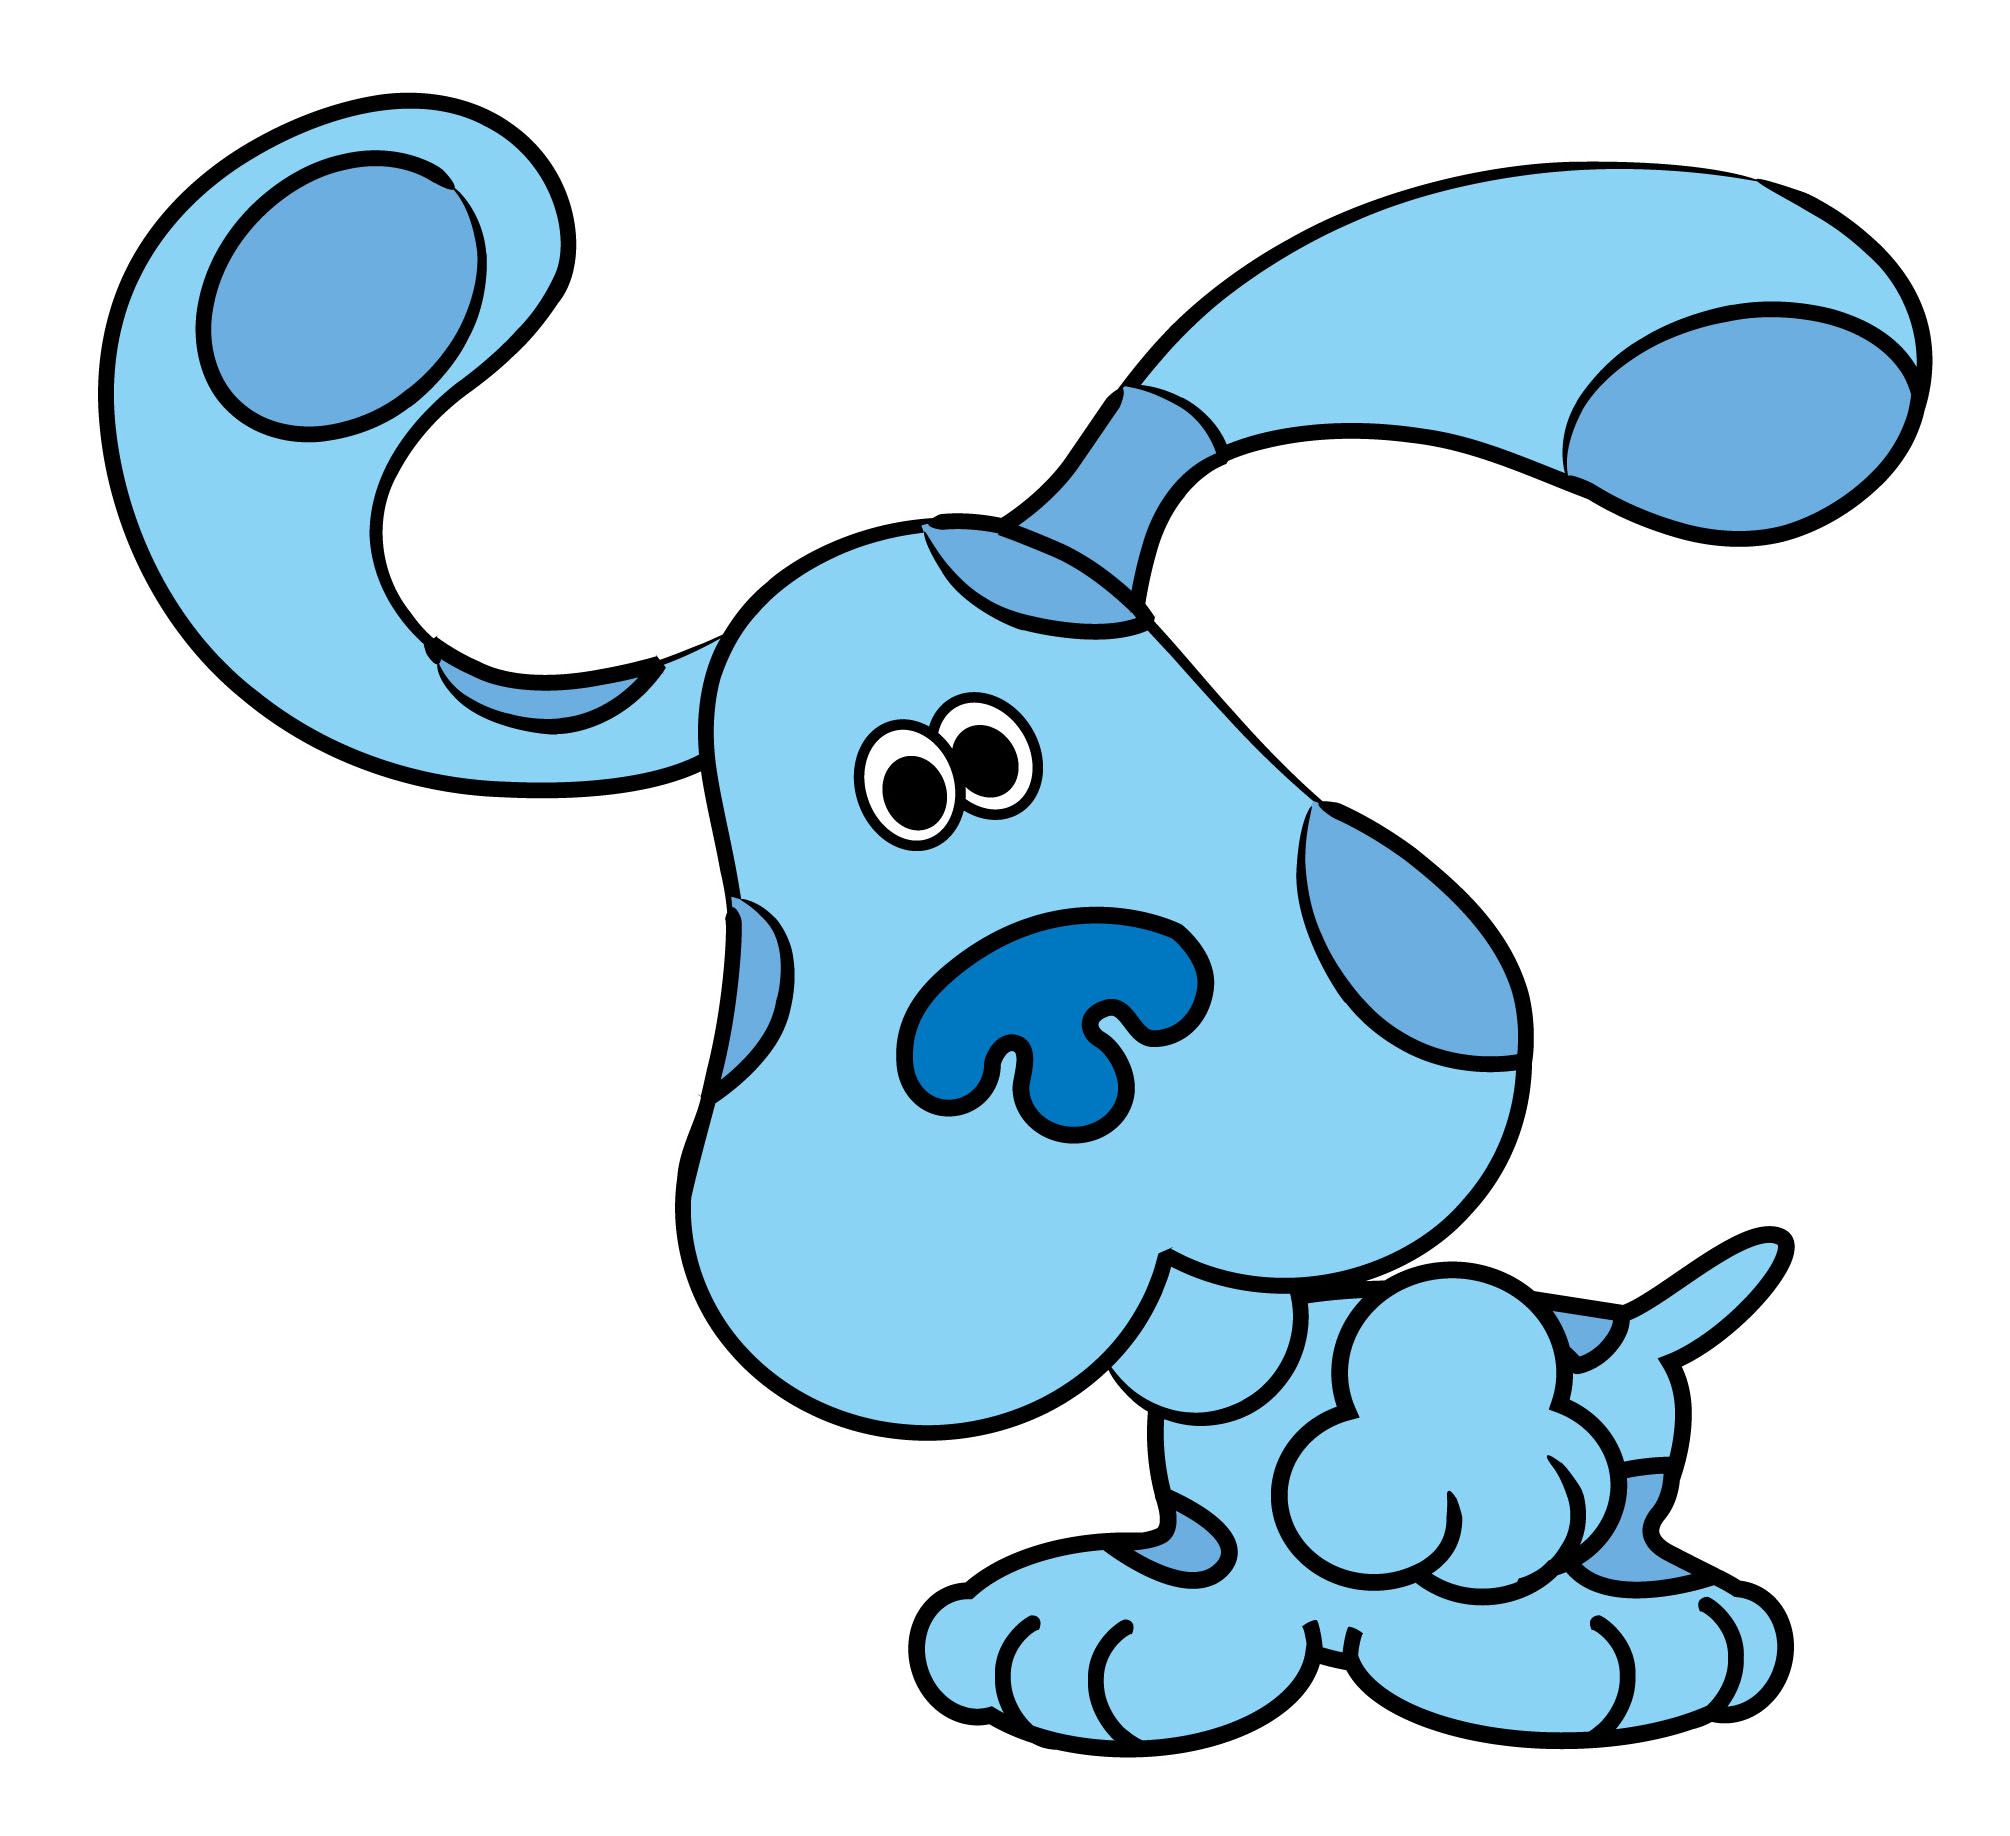
Blue looks wonderfully simple, but that simplicity makes her a smart drawing exercise. Her design depends on a few recognizable ingredients: an oversized head, a broad rounded muzzle, close-set eyes, floppy ears, chunky paws, and playful dark-blue spots. Get those relationships right, and even an unfinished sketch will read as Blue.
This beginner-friendly Blue’s Clues drawing tutorial breaks the character into ten manageable steps. You can use pencil and paper, crayons, colored pencils, markers, or a digital drawing app. The instructions follow the classic seated cartoon pose, although the same method works for standing or clue-hunting poses. No mysterious paw print is requiredjust a pencil and permission to let the first lines look a little goofy.
Character details were checked against official Paramount+ and Nickelodeon Blue’s Clues materials.
Why Blue Is Easy and Fun to Draw
Blue is built from rounded forms rather than complicated anatomy. Her head begins as a circle, her muzzle as an oval, her body as a bean shape, and her paws as clusters of curves. Starting with basic shapes lets you solve proportion before worrying about polished outlines.
She is also forgiving. Blue lives in a world where ears bounce, paws are pleasantly oversized, and spots need not be perfectly symmetrical. Careful observation still matters, but there is plenty of room for personalitygood news for beginners and anyone whose last masterpiece was a suspiciously muscular stick figure.
Supplies You Will Need
- Drawing paper or a sketchbook
- An HB or No. 2 pencil
- A soft eraser
- A black pen or dark-blue pencil for final lines
- Light-blue, dark-blue, and pink coloring tools
- An official or licensed image of Blue for reference
Printer paper is fine for pencil and crayon. Heavier drawing paper handles repeated erasing, while marker paper helps prevent bleeding.
Study Blue’s Main Proportions
Before drawing, notice that Blue’s head is large compared with her compact body. The muzzle fills much of the lower face, the eyes sit close together above the nose, and the long ears extend beyond the cheeks. Do not chase exact measurements. Compare one shape with another: Is the muzzle broad enough? Are the paws large enough to balance the head? Those relationships create the likeness.
The tutorial method synthesizes U.S.-based art education guidance on simple shapes, proportion, line, contour, materials, and beginner cartoon construction from Crayola, Adobe, PBS, the National Gallery of Art, MoMA, the Getty, Art Prof, The Metropolitan Museum of Art, Smithsonian Education, and Blick Art Materials.
How to Draw Blue from Blue’s Clues in 10 Steps
Step 1: Sketch a Light Circle for the Head
Near the upper-middle area of the paper, draw a large, slightly squashed circle. Add a faint vertical centerline and a horizontal guide a little below the middle. These lines will help place the facial features. Use very light pressure so you can erase them later. Think “feather touching paper,” not “signing a mortgage.”
Step 2: Add the Wide Muzzle and Rounded Cheeks
Draw a broad horizontal oval across the lower half of the circle. Let it extend slightly beyond the head on both sides. This oval forms Blue’s muzzle and full cheeks. Soften the outer head contour around it. Avoid making the muzzle narrow; that is the fastest route to drawing an entirely different dog who may demand her own television show.
Step 3: Draw the Eyes and Eyebrows
Place two small vertical ovals close together above the muzzle. Add a dark pupil inside each eye, leaving a tiny white highlight for a lively expression. Draw two short curved eyebrows above them. A gentle upward tilt makes Blue look curious; heavy dramatic brows make her look as though someone solved the clue without waiting.
Step 4: Create the Nose, Smile, and Tongue
Center a broad, rounded nose at the top of the muzzle. It should be dark blue and wider than the eye pair. Shape it like a soft upside-down triangle or a rounded bean. Draw a short line downward, then add a curved smile. For an open mouth, place a shallow curve below the smile and add a small rounded tongue.
Step 5: Add the Long Floppy Ears
Start each ear near the upper side of the head. Curve it outward, let it droop, and finish with a wide rounded tip. The ears do not need identical angles; slight differences make the pose feel animated. Use long curves instead of scratchy marks. If the ears are tiny, Blue may begin looking like a bear cub, so give them plenty of room.
Step 6: Build the Neck and Compact Body
Draw two short neck lines below the head, followed by a rounded bean or pear shape for the torso. The body should be much smaller than the head and narrower near the shoulders. Tilt it slightly rather than making it perfectly vertical. If the torso becomes too long, Blue may look as though she met an enthusiastic cartoon accordion.
Step 7: Draw the Front Legs and Big Paws
Extend two short, gently tapered front legs from the body. Add a large rounded paw beneath each one. Separate the toes with three or four short curves. Keep them soft and chunky, not pointed. Place both paws on roughly the same ground line unless Blue is meant to be balancing on an invisible staircase.
Step 8: Add the Hind Legs and Tail
Draw a broad curved thigh on each side of the lower body, then connect each thigh to a rounded back paw. These shapes frame the torso and make the seated pose feel stable. Add a short curved tail behind one side. Let part of it disappear behind the body; that simple overlap creates depth without complicated shading.
Step 9: Place the Spots and Refine the Outline
Add irregular rounded spots to the ears, face, back, body, and legs. Follow your reference for general placement, but vary their size and shape. Erase unnecessary construction lines, then trace the final contours with a black pen, dark-blue pencil, or clean digital brush. Slightly thicker outer lines around the ears, cheeks, paws, and body make the silhouette easier to read.
When using ink, let it dry before erasing. This brief pause prevents the classic tragedy known as “I was finished, and then my hand smeared everything.”
Step 10: Color Blue
Fill the fur with an even light blue. Color the spots and nose with a deeper blue, add pink to the tongue, and leave white around the pupils. With colored pencils, begin lightly and build several layers. With markers, work in one consistent direction to reduce streaks. A little darker blue beneath the chin and behind the legs adds depth, but keep the shading simple.
Finish with tiny white highlights on the pupils or nose, then view the page from a distance. The silhouette and friendly expression matter more than microscopic perfection. If the puppy looks floppy, cheerful, and ready to leave a clue, you have succeeded.
Common Mistakes and Quick Fixes
The Face Does Not Look Like Blue
Recheck the broad muzzle, wide nose, and close-set eyes. Beginners often make the eyes too large or too far apart. Correcting those three landmarks usually restores the likeness.
The Ears Look Stiff
Imagine each ear as a soft ribbon hanging from the head. Redraw it with one sweeping motion and avoid sharp corners.
The Body Looks Too Realistic
Simplify the anatomy. Enlarge the head, shorten the torso, and round the paws. This is a cartoon puppy, not a veterinary textbook with excellent branding.
The Spots Make the Drawing Busy
Use fewer, larger spots and leave open light-blue areas between them. The markings should support the design, not suggest an argument with a paint sprinkler.
The Final Lines Are Shaky
Rotate the paper until your hand can pull the curve comfortably. Digital artists can lower the sketch layer’s opacity and ink on a new layer.
Easy Ways to Personalize the Drawing
Once the standard pose is finished, draw Blue beside a paw-print clue, near the Thinking Chair, peeking around a question mark, or holding an imaginary notebook. Change the eyebrows, mouth, and ear angles to create a new expression. Several artists can follow the same ten steps and still produce different results. That variation is not failure; it is style quietly introducing itself.
Conclusion
Learning how to draw Blue from Blue’s Clues becomes easier when you stop seeing a finished character and start seeing circles, ovals, bean shapes, and flowing curves. Build the large head and muzzle first, place the eyes and nose carefully, give the ears room, and keep the body compact. Add the paws, spots, final outline, and color only after the silhouette feels balanced.
Your first version may not look exactly like the character on screen, and that is normal. Keep the sketch light, compare the major proportions, and repeat the drawing. Each attempt trains your eye and makes the next line more confident. Soon, this cheerful blue puppy will feel less like a mystery and more like a clue you already know how to solve.
My Experience Drawing Blue: What Made the Biggest Difference
The first time I tried to draw Blue from memory, I felt overly confident. I remembered the blue fur, spots, floppy ears, and nose. What could possibly go wrong? Five minutes later, I had produced a creature that looked like a dog, a beanbag chair, and a concerned seal had formed a committee.
The main problem was proportion. I drew the body first and left too little room for the head. Blue’s design depends heavily on that large, friendly face, so the small head made everything feel wrong. On the second attempt, I placed the head circle first and made it larger than seemed reasonable. Suddenly, the body could stay compact, the paws could be chunky, and the ears had space to stretch outward.
The next lesson involved the muzzle. I initially treated it as a small patch around the mouth, as I might on a realistic dog. Blue needs a broad muzzle that fills the lower face and creates rounded cheeks. Once I enlarged that oval, the eyes and nose almost placed themselves. The nose sat in the center, the eyes tucked closely above it, and the smile had room to feel cheerful instead of cramped.
I also learned to delay the spots. Adding them early was fun, but it distracted me from correcting the silhouette. On one sketch, I finished every dark-blue marking before noticing that one ear was half the size of the other and the front paws were floating. Now I complete the light sketch, check the head-to-body relationship, and add the spots afterward. Decorations are dessert; structure is dinner.
Using lighter pencil pressure made another major difference. Dark construction lines tempted me to keep shapes that were not working because erasing left dents and gray smudges. With faint lines, I could test several ear curves, choose the best one, and remove the others cleanly. The final outline looked more confident even though the early sketch was messier.
Coloring taught me that light blue is not merely empty space between dark spots. An even base layer gives the character unity. With colored pencils, I built the base gradually and added deeper blue afterward. With markers, I completed one body area at a time so the fill stayed smooth. A small shadow beneath the chin and behind the legs added depth, but excessive shading weakened the flat, playful look.
The most useful habit was stepping back. Up close, I worried about individual toes and whether a spot leaned slightly left. From several feet away, I immediately saw whether the ears were broad enough and the expression felt friendly. The drawing did not need to duplicate a production model perfectly; it needed to communicate Blue’s personality.
After several attempts, the process became faster and more enjoyable. I stopped chasing one flawless line and began thinking in stages: shapes, proportions, facial features, limbs, spots, cleanup, and color. That sequence removed much of the pressure. It also proved that a recognizable cartoon drawing rarely requires magic talent. More often, it comes from making one simple decision at a timeand redrawing an ear when it looks like a pancake attempting flight.