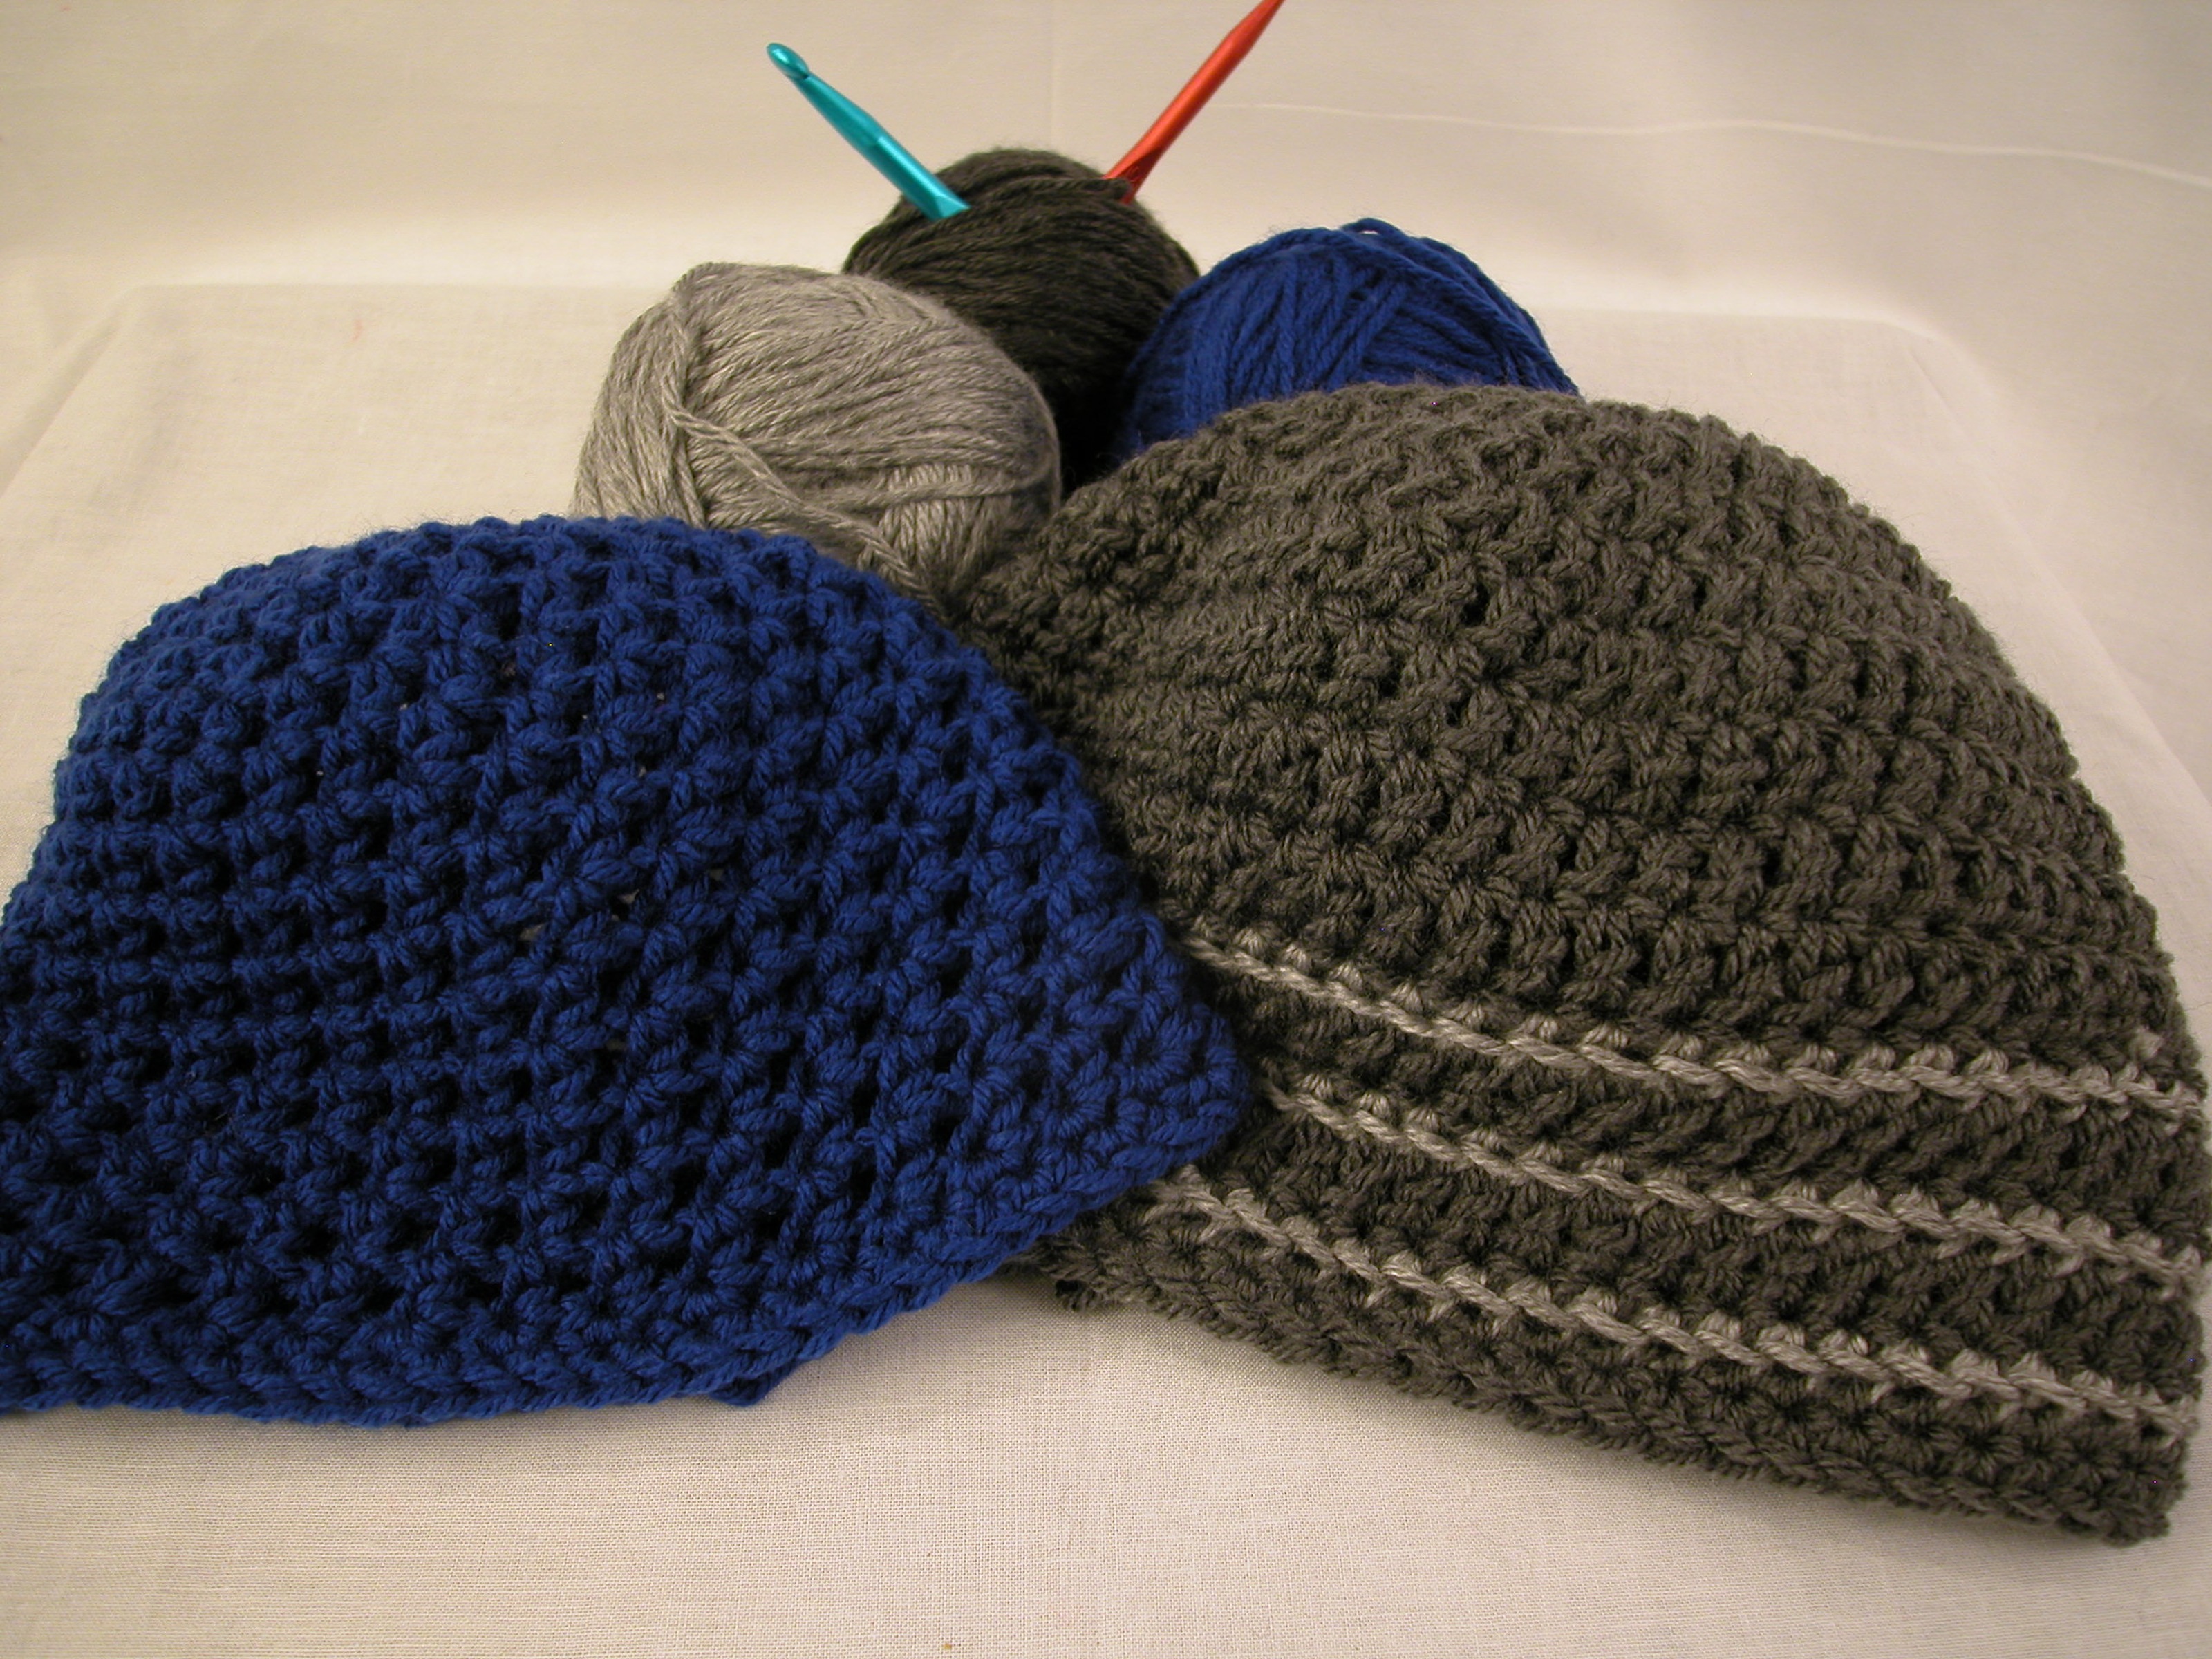
A crochet skull cap is one of those magical projects that looks impressive, feels useful, and does not require a suitcase full of yarn or a PhD in fiber arts. It is close-fitting, warm, simple to customize, and small enough to finish before your coffee goes coldunless you are using a tiny hook and dramatic black yarn at midnight, in which case, may the crochet gods guide you.
In crochet terms, a skull cap is basically a snug beanie that sits close to the head without much slouch. It can be plain, ribbed, textured, striped, or finished with a clean brim. This guide walks you through everything you need to know: supplies, sizing, stitch choices, gauge, step-by-step instructions, common mistakes, and practical finishing tips. By the end, you will know how to crochet a skull cap that actually fits instead of becoming a bowl, a pancake, or a mysterious yarn mushroom.
What Is a Crochet Skull Cap?
A skull cap is a fitted hat designed to hug the head. Unlike a slouchy beanie, it usually has little to no extra fabric at the crown. It is practical for cold weather, outdoor work, sports, casual outfits, and handmade gifts. A crochet skull cap can be made from the top down in rounds, from the bottom up, or from a flat rectangle that is seamed into a hat.
For beginners, the top-down method is one of the easiest to understand because you can watch the crown grow, measure as you go, and adjust the length before finishing. The rectangle method is also beginner-friendly, especially if you love ribbed texture. In this article, we will focus on a classic top-down crochet skull cap because it teaches you the basic structure behind many crochet hat patterns.
Supplies You Need
You do not need fancy tools to make a great skull cap. Start with basic, reliable materials and save the glittery novelty yarn for the day you feel emotionally prepared to untangle a tiny disco storm.
Recommended Materials
- Worsted weight yarn, also called medium weight or size 4 yarn
- 5.0 mm or 5.5 mm crochet hook, depending on your tension
- Scissors
- Yarn needle for weaving in ends
- Stitch marker
- Soft measuring tape
Worsted weight acrylic, wool blend, or cotton blend yarn works well for a first crochet skull cap. Acrylic is affordable and easy to wash. Wool blends are warmer and stretch nicely. Cotton gives cleaner stitch definition but has less bounce, so it may feel less forgiving if your sizing is slightly off.
Important Crochet Terms and Abbreviations
Before you start, here are the basic terms used in this tutorial. The pattern uses standard American crochet terminology.
- ch: chain
- sl st: slip stitch
- sc: single crochet
- hdc: half double crochet
- dc: double crochet
- st: stitch
- rnd: round
- inc: increase, usually two stitches in the same stitch
This pattern uses half double crochet because it is a lovely middle child: taller than single crochet, less holey than double crochet, and fast enough to keep your motivation alive.
How to Measure for a Skull Cap
Fit is the secret ingredient in a good skull cap. The most important measurement is head circumference. Wrap a soft measuring tape around the widest part of the head, usually across the forehead and around the back of the skull. Do not pull too tightly. You want the measurement of a human head, not a yarn hostage situation.
A finished crochet hat is usually made slightly smaller than the actual head circumference because crochet fabric stretches. This difference is called negative ease. For most adult skull caps, making the finished circumference about 1 to 2 inches smaller than the head measurement gives a comfortable snug fit.
Basic Adult Skull Cap Size Guide
| Size | Head Circumference | Finished Hat Circumference | Approximate Hat Height |
|---|---|---|---|
| Teen / Adult Small | 21 inches | 19-20 inches | 8-8.5 inches |
| Adult Medium | 22 inches | 20-21 inches | 8.5-9 inches |
| Adult Large | 23 inches | 21-22 inches | 9-9.5 inches |
| Adult Extra Large | 24 inches | 22-23 inches | 9.5 inches |
These numbers are a practical starting point, not a law carved into a crochet hook. Yarn fiber, stitch pattern, hook size, and personal tension can all affect the final fit.
Gauge: The Boring Step That Saves the Hat
Gauge means how many stitches and rows you get within a specific measurement, usually 4 inches. Yes, making a gauge swatch feels like being asked to do homework before the fun part. But if you skip it, your skull cap may fit a toddler, a linebacker, or your fruit bowl.
For this project, aim for approximately 12 to 14 half double crochet stitches across 4 inches. If you have too many stitches per 4 inches, your work is tight; try a larger hook. If you have too few stitches, your work is loose; try a smaller hook.
Beginner-Friendly Crochet Skull Cap Pattern
This pattern makes a simple adult medium skull cap using worsted weight yarn and half double crochet stitches. You can adjust the size by changing the number of increase rounds and the final hat length.
Pattern Notes
- Work in joined rounds for a clean structure.
- Chain 1 at the beginning of each round; it does not count as a stitch.
- Join each round with a slip stitch to the first half double crochet.
- Use a stitch marker to mark the first stitch of each round.
Step 1: Start the Crown
Make a magic ring. If the magic ring makes you want to gently place your yarn in a drawer and walk away, chain 4 and join with a slip stitch to form a ring.
Round 1: Ch 1, work 10 hdc into the ring. Pull the ring closed. Join with sl st to the first hdc. You should have 10 stitches.
Step 2: Increase the Crown
The crown is the flat circle at the top of the hat. Increasing evenly keeps the circle smooth instead of wavy or cupped.
Round 2: Ch 1, work 2 hdc in each stitch around. Join. You should have 20 stitches.
Round 3: Ch 1, work 1 hdc in the next stitch, 2 hdc in the next stitch. Repeat around. Join. You should have 30 stitches.
Round 4: Ch 1, work 1 hdc in each of the next 2 stitches, 2 hdc in the next stitch. Repeat around. Join. You should have 40 stitches.
Round 5: Ch 1, work 1 hdc in each of the next 3 stitches, 2 hdc in the next stitch. Repeat around. Join. You should have 50 stitches.
Round 6: Ch 1, work 1 hdc in each of the next 4 stitches, 2 hdc in the next stitch. Repeat around. Join. You should have 60 stitches.
For an adult medium skull cap, stop increasing when the crown measures about 6.75 to 7.25 inches across, depending on your yarn stretch and head size. If you need a larger cap, add one more increase round by working 1 hdc in each of the next 5 stitches, then 2 hdc in the next stitch, repeating around.
Step 3: Work Even Rounds for the Body
Once the crown is wide enough, stop increasing. This is where the hat begins to curve downward and become cap-shaped. Congratulations: your yarn pancake is evolving.
Rounds 7-17: Ch 1, work 1 hdc in each stitch around. Join each round with a sl st.
Continue until the hat measures about 8.5 to 9 inches from the top center of the crown to the bottom edge. Try it on as you go. A skull cap should cover the head comfortably and usually reaches the top or middle of the ears, depending on your preferred style.
Step 4: Add a Simple Brim
A brim gives the skull cap a finished edge and helps it stay snug. You can keep it simple with single crochet or make it stretchier with ribbing.
Simple Edge Option: Ch 1, work 1 sc in each stitch around for 2 to 3 rounds. Join each round. Fasten off.
Ribbed Edge Option: Ch 6. Starting in the second chain from the hook, sc across 5 chains. Slip stitch into the next 2 stitches along the hat edge. Turn. Work sc in the back loop only across the 5 brim stitches. Ch 1, turn, and continue around the hat edge. Seam the first and last brim rows together with slip stitches.
The simple edge is faster. The ribbed edge is stretchier and looks more polished. Choose based on your patience level and whether your future self enjoys weaving in extra ends.
How to Customize Your Crochet Skull Cap
Once you understand the basic structure, you can change the look without rewriting the entire pattern. This is where crochet becomes dangerously fun.
Add Stripes
Change colors every 2 to 4 rounds for clean stripes. For a sporty look, use two colors with high contrast. For a softer style, use colors from the same family, such as charcoal and light gray or navy and denim blue.
Use Back Loop Stitches
Working in the back loop only creates subtle ridges. You can use this technique for the body of the cap or just the brim. It adds texture without making the pattern complicated.
Try a Different Stitch
Half double crochet is a great default, but you can experiment with single crochet for a denser cap or double crochet for a faster, more flexible fabric. Keep in mind that changing stitches will change your gauge and sizing.
Add a Patch or Label
A small faux leather tag, woven label, or embroidered patch can make a handmade skull cap look boutique-ready. Place it near the brim on the side or front. Just do not sew it on upside down unless you are intentionally launching a mysterious fashion movement.
Common Mistakes and How to Fix Them
The Crown Is Wavy
If the crown ripples, you may have too many increases or your tension may be too loose. Try using a smaller hook or stopping your increases one round earlier.
The Crown Cups Too Soon
If the crown curves before it reaches the correct diameter, you may not have enough increases. Add another increase round or check whether you accidentally skipped stitches.
The Hat Is Too Tight
If the skull cap feels like it is trying to read your thoughts, it is too tight. Go up a hook size, add an increase round, or work more relaxed stitches. Yarn choice also matters; some cotton yarns do not stretch as much as acrylic or wool blends.
The Hat Is Too Loose
If the cap slides around, try a smaller hook, fewer increase rounds, or a tighter brim. A ribbed brim can help pull the edge in and improve fit.
Best Yarn for a Crochet Skull Cap
The best yarn depends on how the cap will be used. For everyday winter wear, acrylic and wool blends are reliable because they are warm, stretchy, and easy to care for. For sensitive skin, look for soft acrylic, merino blends, or cotton blends. For outdoor work or athletic use, avoid yarn that feels itchy or heavy when worn for a long time.
Color matters too. Dark yarn looks stylish but can be harder to see while stitching. Beginners may want to start with a medium-colored yarn, such as gray, teal, olive, tan, or dusty blue. Black yarn is classic, but crocheting with black yarn in low light is basically crafting in stealth mode.
How Long Does It Take to Crochet a Skull Cap?
A simple crochet skull cap usually takes a few hours, depending on your skill level, yarn weight, hook size, and stitch pattern. A confident crocheter using worsted weight yarn may finish one in an evening. A beginner may take longer, especially when counting increases and checking fit. That is completely normal. Crochet is not a race; it is a series of tiny loops pretending to be a useful object.
Care and Washing Tips
Always check the yarn label before washing your finished skull cap. Many acrylic yarns are machine washable, while wool blends may need gentler care. If you are giving the cap as a gift, include a small care note. Handmade gifts are wonderful, but nobody wants to accidentally turn a full-size hat into a doll accessory after one hot wash.
To help the cap keep its shape, wash it gently, reshape it while damp, and let it dry flat. Avoid hanging a wet crochet hat because the weight of the water can stretch the stitches.
Practical Experience: What I Learned While Crocheting Skull Caps
The first big lesson from making crochet skull caps is that measuring matters more than guessing. A hat can look perfect in your hands and still fit strangely on an actual head. The tape measure is your friend, even if it looks boring next to a beautiful skein of yarn. When I started treating head circumference, crown diameter, and hat height as checkpoints instead of optional details, my finished caps became much more reliable.
The second lesson is that yarn stretch changes everything. Two yarns can both be labeled worsted weight and still behave differently. One may feel springy and forgiving, while another feels firm and structured. A skull cap made with soft acrylic may stretch comfortably after a few wears, while a cotton version may keep its shape but feel less flexible. That is why trying the hat on during the process is so helpful. If the cap is for someone else, compare it to a hat they already own and like.
Another practical trick is to use stitch markers even when the pattern seems simple. It is easy to lose track of the first stitch in a round, especially with half double crochet. A stitch marker prevents that tiny confusion from becoming a slanted seam or an accidental increase. You do not need fancy markers; a scrap of contrasting yarn works perfectly.
Color choice also affects the experience. Light and medium colors are easier for beginners because the stitches are visible. Dark yarn can make a skull cap look sleek, but it also hides stitch tops, increases, and mistakes. If you want to use black, dark navy, or charcoal yarn, work near a bright lamp and take breaks. Your eyes will thank you, and your stitch count will be less dramatic.
When making skull caps as gifts, simple designs often work best. A clean, fitted hat in a neutral color is more likely to be worn than a complicated design that matches only one outfit. Gray, black, navy, forest green, cream, and burgundy are safe choices. If the recipient has a bold style, stripes or a contrasting brim can add personality without making the cap too busy.
One more experience-based tip: do not judge the hat too early. During the crown stage, it may look like a coaster. During the first body rounds, it may look like a bowl. Somewhere near the final third, it suddenly becomes a real hat. Crochet projects have an awkward teenage phase, and skull caps are no exception.
Finally, finishing makes a huge difference. Weave in your ends securely, trim only after you are sure the yarn is locked in, and shape the brim neatly. A well-finished skull cap looks intentional, even if you made a few tiny mistakes along the way. Most people will never notice a slightly uneven stitch, but they will notice a loose yarn tail waving hello from the brim.
Conclusion
Learning how to crochet a skull cap is one of the best ways to build practical crochet skills while making something useful, wearable, and gift-worthy. The project teaches you how increases shape a crown, how gauge affects sizing, how yarn choice changes fit, and how small finishing details can upgrade the final result. Start with worsted weight yarn, measure carefully, check your gauge, and do not be afraid to try the cap on as you go.
Once you finish your first skull cap, the basic pattern becomes a blank canvas. You can add stripes, texture, ribbing, labels, color blocking, or a folded brim. Make one for winter, one for workouts, one for a friend, and one for the person who says, “I do not wear hats,” but mysteriously borrows yours anyway. With a hook, a skein of yarn, and a little patience, you can turn simple stitches into a snug crochet skull cap that looks good and feels even better.