Pumpkins have a unique talent: they can look charmingly rustic, effortlessly modern, or “I own five neutral sweaters and I’m not sorry” chicall before you’ve even lit a candle.
A fall pumpkin centerpiece is basically the little black dress of autumn tablescapes… except it’s orange, sometimes bumpy, and occasionally tries to roll away.
In this guide, you’ll learn how to design a centerpiece that looks polished (not like a craft explosion), holds up through dinner, and feels intentionally styledwhether you’re hosting
Friendsgiving, setting a cozy weeknight table, or just want your dining room to whisper, “Yes, I do have my life together.”
What Makes a Pumpkin Centerpiece “Chic” (Not Just “There’s a Pumpkin on the Table”)
Chic starts with a clear vibe
“Chic” is less about spending more and more about choosing a look on purpose. Pick one main direction:
Modern neutral (white pumpkins + creamy florals), moody (deep burgundy + brass), garden harvest (mums + greenery),
or minimal (a few perfect elements, lots of breathing room). When your choices match, your centerpiece instantly looks curated.
Keep it low so people can actually see each other
A centerpiece should decorate the table, not block conversation. A good rule: if guests have to lean left and right like they’re dodging traffic just to make eye contact,
your arrangement is too tall. Aim for a low, lush shapewide rather than skyscraper.
Use a “texture stack” for designer energy
The easiest way to elevate your centerpiece is to mix textures on purpose:
smooth pumpkin + soft petals + something airy (grasses or eucalyptus) + something structured (berries, pods, or branches).
Texture is what makes a centerpiece feel like it belongs in a magazine instead of a last-minute grocery-store scramble.
Materials: Two Easy Paths to a Chic Pumpkin Centerpiece
Option A: The Classic “Pumpkin Vase” (fresh flowers, big payoff)
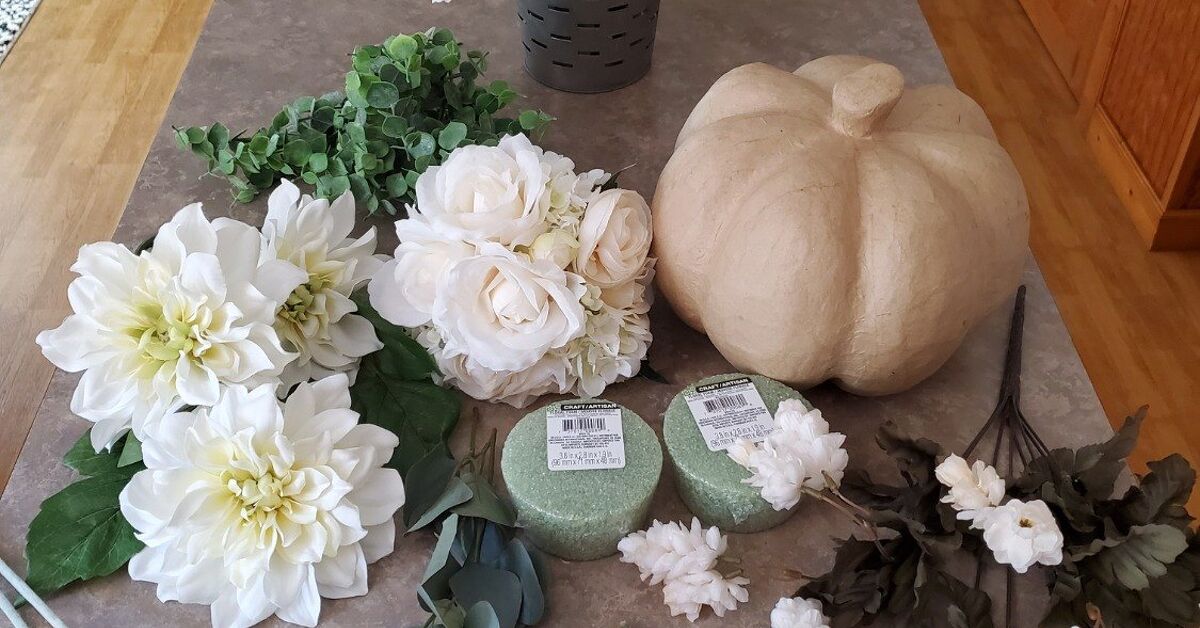
- 1 medium pumpkin (white, heirloom, or classic orange)
- A glass or small vase that fits inside (a jar works great)
- Fresh flowers (1–2 focal flowers + filler + greenery)
- Kitchen spoon for scooping
- Small knife (adult help recommended if you’re not comfortable)
- Paper towels
Option B: The Long-Lasting “Faux or Dried” Centerpiece (zero wilting drama)
- 1 craft pumpkin or real pumpkin you won’t cut
- Dried stems (pampas grass, wheat, bunny tails) or faux florals
- A small weighted container for stability (optional)
- Extras: ribbon, taper holders, mini pumpkins, or a simple runner
If you want a centerpiece that survives the entire season, faux is your best friend. If you want a centerpiece that smells like fall and looks like a fresh flower moment,
go for the pumpkin vase.
Step-by-Step: The Chic No-Fuss Pumpkin Vase Centerpiece
Step 1: Choose the right pumpkin (this matters more than you’d think)
Pick a pumpkin with a flat-ish base so it sits steady. Avoid bruises, soft spots, or cracksthose are the pumpkin equivalent of “this is going to fall apart in a week.”
White pumpkins read modern and clean; orange feels classic; heirloom varieties look instantly high-end because they’re naturally sculptural.
Step 2: Make the opening (small opening = cleaner look)
You can cut from the top like a classic jack-o’-lantern, but for a chic centerpiece, a slightly smaller opening often looks more refined.
Cut a circle just big enough to lower your glass or jar inside. If using a knife makes you nervous, ask an adult for helpno centerpiece is worth a bandage accessory.
Step 3: Scoop and dry (the unglamorous but necessary part)
Scoop out seeds and stringy bits. Then pat the inside dry with paper towels. This helps reduce mess and keeps your hidden vase sitting neatly.
Bonus: save seeds for roasting later, because fall is the season of maximum coziness.
Step 4: Add a hidden water vessel (the secret to “fresh flowers without chaos”)
Place a glass, jar, or small vase inside the pumpkin. This is the pro move:
the pumpkin becomes the pretty shell, and the glass does the actual work of holding water. It also prevents leaks and keeps the pumpkin from turning into a soggy surprise.
Step 5: Build your arrangement like a stylist
Here’s the easy formula that makes almost any bouquet look intentional:
greenery first (your base), focal flowers (your stars), filler (your supporting cast), and
texture (your “wow, fancy” detail).
- Greenery: eucalyptus, ruscus, or seasonal leaves
- Focal flowers: roses, dahlias, ranunculus, or sunflowers
- Filler: mums, asters, baby’s breath alternatives, small daisies
- Texture: berries, seed pods, wheat, or ornamental grasses
Start by placing greenery around the edges to create a low, rounded shape. Then add 3–5 focal blooms at varying heights (but still table-friendly).
Fill gaps with smaller flowers and finish with texture pieces that add movement. Step back a few timesdesign looks better when you’re not hovering like a plant helicopter.
Step 6: Finish with small styling touches
The centerpiece becomes instantly more “designed” with one or two subtle extras:
place mini pumpkins around the base, add a simple linen runner, or set a couple of tapered candles nearby.
If you use candles, consider LED for an easy, worry-free glowespecially around dry foliage.
5 Chic Style Recipes (Pick One and You’ll Look Like You Have a Decorating Degree)
1) Modern Neutral (clean, calm, expensive-looking)
Use a white pumpkin, creamy roses, pale mums, and eucalyptus. Keep the palette tight: ivory + soft green + maybe one warm accent (like pale peach).
Pair with natural linen napkins and simple glassware. This is “quiet luxury,” but make it autumn.
2) Moody Jewel Tones (dramatic, but still classy)
Choose a deep orange or green-gray heirloom pumpkin. Add burgundy dahlias, rust-colored roses, and dark greenery.
Keep accessories minimal: brass candle holders or a dark wood tray. This is the centerpiece for people who think fall should be a little mysterious.
3) Cottage Harvest (warm, welcoming, classic)
Go traditional with an orange pumpkin, sunflowers or golden mums, and a mix of seasonal leaves.
Add small apples, pears, or walnuts in the surrounding styling (on a tray) for a “harvest table” feel that transitions perfectly into Thanksgiving.
4) Coastal Fall (unexpected, fresh, not-your-average pumpkin moment)
Try a blue or painted pumpkin with white flowers and airy greenery. Keep it light and breezy with a few pale accents.
This works beautifully if your home leans coastal or modern and you want fall decor that doesn’t suddenly scream “rustic cabin.”
5) Minimal Runner Centerpiece (for small tables and big style)
Skip the big arrangement and create a long, low “runner” centerpiece:
a few mini pumpkins, short bud vases with single stems, and scattered leaves or dried wheat.
It looks intentionally editorial, and it’s easier to eat aroundwin-win.
How to Make It Last Longer (Because Wilted Flowers Are a Mood Killer)
Fresh flower care that actually works
Flowers last longer when bacteria is kept low and water stays fresh. Use a clean jar or vase inside the pumpkin, remove leaves below the waterline,
and refresh water regularly. If your bouquet came with flower food, use ityour flowers will thank you by not giving up mid-party.
Help your pumpkin stay presentable
Real pumpkins last longer when they’re kept cool and dry, away from direct sun or heat vents. If you’ve cut the pumpkin, it won’t last as long as an uncut one.
A simple trick for cut surfaces is to keep them from drying out too quickly by lightly coating exposed edges with petroleum jelly.
Want a centerpiece that lasts weeks?
Use a craft pumpkin and dried stems (or faux florals). You’ll get the same visual impact without the countdown clock.
This is also the best choice if you’re decorating early or want something you can reuse year after year.
Troubleshooting: Quick Fixes for Common Pumpkin Centerpiece Problems
“My pumpkin is wobbling.”
Switch to a pumpkin with a flatter base, or nestle it onto a tray with a folded cloth underneath.
If it’s already arranged, stabilize the base with mini pumpkins around it (cute and functional).
“My flowers look messy, not chic.”
Pull back and simplify. Remove a few stems and create clearer “zones”: greenery base, focal blooms spaced out, then filler. Too many similar flowers can look crowded.
Fewer stems, better placement.
“Water is leaking or the pumpkin feels damp.”
Make sure water is only in the glass/jar, not inside the pumpkin itself. Dry the pumpkin interior thoroughly before replacing the jar.
If the pumpkin is already compromised, swap to a craft pumpkin next time for a stress-free version.
FAQ: Chic Pumpkin Centerpiece Edition
Do I have to carve the pumpkin?
No. You can cut a simple opening and hide a jar inside, or you can do a no-carve look using mini pumpkins, candles (LED is easiest),
and small bud vases arranged together on a tray.
What flowers look most “fall” without looking like a school fundraiser?
Try mums (classic), dahlias (bold), roses (timeless), marigolds (warm), and seasonal greenery. Add something textural like berries, pods, or wheat to make it feel elevated.
How far in advance can I make it?
For fresh flowers, the day before is usually ideal. For dried or faux, you can make it weeks ahead and enjoy the smug satisfaction of being “early.”
of Real-World “Experience” Tips (What People Learn After Making These a Few Times)
If you’ve ever made a pumpkin centerpiece and thought, “Why does mine look like a confused salad while the internet’s looks like a design editorial?”
you’re not alone. The difference is usually not talentit’s tiny choices that experienced hosts and DIYers learn after a couple rounds of trial and error.
Here are the most common lessons people pick up once they’ve made (and remade) chic fall pumpkin centerpieces.
First: scale is everything. Many people start with a pumpkin that’s too small for their table, then overcompensate with tall flowers.
The result is a centerpiece that blocks faces and feels top-heavy. A medium pumpkin (or a cluster of minis) usually reads more “intentional,” and keeping the overall height low
makes it look instantly more refinedlike you planned the table for a dinner party, not a pumpkin audition.
Second: the “hidden jar” trick is the difference between charming and chaotic. DIYers who skip the internal glass vessel often end up fighting leaks,
soggy pumpkin walls, or flowers that won’t stay positioned. When you tuck a jar inside, everything becomes easier: water stays contained, stems stand up better,
and you can change water without dismantling the arrangement. It’s one of those simple upgrades that feels like a secret handshake.
Third: start with greenery, even if you think you don’t need it. People who jump straight to flowers often end up with a “bouquet plopped in a pumpkin” look.
Greenery creates a base that hides mechanics, softens the rim, and gives your flowers a place to land. It also makes store-bought blooms look more custom.
Even a small handful of eucalyptus or leafy stems can make the whole piece feel styled instead of assembled.
Fourth: chic doesn’t mean complicated. The most successful centerpieces usually have one clear idea:
“neutral and airy,” “deep and moody,” or “harvest and warm.” When people try to use every fall color at onceorange, red, yellow, purple, plus glitterthings can look busy fast.
Experienced decorators tend to limit the palette and repeat it. For example: white pumpkin + cream flowers + green foliage + one accent color (rust or burgundy).
That repetition is what makes a centerpiece look expensive, even if the flowers came from the grocery store.
Finally: plan for real life. People learn quickly that centerpieces live in a world of elbows, serving bowls, and someone reaching for the salt.
That’s why trays are so popular among frequent hosts: a tray gives the arrangement a “home,” catches stray bits, and makes it easy to move the centerpiece when dinner is served.
Another real-life upgrade is choosing LED candles near dried elementsno one wants to spend the evening watching a centerpiece like it’s a campfire.
The best pumpkin centerpiece isn’t just pretty; it’s practical, stable, and friendly to the way people actually gather.
Conclusion: Your Table, But Make It Autumn-Chic
A chic fall pumpkin centerpiece is really just a smart mix of three things: a steady pumpkin, a clear style direction, and a few intentional textures.
Whether you go with a fresh-flower pumpkin vase or a long-lasting dried arrangement, your goal is the same:
create something low, lush, and confidently “put together.”
Pick your vibe, keep the palette focused, and remember: the only thing that needs to be extra at the table is dessert.
Your centerpiece can be chic, calm, and completely doable.