Halloween decorating has a funny way of sneaking up on us. One minute you are calmly drinking coffee in September, and the next minute your front porch is demanding pumpkins, cobwebs, bats, ghosts, and a door wreath with enough personality to make the neighborhood skeleton jealous. The good news? You do not need to spend a small fortune on store-bought Halloween decor. You can make a boo-tiful Halloween wreath with recycled plastic bags, a wire hanger or wreath frame, a pair of scissors, and a little creative mischief.
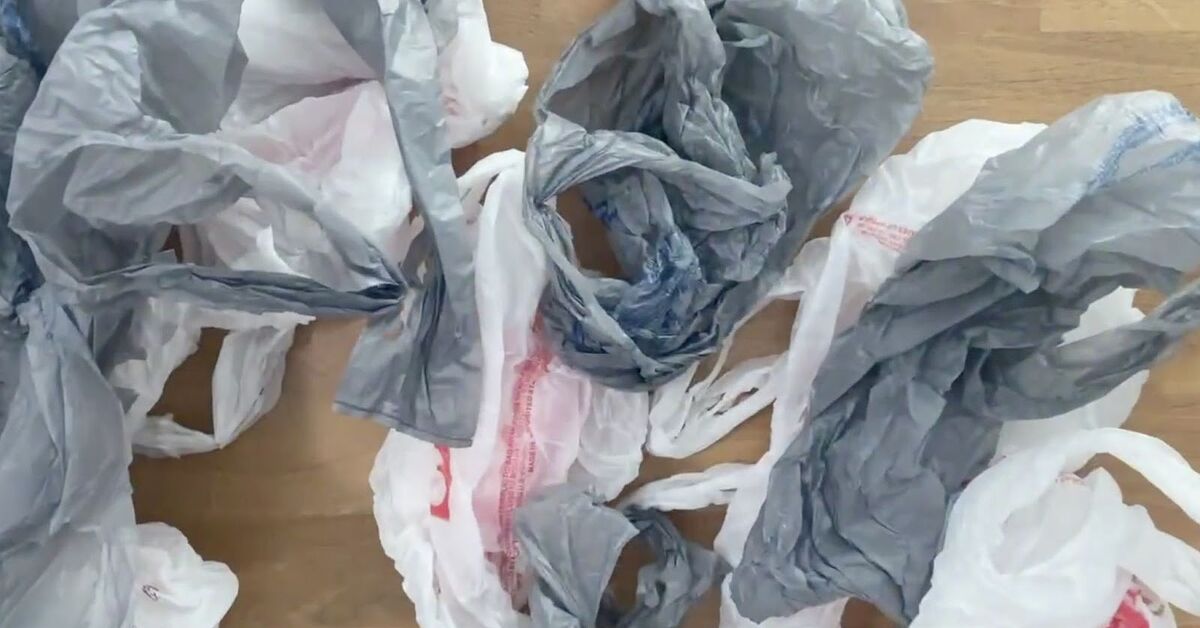
This DIY Halloween wreath is budget-friendly, surprisingly easy, and a clever way to reuse plastic shopping bags before they head to a proper plastic film drop-off location. Instead of letting those bags multiply under the kitchen sink like tiny crinkly gremlins, you can turn them into fluffy, spooky, weather-resistant door decor. White bags become ghosts. Black bags become ravens, bats, and witchy texture. Orange bags bring pumpkin energy. Green bags add monster vibes. In other words, your recycling pile may already be wearing a Halloween costume.
In this guide, you will learn how to make a recycled plastic bag wreath step by step, how to customize it for different Halloween styles, how to hang it safely, and how to store it for next year. We will also talk about practical craft tips, common mistakes, and real-life experience from making this project with different bag colors and wreath bases. Grab your bags, summon your scissors, and let’s make your front door look frightfully fabulous.
Why Make a Halloween Wreath from Recycled Plastic Bags?
A recycled plastic bag wreath is the kind of craft that checks several boxes at once. It is inexpensive, lightweight, easy to personalize, and forgiving enough for beginners. If one strip looks crooked, congratulations: Halloween loves crooked. If your wreath turns out a little wild, call it haunted texture. This is one of those rare DIY projects where perfection is not only unnecessary, it may actually ruin the vibe.
Plastic bags are especially useful for wreath-making because they are flexible and easy to cut into strips. When tied closely around a wire frame, they create a full, ruffled effect similar to fabric, tulle, or ribbon. Unlike paper, plastic bags do not immediately wilt when exposed to a little porch moisture. That makes them a practical choice for covered outdoor spaces, apartment doors, classroom decorations, office cubicles, and Halloween party backdrops.
There is also an environmental angle. Reuse comes before recycling in the waste-reduction hierarchy, and this craft gives plastic bags one more useful life. However, it is still important to remember that plastic bags and plastic film should usually not go into regular curbside recycling bins unless your local program specifically accepts them. Many communities ask residents to take plastic bags to store drop-off bins or other dedicated collection points. So, after Halloween, if your wreath is too tired to haunt another year, remove non-plastic decorations and recycle the clean plastic film through the correct local option.
What You Will Need
One reason this DIY recycled Halloween decoration works so well is that the supply list is wonderfully simple. You may already have most of these items at home, which is the official crafting equivalent of finding candy in last year’s jacket pocket.
Basic Supplies
- 25 to 45 clean plastic shopping bags, depending on wreath size and fullness
- One wire coat hanger, wire wreath form, or sturdy craft ring
- Scissors or a rotary cutter
- Ruler or measuring tape
- Twist ties, floral wire, or zip ties
- Ribbon, yarn, or fishing line for hanging
- Optional: low-temperature hot glue gun for decorations
Halloween Decorations to Add
- Plastic spiders
- Paper bats
- Mini faux pumpkins
- Foam ghosts
- Black ribbon or orange ribbon
- Googly eyes
- Small skulls, bones, or witch hats
- Battery-operated LED lights
Choose clean bags without food residue, sticky spills, or strong odors. A bag that once carried onions may technically be recyclable, but it does not need to become the ghost of grocery trips past on your front door. If bags are dusty, wipe them with a damp cloth and let them dry completely before cutting.
Best Plastic Bags for a Boo-tiful Wreath
Not all plastic bags look the same once they are cut and tied. Thin grocery bags create a soft, fluffy finish. Thicker retail bags add structure and color. White bags are perfect for a ghost wreath or mummy-inspired design. Black bags produce a dramatic gothic look. Orange bags are ideal for a pumpkin-style wreath, especially when paired with green plastic strips as vines or leaves.
If you only have bags with store logos, do not panic. Once the strips are tied tightly and fluffed, most printed areas disappear into the texture. For a cleaner look, cut around large logos or place printed strips toward the back of the wreath. For a funky, pop-art Halloween wreath, use the printed pieces proudly. Halloween is already a holiday where people put fake skeletons in lawn chairs, so a little visual chaos is allowed.
Step-by-Step Guide: How to Make a Halloween Wreath with Recycled Plastic Bags
Step 1: Prepare the Wreath Frame
If you are using a wire coat hanger, bend it into a circle. It does not need to be mathematically perfect. A slightly uneven circle adds handmade charm, also known as “I meant to do that.” Keep the hook at the top so you can use it for hanging. If you prefer a neater shape, use a wire wreath form from a craft store. A 12-inch to 16-inch frame works well for most doors.
For a thicker wreath, use a double-wire wreath frame. For a minimalist version, a single coat hanger works just fine. If the hanger feels too flimsy, wrap two hangers together with floral wire or tape before adding the plastic strips.
Step 2: Cut the Bags into Strips
Lay each plastic bag flat and smooth it with your hands. Cut off the handles and bottom seam. Then cut the remaining plastic into strips about 2 inches wide and 8 to 12 inches long. Shorter strips create a tidy wreath. Longer strips create a wild, shaggy wreath that looks like it has been living in a haunted attic and is proud of it.
For a medium-size wreath, start with about 120 to 180 strips. You can always cut more later. If you are crafting with kids, an adult should handle sharp scissors and any hot glue. Children can help sort colors, tie strips, fluff the wreath, and choose decorations.
Step 3: Tie the Plastic Strips Around the Frame
Take one plastic strip and tie it around the wire frame using a simple knot. Pull the knot snug, but not so tight that the plastic tears. Slide the knot close to the previous one. Repeat this process again and again until the frame begins to fill out.
This is the slowest part of the project, but it is also the most satisfying. Put on a Halloween movie, a true-crime podcast, or a playlist that makes you feel like a friendly neighborhood witch. Tie, slide, fluff, repeat. Before long, the wire will disappear under a cloud of spooky plastic ruffles.
Step 4: Build Fullness and Color Patterns
As you tie, decide whether you want a random mix or a planned design. For a ghost wreath, use mostly white plastic bags and add black eyes. For a candy corn wreath, divide the frame into three sections: white at the top, orange in the middle, and yellow at the bottom. For a witch wreath, use black and purple strips with a mini hat. For a monster wreath, use green bags, googly eyes, and a crooked smile made from black felt.
If your wreath looks thin, push the knots closer together. If one area looks flat, add extra strips in that section. The secret to a professional-looking plastic bag wreath is density. The fuller it is, the less it looks like “I tied garbage to a hanger” and the more it looks like “I am a sustainable Halloween genius.”
Step 5: Trim and Fluff
Once the entire frame is covered, shake the wreath gently. This helps the strips open up. Use scissors to trim any pieces that are much longer than the rest. Do not over-trim; uneven edges create texture and movement. Think spooky chic, not military haircut.
Run your fingers through the strips and pull them outward. Rotate the knots so the fuller ends face forward. If you used a wire coat hanger, make sure the hook is centered at the top. If it is not, twist the wreath slightly until it hangs correctly.
Step 6: Add Halloween Personality
Now comes the fun part: decorating. Attach lightweight Halloween accents with twist ties, floral wire, or a low-temperature hot glue gun. Plastic spiders are an easy win. Place three or five spiders across the wreath for a balanced look. Odd numbers often appear more natural in design.
For a ghost wreath, cut two oval eyes and a round mouth from black felt or paper, then glue them onto the plastic ruffles. For a pumpkin wreath, add a green bow at the top to mimic leaves and vines. For a haunted glam wreath, weave in battery-operated LED lights. Avoid real candles or open flames near plastic decorations. Plastic bags and fire are not Halloween friends; they are a bad sequel.
Step 7: Hang the Wreath Safely
Use the hanger hook, ribbon, fishing line, or a removable door hook. If your wreath will hang outdoors, place it on a covered porch or protected door. Although plastic can handle some moisture, strong wind may stretch or tear thin strips. If a storm is coming, bring the wreath inside. Even ghosts know when to avoid bad weather.
Keep the wreath away from porch lights that get hot, candles, heaters, grills, and any open flame. If you add lights, choose battery-operated LED lights because they stay cooler and are safer for craft materials.
Creative Halloween Wreath Ideas Using Recycled Plastic Bags
The Classic Ghost Wreath
Use white plastic bags for the entire wreath. Add black felt eyes and a surprised mouth. Tie a black ribbon at the top. This style is cute, simple, and perfect for families who prefer “adorably haunted” over “nightmare fuel.”
The Candy Corn Wreath
Use white, orange, and yellow bags in color-blocked sections. This design works especially well on a round wire frame. Add a small sign that says “Trick or Treat” or “Boo!” for extra charm.
The Witchy Black Wreath
Use black plastic bags and add purple ribbon, green accents, and a tiny witch hat. A few glittery spiders can make it feel more polished. This wreath looks great on a white, orange, or natural wood door.
The Monster Door Wreath
Use green plastic bags and glue on oversized googly eyes. Add felt teeth near the bottom. The sillier the face, the better. This is a great Halloween craft for kids because monsters do not care about symmetry.
The Spider Nest Wreath
Use gray, white, and black bags mixed together. Stretch a little faux spider web across the center and attach several plastic spiders. This version is spooky without being too scary, unless someone in your house really hates spiders. In that case, congratulations, you have created emotional realism.
Common Mistakes and How to Avoid Them
The first common mistake is cutting strips too narrow. Very thin strips can tear while tying and may not create enough fullness. Aim for about 2 inches wide. The second mistake is using too few strips. A sparse wreath looks unfinished, so keep tying until the frame disappears completely.
The third mistake is placing heavy decorations on the plastic strips instead of securing them to the frame. If you want to add mini pumpkins, skulls, or a sign, wire them directly to the wreath form. Plastic ruffles are decorative; the frame provides the strength.
The fourth mistake is using real candles nearby. Halloween is full of spooky traditions, but accidental fire should not be one of them. Keep this wreath away from flames, high heat, and hot bulbs. LED lights are the safer choice.
The final mistake is throwing the wreath into the trash immediately after Halloween. If it is still in good condition, store it. If it is damaged, remove non-recyclable add-ons and check local plastic film recycling options. Responsible crafting does not end when the candy bowl is empty.
How to Store Your Recycled Plastic Bag Halloween Wreath
To store your wreath, gently shake off dust and remove any loose decorations. Place it in a large paper bag, storage bin, or reused cardboard box. Do not crush it under heavy items, or next year it may emerge looking like a haunted pancake. If the plastic strips become flattened, fluff them by hand before hanging again.
Store the wreath away from heat, direct sunlight, and damp areas. A closet shelf, craft bin, or holiday decoration box works well. Add a label so you can find it next October without opening six mystery boxes and accidentally rediscovering Easter eggs from three years ago.
Extra Tips for a More Polished Look
For a fuller wreath, mix plastic bag strips with fabric scraps, ribbon, or tulle. For a rustic Halloween wreath, attach the plastic ruffles to a grapevine wreath and leave some twigs visible. For a modern look, stick to one color and one accent, such as all black plastic with one orange bow.
If you want a cleaner shape, use strips of equal length. If you want a wild haunted look, vary the lengths slightly. You can also curl the ends of some strips by gently running them between your fingers, but do not use heat. Plastic can melt quickly, and melted plastic is not the scent of cozy fall.
To make the wreath more visible at night, add reflective ribbon or small LED lights. If your front door is dark, a white ghost wreath will stand out better than a black one. If your door is white, black, orange, or purple will pop beautifully.
Experiences from Making a Recycled Plastic Bag Halloween Wreath
The first thing you notice when making this wreath is that plastic bags go much further than expected, but not always as far as you hope. At the beginning, 20 bags may look like a mountain. After cutting and tying for a while, that mountain becomes a small hill, and the wreath starts whispering, “Feed me more strips.” For a full wreath, it is better to prepare extra bags before you begin. Running out halfway through is not a disaster, but it does interrupt the crafting rhythm.
White grocery bags are the easiest to use for a ghost-style wreath because they hide logos well and create a soft, puffy look. Black bags are dramatic but can show thin spots if the wreath is not packed tightly. Orange retail bags are fantastic when you can find them, but they are less common, so save them whenever they appear. Around Halloween, some stores use seasonal bags, and those can become craft gold.
One practical lesson is to cut strips in batches. Cutting one bag, tying one bag, and repeating the process feels organized at first, but it becomes slow. A better method is to flatten several bags, cut off the handles and seams, stack the plastic, and cut multiple strips at once. This saves time and keeps the strip sizes more consistent. Just do not stack too many bags or the scissors may slip.
Another experience is that the wreath looks unimpressive until it suddenly looks amazing. For the first 20 minutes, it may resemble a sad plastic caterpillar clinging to a wire circle. Keep going. The magic happens when the knots are close enough to hide the frame. Once the wreath reaches that fluffy stage, the transformation is surprisingly satisfying. This is the moment when the project stops looking recycled and starts looking intentional.
Decorations should be added slowly. It is tempting to attach every spider, skull, eyeball, and ribbon in the craft drawer, but the wreath can become visually crowded. Start with one focal point, such as a bow or ghost face, then add smaller accents. Step back after each addition. If the wreath looks festive from six feet away, it will look great on a door.
For family crafting, this project works best as an assembly line. One person cuts strips, one person ties, and one person fluffs. Kids usually enjoy choosing colors and adding silly eyes, while adults can manage the frame and glue. The project is repetitive in a calming way, making it a good weekend activity while watching Halloween movies. By the end, everyone feels slightly proud and slightly covered in plastic static.
The biggest surprise is durability. A well-tied plastic bag wreath can last more than one Halloween season if stored properly. The strips may flatten in a box, but they fluff back up with a little finger-combing. If a few pieces tear, simply tie on new strips. This makes the wreath easy to refresh every year. You can even change the theme by removing decorations and adding new ones.
Most importantly, this craft changes how you look at everyday waste. A plastic bag is easy to ignore when it is stuffed under the sink. But when it becomes a ghost wreath, a monster face, or a spider nest, it reminds you that creativity often starts with ordinary materials. That is the real charm of recycled Halloween crafts: they are playful, practical, and just a little rebellious. Instead of buying another decoration, you make one. Instead of tossing a bag immediately, you give it a starring role. Not bad for something that once carried bananas.
Conclusion
Learning how to craft a boo-tiful Halloween wreath with recycled plastic bags is a fun way to decorate your home, save money, and reuse materials that might otherwise be forgotten. With a wire frame, clean plastic bags, scissors, and a few spooky accents, you can create a custom Halloween door wreath that fits your style, whether you love cute ghosts, creepy spiders, classic pumpkins, or full witchy drama.
This project is beginner-friendly, family-friendly, and flexible enough to match whatever supplies you already have. It also encourages more mindful decorating. Reusing plastic bags for seasonal crafts gives them another purpose, and properly recycling or storing the wreath afterward helps keep the project responsible. So before you buy another mass-produced decoration, check your bag stash. Your next Halloween masterpiece may already be hiding in the kitchen cabinet, quietly waiting to say, “Boo.”
Note: This article is original, publication-ready content synthesized from real DIY, recycling, and Halloween safety guidance. Always follow local recycling rules and keep plastic decorations away from flames or high heat.