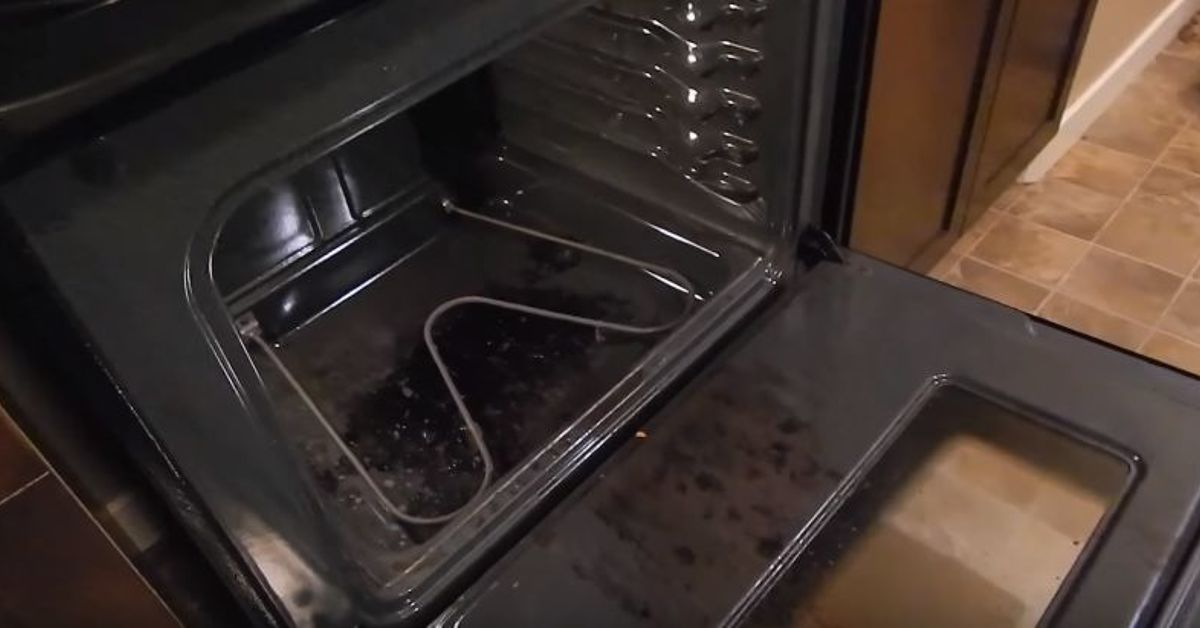
There comes a moment in every kitchen when you open the oven door, look inside, and realize that several previous dinners are still technically living there. A little lasagna sauce on the wall, a mysterious black patch on the bottom, and enough baked-on grease to qualify as archaeological evidenceit happens to the best of us.
Fortunately, learning how to clean your oven with baking soda and vinegar gives you a practical alternative to reaching immediately for a heavy-duty commercial oven cleaner. Baking soda is mildly abrasive and alkaline, making it useful for loosening greasy, cooked-on food. Distilled white vinegar is acidic and works especially well as a finishing rinse for leftover baking soda residue.
There is one important twist, though: dumping baking soda and vinegar together in a bowl is not necessarily the most effective approach. The spectacular fizz is an acid-base reaction that produces carbon dioxide, water, and sodium acetate. Entertaining? Absolutely. A tiny kitchen volcano? Definitely. But for oven cleaning, using the ingredients sequentially usually makes more senselet the baking soda paste work first, then bring in vinegar during cleanup.
Here is a detailed, practical method for getting that oven back into respectable condition without turning your kitchen into a chemistry laboratory.
Why Baking Soda and Vinegar Work for Oven Cleaning
Baking Soda Tackles Grease and Baked-On Food
Baking soda, or sodium bicarbonate, is a gentle alkaline powder with mild abrasive properties. When turned into a thick paste and spread over greasy oven surfaces, it provides both chemical and mechanical help. The paste stays in contact with the mess for hours while its fine particles make later scrubbing easier.
The real secret is not aggressive scrubbing. It is dwell time. Instead of spending 45 minutes attacking a burnt cheese stain as though it personally offended you, coat it with baking soda and give the paste several hours to soften the buildup.
Vinegar Is Most Useful as the Finishing Step
White vinegar can help dissolve mineral residue and makes an excellent follow-up when traces of dried baking soda remain after wiping. When vinegar contacts baking soda, the familiar bubbling reaction also helps reveal spots where alkaline residue is still hiding.
For that reason, this guide does not begin by premixing an enormous bottle of baking soda and vinegar. Once the ingredients react completely, much of their original acidity and alkalinity has been neutralized. Instead, let baking soda do the heavy lifting first and use diluted vinegar later.
What You’ll Need
- About 1/2 to 1 cup baking soda
- Water
- Distilled white vinegar
- A small bowl
- A spray bottle
- Rubber cleaning gloves
- Microfiber cloths or clean rags
- A non-scratch sponge
- A plastic or silicone scraper
- An old toothbrush or small soft-bristle brush
- Dish soap for especially greasy racks, if needed
- Old towels or newspaper to protect the floor
Before using any homemade cleaner, check your oven’s owner’s manual. Some self-cleaning, steam-cleaning, catalytic, or specialty-coated ovens have manufacturer-specific cleaning instructions. The manual wins every argument, even when Pinterest sounds extremely confident.
How To Clean Your Oven With Baking Soda & Vinegar
Step 1: Turn Off the Oven and Let It Cool Completely
Never apply a baking soda mixture to a hot oven. Turn everything off and wait until the interior is completely cool.
Remove cookware, oven thermometers, pizza stones, oven liners, and other accessories. Take out the racks as well unless your manufacturer specifically recommends another cleaning procedure.
Step 2: Remove Loose Crumbs and Debris
Before adding moisture, get rid of anything that can simply be swept, vacuumed, or lifted away. A small vacuum attachment works surprisingly well for dry crumbs.
For larger burnt pieces, use a plastic or silicone scraper. Avoid metal blades unless your appliance manufacturer specifically allows them, particularly around enamel finishes and door glass.
This five-minute preparation prevents you from turning dry bread crumbs into what can only be described as oven-flavored mud.
Step 3: Make a Baking Soda Paste
Start with approximately:
- 1/2 cup baking soda
- 2 to 3 tablespoons water
Add the water gradually. You want a thick but spreadable consistency similar to frosting or toothpaste. For a large or exceptionally dirty oven, double the quantity.
If the interior is coated with heavy grease, a small drop of grease-cutting dish soap can be added, provided your oven manufacturer allows it.
Step 4: Coat the Dirty Oven Interior
Put on gloves and spread the baking soda paste across the dirty interior surfaces using a sponge, brush, or flexible silicone spatula.
Concentrate on:
- The oven floor
- Side walls
- Back wall
- Greasy corners
- Baked-on spills
- The interior oven door and glass, if permitted by the manual
Do not blindly coat everything. Avoid electrical heating elements, gas burner openings, vents, fans, sensors, ignition components, and other areas your manual tells you not to clean.
Also keep cleaning mixtures away from the flexible oven-door gasket. Saturating or aggressively scrubbing this seal can damage it and potentially interfere with the oven’s ability to retain heat.
Step 5: Let the Baking Soda Sit
For a lightly dirty oven, 20 to 60 minutes may be enough to loosen fresh residue. For normal baked-on grime, several hours works better.
For the full deep-clean treatment, leave the baking soda paste for 6 to 12 hours or overnight. Very stubborn buildup can sometimes benefit from an even longer dwell time if your manufacturer’s care instructions permit it.
During this period, the paste may darken or turn brown in greasy areas. That is normal. Your oven has not developed a new disease.
How To Clean Oven Racks While You Wait
The waiting period is the perfect opportunity to deal with oven racks.
Place the racks in a large sink, utility basin, or bathtub lined with an old towel to prevent scratches. Soak them in hot water with dish soap, or apply a baking soda paste directly to stubborn deposits.
Give heavily soiled racks at least one or two hours. Overnight soaking can substantially reduce scrubbing on neglected racks.
After soaking, scrub with a non-scratch sponge or soft brush, paying extra attention to rack intersections where grease likes to establish permanent residency.
Rinse thoroughly and dry before returning the racks to the oven.
Removing the Baking Soda From the Oven
Step 6: Wipe Away the Paste
Use a damp microfiber cloth or sponge to remove as much dried baking soda as possible. Work from the upper surfaces downward so debris naturally falls toward the oven floor.
Rinse your cloth frequently. This stage may require several passes because baking soda has a remarkable ability to appear finished and then magically reappear as a white film ten minutes later.
Use a plastic scraper on softened stubborn deposits. Resist the urge to attack the enamel with steel wool or sharp metal tools.
Step 7: Bring in the Vinegar
Once most of the baking soda has been physically removed, fill a spray bottle with a diluted vinegar solution. A simple mixture is:
- 1 part distilled white vinegar
- 1 part water
Lightly mist areas where baking soda residue remains. You may see bubbling. Wipe immediately with a clean damp cloth.
The vinegar is particularly useful here because it reacts with leftover alkaline baking soda and makes stubborn powdery film easier to identify and remove.
Again, avoid saturating gaskets, electrical components, openings, heating elements, vents, and other sensitive parts.
Step 8: Rinse With Plain Water
This step is easy to overlook but important. Wipe the oven again using a clean cloth dampened with plain water.
Repeat until you no longer see baking soda streaks or smell significant vinegar. Appliance manufacturers commonly emphasize removing cleaner residue before the oven is put back into service.
Dry the interior with a clean microfiber cloth and leave the oven door open briefly so residual moisture can evaporate.
How To Clean the Oven Door Glass
Few things make an otherwise clean oven look dirtier than brown grease baked onto the door window.
If your manual permits baking soda on the glass, spread a thin paste over the dirty interior surface and let it work for approximately 20 to 30 minutes. Wipe with a damp microfiber cloth, using a plastic scraper carefully on stubborn patches.
Finish with diluted vinegar and water, followed by a plain-water wipe and a dry microfiber cloth.
Avoid pouring liquid around the edges of the glass. Oven doors frequently contain multiple glass panels, and getting liquid between them can create streaks that are considerably harder to reach.
Can You Mix Baking Soda and Vinegar Together?
You certainly can. The question is whether you should mix them long before they reach the dirty surface.
Baking soda is a base, while vinegar contains acetic acid. When combined, they react and produce carbon dioxide gasthe bubbles that make the mixture look spectacularly busy.
However, once enough acid and base have reacted, their original properties are reduced. That means a bottle of fully reacted baking soda-and-vinegar solution is not automatically a more powerful cleaner simply because it fizzed impressively earlier.
A more practical approach for an oven is:
- Use baking soda and water as the main cleaning paste.
- Give it time to soften grime.
- Physically wipe away grease and debris.
- Use diluted vinegar afterward to deal with remaining baking soda film.
- Finish with plain water.
Less kitchen volcano, more useful cleaning.
Common Oven-Cleaning Mistakes to Avoid
Using the Self-Clean Cycle With Cleaner Still Inside
Never assume you can apply a cleaner and then turn on a high-temperature self-cleaning cycle. Self-cleaning systems have specific operating instructions. Remove homemade cleaning substances completely and follow your appliance manual.
Scrubbing the Door Gasket
The soft seal around the door is not simply another dirty surface. It helps maintain the proper seal during cooking. Avoid soaking, scraping, or aggressively cleaning it.
Covering Heating Elements
Keep baking soda paste away from exposed electrical elements, gas openings, igniters, fans, sensors, and vents unless your appliance instructions explicitly say otherwise.
Skipping the Final Rinse
If baking soda remains inside the oven, it can dry into a white haze. Vinegar helps remove that film, but plain water should generally provide the final rinse.
Expecting Five Minutes to Fix Five Years of Grime
A severely neglected oven may need two rounds. Natural cleaning methods depend heavily on dwell time and physical wiping. If the first treatment removes 80 percent of the mess, repeat the process on the remaining trouble spots rather than attempting to sandblast them with a sponge.
How Often Should You Clean Your Oven?
There is no universal schedule because oven use varies enormously. Someone roasting vegetables every evening creates a different cleaning challenge from someone whose oven’s primary responsibility is reheating pizza twice a month.
As a practical rule, wipe fresh spills after the oven cools rather than repeatedly baking them onto the surface. Consider a deeper cleaning every few months, or sooner when you notice visible buildup, persistent odors, or smoke caused by food residue.
Regular spot cleaning is much easier than waiting until the oven interior resembles the surface of an unexplored planet.
Easy Ways to Keep Your Oven Cleaner Longer
- Clean spills promptly: Once the oven is cool, wipe fresh splatters before they become carbonized decorations.
- Use a baking sheet beneath messy dishes: A sheet pan can catch drips from pies, casseroles, and bubbling cheese.
- Use appropriately sized cookware: Overfilled baking dishes are basically scheduled cleaning appointments.
- Check food before it boils over: Five seconds of prevention can save an hour of scrubbing.
- Wipe the door regularly: Light grease is dramatically easier to remove before repeated heating darkens it.
- Follow manufacturer guidance: Do not line the oven floor or block vents unless the appliance instructions specifically allow the product or method you intend to use.
Experience-Based Lessons for Cleaning an Oven With Baking Soda and Vinegar
When you compare real-world oven-cleaning routines, one lesson appears again and again: patience usually matters more than force. People often begin a deep clean expecting the baking soda to work like a commercial sprayapply it, count to 30, wipe once, and admire their reflection. That expectation creates unnecessary frustration.
The better experience usually comes from planning the job around waiting time. Applying the paste after dinner and wiping it away the next morning, for example, turns the project into two relatively short sessions. You spend perhaps 15 minutes preparing the oven at night, then return when the residue has softened considerably. The oven essentially spends the night doing the least exciting sleepover activity imaginable.
Another practical observation concerns paste consistency. A runny mixture is annoying because it slides off vertical walls and collects on the oven floor. An excessively dry mixture, meanwhile, crumbles before it can be spread. Adding water slowly produces a frosting-like paste that stays where you put it. Starting with less water is much easier than attempting to rescue baking soda soup.
Heavily carbonized spots also teach an important lesson. One patch sometimes remains after everything else looks clean. The natural reaction is to scrub that one spot harder and harder. Usually, a second targeted application of baking soda is easier. Cover the remaining stain, mist it lightly with water, give it another hour or two, and try again with a plastic scraper or non-scratch sponge.
The vinegar stage is another area where technique improves the experience. Spraying vinegar everywhere immediately after opening the oven creates enormous amounts of foam and wet baking soda. It looks productive but can make cleanup messier. Removing most of the dried paste first and then misting vinegar onto remaining residue creates a much more controlled process.
White streaks are probably the most common surprise for first-time users. The oven can look beautifully clean while wet and then develop chalky patches as it dries. This usually means some baking soda remains. A light vinegar wipe followed by clean water generally solves the problem. A flashlight aimed sideways across dark enamel can help reveal residue before you declare victory.
Racks deserve their own strategy too. Trying to scrub dry, greasy racks over the kitchen sink is awkward, messy, and surprisingly good exercise. Soaking them first changes the job completely. Hot water, time, and a suitable cleaner soften residue around the joints and rails, meaning the brush does far less work later.
Finally, the most valuable experience may be discovering that you do not need to wait for an oven emergency. Once a thick black layer has formed, cleaning becomes a project. Wiping a fresh casserole spill after the appliance cools takes perhaps a minute. The difference between those two scenarios is essentially procrastination being converted into manual labor.
A baking soda-and-vinegar oven cleaning routine is therefore best viewed less as a miracle hack and more as a low-cost process: loosen, wait, wipe, rinse, and repeat only where necessary. It is simple, but doing the steps in the right order makes an enormous difference.
Final Thoughts
Cleaning an oven with baking soda and vinegar does not require exotic equipment or heroic scrubbing. The most effective approach is to let a baking soda-and-water paste remain on greasy buildup long enough to soften it, physically remove the loosened grime, and then use diluted white vinegar as a finishing aid for stubborn baking soda residue.
Take your time, protect sensitive oven components, rinse everything thoroughly, and always give your appliance’s owner’s manual priority over generic cleaning advice.
The biggest advantage is simplicity. A box of baking soda, a little vinegar, some water, and a patient evening can transform an oven that looks frighteningly well seasoned into one you are happy to cook in again.
Note: Oven designs and interior coatings vary. Before using baking soda, vinegar, dish soap, steam, commercial cleaners, or a self-cleaning cycle, consult the cleaning and care instructions supplied by your oven manufacturer.