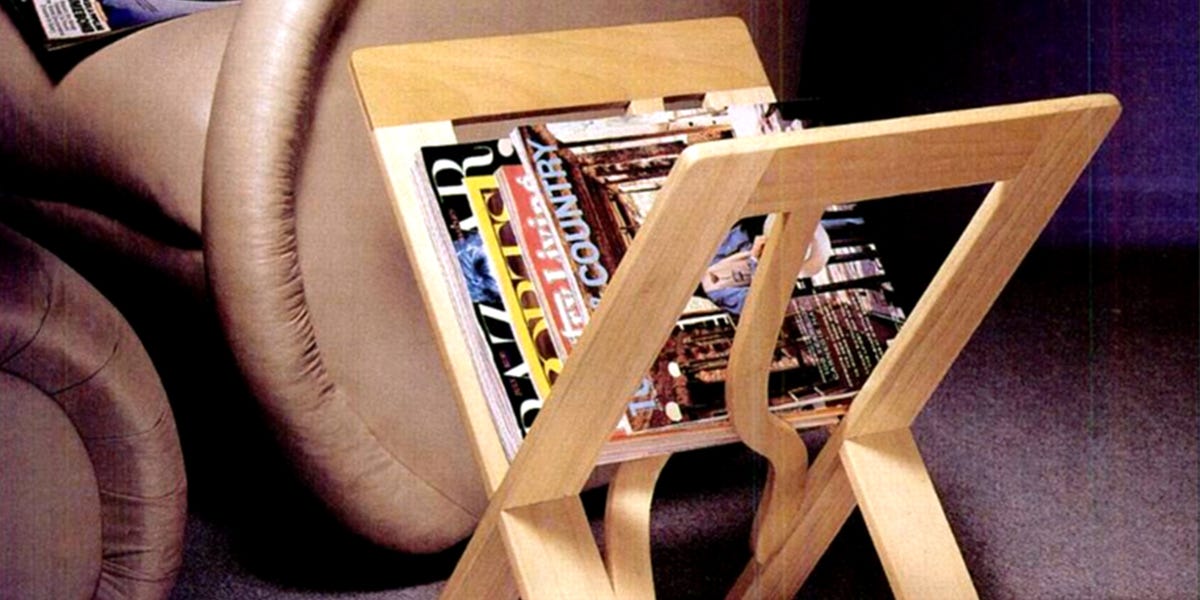
A good magazine rack does not need to look like it was designed by a committee of furniture professors wearing tiny round glasses. Sometimes the best home projects are simple, useful, and handsome enough to make your living room look slightly more organized than your actual life. That is exactly what this simple magazine rack does.
This project is designed for beginners, weekend DIY fans, renters who want cleaner storage, and anyone whose coffee table currently looks like a paper avalanche. With basic lumber, a few common tools, and a relaxed afternoon, you can build a wooden magazine rack that holds magazines, catalogs, notebooks, mail, slim books, or that one design issue you keep saving because “someday” you will definitely redo the hallway.
The version in this guide is a wall-mounted wooden magazine rack with a shallow pocket, front rail, and clean modern lines. It is sturdy, inexpensive, and customizable. Paint it white for a farmhouse look, stain it walnut for a warmer finish, or go bold with a color that says, “Yes, I own a drill and I have opinions.”
Why Build a DIY Magazine Rack?
A DIY magazine rack solves a surprisingly common problem: flat surfaces collect paper. Coffee tables collect magazines. Kitchen counters collect mail. Entryway benches collect school flyers, catalogs, receipts, and mysterious envelopes that nobody wants to open. A wall-mounted magazine rack gives those papers a proper home while freeing up your surfaces.
Building one yourself also lets you control the size, finish, and style. Store-bought racks may be too deep, too narrow, too rustic, too shiny, or too expensive for what is basically a polite wooden pocket. With this project, you can make a rack that fits your wall, matches your decor, and holds exactly what you want it to hold.
Project Overview
This simple magazine rack uses a flat back panel, two side pieces, a bottom ledge, and a front rail. The back panel supports the structure, the bottom ledge keeps magazines from sliding out, and the front rail holds everything in place while still allowing the covers to show. The result is practical storage that doubles as casual wall decor.
Recommended Finished Size
A good all-purpose size is approximately 18 inches wide, 12 inches tall, and 3 inches deep. This fits most magazines without feeling bulky. If you want to hold oversized art magazines or kids’ picture books, increase the width to 22 or 24 inches and make the front rail slightly taller.
Difficulty Level
This is a beginner-friendly woodworking project. You should be comfortable measuring, cutting, sanding, drilling pilot holes, and driving screws. If you are new to power tools, work with someone experienced and follow the tool manufacturer’s safety instructions.
Materials You Will Need
- One 1/2-inch plywood panel, cut to 18 inches by 12 inches
- One 1×4 board for the bottom shelf, cut to 18 inches long
- One 1×2 board for the front rail, cut to 18 inches long
- Two 1×3 boards for side supports, cut to 12 inches long
- Wood glue
- 1-inch or 1 1/4-inch wood screws
- Wood filler
- 120-grit and 220-grit sandpaper
- Paint, stain, or clear protective finish
- Wall anchors or screws appropriate for your wall type
Tools You Will Need
- Tape measure
- Pencil
- Square
- Miter saw, circular saw, or handsaw
- Drill/driver
- Clamps
- Sanding block or random orbital sander
- Paintbrush, foam brush, or clean staining cloth
- Stud finder, if mounting to a wall
- Level
Step-by-Step Instructions
Step 1: Choose the Best Location
Before cutting wood, decide where the magazine rack will live. Good locations include beside a reading chair, near an entryway, next to a desk, in a bathroom, beside a child’s bed, or on a kitchen wall for mail and recipe magazines. The rack should be easy to reach but not placed where elbows, backpacks, or door swings will attack it daily.
Hold a magazine against the wall to visualize the height. For a living room, 30 to 42 inches from the floor often feels natural. For a child’s room, mount it lower. For an entryway mail station, place it near keys, bags, or a small command center.
Step 2: Cut the Wood Pieces
Cut your back panel to 18 inches wide by 12 inches tall. Then cut the bottom shelf from a 1×4 board to 18 inches long. Cut the front rail from a 1×2 board to 18 inches long. Finally, cut two side supports from 1×3 boards to 12 inches long.
If your lumber has rough ends, trim a tiny amount off before measuring final pieces. Clean cuts make assembly easier and reduce the amount of sanding later. This is one of those small steps that feels fussy until your project looks square and you quietly congratulate yourself.
Step 3: Dry-Fit the Rack
Place the plywood back panel flat on your work surface. Position the bottom shelf along the lower edge, with the shelf projecting forward. Set the side supports vertically on the left and right edges. Then place the front rail across the lower front area, about 2 to 3 inches above the bottom shelf.
This dry fit helps you catch layout mistakes before glue enters the chat. Make sure magazines can slide in easily and lean slightly backward against the panel. If the pocket feels too shallow, you can use a wider bottom board. If it feels too deep, trim the shelf or move the front rail closer to the panel.
Step 4: Sand Before Assembly
Sand all visible faces and edges before you assemble the rack. Start with 120-grit sandpaper to smooth saw marks, then move to 220-grit for a finer surface. Slightly round the front edges of the rail and shelf so they feel comfortable to the touch.
Do not skip sanding the inside corners now. Once the rack is assembled, those areas become harder to reach, and you may find yourself poking sandpaper into corners like a raccoon trying to solve a puzzle. Sand first, thank yourself later.
Step 5: Attach the Bottom Shelf
Apply a thin line of wood glue along the bottom edge of the back panel where the shelf will attach. Position the 1×4 bottom shelf so it sits flush with the left and right edges. Clamp it in place if possible. Drill pilot holes through the back panel into the shelf, then drive screws to secure the joint.
Pilot holes help prevent splitting, especially near board ends. Use two or three screws along the width of the shelf. Wipe away excess glue with a damp cloth before it dries. Dried glue can interfere with stain, and it has a sneaky way of showing up exactly where you do not want it.
Step 6: Attach the Side Supports
Add glue along the back edge of each side support and position them vertically on the left and right sides of the panel. The side supports help form the magazine pocket and give the rack a finished frame-like look. Drill pilot holes from the back and secure each side with screws.
Check that the side supports are square to the bottom shelf. A carpenter’s square is useful here, but you can also use careful measuring. A slightly uneven rack may still hold magazines, but a square rack looks intentional instead of “handmade in a wind tunnel.”
Step 7: Install the Front Rail
The front rail is the piece that keeps magazines from falling forward. Position the 1×2 board across the front of the rack, usually 2 to 3 inches above the bottom shelf. You can attach it directly to the side supports with glue and screws or brad nails.
If you prefer a cleaner face with no visible screws, drive screws from the outside of the side supports into the ends of the rail, then fill the holes. Another option is to use pocket holes from the inside, but that requires a pocket-hole jig. For a simple build, glue and screws are reliable and easy.
Step 8: Fill Holes and Sand Again
Apply wood filler to screw holes, gaps, or tiny imperfections. Let it dry according to the product directions, then sand the filled areas smooth. Run your hand over the rack to feel for rough spots. Your fingers will find bumps your eyes miss.
After sanding, remove dust with a vacuum, tack cloth, or clean dry rag. Dust left on the wood can create a rough finish. Think of sanding dust as glitter’s less festive cousin: it gets everywhere and somehow ruins the mood.
Finishing Options
Option 1: Paint for a Clean, Modern Look
Paint is forgiving and ideal if you are using budget lumber or plywood with visible patches. Apply primer first, especially if the wood is porous or uneven in color. Then apply two thin coats of interior paint, letting each coat dry fully. Satin or semi-gloss paint is easier to wipe clean than a flat finish.
Option 2: Stain for a Warm Wood Finish
If you like visible grain, stain is a great choice. Sand the wood evenly, remove dust, and apply stain with the grain. Wipe off excess stain after a few minutes so the color does not become blotchy or sticky. For softwoods like pine, a pre-stain conditioner can help the color absorb more evenly.
Option 3: Clear Finish for a Natural Style
A clear finish protects the wood while keeping the look simple. Use polyurethane, polycrylic, shellac, or another interior clear coat. Apply thin coats and sand lightly between coats if the product instructions recommend it. Clear finish is especially nice for birch plywood, oak, walnut, maple, or any wood with attractive grain.
How to Mount the Magazine Rack Safely
Once the finish is dry, it is time to hang the rack. Use a stud finder to locate wall studs whenever possible. Mounting into studs provides the strongest hold. If studs are not available where you want the rack, use wall anchors rated for the weight of the rack plus the magazines it will hold.
Hold the rack against the wall and place a level across the top. Mark screw locations through the back panel. Drill pilot holes, then fasten the rack to the wall. Test it gently before loading it with magazines. Add a few items first, then gradually fill it. A rack that falls off the wall is not storage; it is a dramatic announcement.
Design Variations to Try
Add a Second Pocket
If you need more storage, build a taller back panel and add a second front rail above the first. This creates two magazine rows. It works well for offices, waiting areas, craft rooms, and family command centers.
Use Dowels Instead of a Front Rail
For a lighter, more decorative look, replace the 1×2 front rail with a wooden dowel. Drill matching holes in the side supports and glue the dowel into place. This gives the rack a mid-century or Scandinavian feel.
Add Labels
If the rack will hold mail, homework, coupons, or project folders, add small label holders to the front rail. Labels such as “Read,” “File,” “Pay,” or “Someday When I Become Organized” can be surprisingly helpful.
Make It Freestanding
To make a tabletop magazine holder, widen the base and angle the back panel slightly. Add a rear support leg or triangular side panels. This version works well beside a sofa or on a large desk.
Common Mistakes to Avoid
The first common mistake is making the pocket too deep. A deep rack may hide magazine covers and make items hard to grab. A shallow pocket lets covers show and keeps the rack visually light.
The second mistake is skipping pilot holes. Small boards can split when screws are driven too close to the ends. Pilot holes take only a moment and make the project stronger.
The third mistake is rushing the finish. Paint, stain, and clear coat all need drying time. If you handle the rack too soon, you may leave fingerprints, smudges, or mystery marks that appear to have been made by a tiny furniture goblin.
The fourth mistake is weak mounting. Even a lightweight wooden magazine rack becomes heavier once filled. Use studs or proper wall anchors, and do not rely on tiny nails unless the rack is purely decorative.
Where This Simple Magazine Rack Works Best
In a living room, this rack keeps reading material beside a favorite chair without taking over the coffee table. In an office, it can organize notebooks, catalogs, brochures, and folders. In a kitchen, it can hold meal plans, recipe magazines, or takeout menus. In a child’s room, it creates an easy front-facing book display that encourages reading because covers are visible.
It also works beautifully in small spaces. Wall-mounted storage uses vertical space, which is often ignored. If your home lacks square footage, the walls can become your best storage allies. They are just standing there anyway.
Budget Tips
This project can be very affordable. Check the scrap bin at your local home center for plywood offcuts or short boards. Use leftover paint from another room. Reuse old cabinet knobs as decorative hooks on the bottom. If you have pallet wood or reclaimed boards, you can use them, but inspect carefully for damage, nails, stains, and rough edges.
For a polished look on a small budget, spend your effort on sanding and finishing. In many beginner projects, careful prep matters more than expensive materials. A neatly sanded pine rack with a smooth coat of paint can look better than pricey hardwood assembled in a hurry.
Maintenance and Care
Dust the rack regularly with a soft cloth. If it is painted or sealed, wipe it with a slightly damp cloth when needed. Avoid overloading it with heavy books unless you designed and mounted it for that weight. Every few months, check the wall screws to make sure they remain tight.
If the finish gets scratched, lightly sand the damaged area and touch it up with matching paint or clear coat. Small repairs are easy, and because you built the rack yourself, you will not feel intimidated by maintenance. You know every screw, every edge, and every tiny mistake you heroically hid with wood filler.
Experience Notes: What You Learn While Building a Simple Magazine Rack
One of the best things about building a simple magazine rack is that the project teaches several core woodworking lessons without overwhelming you. You learn how important accurate measuring is. You learn that lumber is not always perfectly straight, even when it looks innocent at the store. You learn that sanding is not glamorous, but it is the difference between “nice handmade piece” and “splinter delivery system.”
Many builders discover that the dry-fit stage is more valuable than expected. When all the pieces are laid out before glue is applied, the design becomes easier to understand. You may realize the front rail should sit a little higher, the shelf should be slightly deeper, or the side supports would look better with rounded corners. This is where a simple project becomes your project.
The finishing stage also teaches patience. Paint may look uneven after the first coat, and stain may seem too light before the clear finish deepens it. Beginners often want to judge the project too early. Give the finish time to dry, add the next coat carefully, and let the piece come together gradually. Furniture projects have a way of looking questionable right before they look great.
Another useful experience is learning how much weight wall storage can hold. A magazine rack seems light, but paper adds up quickly. A few glossy magazines can feel surprisingly heavy. That is why strong mounting matters. Once you have successfully mounted this rack, you will feel more confident installing shelves, hooks, and other wall organizers around the house.
You may also notice how much a handmade item changes a room. A simple wooden rack can make a reading corner feel intentional. It creates a place for favorite magazines, a notebook, a sketchpad, or a few slim books. Instead of clutter, the same items become part of the decor. That is the quiet magic of good storage: it does not just hide things; it gives them a better role.
If you build this project more than once, you will probably improve it each time. The first version might be basic and practical. The second might include a dowel rail, a stained finish, or a small label plate. The third might become a gift. Simple woodworking projects are addictive that way. One minute you are building a magazine rack; the next minute you are looking at every wall in your house and thinking, “I could put storage there.”
The biggest lesson is that useful DIY does not have to be complicated. You do not need a giant workshop, exotic hardwood, or a tool collection that requires its own insurance policy. With a few boards, careful measurements, and a little patience, you can create something attractive and functional. And unlike flat-pack furniture, this rack comes with bragging rights built in.
Conclusion
Building this simple magazine rack is a practical, beginner-friendly way to add storage and personality to your home. It uses basic materials, common tools, and straightforward assembly steps, but the finished result feels polished and useful. Whether you mount it beside a reading chair, in an entryway, in a home office, or in a child’s room, the rack helps control paper clutter while adding a handmade touch.
The beauty of this DIY magazine rack is its flexibility. You can paint it, stain it, resize it, add labels, use dowels, or build multiple pockets. Start with the basic design, then adjust it to fit your space and style. By the end, you will have more than a place to store magazines. You will have a small woodworking win, and those are always worth celebrating.