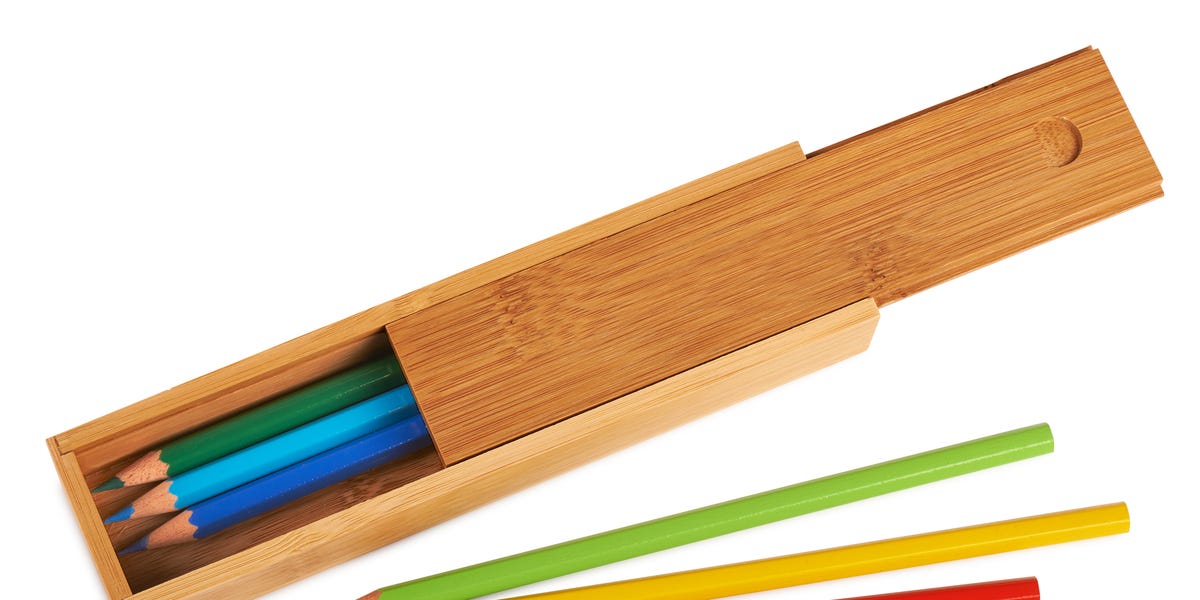
Note: This beginner-friendly guide is designed for a simple wooden pencil box that can be made with basic tools, affordable materials, and a patient attitude. The attitude is optional, but highly recommended.
Introduction: A Small Box With Big DIY Energy
A pencil box sounds simple, and that is exactly why it is such a satisfying woodworking project. It does not require a giant workshop, a heroic collection of power tools, or the emotional stamina needed to build a dining table that seats twelve. A simple pencil box is practical, customizable, inexpensive, and small enough that mistakes are fixable instead of tragic.
Whether you want a handmade school supply case, a desk organizer, a gift for a student, or a neat home for colored pencils, learning how to build a simple pencil box teaches several core woodworking skills. You will measure, cut, glue, clamp, sand, finish, and maybe even whisper encouraging words to a stubborn lid. By the end, you will have a useful wooden box and a better understanding of how small DIY projects come together.
This guide focuses on a basic rectangular pencil box with a removable or sliding lid. The design is beginner-friendly, but it still looks clean and intentional. You can build it from pine, poplar, plywood, craft boards, or scrap hardwood. The project is also easy to personalize with paint, stain, woodburning, decals, initials, or bright colors that say, “Yes, I organize my pencils, and yes, I am thriving.”
What Is a Simple Pencil Box?
A simple pencil box is a small container designed to hold pencils, pens, erasers, sharpeners, markers, or other desk supplies. In woodworking terms, it is a small rectangular box with four side walls, a bottom panel, and a lid. The lid can lift off, slide into grooves, or hinge open, depending on your tools and skill level.
The easiest version uses straight cuts, wood glue, clamps, and light sanding. For beginners, a lift-off lid is the simplest option. A sliding lid looks more polished and keeps supplies secure, but it requires a little more accuracy. A hinged lid is also attractive, though tiny hinges can be surprisingly dramatic for such small pieces of metal.
Why Build a Pencil Box Instead of Buying One?
Store-bought pencil boxes are convenient, but a handmade pencil box has character. It can be sized perfectly for your favorite pencils, built from leftover wood, and finished to match your desk, backpack, craft room, or child’s school supplies. It also makes a thoughtful handmade gift because it is useful without being overly complicated.
Building your own pencil box also helps you practice woodworking on a small scale. A box teaches precision. If the sides are slightly uneven, the lid will complain. If the glue-up is crooked, the corners will reveal the truth. That sounds intimidating, but it is actually helpful. Small projects show you what matters without using a mountain of materials.
Tools and Materials You Will Need
Basic Materials
- One 1/4-inch plywood sheet, craft board, or thin solid wood board
- Wood glue
- Sandpaper in 120-grit, 180-grit, and 220-grit
- Small clamps or painter’s tape for holding pieces while glue dries
- Wood filler, optional
- Paint, stain, clear polyurethane, shellac, or natural oil finish
- Small hinges, optional for a hinged lid
- Felt pads or lining, optional
Basic Tools
- Measuring tape or ruler
- Pencil
- Square
- Hand saw, miter saw, table saw, or craft saw
- Clamps
- Drill, optional for hinges or pilot holes
- Sanding block
- Small brush or rag for finish
You do not need every fancy tool in the woodworking aisle. For this project, accuracy matters more than horsepower. A clean measurement, a square cut, and a careful glue-up will do more for your pencil box than an expensive tool you bought because it looked powerful and emotionally supportive.
Recommended Pencil Box Dimensions
A practical pencil box should fit standard pencils, which are usually about 7.5 inches long before sharpening. A good finished size is approximately 8.5 inches long, 3 inches wide, and 1.5 to 2 inches tall. This gives enough room for pencils, pens, a small eraser, and a sharpener.
Suggested Cut List
- Bottom panel: 8.5 inches by 3 inches
- Two long sides: 8.5 inches by 1.5 inches
- Two short ends: 3 inches by 1.5 inches
- Lid: 8.75 inches by 3.25 inches for a lift-off lid
These measurements are flexible. If you want a colored pencil box, make it longer or wider. If it is for a backpack, keep it compact. If it is for a desk, you can add compartments. The beauty of DIY is that the pencil box serves you, not the other way around.
Step-by-Step Guide: How To Build a Simple Pencil Box
Step 1: Choose the Right Wood
For a first pencil box, pine, poplar, basswood, or thin plywood are excellent choices. Pine is affordable and easy to find. Poplar is smooth and paints beautifully. Plywood is stable and resists warping, especially in thin panels. Hardwood scraps such as maple, cherry, or walnut can create a more premium pencil box, but they may require sharper tools and more careful sanding.
Avoid warped, cracked, or heavily knotted wood. A knot in the middle of a tiny pencil box side can make cutting and sanding harder than necessary. Choose flat pieces with straight grain whenever possible.
Step 2: Measure Twice, Cut Once
Measure each piece carefully and mark cut lines with a sharp pencil. Use a square to keep lines straight. This is the point where many beginner projects succeed or quietly prepare to become “rustic.” Rustic is charming, but square corners are still the goal.
Cut the bottom, long sides, short ends, and lid according to your cut list. If you are using a hand saw, clamp the wood before cutting and let the saw do the work. Rushing creates rough edges and uneven cuts. If you are using a power saw, wear eye protection, keep hands away from the blade, and follow the tool manufacturer’s safety instructions.
Step 3: Dry-Fit the Pieces
Before reaching for glue, assemble the pieces without adhesive. Place the two long sides along the long edges of the bottom panel, then position the short end pieces between them. Check whether the corners meet cleanly and whether the box sits flat.
If one side is slightly too long, sand or trim it carefully. A dry fit saves frustration because wet glue has a magical ability to make small problems feel urgent. Think of dry-fitting as a rehearsal before opening night.
Step 4: Glue the Box Together
Apply a thin, even bead of wood glue along the bottom edges of the side pieces and the meeting edges at the corners. Do not drown the wood in glue. Too much glue creates squeeze-out, slippery parts, and a cleanup session nobody asked for.
Press the sides into place around the bottom panel. Use clamps to hold the box square while the glue sets. If you do not have small clamps, painter’s tape can work for light-duty pressure on small boxes. Wrap the tape tightly around the box to hold the corners together.
Wipe away excess glue with a damp cloth while it is still wet. Dried glue can block stain and create pale patches, so cleaning now saves trouble later. Let the glue dry according to the glue manufacturer’s instructions. Many common wood glues need at least 30 minutes to an hour of clamp time for unstressed joints, but the box should not be handled roughly until the glue has cured longer.
Step 5: Check for Square
While the glue is still workable, check that the pencil box is square. Measure diagonally from corner to corner in both directions. If the measurements match, the box is square. If not, gently adjust the shape before the glue sets.
You can also place the box against a square or check that the lid sits evenly on top. A slightly imperfect box can still be useful, but a square box looks better and makes the lid easier to fit.
Step 6: Make the Lid
The simplest lid is a flat piece of wood that rests on top of the pencil box. Cut it slightly larger than the box opening so it overhangs a little on each side. Sand the edges smooth and round the corners slightly for a comfortable feel.
If you want a more secure lid, glue two narrow strips underneath the lid so they fit just inside the box opening. These strips act as guides and keep the lid from sliding off. Leave a tiny amount of clearance so the lid is easy to remove. Wood can expand slightly with humidity, and a too-tight lid may decide to become a permanent roof.
For a sliding lid, cut shallow grooves along the inside top edges of the long sides before assembly. The lid slides through these grooves from one end. This looks elegant, but it requires careful planning. If this is your first pencil box, the lift-off lid is easier and still works beautifully.
Step 7: Sand Everything Smooth
Sanding turns a basic wooden box into something that feels finished. Start with 120-grit sandpaper to smooth cut edges and remove rough spots. Move to 180-grit, then finish with 220-grit for a soft, clean surface. Always sand with the grain when working with solid wood.
Round over sharp edges slightly, especially if the pencil box will be used by children. The goal is not to remove the box’s shape, but to make it comfortable to handle. Pay special attention to corners, lid edges, and the inside rim.
Step 8: Fill Small Gaps if Needed
If you notice tiny gaps at the corners, apply a small amount of wood filler. Let it dry, then sand it smooth. Wood filler works well if you plan to paint the box. If you plan to stain it, choose a stainable filler and test it first because filler can absorb color differently than wood.
Small flaws are normal, especially on a first project. A handmade pencil box should look neat, but it does not need to look like it came from a machine. Machines are efficient; handmade projects have personality.
Step 9: Add Compartments, Optional
To make the pencil box more organized, add a thin divider inside. Cut a narrow strip of wood to fit across the width or length of the box, then glue it in place. One small section can hold erasers and sharpeners while the longer section holds pencils.
For artists, you can create several channels for colored pencils. For students, keep the design simple so it is easy to clean. For office use, consider a wider box that holds pens, sticky notes, clips, and other desk supplies.
Step 10: Finish the Pencil Box
A finish protects the wood and improves the appearance. Paint is the easiest choice if you want bold color or if the wood has visible filler. Stain highlights the grain and gives the pencil box a warmer, more traditional look. Clear polyurethane adds durability for daily use. Water-based finishes are popular for indoor projects because they dry quickly, have lower odor, and clean up with water.
Apply finish in thin coats. Thick coats can drip, bubble, or stay tacky longer than expected. Lightly sand between coats if the product instructions recommend it. Let the finish cure fully before loading the box with supplies.
Safety Tips for Building a Pencil Box
Even a small woodworking project deserves safe habits. Wear safety glasses when cutting, sanding, or drilling. Use a dust mask or respirator when sanding, especially indoors. Clamp wood before cutting so it does not shift. Keep fingers away from blades, and never rush a cut just because the project is small.
Work in a ventilated area when applying stain, paint, or clear finish. Keep finishes away from open flames. Dispose of oily rags according to the product label because some finishing oils can generate heat as they dry. Safety may not be glamorous, but neither is explaining to your pencil box that the project ended because you ignored the goggles.
Design Ideas for a Custom Pencil Box
Painted School Pencil Box
Paint the box in bright colors and add a child’s name with letter stickers or stencils. A clear topcoat can help protect the paint from scratches.
Natural Wood Desk Box
Use poplar, maple, cherry, or walnut and finish it with clear polyurethane or oil. This style looks clean, mature, and perfect for a home office.
Artist Pencil Box
Make the box longer and add dividers for colored pencils, blending stumps, erasers, and sharpeners. A sliding lid is especially useful for artists who carry supplies.
Rustic Scrap Wood Pencil Box
Use leftover wood pieces, sand the edges smooth, and finish with stain. Slight color variations can make the box look charming and handmade.
Personalized Gift Pencil Box
Add initials, a date, a quote, or a small design with woodburning tools. Handmade pencil boxes make thoughtful gifts for students, teachers, artists, writers, and anyone whose desk currently looks like a stationery tornado passed through.
Common Mistakes and How To Avoid Them
Using Too Much Glue
More glue does not mean a stronger pencil box. A thin, even layer is enough. Excess glue creates mess and can interfere with stain.
Skipping the Dry Fit
Dry-fitting helps you catch problems before glue is involved. Always test the assembly first.
Not Sanding Enough
A pencil box is handled often, so rough edges are noticeable. Sand the inside, outside, corners, and lid carefully.
Making the Lid Too Tight
A tight lid may stick when humidity changes. Leave a little clearance so it opens smoothly.
Ignoring Grain Direction
When sanding solid wood, sand with the grain to avoid visible scratches. Cross-grain scratches become much more obvious after staining.
How Long Does It Take To Build a Simple Pencil Box?
The hands-on work can take about two to four hours for a beginner. However, drying time for glue and finish may stretch the project across a day or two. The actual build is quick, but patience makes the final result better.
If you paint or apply multiple coats of finish, allow proper drying time between coats. A pencil box that feels dry to the touch may still need more time before it is ready for daily use. Waiting is not exciting, but neither is leaving fingerprints in fresh finish.
How Much Does It Cost?
A simple pencil box can be very affordable. If you already have basic tools and scrap wood, the project may cost only a few dollars for glue, sandpaper, or finish. If you buy new craft boards, wood glue, and paint, expect a modest beginner project cost. The most expensive part is usually tools, but those can be reused for many future DIY projects.
Beginner-Friendly Variations
No-Saw Pencil Box
Some craft stores sell pre-cut wood pieces. You can choose pieces close to your desired dimensions and assemble them with glue. This is a good option for kids, classrooms, or apartment DIY projects.
Cardboard Prototype
Before cutting wood, make a quick cardboard model. This helps you test the size and lid style. It also prevents the classic beginner mistake of building a box that fits everything except actual pencils.
Decorative Lid
Add a thin contrasting strip of wood to the lid, paint a pattern, or attach a small wooden knob. Small details can make a simple box look more professional.
Cleaning and Maintaining Your Pencil Box
To clean a wooden pencil box, wipe it with a dry or slightly damp cloth. Avoid soaking it in water. If pencil graphite collects inside, use a soft brush or cloth to remove dust. For painted or clear-coated boxes, a gentle wipe is usually enough.
If the finish becomes scratched over time, lightly sand the surface and add another thin coat of finish. A wooden pencil box can last for years with basic care, and small signs of use often make it more charming.
Experience Section: Real-World Lessons From Building a Simple Pencil Box
The first thing you learn when building a pencil box is that small projects are not automatically easy projects. They are manageable, yes, but they also reveal every tiny measurement mistake with the confidence of a math teacher holding a red pen. A pencil box is simple enough for beginners, but it still rewards patience, clean cuts, and careful assembly.
One useful experience is to cut all matching pieces at the same time whenever possible. For example, the two long sides should be exactly the same length, and the two short ends should match each other. If one side is even slightly longer, the box may twist during glue-up. The project will still hold pencils, but the lid may wobble like it has a tiny wooden attitude problem.
Another lesson is that clamps are helpful, but they are not magic. When clamping a small box, too much pressure can cause pieces to slide out of alignment. Gentle, even pressure works better than squeezing the project like it owes you money. Painter’s tape is surprisingly useful for lightweight boxes because it holds the corners together without crushing anything.
Sanding also matters more than beginners expect. The difference between a rough craft project and a smooth handmade pencil box often comes down to ten extra minutes of sanding. Rounded edges make the box feel better in the hand. A smooth lid feels more finished. Even the inside should be sanded because pencils, erasers, and fingers will touch it often.
Finishing is where personality enters the project. A painted pencil box can look playful and modern. A stained box feels traditional and warm. A clear finish lets the wood grain show, which is especially attractive if you use hardwood scraps. If the box is for a child, bright paint and a name on the lid can make it special. If it is for an adult desk, a satin clear coat over clean wood looks simple and elegant.
One practical tip is to avoid overcomplicating the first build. Skip the hinges, hidden magnets, secret compartments, carved dragons, and complicated joinery until you have built one clean basic box. The first pencil box teaches the fundamentals. The second one can be fancier. By the third one, you may start looking at every scrap of wood and thinking, “That could be a pencil box.” This is normal. Welcome to woodworking.
It also helps to think about how the box will actually be used. A school pencil box should be sturdy, light, and easy to open. An artist’s pencil box may need dividers and a secure lid. A desk pencil box can be wider and more decorative. A gift pencil box should feel personal, perhaps with initials, a favorite color, or a small message inside the lid.
The most satisfying part is loading the finished box with pencils for the first time. Suddenly, a few flat pieces of wood become something useful. It has a purpose. It clears clutter. It sits proudly on a desk as if it has always belonged there. And unlike many beginner projects, a pencil box does not demand much space. It simply does its job, quietly holding pencils and making you feel like a capable human being with excellent stationery management skills.
Conclusion
Learning how to build a simple pencil box is a rewarding way to practice basic woodworking while creating something useful. With a few pieces of wood, careful measurements, wood glue, sanding, and a protective finish, you can make a custom pencil box for school, art supplies, office tools, or handmade gifts. The project is small, affordable, and beginner-friendly, but it still teaches valuable skills such as cutting accurately, assembling square corners, fitting a lid, and finishing wood properly.
Start with a basic design, keep your measurements simple, and focus on clean construction. Once you understand the process, you can personalize future pencil boxes with dividers, sliding lids, paint, stain, woodburning, or decorative hardware. A handmade pencil box may be humble, but it is also proof that useful things do not have to be complicated. Sometimes the best DIY project is just a small box that keeps your pencils from staging a dramatic escape across the desk.