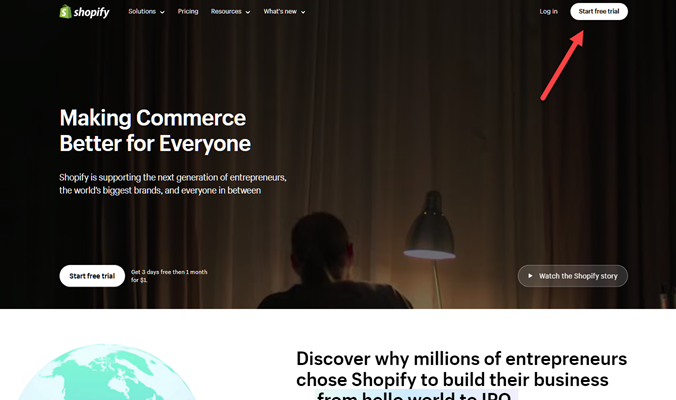
Building an online store used to require a developer, a designer, a payment specialist, and possibly a patient relative willing to explain what “DNS propagation” means. Shopify changes that equation. It combines website hosting, product management, checkout, payments, shipping tools, marketing integrations, and analytics in one dashboard.
That does not mean a successful Shopify website appears after ten minutes of enthusiastic clicking. The platform makes the technical work easier, but you still need a clear offer, useful product information, trustworthy policies, and a shopping experience that does not make visitors hunt for the “Add to Cart” button like it is buried treasure.
This guide explains how to build a Shopify website in 10 practical steps, from choosing a business idea to testing checkout and launching your store. No coding degree is required, although coffee remains highly recommended.
What You Need Before Building a Shopify Store
You can start experimenting with Shopify before every detail is finalized, but a little preparation will prevent your dashboard from becoming a digital junk drawer.
Gather the following information before you begin:
- Your business name and basic brand identity
- A list of products or services you plan to sell
- Product prices, costs, weights, dimensions, and inventory quantities
- Product photographs or sample images
- A business email address
- Banking and tax information
- Shipping regions and expected delivery times
- Return, refund, privacy, and customer-service policies
You do not need a giant catalog. A focused store with five well-presented products can look more credible than a store containing 300 rushed listings and seventeen photos apparently taken inside a dark garage.
Step 1: Define Your Products, Customers, and Store Goals
Before creating a Shopify account, decide exactly what the website is supposed to accomplish. “Make money online” is an understandable dream, but it is not yet a business plan.
Choose a Specific Target Customer
Identify the people most likely to need your products. Consider their age range, location, budget, interests, frustrations, and reasons for buying. A store selling premium hiking backpacks to experienced travelers should use different language, photography, and navigation than a store selling colorful school bags to parents.
Clarify Your Main Value Proposition
Write one sentence explaining why someone should buy from you instead of another seller. For example:
“We sell lightweight, weather-resistant daypacks designed for commuters who want outdoor durability without looking as though they are climbing a mountain during lunch.”
This statement can guide your homepage headline, product descriptions, advertisements, and About page. It also stops you from filling the website with vague claims such as “high quality,” “best products,” and the always suspicious “revolutionary solution.”
Step 2: Create Your Shopify Account and Configure Business Details
Create a Shopify account and enter a temporary store name. Shopify assigns the store a unique myshopify.com address, which you can use while building the website. Customers do not need to see that temporary address once you connect a branded domain.
Inside the Shopify admin, review the main business settings carefully:
- Legal business name
- Business address
- Store currency
- Time zone
- Order ID format
- Customer contact email
- Billing information
Selecting the correct currency and time zone is especially important. Discovering after launch that your reports follow the wrong day or your prices are displayed in the wrong currency is not the kind of international expansion most merchants have in mind.
Explore the admin menu before changing everything. The most frequently used sections include Products, Orders, Customers, Content, Analytics, Marketing, Discounts, Apps, and Settings.
Step 3: Choose and Connect a Custom Domain
A custom domain gives your Shopify website a professional address such as northwindpacks.com. You can purchase a domain through Shopify or connect one registered with another domain provider.
How to Pick a Good Domain Name
Choose a domain that is short, memorable, easy to pronounce, and difficult to misspell. Avoid unnecessary numbers, doubled letters, and hyphens unless they are essential to your brand.
Before buying the domain, search for similar business names, social-media handles, and trademarks. A clever name loses much of its charm when customers repeatedly land on another company’s website.
Set the Primary Domain
After connecting the domain, designate one version as your primary domain. Other connected versions should redirect to it. Using a consistent primary address helps customers recognize your brand and prevents multiple versions of the same store from competing in search results.
Create a branded email address as well, such as [email protected]. It usually looks more trustworthy than an address created during your middle-school gaming era.
Step 4: Select a Shopify Theme That Fits Your Catalog
Your Shopify theme controls the store’s visual layout, typography, product-page structure, collection pages, menus, and many interactive elements. Shopify offers free themes and paid themes through its Theme Store.
Do not choose a theme based only on the dramatic demonstration homepage. Demo stores often contain perfect photography, carefully edited copy, and products arranged by professional designers. Evaluate whether the theme supports your actual catalog and selling strategy.
Compare Themes Using Practical Criteria
- Mobile navigation and responsive design
- Product filtering and sorting
- Large-image or video support
- Color swatches and variant selection
- Quick-add or quick-view functions
- Product recommendations
- Sticky add-to-cart controls
- Blog and editorial layouts
- Accessibility and keyboard navigation
You can preview and customize an unpublished theme before making it live. Keep an untouched backup before editing code or making extensive design changes. A backup is considerably cheaper than staring at a broken homepage at 2:00 a.m. while whispering, “What did I click?”
Step 5: Customize the Homepage and Brand Design
Open Shopify’s theme editor and build the homepage using sections. Most modern themes let you add, remove, rearrange, and configure content without editing code.
Create a Clear Homepage Structure
A practical ecommerce homepage can include:
- A concise headline explaining what you sell
- A primary call-to-action button
- Featured products or collections
- A short explanation of your competitive advantage
- Customer reviews or other trust signals
- Shipping, warranty, or return highlights
- An email signup form
- Links to customer-service information
Your opening banner should answer three questions immediately: What does this store sell? Who is it for? What should the visitor do next?
Keep the Design Consistent
Choose a limited color palette and one or two readable fonts. Use consistent button styles, image proportions, spacing, and language across the store. A brand can feel energetic without assigning every section a different color and asking five fonts to fight for attention.
Check the mobile preview after every major change. Mobile shoppers need readable text, properly sized buttons, simple menus, and fast-loading images. A beautiful desktop design is not much help when the mobile version resembles a furniture store after an earthquake.
Step 6: Add Products and Write Persuasive Product Pages
Go to the Products section and create a listing for each item. Include the product title, description, media, price, inventory, shipping details, variants, search-engine fields, and organizational information.
Use Descriptive Product Titles
A title should help both customers and search engines understand the item. “Everyday Waterproof Commuter Backpack” is more useful than “Model X7,” unless Model X7 is already famous enough to have its own fan club.
Write Benefit-Focused Descriptions
Explain what the product is, who it helps, how it is used, and why its features matter. Instead of merely saying that a backpack uses water-resistant fabric, explain that the material helps protect a laptop during an unexpected commute in the rain.
A strong product description may include:
- A brief opening benefit
- Key features and practical advantages
- Materials and dimensions
- Care instructions
- Compatibility or sizing information
- Shipping and return reminders
- Answers to common purchase objections
Upload Useful Product Media
Use sharp, consistent photographs showing multiple angles, close-up details, scale, packaging, and the product in use. Compress large images before uploading them. Product photos should help shoppers make decisions, not force them to inspect a mysterious thumbnail and hope for the best.
Add descriptive alternative text to important images. This improves accessibility and gives search engines additional context.
Configure Variants and Inventory
Create variants for options such as size, color, material, or quantity. Assign accurate SKUs, prices, weights, and inventory levels. Shopify metafields can store additional structured details, including ingredients, technical specifications, care instructions, or downloadable files.
Step 7: Organize Collections, Navigation, and Essential Pages
Collections group related products and make browsing easier. You might create collections based on product type, customer need, price range, season, material, or intended use.
For example, a skincare store could use collections such as:
- Cleansers
- Moisturizers
- Products for Dry Skin
- Travel Sizes
- Best Sellers
Shopify supports manual collections and automated collections based on conditions. Automated collections are helpful when products share tags, prices, vendors, or other attributes.
Build Simple Navigation
Your main menu should prioritize shopping. Common links include Shop, Collections, Best Sellers, New Arrivals, About, and Contact. Place policies, account links, FAQs, shipping information, and social profiles in the footer.
Avoid menu labels that sound creative but reveal nothing. “The Journey” may feel poetic, but “Shop Travel Bags” usually receives fewer confused clicks.
Create Trust-Building Pages
At minimum, consider creating these pages:
- About Us
- Contact Us
- Frequently Asked Questions
- Shipping Policy
- Return and Refund Policy
- Privacy Policy
- Terms of Service
Shopify can generate policy templates, but review and customize them for your business. Clearly state delivery estimates, return windows, product conditions, refund methods, exclusions, and responsibility for return shipping. Policies should reflect what your business can actually deliver.
Step 8: Configure Payments, Taxes, Shipping, and Checkout
These settings turn a polished catalog into a working ecommerce store. They also contain enough details to make “I’ll handle that later” a dangerous strategy.
Activate Payment Methods
In the Payments settings, activate Shopify Payments where available or select an eligible third-party payment provider. Depending on your location and setup, you may also offer accelerated or alternative options such as Shop Pay, PayPal, Apple Pay, Google Pay, or local payment methods.
Review transaction fees, payout schedules, supported currencies, dispute procedures, and identity-verification requirements before choosing a provider.
Configure Sales Taxes
Shopify includes tools that help calculate taxes, but the merchant remains responsible for determining where tax registration and collection are required. Enter your registrations in the appropriate tax settings and consult a qualified tax professional when your obligations are unclear.
Set Shipping Zones and Rates
Define where you ship, which fulfillment location handles each product, and what customers pay. Common approaches include:
- Free shipping
- Free shipping above an order threshold
- Flat-rate shipping
- Weight-based or price-based rates
- Carrier-calculated rates
- Local delivery or pickup
Use custom shipping profiles when oversized, fragile, refrigerated, or unusually heavy products require different rates. Compare packaging dimensions and carrier charges before promising free nationwide shipping. Otherwise, your first large order may produce plenty of excitement right up until you calculate postage.
Review the Checkout Experience
Decide whether customer accounts are optional or required, configure marketing-consent choices, verify abandoned-checkout settings, and customize transactional notifications. Ask only for information you genuinely need. Every unnecessary field gives a hurried shopper another opportunity to reconsider life, commerce, and your checkout page.
Step 9: Optimize the Shopify Website for SEO and Marketing
Shopify handles several technical SEO elements automatically, including generating a sitemap and basic structured data through compatible themes. However, rankings still depend heavily on useful content, clear site architecture, descriptive pages, internal links, reputable mentions, and a good customer experience.
Optimize Titles and Meta Descriptions
Create unique search titles and meta descriptions for the homepage, products, collections, pages, and blog posts. Use the primary keyword naturally while describing the page accurately. Avoid copying one generic description across the entire store.
Improve URLs and Internal Links
Keep URL handles readable and concise. When changing an existing URL, create a redirect from the old address. Link between related products, collections, buying guides, and educational articles so shoppers and search engines can discover important pages.
Create Helpful Content
Publish articles that answer questions customers ask before buying. A cookware store might create guides about choosing pan materials, caring for cast iron, or selecting cookware for induction ranges. Useful content can attract search visitors and guide them toward relevant products without shouting “BUY NOW” every twelve seconds.
Connect Measurement and Sales Channels
Connect Google Analytics and relevant advertising or shopping channels. Depending on your audience, Shopify can integrate with tools and platforms for search, email marketing, social advertising, product feeds, and retargeting.
Track meaningful ecommerce actions such as product views, add-to-cart activity, checkout starts, purchases, average order value, conversion rate, and returning-customer behavior. Install only the apps you truly need. Too many overlapping applications can increase costs, complicate tracking, and slow the store.
Step 10: Test Everything and Launch the Store
Before removing the storefront password, test the website as though you are a suspicious first-time customer with limited patience.
Complete Several Test Orders
Use Shopify Payments test mode, Shopify’s test gateway, or an appropriate testing option from your payment provider. Test successful payments, declined payments, discount codes, shipping rates, tax calculations, inventory changes, confirmation emails, refunds, and fulfillment workflows.
Remember to disable test mode before opening the store to real customers. A launch campaign that sends shoppers into a checkout incapable of accepting real cards is memorable for all the wrong reasons.
Review the Store on Multiple Devices
Check the website on desktop computers, phones, and tablets. Test major browsers and inspect:
- Menus and search
- Product variants
- Forms and buttons
- Image quality
- Page speed
- Cart behavior
- Checkout and payment options
- Policy links
- Contact information
Prepare for the First Real Order
Make sure packaging, labels, inventory, customer-service procedures, and fulfillment responsibilities are ready. Then remove the storefront password, confirm the primary domain, submit the sitemap to major search engines, and begin promoting the store.
Launch is not the finish line. It is the moment you finally receive useful evidence about what customers understand, ignore, enjoy, or abandon.
Practical Experience: Lessons Learned While Building Shopify Websites
Across real ecommerce projects, the biggest lesson is that building the pages is rarely the hardest part. The difficult work is making dozens of small decisions consistently. A merchant may spend two hours comparing button colors while the product description still fails to mention the item’s dimensions. Customers generally care more about whether the product fits in their kitchen than whether the button is forest green or ambitious teal.
The most productive Shopify builds usually begin with real product information. When titles, prices, images, variants, weights, and inventory data are prepared in advance, the website comes together quickly. When those details are missing, every step becomes interrupted by another search through spreadsheets, supplier messages, and folders named things like final-images-newest-use-these-2.
Start With a Small, Complete Catalog
Launching with a smaller set of polished listings is often more effective than importing an enormous catalog immediately. A complete product page should answer the buyer’s practical questions without requiring an email. When merchants examine customer-service messages after launch, they often discover that repeated questions point directly to missing page content.
If five shoppers ask whether a shirt shrinks, add care and fabric information. If customers repeatedly ask whether a lamp includes a bulb, state the answer near the purchase button. Every question can improve the website for the next visitor.
Mobile Testing Changes Design Decisions
Another recurring lesson is that a homepage can look elegant on a large monitor and become exhausting on a phone. Oversized banners push products too far down the page. Long paragraphs become walls of text. Pop-ups block important buttons. Mobile testing should happen throughout the build rather than during the final fifteen minutes before launch.
A useful test is to complete a purchase using one hand on a phone. If variant selectors are difficult to tap, shipping information is hidden, or checkout requires excessive typing, customers may encounter the same problems.
Fewer Apps Usually Produce a Cleaner Store
Shopify’s app ecosystem is valuable, but new merchants sometimes install an application for every imaginable feature. Soon the store has three review widgets, two email pop-ups, four tracking scripts, and a loyalty program with no customers.
Begin with essential functions. Add an app only when it solves a defined problem, and review its permissions, cost, support quality, and effect on performance. After removing an app, check whether it left unused code or theme elements behind.
Testing Policies Is as Important as Testing Payments
Many merchants test whether a credit card works but forget to test the promises surrounding the purchase. Review whether shipping estimates appear correctly, confirmation emails match the brand, refund instructions are understandable, and customer messages reach an actively monitored inbox.
A store earns trust when its operational details agree. Product pages, checkout messages, shipping policies, advertisements, and customer emails should not provide five different delivery estimates.
The Best Store Is Built Through Revisions
No Shopify website launches in its final form. Analytics may reveal that shoppers leave a particular product page, rarely use a menu item, or abandon checkout after seeing shipping costs. Those signals provide a practical improvement list.
Make controlled changes and measure the results. Improve the product photographs, clarify the headline, simplify navigation, adjust shipping thresholds, or answer a common objection. Continuous improvement usually beats a dramatic redesign based entirely on someone saying, “I just feel the homepage needs more energy.”
Conclusion
Learning how to build a Shopify website is less about mastering complicated code and more about assembling a complete, trustworthy shopping experience. Define your customer, configure the store correctly, connect a branded domain, choose a suitable theme, create useful product pages, organize navigation, establish reliable payment and shipping settings, optimize for search, and test every important workflow.
The strongest Shopify stores make buying feel simple. They explain products clearly, answer objections early, display honest policies, work smoothly on mobile devices, and keep surprises out of checkout. Build that foundation first. The dramatic animations, clever apps, and dancing homepage mascot can wait.