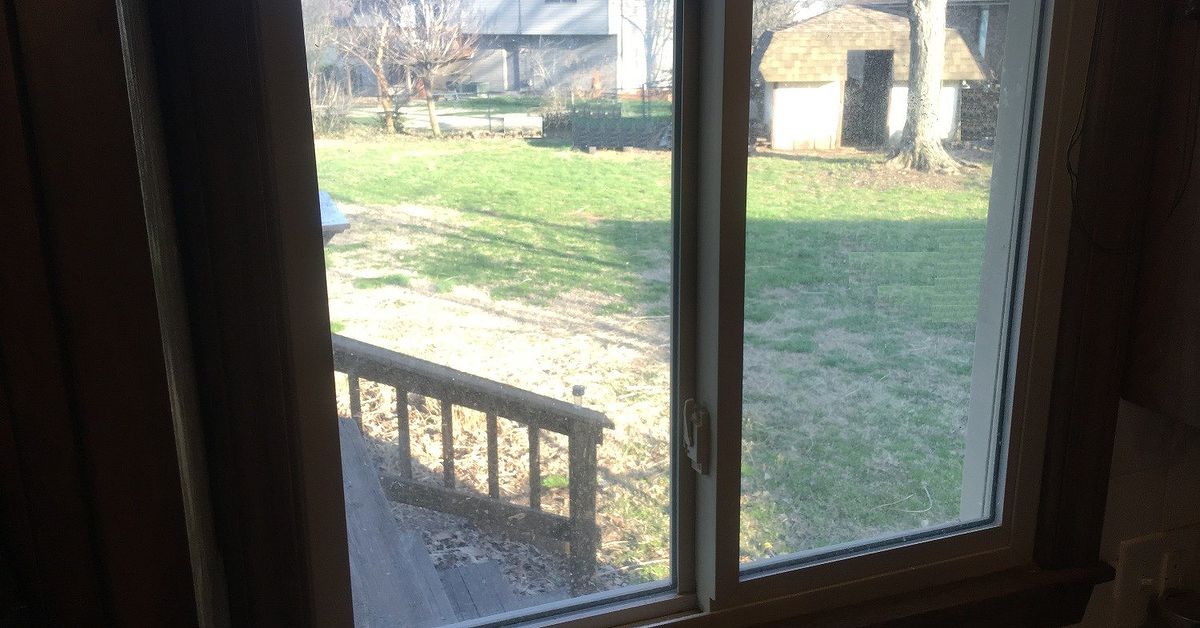
A kitchen window is prime real estate. It offers natural light, a pleasant view, andif you add one narrow boarda surprisingly useful place for herbs, small dishes, decorative jars, or the pothos plant that has been quietly plotting to take over your home.
This quick kitchen window shelf DIY project requires only basic tools, affordable materials, and a little careful measuring. The finished shelf can be installed in an afternoon, customized to suit almost any decorating style, and removed later without dismantling half the kitchen. The key is to keep the design simple, mount it safely, and avoid interfering with the window, faucet, blinds, or curtains.
Why Build a Shelf Across a Kitchen Window?
Many kitchens have limited counter and cabinet space, yet the area around a window is often left unused. A narrow window shelf turns that empty zone into functional storage without making the room feel crowded.
It is especially useful for:
- Small pots of basil, thyme, mint, or parsley
- Succulents and compact houseplants
- Frequently used coffee cups
- Decorative glass bottles and vases
- Small jars of tea, spices, or cooking utensils
- Seasonal decorations that do not deserve an entire cabinet
A shelf can also make an ordinary window look more intentional. Designers frequently use open shelving around kitchen windows to add storage while preserving an airy appearance. A shelf positioned across the opening can create a simple architectural feature without requiring built-in cabinetry.
Choose the Best Shelf Style for Your Window
A Bracket-Mounted Wood Shelf
The easiest option is a single wood board supported by two small metal angle brackets. The brackets attach to the surrounding wall, solid wood jamb, or structural framingnot to the glass, moving sash, or flimsy vinyl trim.
This design is inexpensive, sturdy, and easy to adjust. It is also the best choice for beginners because every part remains visible during installation. There are no mysterious hidden fasteners waiting to test your patience.
A Shelf Supported by Side Cleats
If the window sits inside a deep wood recess, short wood cleats can be installed on both sides. The shelf rests on top of the cleats and can be screwed down or left removable.
This option looks clean because there are no brackets beneath the board. However, it should only be used when the side surfaces are solid wood or when the cleats can be securely fastened into framing.
A Hanging Window Shelf
A hanging shelf suspended from ceiling hooks can create an attractive plant display. It also avoids drilling near the window frame. However, it takes longer to level, may sway when bumped, and requires secure overhead attachment. For a quick shelf above a busy kitchen sink, fixed brackets are usually more practical.
Plan the Shelf Before Buying Materials
Before heading to the hardware store, study how the window functions. Open and close it fully. Raise the blinds, move the curtains, turn the faucet, and imagine yourself washing a large pot beneath the proposed shelf.
The shelf should not:
- Block the window latch or handles
- Prevent the sash from opening
- Interfere with blinds or curtains
- Sit so low that you regularly hit it while using the sink
- Project so far that it blocks daylight
- Place plants directly against cold or extremely hot glass
Use painter’s tape to mark the planned height and width. Live with the tape outline for a few minutesor a full day if you are cautious. This simple preview often reveals clearance problems before any holes are drilled.
Recommended Dimensions
For most kitchen windows, a shelf approximately 4 to 7 inches deep provides useful space without becoming visually heavy. A standard 1-by-6 board has an actual depth of about 5 1/2 inches, making it a convenient starting point.
The shelf may span the entire window opening or stop slightly short of the side trim. Leaving a small gap at each end makes installation easier and allows room for natural wood movement.
Longer shelves and heavier displays need additional support. Installation guidance from major home-improvement sources consistently recommends fastening brackets into studs whenever possible, using anchors appropriate for the wall material when studs are unavailable, and adding support when a shelf is long or carries more weight.
Tools and Materials
Materials
- One 1-by-6 or 1-by-8 wood board
- Two sturdy shelf brackets for a short, light-duty shelf
- A third bracket if required by the shelf length or expected load
- Wood screws shorter than the thickness of the shelf board
- Structural screws or suitable wall anchors for mounting
- 120-grit and 180-grit sandpaper
- Primer and paint, stain, or clear protective finish
- Wood filler, if needed
- Painter’s tape
- Small adhesive pads for plant pots
Tools
- Tape measure
- Pencil
- Stud finder
- Level
- Drill or driver
- Drill bits
- Hand saw, circular saw, or miter saw
- Safety glasses
- Clamps, if available
A 3/4-inch-thick board is appropriate for many small household shelves, but shelf stiffness depends on the material, span, depth, load, and bracket placement. Plywood is often chosen for stability, while solid wood offers attractive grain and easy edge finishing.
How to Build a Quick Shelf for a Kitchen Window
Step 1: Measure the Available Space
Measure the width between the surfaces where the shelf will sit. Take measurements near the front and back because older window openings are not always perfectly square.
Subtract approximately 1/4 inch from the narrowest measurement. This creates a small installation gap and prevents the board from becoming wedged between the sides.
Next, determine the shelf depth. A shallow board is usually better over a sink because it collects less clutter and is less likely to meet your forehead during an enthusiastic dishwashing session.
Step 2: Locate Solid Mounting Points
Use a stud finder to identify framing around the window. Mark stud locations with painter’s tape rather than drawing directly across painted walls.
Whenever practical, drive mounting screws into solid framing. If the desired bracket location does not align with a stud, use an anchor specifically rated for the wall type and expected load. Do not assume that a general-purpose plastic anchor can safely hold wet flowerpots, ceramic containers, and the consequences of optimism.
Before drilling, consider the possibility of electrical wiring or plumbing inside the wallparticularly around a kitchen sink. Stop if the stud finder indicates wiring, if the drilling location is directly in line with plumbing fixtures, or if you are uncertain about what is behind the surface.
Step 3: Cut the Board
Mark the cut line with a square so it is perpendicular to the board’s edge. Clamp the board securely and cut slowly. If purchasing lumber from a home-improvement store, ask whether an employee can make a basic crosscut for you.
Test-fit the board before sanding or finishing it. Confirm that it slides into position without scraping the walls and that the window still opens properly.
Step 4: Sand the Shelf
Sand all surfaces with 120-grit sandpaper, then smooth them with 180-grit paper. Slightly soften the front corners and edges so they are comfortable to touch and less likely to chip.
Remove the dust with a vacuum and clean cloth. Avoid leaving loose sanding dust beneath paint or clear finish unless your decorating goal is “permanently textured by accident.”
Step 5: Apply a Moisture-Resistant Finish
A kitchen window shelf may be exposed to steam, condensation, splashes, damp plant pots, and strong sunlight. Seal the top, bottom, edges, and cut ends rather than finishing only the visible surface.
Good options include:
- Interior enamel paint over a compatible primer
- Wood stain followed by a protective clear coat
- Water-based polyurethane for a clear, durable surface
- A furniture-grade hard-wax oil approved for the intended use
Follow the manufacturer’s drying and recoating instructions. A finish that feels dry may not be fully cured, so avoid immediately loading the shelf with damp pots.
Step 6: Mark the First Bracket
Hold the first bracket at the planned height. Use a level to make sure its shelf-supporting arm is horizontal, then mark the mounting holes.
Drill pilot holes where appropriate. Pilot holes help guide screws and can reduce the risk of splitting solid wood trim or cleats. Do not force a standard wood screw into an empty wall cavity; use the correct anchor or relocate the bracket.
Step 7: Install and Level the Brackets
Secure the first bracket without overtightening it. Position the second bracket at the opposite end, place the level across both supports, and adjust until they are aligned.
For a longer shelf, install a center bracket at a solid mounting point. The exact spacing and weight capacity should follow the bracket manufacturer’s instructions. Hardware ratings matter more than confident guessing.
Once all brackets are correctly positioned, tighten the fasteners. Check the level from side to side and from front to back.
Step 8: Attach the Shelf Board
Place the finished board on the brackets and center it. Mark the bracket holes on the underside, then remove the board and drill shallow pilot holes.
Return the shelf to position and drive screws upward through the brackets into the wood. Make sure the screws are short enough that they cannot break through the top surface. Wall-mounted shelf instructions commonly use this method to keep the board from sliding or tipping.
Step 9: Test the Shelf Gradually
Press gently on different areas and watch for movement. Add lightweight items first, then increase the load gradually while checking the brackets and fasteners.
Do not exceed the lowest-rated component in the system. A heavy-duty bracket does not create a heavy-duty shelf when it is attached to weak trim, an unsuitable anchor, or a cracked board.
How to Style the Finished Kitchen Window Shelf
Create a Small Herb Garden
A kitchen window is a convenient location for culinary herbs because fresh leaves remain close to the food-preparation area. However, plant requirements vary, so evaluate how much direct light reaches the shelf before choosing varieties. Many common edible plants prefer several hours of strong light, while some leafy herbs tolerate gentler conditions.
Use pots with drainage holes and saucers. Add cork pads or waterproof trays beneath containers to prevent trapped moisture from damaging the shelf finish.
Build a Coffee or Tea Display
Arrange a few attractive mugs, tea tins, or small jars on the shelf. Keep frequently handled items within comfortable reach and avoid placing breakable objects where an open window or swinging curtain could knock them over.
Keep the Styling Light
Natural light is the window’s main feature, so resist the urge to cover every inch. Group items in small clusters and leave open space between them. A few plants at different heights usually look better than a rigid line of identical pots.
Add a Front Rail for Extra Security
If the shelf holds lightweight plant pots, consider attaching a narrow wood strip or small brass rail along the front edge. This creates a subtle barrier against sliding objects. Keep the rail low enough that pots remain easy to remove for watering.
Common Kitchen Window Shelf Mistakes
Attaching Hardware to the Moving Window
Do not drill into the operable sash, glass stops, weather seals, or thin vinyl components. Attach the shelf to surrounding structural material instead. Modifying the window itself may cause leaks, operating problems, or warranty issues.
Ignoring Water Exposure
Unsealed wood quickly develops stains around damp pots. Finish every surface and wipe up water promptly. A washable liner or tray provides another layer of protection.
Using a Shelf That Is Too Deep
An oversized shelf may block light, interfere with the faucet, and make the sink feel cramped. Begin with the shallowest depth that can hold the intended objects.
Mounting Brackets Without a Level
Measuring upward from a countertop is not always reliable because countertops and window trim can be slightly uneven. Use a level across the actual brackets before drilling all the holes.
Loading the Shelf Like a Pantry
This project is ideal for herbs, cups, and decorative objectsnot cast-iron cookware, bulk canned goods, or a heroic collection of stoneware. Keep the load modest unless the shelf has been specifically engineered and mounted for heavier storage.
Practical Experience Notes: Lessons That Make the Project Easier
The following observations are distilled from common DIY installation experiences and the mistakes that repeatedly appear in shelf projects.
The first major lesson is that measuring the window opening once is not enough. Walls, trim, and jambs can lean slightly, especially in an older house. A board cut to the top measurement may not fit at the intended shelf height. Measuring the front, back, left, and right sides takes only another minute and can prevent a return trip to the saw.
Painter’s tape is also more useful than it appears. Creating a full-size tape outline makes the shelf feel real before construction begins. It becomes immediately obvious when the planned shelf is too low, too deep, or directly in the path of a window handle. Tape can also protect painted surfaces while brackets are being positioned.
Another recurring lesson is that the simplest design usually produces the best result. It is tempting to add rope, decorative chains, carved corbels, multiple tiers, and perhaps a tiny ladder for the basil. Each addition introduces more alignment work. A straight board and two well-mounted brackets often look cleaner and are much easier to maintain.
Finishing the board before installation saves considerable frustration. Painting around brackets creates drips and missed spots, while staining an installed shelf above a sink invites a completely different kind of kitchen recipe. Finish all six surfaces on a workbench or protected table, allow the coating to cure, and then install the shelf.
Bracket quality matters, but mounting quality matters more. A beautifully made steel bracket cannot compensate for a screw spinning loosely in drywall. The most reassuring part of the project is feeling a properly sized screw bite into solid framing. When a stud is unavailable, the selected anchor should match the wall material and the actual load rather than whatever happened to be rolling around in the bottom of the toolbox.
It is also wise to check the length of every screw before using it. Screws that attach the board to the bracket should be shorter than the board thickness. This sounds painfully obvious until a sharp metal point appears through a freshly painted shelf. A piece of painter’s tape wrapped around the drill bit can act as a simple depth guide for pilot holes.
Plants introduce another set of practical lessons. Pots become much heavier after watering, and moisture tends to collect beneath saucers. A shelf that feels solid with empty containers should be tested with realistic weight. Waterproof trays, cork pads, and felt protectors make cleaning easier and reduce scratches, but spills should still be wiped up promptly.
Finally, the best shelf is not necessarily the one holding the most objects. Leaving open space allows light to reach the room and makes each item easier to see. Start with two or three plants or useful kitchen pieces, then add items slowly. When the shelf begins to resemble a crowded garage sale hovering above the sink, editing is cheaper than installing another bracket.
Conclusion
Learning how to build a quick shelf for a kitchen window is a manageable project for a first-time DIYer. A narrow board, dependable brackets, careful measurements, and a moisture-resistant finish can transform an overlooked window into useful storage and an attractive display.
The project succeeds when function comes first. Preserve the operation of the window, mount the hardware into reliable structural support, use fasteners suited to the wall, and keep the shelf load within the hardware manufacturer’s limits. Once those details are handled, the fun part begins: adding herbs, favorite mugs, or just enough greenery to make washing dishes feel slightly less like a recurring administrative task.