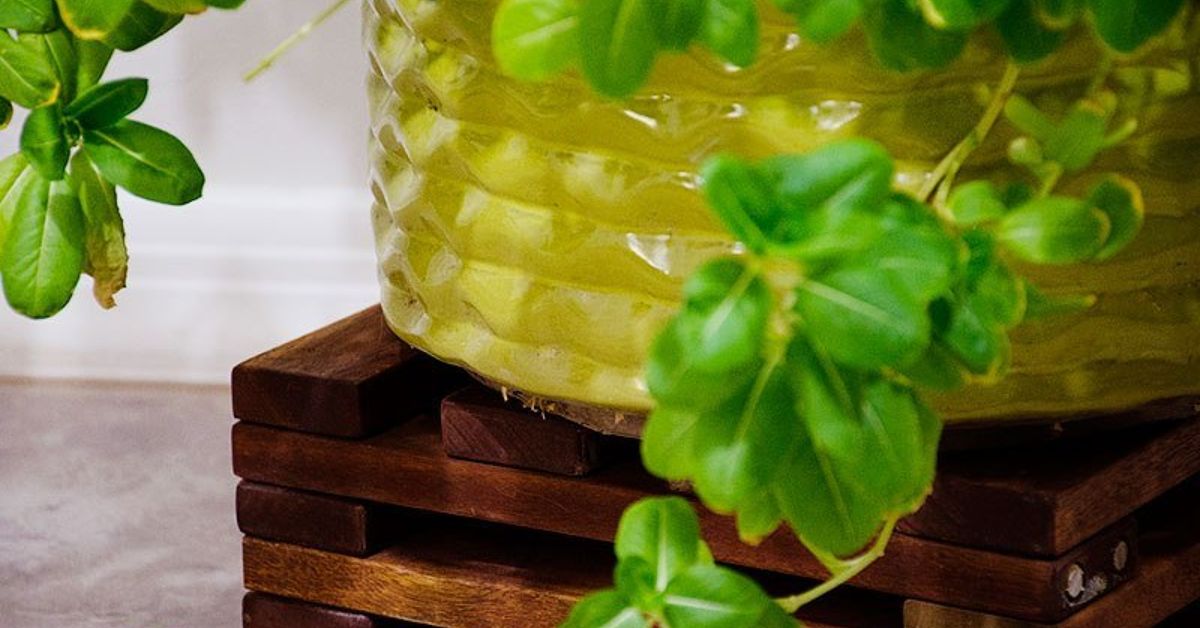
A good plant stand should lift your greenery, improve the room, and avoid turning a quiet Saturday into an audition for a home-renovation disaster show. This beginner-friendly DIY plant stand does exactly that. It uses one simple wooden board, four ready-made furniture legs, and basic hardware available at most home-improvement stores.
There are no complicated joints to cut, no advanced woodworking techniques to master, and no mysterious diagrams featuring seventeen arrows and a person wearing professional-grade safety goggles. Have the board cut at the store, and the project can be completed with little more than a drill, sandpaper, and a willingness to measure twice.
Why Build an Easy DIY Plant Stand?
Houseplants often begin life on a windowsill. Then another plant arrives. And another. Soon, the floor looks like a botanical waiting room, while the window is performing crowd control.
A simple wooden plant stand solves several problems at once. It raises pots closer to available light, creates an organized display, protects plants from foot traffic, and adds height to a room. A low bench-style stand can hold several small pots, one dramatic statement plant, or a rotating display of herbs and seasonal flowers.
DIY plant stands can be constructed from new lumber, crates, stools, ladders, tomato cages, plywood, concrete, and repurposed furniture. However, the easiest design for a beginner is usually the one with the fewest cuts and connections. A flat board supported by premade furniture legs offers a useful balance of simplicity, stability, and style.
Benefits of the One-Board Design
This project is especially practical because it can be customized without redesigning the structure. Make it short for one planter, long enough to sit beneath a window, or narrow enough for an apartment entryway. Paint it to match a wall, stain it for a natural finish, or leave the wood pale and simple for a Scandinavian-inspired look.
The open area below the top also keeps the stand visually light. It provides room for a watering can, a basket of gardening supplies, or absolutely nothingwhich is sometimes the most luxurious form of storage.
The Easiest Plant Stand Design
The finished stand in this guide resembles a slim wooden bench. A 36-inch top provides enough room for several small and medium containers without becoming difficult to move. Four furniture legs attach underneath using hanger bolts and T-nuts.
Because the legs are sold ready-made, you do not need to cut four pieces to identical lengths. This is important. A difference that looks microscopic on a workbench can become a surprisingly enthusiastic wobble after assembly.
Suggested Finished Dimensions
- Length: approximately 36 inches
- Depth: approximately 11 1/4 inches
- Height: approximately 16 to 18 inches
These measurements are recommendations, not sacred plant law. Before buying materials, measure the intended location and the widest pots you expect to display. Leave room around containers so they can be lifted without knocking neighboring leaves into an emergency meeting.
Materials and Tools
Materials
- One 1-by-12 pine board, cut to 36 inches long
- Four premade wooden furniture legs with 5/16-inch hanger bolts
- Four compatible 5/16-inch T-nuts
- Medium-grit and fine-grit sandpaper
- Paint, wood stain, or clear protective finish
- Four felt pads or rubber furniture feet
- Optional wood filler
- Optional waterproof plant saucers
Tools
- Tape measure
- Pencil
- Drill or drill-driver
- Drill bit sized for the T-nuts
- Hammer or rubber mallet
- Two adjustable wrenches or a hanger-bolt driver
- Clean cloth or tack cloth
- Eye protection
Check the packaging for the exact drilling requirements of your hardware. A common version uses 5/16-inch hanger bolts and matching T-nuts, but hardware sizes vary. Bring one furniture leg to the hardware aisle when selecting the T-nuts. This simple step can prevent a return trip powered entirely by frustration.
Pilot holes and correctly sized drilled openings make fasteners easier to position and reduce the chance of splitting wood. Drilling guidance should follow the dimensions of the actual screw or hanger bolt rather than a one-size-fits-all rule.
How to Build the Easiest Ever Plant Stand
Step 1: Choose and Inspect the Board
Select a board that looks straight when viewed from both ends. Avoid lumber with major twists, deep cracks, loose knots, or edges that resemble a potato chip. Small cosmetic knots are fine and can add character, but the board should sit flat on a level surface.
Many home-improvement stores will cut lumber to length. Asking for a 36-inch cut eliminates the need to own a saw and makes the project far more approachable for a first-time builder.
Step 2: Sand the Wood
Sand the top, bottom, edges, and corners. Begin with medium-grit sandpaper to remove rough areas, then move to a finer grit for a smoother surface. Slightly rounding the sharp corners makes the stand more comfortable to handle and less likely to catch clothing.
Wipe away all sanding dust before applying paint or finish. Dust left on the board has a remarkable ability to become a permanent decorative feature the moment a brush touches it.
Wood-finishing instructions generally recommend progressive sanding, complete dust removal, and a clean surface before applying stain or a protective topcoat. Always follow the drying and recoating directions printed on the selected product.
Step 3: Mark the Leg Positions
Place the board upside down. At each corner, measure approximately 2 inches inward from the short end and 2 inches inward from the long edge. Mark the center point for each leg.
The four marks should form a neat rectangle. Measure the distances between opposite marks to confirm that the layout is symmetrical. Even spacing improves appearance and helps distribute the load across the top.
Avoid placing the legs extremely close to the edges, where drilling may split the wood. Do not move them too far toward the center, either, because excessive overhang can make the stand easier to tip.
Step 4: Drill the Holes
Place the board on scrap wood so the drill bit can pass through without damaging the work surface. Drill straight through each marked point using the bit size specified for the T-nuts.
Keep the drill perpendicular to the board. A square or drill guide can help, but a simple visual check from two directions is usually enough for this project. Use steady pressure and let the drill bit do the cutting. Forcing it is unnecessary and may produce a rough exit hole.
After drilling, lightly sand any splintered fibers around the openings.
Step 5: Install the T-Nuts
Turn the board right side up. Insert one T-nut into each drilled hole from the top surface, unless the hardware manufacturer specifies another orientation. Tap it gently with a hammer or rubber mallet until the flange sits flush against the wood.
Place a scrap block over the hardware before striking it if you want to protect the finish. The prongs on the underside should bite into the wood and prevent the nut from turning when the legs are installed.
Step 6: Prepare the Furniture Legs
Inspect the hanger bolt protruding from each leg. It must extend far enough to pass through the board and engage securely with the T-nut.
If more threaded length is needed, adjust the bolt using a hanger-bolt driver. Another method is to tighten two compatible nuts against each other on the machine-threaded end, turn the bolt with a wrench, and then remove the nuts. Do not grip the threads directly with pliers, because damaged threads may refuse to cooperate later out of pure spite.
Step 7: Attach the Legs
Turn the top upside down again. Thread one leg into each T-nut by hand. Tighten until the legs are secure and face the desired direction, but do not overtighten. Excessive force can damage the threads, crush soft wood, or pull the hardware out of position.
Turn the stand upright on a level floor and press gently on each corner. If it rocks, check that every leg is fully seated. Felt pads can correct a tiny difference while also protecting indoor flooring.
Step 8: Test Before Adding Plants
Do not begin the test with your largest ceramic planter and an optimistic smile. First place a few evenly distributed household items on the top. Press down gently and watch for movement, flexing, or loosening.
This beginner design works best for small and medium houseplants. Very large planters can become surprisingly heavy after watering. For a longer stand, heavier containers, or frequent outdoor use, add a center leg, an apron beneath the top, or another form of bracing.
Painting, Staining, and Protecting the Stand
For Indoor Use
Indoor plant stands still encounter water, damp saucers, spilled soil, and the occasional watering-can miscalculation. A painted surface or clear protective topcoat makes cleanup easier and reduces staining.
For a modern appearance, try warm white, matte black, sage green, muted terracotta, or a color already present in the room. A transparent finish preserves the natural grain, while stain can coordinate inexpensive pine with darker wood furniture.
Apply thin, even coats and allow the finish to cure fully before placing containers on the surface. A finish that feels dry to the touch may still be soft enough to stick to a rubber saucer.
For Outdoor or Covered-Porch Use
A stand placed outdoors needs a finish specifically labeled for exterior wood. Outdoor stains and sealers are designed to reduce moisture absorption and weather-related damage. Coat the top, bottom, edges, drilled holes, and legs rather than protecting only the most visible surfaces.
Even with an exterior finish, keeping the stand under a covered porch will usually reduce wear. Do not leave wooden feet sitting in puddles. Rubber feet can lift the legs slightly above a damp patio and make the project feel much more sophisticated than its actual construction history.
How to Style a Wooden Plant Stand
Create a Layered Display
Combine plants with different heights and growth habits. A taller upright plant can anchor one end, while trailing pothos, heartleaf philodendron, or string-type succulents soften the opposite side. Fill the middle with compact foliage or herbs.
Avoid lining up six identical pots unless the goal is to create a tiny plant army. Slight variations in height, leaf shape, texture, and container color usually produce a more natural arrangement.
Respect Each Plant’s Light Requirements
Position the stand according to the plants rather than choosing a plant collection only because the pots match. A bright window may suit some species but overwhelm others. Rotate containers periodically when growth begins leaning strongly toward the light.
Also leave some space between leaves and cold window glass. Indoor gardening guidance recommends considering drainage, light exposure, temperature, and the individual needs of each plant rather than treating every windowsill as universally perfect.
Protect the Stand and the Floor
Use pots with drainage holes and place waterproof saucers beneath them. Drainage allows excess water to escape instead of leaving roots in saturated potting mix, while saucers protect the stand and floor. Empty standing water after the pot has drained.
Place cork pads or silicone protectors beneath rough ceramic containers. These small barriers prevent scratches and allow air to circulate beneath saucers.
Easy Customization Ideas
Make a Single-Pot Pedestal
Use a square or round wooden top approximately 12 to 16 inches wide and attach three or four short furniture legs. A three-leg design naturally rests without rocking on an uneven floor, but the legs must be positioned carefully to create a broad, stable footprint.
Create a Long Window Bench
Extend the top to 48 inches for a larger collection. Add a fifth leg in the center or install support rails beneath the board to reduce flexing. Keep the heaviest pots near the legs rather than gathering them in the unsupported middle.
Add a Lower Shelf
A second board can be mounted between the legs for gardening books, lightweight pots, or supplies. This upgrade requires more measuring and hardware, so it may be best saved for the sequel: “Slightly Less Easy Plant Stand.”
Use Reclaimed Materials Carefully
An old stool, sturdy crate, small bench, or salvaged table can become a plant display with cleaning, sanding, and a fresh finish. Check reused pieces for rot, rust, loose joints, protruding nails, and unknown coatings before bringing them indoors. Repurposed furniture and garden materials are frequently used to create affordable stands with character, provided the finished structure remains stable.
Common Plant Stand Mistakes
Skipping the Measuring Stage
A beautiful stand is not especially useful when it blocks a doorway, extends past the window, or leaves no room for the intended pots. Measure the location, containers, baseboards, curtains, and nearby furniture before finalizing the dimensions.
Using an Unsealed Indoor Finish Outside
Interior paint or furniture polish may look excellent at first but fail quickly in outdoor moisture and sunlight. Use exterior-rated products for an outdoor plant stand and recoat them according to the manufacturer’s maintenance instructions.
Ignoring Wet-Soil Weight
A planter is much heavier after watering. Soil, ceramic, decorative stones, and water all contribute to the load. Spread containers across the stand and reserve especially large planters for the floor or a structure designed for heavier use.
Making the Stand Too Tall and Narrow
Height can improve a display, but a tall stand with a small footprint is easier to tip. This matters in homes with children, pets, robot vacuums, and cats who believe every elevated surface was installed specifically for them.
Letting Water Sit on the Top
Even sealed wood should not remain continuously wet. Wipe spills, empty saucers, and check beneath pots periodically. Hidden moisture is an extremely patient troublemaker.
Experiences First-Time Builders Commonly Have
The most memorable part of making an easy plant stand is often discovering how manageable basic woodworking can be. Many beginners approach the drill as though it were a small, noisy animal that might object to being handled. After four straight holes, the tool becomes much less intimidating. The project offers quick evidence that careful measuring matters more than expert speed.
One common experience is the temptation to skip sanding because the board already looks “smooth enough.” That judgment usually changes after the first coat of paint highlights every scratch, fuzzy edge, and pencil mark. A few extra minutes of surface preparation often create a more professional result than an expensive paint color or decorative hardware.
Another frequent lesson involves the leg layout. Marks that are only slightly uneven may not be obvious when the board is upside down. Once the stand is upright, however, the eye immediately notices a leg wandering away from the group like it has somewhere else to be. Drawing clear reference lines and comparing diagonal measurements helps prevent this problem.
Hardware selection can also become part of the adventure. Furniture legs, hanger bolts, threaded inserts, and T-nuts may all look compatible while sitting peacefully in separate packages. Compatibility becomes less certain at home. Taking a leg to the hardware aisle, checking thread size, and reading the installation instructions saves time and reduces the likelihood of inventing new vocabulary beside the workbench.
The first stability test is both practical and oddly satisfying. A newly assembled stand can look finished while still hiding a loose leg. Pressing each corner, checking for wobble, and gradually adding weight turns a decorative object into something trustworthy. Tiny adjustments to a hanger bolt or felt pad can make the difference between a firm stand and one that taps the floor whenever someone walks past.
Plant selection creates another useful lesson. It is easy to focus on foliage and forget that the pot and wet soil may weigh more than the plant itself. Beginners often arrange every container first and evaluate the load second. A safer process is to place the largest pot near a supported end, distribute the remaining containers, and then water them in position while watching for flexing.
Water management is usually the final discovery. A beautifully finished stand can receive its first ring-shaped stain within minutes if a draining pot is placed directly on top. Waterproof saucers, cork pads, and immediate cleanup are inexpensive details, but they preserve the finish and make routine plant care less stressful.
The completed project often changes the appearance of a room more than expected. Plants that once looked scattered suddenly feel like a deliberate collection. Raising them creates visible layers, improves access for watering, and frees floor space. The stand may be simple, but simplicity is part of the appeal: it supports the plants without competing with them.
Most importantly, an easy DIY plant stand is a useful confidence-building project. It introduces measuring, drilling, hardware installation, sanding, and finishing without requiring advanced joinery. The result is functional enough to use every day and customizable enough to feel personal. It may even encourage a second projectwhich is how garages slowly fill with clamps.
Conclusion
The easiest ever plant stand does not require elaborate tools, expensive lumber, or advanced carpentry. A pre-cut board, four furniture legs, matching T-nuts, and a protective finish can create a clean, useful display in a single weekend.
The keys are straightforward: measure the space, choose a flat board, position the legs evenly, drill accurately, use compatible hardware, and test the stand before loading it with plants. Add proper saucers and a moisture-resistant finish, and the project will be easier to maintain as well as easier to build.
Once complete, the stand gives scattered pots a shared home and turns an ordinary window, hallway, porch, or empty wall into a small indoor garden. It is simple, practical, affordable, and significantly more dignified than keeping your favorite fern on an upside-down storage bin.