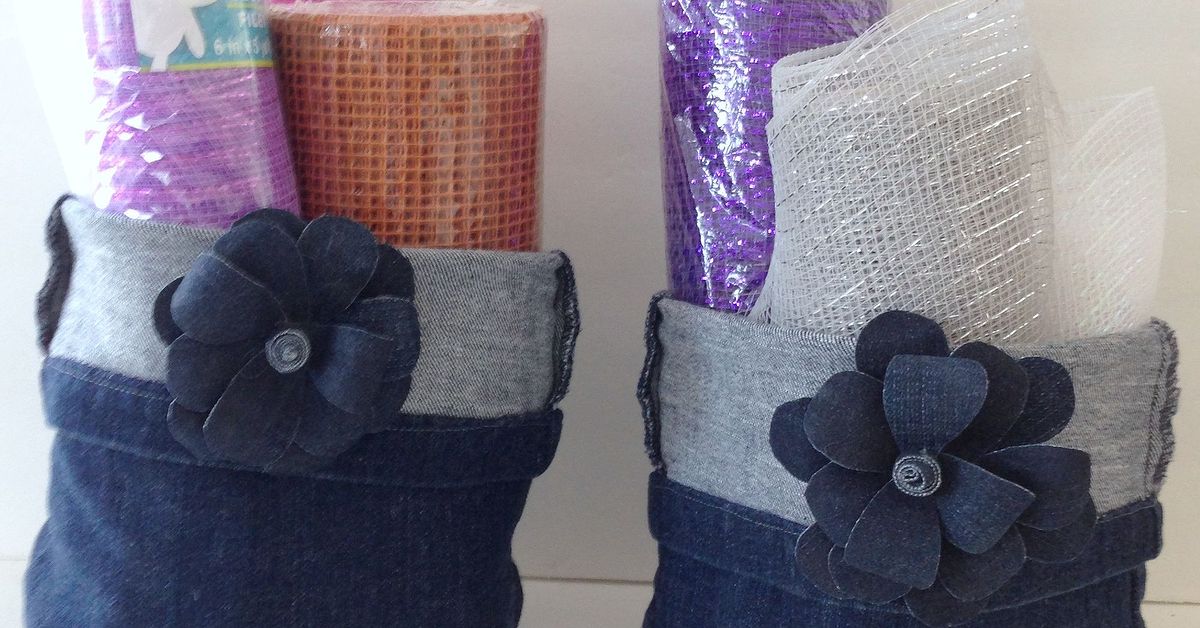
That retired pair of jeans may be too faded, too torn, or far too optimistic about your current waistline, but it still has one excellent career move left: becoming a sturdy storage basket. A DIY upcycled denim storage basket combines the rugged character of old blue jeans with the usefulness of a lined fabric bin. Use it for yarn, toys, bathroom supplies, chargers, craft scraps, or the mysterious clutter that gathers on every household counter.
Denim is ideal for this project because it is durable, washable, and full of reusable details. Pockets become compartments, belt loops become handles, and faded areas create a finish no new fabric can imitate. In the U.S. Environmental Protection Agency’s 2018 estimates, 13 million tons of clothing and footwear reached end of life, while only 13% was recycled; reuse occurs before that calculation. Turning worn jeans into practical storage is one small way to extend a textile’s useful life.
Why Make a Storage Basket From Old Jeans?
Medium- and heavyweight denim naturally gives a fabric basket more body than lightweight cotton. It also tolerates daily handling and develops character as it ages. A back pocket can hold scissors or a remote, original topstitching adds detail, and repaired tears can become visible-mending features instead of defects.
The finished basket works well for craft supplies, small toys, toiletries, desk accessories, entryway essentials, or reusable gift packaging. Make one basket as a weekend project, or cut several at once for a coordinated organizing set.
Materials and Tools
The measurements below produce a medium basket about 9 inches wide, 5 inches deep, and 8 to 9 inches tall. The final size varies slightly with fabric thickness and seam allowance.
- One adult-size pair of old jeans or equivalent denim scraps
- About 1/2 yard of cotton lining fabric
- About 1/2 yard of medium- or heavyweight fusible interfacing
- All-purpose polyester thread
- Denim needle, usually size 90/14 or 100/16
- Sewing machine, scissors or rotary cutter, ruler, seam ripper, clips, fabric marker, and iron
- Optional topstitching thread, webbing, labels, patches, or rivets
A proper denim needle is important. Needle and sewing-machine manufacturers commonly recommend jeans needles in sizes 90/14 or 100/16 for thick woven denim. A needle that is too fine may bend, break, or skip stitches when it meets multiple layers.
Prepare and Cut the Denim
Wash and dry the jeans before cutting. Inspect the fabric and avoid brittle areas, permanent oil stains, and places that tear when gently pulled. Strong sections of the legs and seat are usually the most useful. Save pockets, belt loops, labels, hems, and attractive flat-felled seams for decoration.
Cut denim in a single layer when thick seams make it difficult to keep pieces aligned. For a simple basket, cut:
- Two denim panels: 14 by 13 inches
- Two lining panels: 14 by 13 inches
- Two interfacing panels: 14 by 13 inches
- Two handle strips: 3 by 8 inches
From both lower corners of every outer and lining panel, cut a 2 1/2-inch square. These openings create the boxed base. Use 2-inch squares for a shallower basket or 3-inch squares for greater depth. Before sewing, test your needle, thread, tension, and stitch length on a layered scrap.
How to Sew a DIY Upcycled Denim Storage Basket
1. Decorate the Outer Panels
If you want a pocket, remove one from the jeans with a seam ripper, place it on the right side of a denim panel, and stitch along its original side and lower stitching lines. Keep it at least 1 inch from future seams. For patchwork, join scraps into oversized panels, press the seams, topstitch if desired, and trim each panel to 14 by 13 inches.
2. Add Interfacing
Fuse interfacing to the wrong side of both denim panels according to the product directions. Use medium-weight support for rigid denim and firmer interfacing for soft or stretchy jeans. Lift and press the iron instead of sliding it, which can distort the panels. If fusible interfacing will not bond to a treated surface, baste sew-in stabilizer in place.
3. Make the Handles
Fold each handle strip in half lengthwise and press. Open it, fold both long edges to the center crease, then fold the strip in half again. Topstitch along both long edges. Center one handle on each outer panel with its raw ends aligned at the top and about 3 inches apart. Point the handle downward and baste the ends securely. Saved belt loops can replace fabric handles on a small basket.
4. Sew the Outer Basket
Place the denim panels right sides together. Clip and sew the side and bottom edges with a 1/2-inch seam allowance, leaving the square cutouts open. Use a straight stitch around 3 to 3.5 millimeters long. A slightly longer stitch often feeds dense layers better, while polyester thread provides dependable construction strength. For decorative topstitching, use heavy thread in the needle and regular thread in the bobbin.
5. Box the Corners
Open one lower cutout and bring the side seam to meet the bottom seam. Match the seams carefully so the raw edges form a straight line. Clip and sew across with a 1/2-inch allowance, then repeat on the other corner. This boxed-corner technique turns flat panels into a bin with a stable base.
Trim uneven bulk without cutting too close to the stitches. Turn the denim shell right side out and gently shape the corners with a blunt tool.
6. Sew the Lining
Place the lining panels right sides together. Sew the sides and bottom with a 1/2-inch allowance, leaving a 4- to 5-inch opening in the center of the bottom seam. Box both corners exactly as you did on the denim shell. Leave the lining wrong side out.
7. Join the Basket and Lining
Slide the right-side-out denim shell inside the wrong-side-out lining so the right sides face each other. Match the side seams and top edges, keeping the handles tucked between the layers. Clip around the rim and sew the full circle with a 1/2-inch allowance.
At bulky seams, stop with the needle down, raise the presser foot, and place a folded scrap or hump-jumper tool behind the foot so it stays level. Hand-turn the wheel through the thickest spot if necessary. Never pull the fabric from behind, because that can bend the needle.
8. Turn and Finish
Pull the basket through the lining opening. Push the lining inside, press the top edge, and topstitch 1/8 to 1/4 inch from the rim. Close the turning gap by machine or with a ladder stitch. Shape the corners, and enjoy the fact that yesterday’s jeans now have more organizational ambition than most junk drawers.
Easy Ways to Customize the Basket
Add a Contrasting Cuff
Cut the lining 3 inches taller than the denim panels. After assembly, fold the extra lining over the rim to reveal gingham, floral cotton, ticking stripes, or a bold solid.
Try Visible Mending
Place a fabric patch behind a small hole and secure it with parallel stitching, zigzags, or hand embroidery. The repair becomes part of the design and lets you use more of the original jeans.
Adjust the Size
Use smaller panels and 1 1/2-inch corner squares for drawer bins. For a large toy basket, enlarge the panels and add foam stabilizer or canvas. Increase handle width and reinforce the attachment points, because toys become mysteriously heavier at cleanup time.
Common Problems and Quick Fixes
- Skipped stitches: Install a fresh denim needle, rethread the machine, lengthen the stitch slightly, and remove unnecessary bulk.
- Floppy sides: Add firmer interfacing, foam stabilizer, or a removable covered plastic-canvas base.
- Wavy rim: Avoid pulling the fabric, clip frequently, press rather than drag the iron, and staystitch stretch denim before assembly.
- Lumpy corners: Match side and bottom seams precisely, grade seam allowances, and avoid stacking pockets or original jeans seams at the corners.
Care and Maintenance
Spot-cleaning is safest. A fully washable basket made from cotton denim, cotton lining, polyester thread, and washable interfacing may be gently washed in cold water and air-dried. Reshape it while damp. Do not machine-wash a basket containing cardboard, leather labels, rust-prone hardware, glued decorations, or nonwashable stabilizer.
A Maker’s Notebook: Lessons From Building Denim Baskets
The first lesson many makers learn is that “old jeans” is not one consistent material. One pair may be dense cotton denim, while another is soft and stretchy enough to audition for yoga pants. Mixed denim can create beautiful patchwork, but the differences need managing. Firm pieces can carry the structure; stretchy panels should be stabilized first. Otherwise, one side stands proudly while the other leans away as if avoiding a group photo.
A typical first attempt also includes the belief that every original jeans seam should be preserved because it looks interesting. The basket may indeed look interestinguntil several thick seams meet at one boxed corner. Selective reuse works better. Keep one flat-felled seam across the front, a pocket on the side, or a waistband label near the rim. Trim or reposition the rest. Denim character is valuable; concentrated denim geology is not.
Interfacing determines whether the project becomes a basket or a relaxed fabric bowl. Heavy rigid jeans may support a small bin with medium interfacing, while soft stretch denim needs firmer reinforcement. A large toy basket benefits from foam stabilizer, though the added thickness means seam allowances should be graded and handle positions planned before sewing.
Testing on scraps saves more time than it consumes. Build a sample stack containing denim, interfacing, lining, and decorative thread. Adjust stitch length, tension, and needle size there. If the machine thumps loudly, skips stitches, or pushes the top layer forward, it is providing useful warnings. A fresh 100/16 needle, slower speed, clips instead of pins, and a level presser foot often transform the experience.
Handles are where appearance and function must negotiate. Belt loops make clever grab handles, but they are short. Folded fabric handles are more comfortable for a larger bin, especially when reinforced with webbing. Baste them firmly before adding the lining; otherwise, you may turn the basket right side out and discover one handle trapped sideways like a tiny denim sundial.
The pocket is often the most satisfying detail. It announces the basket’s previous life and provides real storage for crochet hooks, pencils, labels, or the remote everyone insists somebody else misplaced. Attach it before sewing the side seams and test the opening with the intended object. A perfectly centered pocket that holds nothing larger than a postage stamp is decorative, not organizational.
Pressing matters more than beginners expect. Denim resists casual suggestions, so press every stage with steam when the fiber content permits. Flatten bulky seams with a clapper or folded towel and let them cool before moving. The basket becomes crisper, boxed corners align more accurately, and topstitching is easier to control.
Finally, perfection is not the purpose of an upcycled project. Faded patches, repaired holes, mixed thread colors, and slightly irregular stitching can make the basket more appealing. The goal is sturdy storage with a story. Once the bin is finished, the leftover waistband becomes a handle, the hems become coasters, and the tiny scraps begin lobbying for their own patchwork project. Upcycling has a way of reducing one scrap pile while creating a much more emotionally significant scrap pile.
Final Thoughts
A DIY upcycled denim storage basket is useful, creative, and easy to personalize. Start with strong fabric, use the correct needle, stabilize soft denim, and keep bulky seams away from critical intersections. Once you understand the basic lined-panel and boxed-corner construction, you can scale it into drawer organizers, gift baskets, toy bins, or matching storage for every room.
Note: Test needle size, stitch length, pressing temperature, and interfacing on a scrap from the same jeans before sewing the final basket.