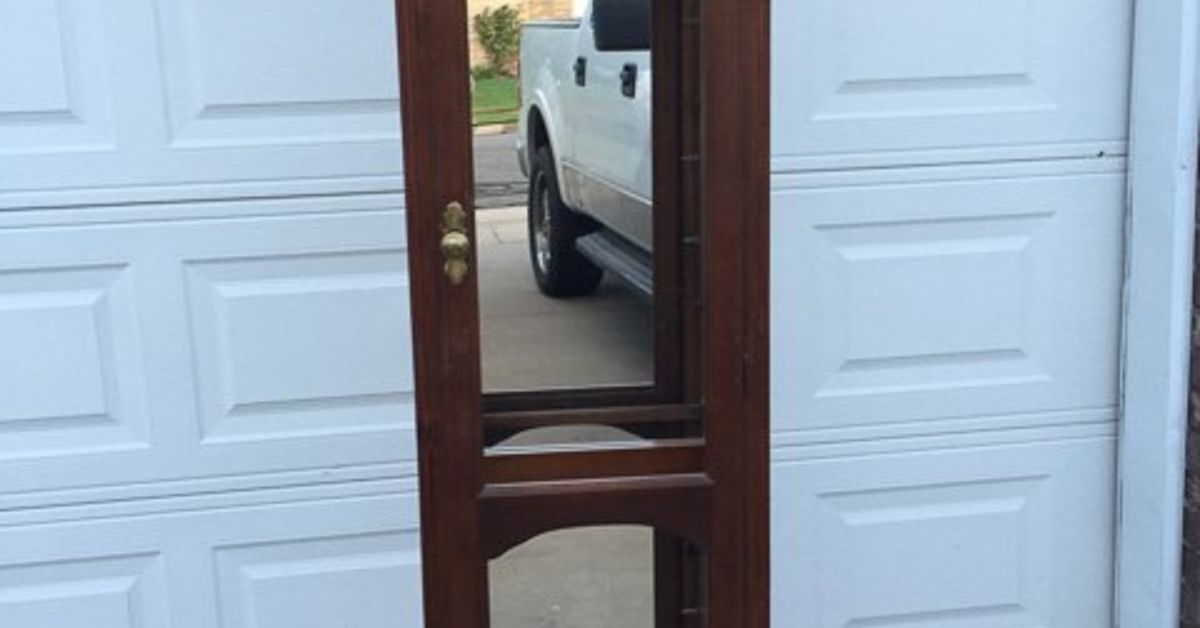
Note: This article is written in original, web-ready American English and synthesizes practical guidance from reputable home improvement, furniture refinishing, safety, and interior design resources.
A curio cabinet is usually where fancy teacups, tiny porcelain birds, inherited glassware, and mysterious “don’t touch that” objects go to retire. But what if that tall, glass-fronted cabinet could do more than display the world’s most fragile collection of dust magnets? Welcome to the surprisingly stylish world of the DIY curio turned wardrobea smart furniture makeover that transforms an old display cabinet into a compact, character-packed clothing storage solution.
This project is perfect for small bedrooms, guest rooms, nurseries, entryways, studio apartments, and anyone who has ever looked at a closet and thought, “That’s cute, but where do my actual clothes go?” A vintage curio cabinet already has height, doors, shelves, and a furniture silhouette that feels more intentional than a plastic storage bin. With a little planning, sanding, paint, hardware, and maybe one dramatic “before and after” photo, it can become a functional wardrobe with serious charm.
The best part? You do not need to be a master carpenter. You need patience, basic tools, and the emotional strength to remove a glass shelf without panicking. Let’s turn that forgotten curio into a wardrobe that looks custom, saves space, and gives your room a little vintage personality.
Why Turn a Curio Cabinet Into a Wardrobe?
A curio cabinet is basically a wardrobe in disguise. It has a tall frame, enclosed storage, decorative doors, and often a narrow footprint. That makes it ideal for rooms where a full-size armoire feels too bulky. Instead of buying new furniture, this DIY wardrobe makeover gives an existing piece a second life.
Repurposing furniture also adds something new furniture rarely has: a story. A thrifted curio, a family hand-me-down, or a marketplace find can become a one-of-a-kind wardrobe that no big-box store can duplicate. That little nick on the corner? Character. The odd brass handle? Potential. The glass doors? A chance to show off neatly folded sweatersor hide everything behind reeded film if your folding style is “emotional support pile.”
Best Curio Cabinets for a Wardrobe Makeover
Not every curio cabinet is the right candidate. Before you fall in love with a piece, check the structure. A good curio cabinet wardrobe conversion should feel sturdy, stand level, and have enough interior depth for the items you want to store.
Look for Solid Construction
Solid wood or wood veneer pieces are usually easier to refinish than flimsy particleboard. Press gently on the sides, back, and shelves. If the cabinet wobbles like it has had three cups of coffee, it may need reinforcement before becoming a wardrobe.
Check the Interior Depth
For hanging clothes, depth matters. Many curios are shallower than traditional wardrobes, so they may work best for children’s clothing, scarves, folded jeans, handbags, accessories, linens, or short hanging items. If the cabinet is too shallow for a standard hanger facing forward, consider installing the rod front-to-back, using hooks, or converting it into a folded-clothing wardrobe.
Inspect the Glass
Glass doors are beautiful, but they must be secure. Tighten loose hinges, replace cracked panes, and consider safety film if the wardrobe will be used in a child’s room. You can also replace glass with cane webbing, fabric panels, wood inserts, or fluted privacy film for a softer look.
Tools and Materials You May Need
Your exact supply list depends on the cabinet, but most DIY curio turned wardrobe projects use a similar toolkit.
- Screwdriver or drill
- Measuring tape
- Level
- Stud finder if anchoring to a wall
- Sandpaper or sanding sponge, usually 120- to 220-grit
- Wood filler
- Primer suitable for wood, laminate, or previously painted surfaces
- Furniture paint or cabinet-grade enamel
- Protective topcoat if needed
- Closet rod, hooks, pegs, baskets, or shelf supports
- New knobs, pulls, or hinges
- Anti-tip furniture anchor
Do not skip the measuring tape. It is the tiny referee that prevents you from buying a closet rod two inches too long and then staring at it like it personally betrayed you.
Step-by-Step: How to Turn a Curio Into a Wardrobe
Step 1: Empty and Disassemble the Cabinet
Remove glass shelves, shelf pins, loose hardware, and any decorative pieces that could break while you work. Label screws and hinges in small bags if you plan to reuse them. If the cabinet has interior lighting, unplug it and decide whether to keep, remove, or update it.
This is also the moment to clean out every forgotten corner. Curio cabinets are famous for hiding dust in places only dust understands.
Step 2: Clean the Surface Thoroughly
Before sanding or painting, clean the cabinet well. Furniture polish, grease, wax, and old household grime can prevent primer and paint from sticking. Use a gentle degreasing cleaner suitable for the surface, then wipe with clean water and let everything dry completely.
Step 3: Repair Damage
Fill scratches, dents, and unused shelf-pin holes with wood filler. Let it dry according to the product instructions, then sand smooth. If the back panel feels thin or loose, reinforce it with small brad nails, screws, or a replacement panel. A wardrobe needs to handle daily use, not just sit quietly holding figurines.
Step 4: Sand for Better Adhesion
You usually do not need to sand down to raw wood. The goal is to scuff the glossy surface so primer has something to grip. Use a medium sanding sponge or 180- to 220-grit sandpaper on flat surfaces and hand-sand detailed trim. After sanding, vacuum the dust and wipe with a tack cloth or slightly damp microfiber cloth.
Step 5: Prime the Cabinet
Primer is the difference between a wardrobe makeover that lasts and one that peels the first time a sleeve brushes against it. Use a bonding primer for slick finishes, laminate, or veneer. Use a stain-blocking primer if the wood has tannins, old stains, or mystery marks that keep trying to rejoin society through your paint.
Step 6: Paint in Thin, Even Coats
Choose durable furniture paint, cabinet paint, acrylic enamel, or hybrid alkyd paint for a smooth finish. Thin coats are better than thick coats. A high-density foam roller works well on flat panels, while an angled brush helps with corners and trim. Let each coat dry fully, then sand lightly between coats if you want a more polished result.
Popular colors for a DIY curio wardrobe include warm white, sage green, charcoal, navy, mushroom beige, dusty blue, and soft black. For a playful nursery wardrobe, try butter yellow or muted coral. For a moody guest room, deep olive or espresso brown can make the piece feel expensiveeven if you found it online next to a listing for “free treadmill, must pick up today.”
Step 7: Rework the Interior
This is where the curio officially becomes a wardrobe. Remove or rearrange shelves depending on your storage plan. Install a small closet rod for hanging clothes, add hooks for bags or hats, or keep lower shelves for folded items. If the cabinet is narrow, use baskets to organize socks, baby clothes, scarves, belts, or seasonal accessories.
For a hybrid design, place a hanging rod in the upper half and shelves or drawers in the lower half. This works beautifully for a guest wardrobe because visitors can hang shirts and store folded clothes without needing a full closet.
Step 8: Upgrade the Doors
Glass doors can stay clear if you love a boutique-style display. But if you want to hide visual clutter, add peel-and-stick privacy film, fabric behind the glass, cane webbing, wallpaper panels, or thin plywood inserts. Reeded glass film is especially useful because it blurs the contents while keeping the cabinet light and elegant.
Step 9: Add New Hardware
Hardware is the jewelry of a furniture makeover. Swap dated knobs for brass pulls, matte black handles, ceramic knobs, antique bronze hardware, or simple wood pulls. If the hinges are visible and worn, clean or replace them to match the new look.
Step 10: Anchor the Wardrobe
A tall cabinet should be anchored to the wall, especially in homes with children, pets, or enthusiastic adults who open doors like they are making a dramatic entrance. Use an anti-tip kit designed for furniture and attach it properly to the wall structure. A beautiful wardrobe is great; a safe wardrobe is better.
Design Ideas for a DIY Curio Turned Wardrobe
The Boutique Wardrobe
Keep the glass doors, paint the exterior a soft neutral, and line the back with peel-and-stick wallpaper. Add a brass rod and matching hooks. This style works well for displaying pretty dresses, linen shirts, handbags, or baby outfits.
The Hidden Storage Wardrobe
Replace or cover glass panels with cane, fabric, or frosted film. Paint the cabinet the same color as the wall for a built-in look. Use baskets inside to keep everything tidy. This option is perfect if your wardrobe contents are practical rather than photogenic.
The Kids’ Dress-Up Closet
A curio makes an adorable dress-up wardrobe. Install a low rod, add hooks for hats and costumes, and use bins for shoes and accessories. Choose washable paint and rounded hardware. Anchor it securely and avoid placing heavy items on top.
The Entryway Coat Cabinet
Turn the curio into a compact entry wardrobe with hooks for jackets, shelves for shoes, and baskets for gloves or pet leashes. Add a mirror to the inside of one door for last-minute checks before leaving the house.
The Linen Wardrobe
If your home lacks a linen closet, this project can save the day. Keep shelves in place, paint the inside a fresh color, and store towels, sheets, blankets, and toiletries in labeled baskets. Glass doors can make linens look crisp and intentional.
Safety and Durability Tips
Older furniture deserves respect, especially when paint, glass, and structural changes are involved. If the curio is vintage and may have old paint or finish, use caution when sanding. Work in a ventilated area, wear a mask, and avoid creating unnecessary dust. If you suspect lead paint on an older piece, test before sanding or consult a professional.
Durability also depends on curing time. Paint may feel dry in a few hours but still need days or weeks to fully cure. Avoid stuffing the wardrobe immediately after painting. Give shelves and rods time to harden so hangers, baskets, and folded clothes do not leave marks.
Common Mistakes to Avoid
Skipping Prep Work
Paint does not forgive laziness. Cleaning, sanding, and priming may not be glamorous, but they are what make the finish last. Skipping prep is like wearing a tuxedo over pajamas: impressive from a distance, questionable up close.
Using the Wrong Paint
Wall paint is not always tough enough for furniture that gets touched daily. Choose a durable finish designed for cabinets, trim, or furniture. Satin, semi-gloss, and enamel finishes are easier to wipe clean than flat paint.
Overloading the Rod
A curio cabinet was not originally built to hold a full winter coat collection. Install rods into solid side supports, use proper brackets, and avoid overloading. If in doubt, reinforce the interior before hanging clothing.
Ignoring Door Swing
Before placing the finished wardrobe, make sure the doors open fully. A beautiful cabinet wedged next to a bed, dresser, or wall may look great until you cannot access the socks.
Budget Breakdown
A DIY curio turned wardrobe can be surprisingly affordable. If you already own the cabinet, the main costs are paint, primer, hardware, a rod, and organizational inserts. A thrifted curio may cost anywhere from very cheap to “vintage seller discovered Pinterest” pricing, but even then, the total project is often less than buying a new wardrobe with similar character.
Expect to spend more if you replace glass, add decorative cane panels, install custom shelves, or buy premium hardware. The good news is that small upgrades make a big visual impact. A $12 knob can make a $40 cabinet look like it has a trust fund.
Where This Wardrobe Works Best
This type of furniture makeover is especially useful in rooms where storage is limited but style still matters. In a guest bedroom, it provides a welcoming place for visitors to unpack. In a nursery, it becomes a sweet mini closet for tiny clothes. In a small apartment, it offers vertical storage without the footprint of a full armoire. In a craft room, it can store fabric, yarn, patterns, and supplies behind pretty doors.
The key is to match the interior layout to your real life. Do not design a wardrobe for the fantasy version of yourself who folds every sweater into a perfect rectangle. Design it for the human version of yourself who needs baskets, labels, and a place to toss scarves in a hurry.
Extra Experience: Lessons From a DIY Curio Turned Wardrobe Project
The first thing you learn from converting a curio into a wardrobe is that furniture has opinions. A cabinet that looked perfectly innocent in the corner may suddenly reveal loose trim, stubborn hinges, and one shelf peg that refuses to leave its tiny wooden kingdom. The best approach is to slow down and treat the project like a conversation rather than a battle.
One of the most useful experiences is testing the layout before committing. Instead of drilling right away, place your clothing, baskets, or hangers inside the cabinet and see how they actually fit. A rod that seems perfect on paper may sit too low for dresses or too high for a child to reach. Painter’s tape can help mark shelf heights and rod placement. This five-minute mockup can prevent a very dramatic “why did I drill there?” moment later.
Another practical lesson is that the inside matters as much as the outside. Many people spend all their energy painting the exterior, then leave the interior dark, scratched, or awkward. But once a curio becomes a wardrobe, you interact with the inside every day. A light-colored interior can make clothing easier to see. Wallpaper on the back panel can add personality. Small battery-powered lights can make the wardrobe feel boutique-like, especially if the cabinet still has glass doors.
Hardware also changes the personality of the piece more than expected. Old shiny brass can look charming on some cabinets and tired on others. If the original hardware has a good shape, try cleaning it before replacing it. If it still looks wrong, new pulls can instantly modernize the wardrobe. The same goes for hinges. Fresh hinges or painted hinges in a matching finish can make the whole project feel more polished.
Patience with paint is another lesson learned the hard way. It is tempting to reload the wardrobe as soon as the paint feels dry, but cured paint is stronger than dry paint. Waiting longer helps prevent sticky shelves, hanger dents, and fingerprints. During curing time, leave doors slightly open when possible so air can circulate.
Finally, the best DIY curio turned wardrobe projects keep some of the original charm. You do not have to erase every sign of age. Maybe the curved glass stays. Maybe the carved trim becomes a feature. Maybe one little imperfection remains because it makes the piece feel real. A successful makeover is not about making old furniture look brand-new; it is about making it useful, beautiful, and welcome in your home again.
Conclusion
A DIY curio turned wardrobe is more than a clever furniture flip. It is a practical storage solution, a sustainable design choice, and a chance to create something with personality. With careful cleaning, sanding, priming, painting, and smart interior planning, an outdated display cabinet can become a stylish wardrobe for clothing, linens, accessories, kids’ costumes, or guest-room essentials.
The project works because it combines function with charm. Instead of buying a plain storage piece, you get a wardrobe with history, detail, and custom style. Whether you keep the glass doors, add cane panels, install a closet rod, or line the back with wallpaper, the result can feel personal and high-end without requiring a high-end budget.
So before you pass by that lonely curio cabinet at a thrift store, look again. It may not be asking to hold china anymore. It may be quietly whispering, “Put sweaters in me.” And honestly, that is the kind of furniture ambition we should all support.