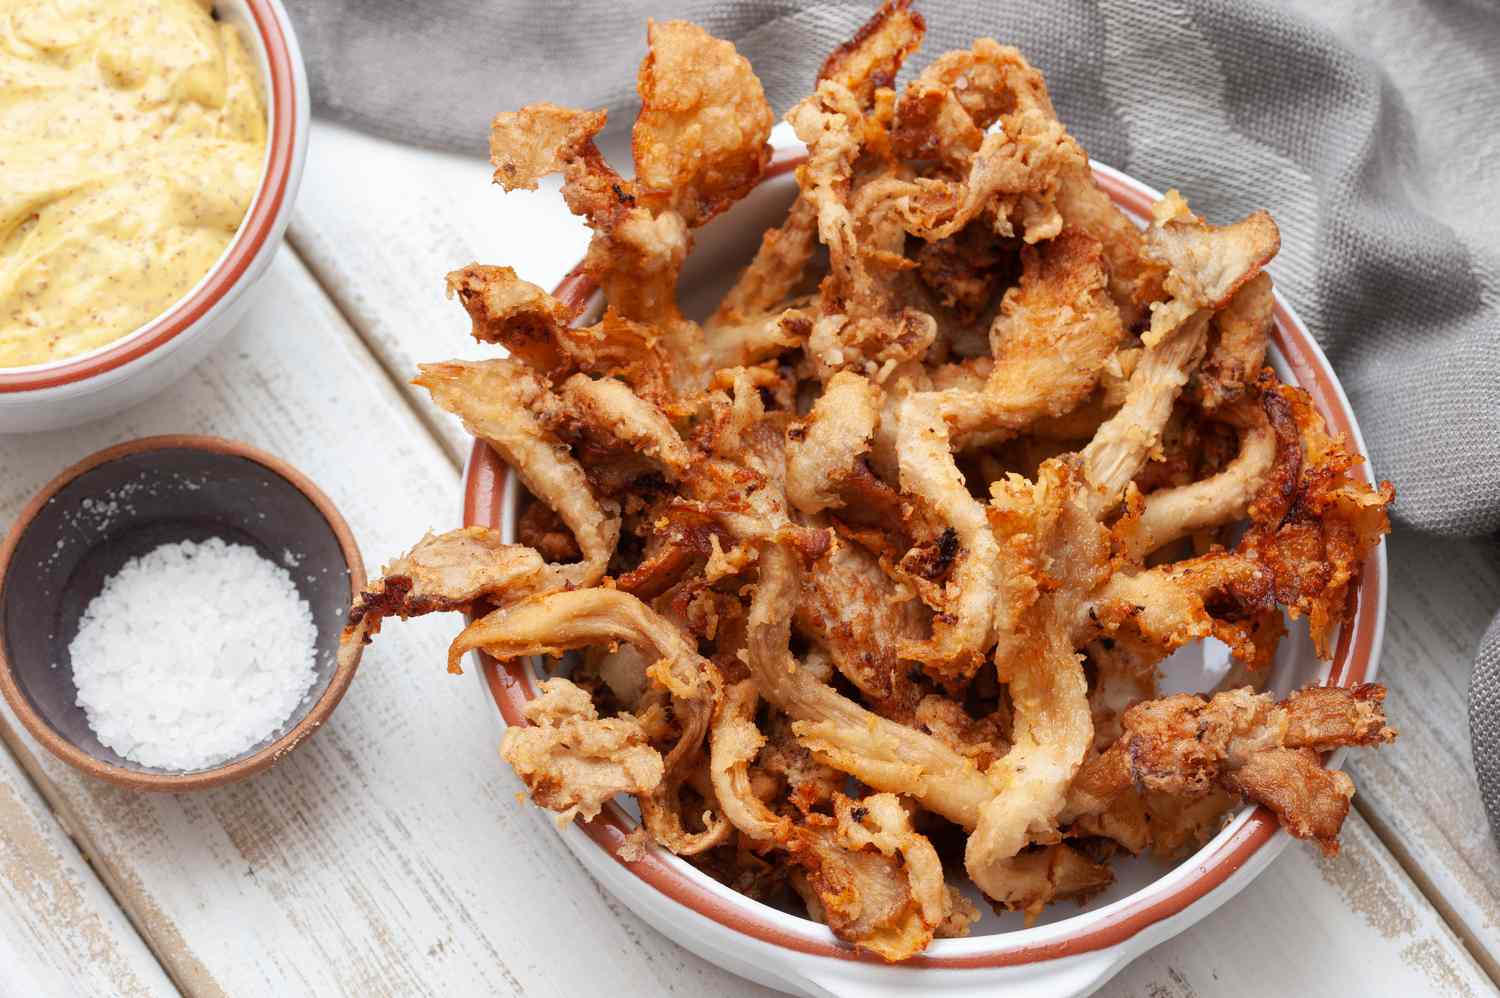
There are snacks, and then there are snacks that make people hover around the kitchen like polite little raccoons. This buttermilk fried mushrooms recipe belongs firmly in the second category. The outside is crisp, craggy, and golden. The inside stays juicy, savory, and almost meaty without trying too hard. It is the kind of appetizer that disappears before the dipping sauce has emotionally prepared itself.
Fried mushrooms are not complicated, but they are a little dramatic. Mushrooms hold moisture. Hot oil dislikes moisture. Your coating wants to cling. Your mushrooms want to steam. The goal is to create a crunchy shell before the mushroom gives up too much juice. That is where buttermilk, seasoned flour, smart oil temperature, and a little patience walk into the room wearing aprons.
This recipe uses button, cremini, or oyster mushrooms, a tangy buttermilk soak, and a well-seasoned flour coating with cornstarch for extra crunch. It is written for home cooks who want restaurant-style fried mushrooms without needing a culinary degree, a commercial fryer, or a motivational speech from a chef named Tony.
Why Buttermilk Works So Well for Fried Mushrooms
Buttermilk is the secret handshake of many fried foods. It adds tang, helps seasonings stick, and gives the flour coating something to grip. In this recipe, buttermilk creates a light, flavorful layer around the mushrooms without turning them into heavy batter balloons.
The mild acidity of buttermilk also balances the earthy flavor of mushrooms. Button mushrooms become snackable and familiar, cremini mushrooms taste deeper and nuttier, and oyster mushrooms develop those crispy, ruffled edges that make people say, “Wait, are these mushrooms or vegetarian fried chicken?” The answer is yes, spiritually.
Best Mushrooms for Buttermilk Fried Mushrooms
Button Mushrooms
White button mushrooms are easy to find, affordable, and perfect for classic fried mushrooms. Choose small to medium mushrooms so they cook quickly and stay bite-sized. If they are large, halve or quarter them.
Cremini Mushrooms
Cremini mushrooms, sometimes called baby bellas, have a slightly richer flavor. They are excellent if you want a more savory, steakhouse-style appetizer.
Oyster Mushrooms
Oyster mushrooms are fantastic for crispy edges. Tear large clusters into smaller pieces before soaking. Their irregular shape catches breading beautifully, which means more crunch per bite. This is not official math, but it should be.
Recipe Overview
- Prep time: 20 minutes
- Cook time: 10 to 12 minutes
- Total time: About 35 minutes
- Servings: 4 as an appetizer
- Best for: Game day snacks, party appetizers, vegetarian comfort food, side dishes, and “I deserve something crispy” nights
Ingredients
For the Mushrooms
- 1 pound small button mushrooms, cremini mushrooms, or oyster mushrooms
- 1 1/2 cups buttermilk
- 1 large egg
- 1 teaspoon hot sauce, optional
- 1 1/2 cups all-purpose flour
- 1/2 cup cornstarch
- 1 teaspoon baking powder
- 1 1/2 teaspoons kosher salt
- 1 teaspoon garlic powder
- 1 teaspoon onion powder
- 1 teaspoon smoked paprika
- 1/2 teaspoon black pepper
- 1/4 teaspoon cayenne pepper, optional
- Vegetable oil, canola oil, or peanut oil for frying
For the Quick Ranch-Style Dip
- 1/2 cup mayonnaise
- 1/2 cup sour cream or Greek yogurt
- 1 tablespoon buttermilk, plus more to thin
- 1 teaspoon lemon juice
- 1/2 teaspoon garlic powder
- 1/2 teaspoon onion powder
- 1 tablespoon chopped fresh dill or parsley
- Salt and black pepper to taste
How to Make Buttermilk Fried Mushrooms
Step 1: Clean the Mushrooms the Right Way
Brush off dirt with a dry paper towel, clean kitchen towel, or soft brush. Avoid soaking mushrooms in water because they absorb moisture, and moisture is the sworn enemy of crispiness. If your mushrooms are very dirty, give them a quick rinse and dry them extremely well. Not “I waved a towel near them” dry. Really dry.
Step 2: Trim and Cut
Trim the stem ends. Leave small button or cremini mushrooms whole. Halve medium mushrooms and quarter large ones. For oyster mushrooms, tear them into large bite-sized pieces. Try to keep pieces similar in size so they fry evenly.
Step 3: Make the Buttermilk Mixture
In a medium bowl, whisk together buttermilk, egg, and hot sauce if using. Add the mushrooms and toss gently. Let them sit for 10 to 15 minutes. This short soak helps the coating cling while adding flavor. Do not marinate them for hours; mushrooms are sponges with ambition.
Step 4: Mix the Seasoned Flour
In a shallow dish, whisk together flour, cornstarch, baking powder, salt, garlic powder, onion powder, smoked paprika, black pepper, and cayenne. Cornstarch helps create a lighter, crispier crust, while baking powder encourages tiny bubbles in the coating.
Step 5: Dredge Like You Mean It
Lift a few mushrooms from the buttermilk, allowing excess liquid to drip off. Roll them in the seasoned flour, pressing gently so the coating sticks. For extra crunch, dip them back into the buttermilk and coat once more in the flour mixture. This double-dredge method creates those rugged little crispy bits everyone secretly fights over.
Step 6: Heat the Oil
Pour 1 1/2 to 2 inches of oil into a heavy pot, Dutch oven, or deep skillet. Heat to 350°F. A thermometer is your best friend here. If the oil is too cool, the mushrooms absorb oil and turn greasy. If it is too hot, the coating browns before the mushrooms cook through.
Step 7: Fry in Small Batches
Carefully add mushrooms to the hot oil in small batches. Do not crowd the pot. Fry for 3 to 5 minutes, turning occasionally, until golden brown and crisp. Oyster mushrooms may cook slightly faster because they are thinner. Button and cremini mushrooms may need the full time.
Step 8: Drain and Season Immediately
Transfer fried mushrooms to a wire rack set over a baking sheet. A paper towel works in a pinch, but a rack keeps the bottoms from steaming. Sprinkle with a pinch of salt while hot. This is the moment when the crust is most receptive, like a tiny golden flavor sponge.
Step 9: Serve Hot
Serve immediately with ranch dip, spicy mayo, honey mustard, garlic aioli, or a squeeze of lemon. Fried mushrooms are at their best when hot and crisp, ideally eaten while everyone is still pretending they will “just have one.”
Pro Tips for Extra Crispy Fried Mushrooms
Keep the Mushrooms Dry Before Soaking
Dry mushrooms fry better. Too much surface water weakens the coating and can make the oil splatter. Clean them gently and dry them well before they touch the buttermilk.
Use Cornstarch for Crunch
A flour-only coating works, but adding cornstarch makes the crust lighter and crispier. It is a small ingredient with main-character energy.
Do Not Skip the Resting Rack
After dredging, let the coated mushrooms rest on a wire rack for 5 to 10 minutes before frying. This gives the coating time to hydrate and stick. Translation: less breading floating sadly in your oil.
Watch the Oil Temperature
Keep the oil around 350°F. The temperature will drop when you add mushrooms, so fry in batches and give the oil time to recover. Good frying is less about bravery and more about temperature control.
Common Mistakes to Avoid
Mistake 1: Crowding the Pan
Too many mushrooms at once lower the oil temperature and trap steam. Instead of crisp fried mushrooms, you get oily mushroom dumplings. Delicious? Maybe. The assignment? Not quite.
Mistake 2: Using Wet Mushrooms
If mushrooms are wet before coating, the breading can slide off. Dry first, soak briefly, dredge thoroughly, and fry promptly.
Mistake 3: Underseasoning the Flour
The coating is where much of the flavor lives. Season it well with salt, garlic powder, onion powder, paprika, and pepper. Mushrooms are earthy and mild, so they appreciate a little support from the spice cabinet.
Mistake 4: Serving Too Late
Fried mushrooms are not a “make it three hours ahead and hope for the best” food. Serve them hot. If needed, keep batches warm in a 250°F oven on a wire rack while you finish frying.
Flavor Variations
Spicy Buttermilk Fried Mushrooms
Add extra cayenne to the flour and a tablespoon of hot sauce to the buttermilk. Serve with cooling ranch or blue cheese dip.
Garlic Parmesan Fried Mushrooms
After frying, toss the hot mushrooms with finely grated Parmesan, garlic powder, and chopped parsley. Serve with marinara or creamy garlic dip.
Southern-Style Fried Mushrooms
Add a pinch of chili powder, dried thyme, and black pepper to the flour. Serve with comeback sauce or buttermilk ranch.
Extra Crunchy Panko Mushrooms
After the buttermilk dip and flour coating, roll the mushrooms in panko breadcrumbs. This creates a chunkier, shatter-crisp crust that feels very appetizer-menu friendly.
What to Serve with Buttermilk Fried Mushrooms
These crispy fried mushrooms are excellent as an appetizer, but they can also become a full meal with the right supporting cast. Serve them with burgers, grilled cheese, barbecue sandwiches, veggie wraps, or a big chopped salad. They also work beautifully on a snack board with pickles, celery sticks, carrots, olives, and two or three dipping sauces.
For drinks, pair them with lemonade, iced tea, sparkling water with lemon, or a cold soda. The mushrooms are rich and savory, so something bright and refreshing balances the plate.
Storage and Reheating
Buttermilk fried mushrooms taste best right after frying. If you have leftovers, cool them completely and store them in an airtight container in the refrigerator for up to 3 days. For food safety, do not leave cooked mushrooms sitting at room temperature for more than 2 hours.
To reheat, use an air fryer or oven. Heat at 375°F until warmed through and crisp again, usually 5 to 8 minutes in an air fryer or 8 to 12 minutes in an oven. Avoid the microwave unless you are emotionally prepared for soft coating. The microwave is many things, but a crispness preservation device it is not.
Buttermilk Fried Mushrooms Recipe FAQs
Can I make fried mushrooms without buttermilk?
Yes. Mix 1 1/2 cups of whole milk with 1 1/2 tablespoons of lemon juice or white vinegar. Let it sit for 5 minutes, then use it as a buttermilk substitute. It will not be exactly the same, but it gets the job done.
Can I air fry buttermilk fried mushrooms?
Yes, but the texture will be different. Spray the coated mushrooms generously with cooking spray and air fry at 390°F for 8 to 12 minutes, turning once. They will be crisp, though not quite as deeply golden as oil-fried mushrooms.
Why did my coating fall off?
The mushrooms may have been too wet, the coating may not have rested long enough, or the oil may not have been hot enough. Dry the mushrooms well, press the flour mixture firmly onto the surface, let them rest briefly, and fry at 350°F.
Are buttermilk fried mushrooms vegetarian?
Yes, this recipe is vegetarian because it uses mushrooms, dairy, egg, flour, and seasonings. It is not vegan as written, but you can experiment with plant-based milk mixed with lemon juice and an egg substitute.
Experience Notes: What I Learned Making Buttermilk Fried Mushrooms at Home
The first thing you learn when making buttermilk fried mushrooms is that mushrooms are tiny moisture-filled tricksters. They look innocent in the package, all calm and earthy, but once they hit hot oil, they remind you that nature has a sense of humor. The best batches always start with mushrooms that are clean but dry. Wiping them with a towel feels like a fussy step until you skip it once and watch your coating slide off like it has somewhere better to be.
Another experience worth sharing: small mushrooms are your friend. The first time I made fried mushrooms, I used large button mushrooms and left them whole because I was feeling optimistic. They looked beautiful, but they were awkward to bite and held a lot of hot juice inside. Smaller mushrooms, halved cremini mushrooms, or torn oyster mushrooms give you better balance. You get crisp coating, tender mushroom, and no surprise lava moment. Appetizers should be exciting, yes, but not medically interesting.
The buttermilk soak is also more about coating and flavor than long marination. With chicken, people often think in hours. With mushrooms, think in minutes. Ten to fifteen minutes is plenty. Any longer and they may become too wet, which makes frying harder. A short soak gives the flour something to cling to and adds that subtle tang that makes the final bite taste more complete.
Oil temperature is where the recipe becomes a small lesson in patience. When the oil is at 350°F, the mushrooms fry quickly and the crust sets before things get soggy. If you add too many at once, the temperature drops and the mushrooms start absorbing oil instead of crisping. I have learned to fry fewer pieces per batch than my hungry brain wants. The reward is a lighter, crunchier mushroom that tastes like a restaurant appetizer instead of a kitchen experiment with good intentions.
The dipping sauce matters, too. Ranch is classic because it is creamy, tangy, and familiar. Spicy mayo is great if you want heat. Lemon garlic aioli makes the mushrooms feel slightly fancy, like they might know how to pronounce “hors d’oeuvres.” My favorite move is to serve two dips: one cool and creamy, one spicy or acidic. The mushrooms are rich, so a bright sauce keeps people coming back.
Finally, buttermilk fried mushrooms are best eaten immediately. This is not a flaw; it is an invitation. Gather people near the kitchen, fry in batches, and serve as they come out. The first batch will vanish while the second batch is still bubbling. That is normal. That is the rhythm of fried food. Nobody stands near a plate of hot crispy mushrooms and says, “I shall wait until these are room temperature.” At least nobody I trust with appetizers.
Conclusion
This buttermilk fried mushrooms recipe proves that a simple mushroom can become the star of the snack table with the right coating, oil temperature, and a little crunchy confidence. The key is to keep the mushrooms dry before soaking, season the flour boldly, fry in small batches, and serve them hot with a dip that makes everyone suspiciously quiet for a few minutes.
Whether you use button mushrooms, cremini mushrooms, or oyster mushrooms, the method stays approachable and flexible. Make them spicy, garlicky, extra crunchy, or Southern-style. Just do not crowd the pan, do not forget the salt, and definitely do not expect leftovers.