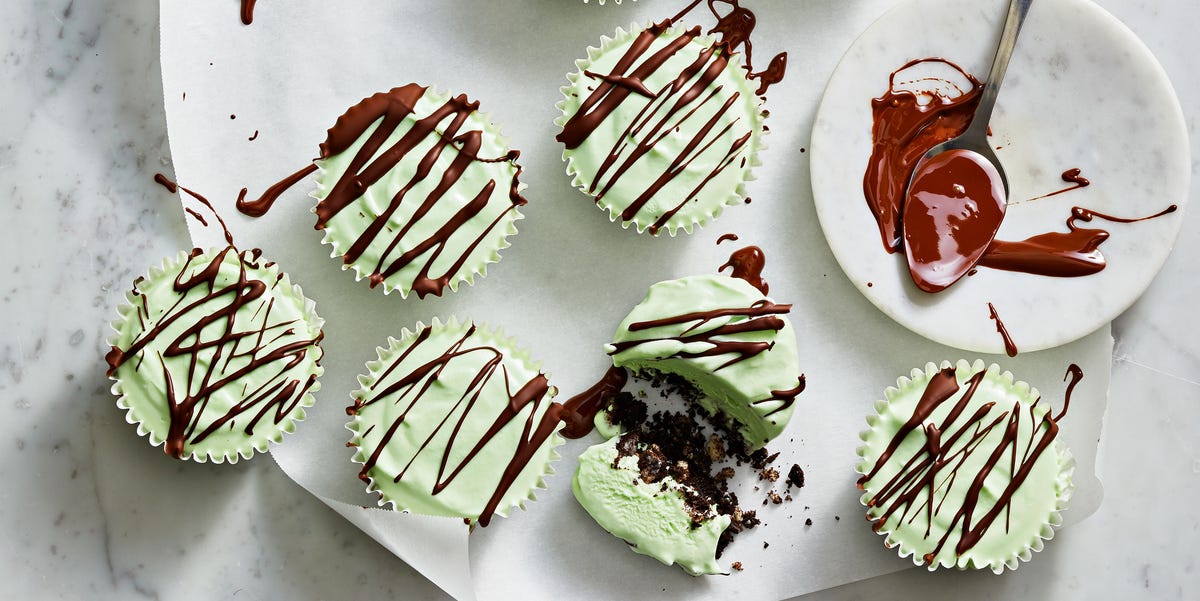
There are desserts that politely wait their turn, and then there are mini grasshopper pies. These little chocolate-and-mint troublemakers arrive cold, creamy, bright, and entirely too easy to grab “just one” of. With a crisp chocolate cookie crust, a fluffy mint filling, and a shower of chocolate curls on top, they deliver all the flavor of a classic grasshopper pie without requiring anyone to cut a perfect slice while twelve people watch.
This mini grasshopper pies recipe is designed for real life: a standard muffin pan, easy grocery-store ingredients, no complicated custard, and no need to summon advanced pastry skills. The filling is smooth and lightly tangy from cream cheese, airy from whipped cream, and cool with peppermint flavor. The result is a no-fuss dessert that feels festive enough for St. Patrick’s Day, elegant enough for a dinner party, and fun enough for a random Tuesday when the refrigerator needs a little more personality.
Best of all, these individual mint chocolate pies can be made ahead. That means you get to look suspiciously organized when guests arrive, even if you spent the previous hour searching for a matching sock.
Why These Mini Grasshopper Pies Are So Good
A traditional grasshopper-style dessert usually combines chocolate, mint, cream, and a cheerful green color. This version keeps those familiar flavors but turns them into neat, hand-held treats. Each pie has a sturdy cookie crust, a chilled mint cream filling, and a topping that makes it look like it came from a bakery with very confident lighting.
Mini desserts solve several party problems at once. There is no slicing drama, no cracked first piece, and no debate over who got the biggest portion. Everyone gets a complete little pie, complete with crust, filling, and topping. It is dessert equality, with chocolate.
The recipe is also easy to adjust. Prefer a stronger mint flavor? Add a tiny bit more peppermint extract. Want a deeper chocolate profile? Use dark chocolate sandwich cookies or add a thin layer of ganache. Need a kid-friendly dessert? This version is naturally alcohol-free, so everyone can enjoy it without turning dessert into a legal discussion.
Mini Grasshopper Pies at a Glance
- Yield: 12 mini pies
- Prep time: About 30 minutes
- Chill time: At least 2 hours
- Skill level: Beginner-friendly
- Best for: Holidays, potlucks, birthdays, spring parties, and chocolate-mint emergencies
Ingredients for the Best Mini Grasshopper Pies
For the Chocolate Cookie Crust
- 20 chocolate sandwich cookies, including the filling
- 5 tablespoons unsalted butter, melted
- Pinch of fine salt
For the Mint Cream Filling
- 8 ounces full-fat cream cheese, softened
- 1/2 cup confectioners’ sugar
- 3 tablespoons sour cream
- 1 teaspoon peppermint extract
- 1/8 teaspoon fine salt
- 2 to 4 drops green gel food coloring, optional
- 1 cup cold heavy whipping cream
- 1 tablespoon granulated sugar
For the Topping
- 1/2 cup whipped cream or whipped topping
- Chocolate shavings, chopped chocolate, or crushed mint chocolate candies
- Small mint leaves, optional
- Extra cookie crumbs, optional
How To Make Mini Grasshopper Pies
1. Prepare the Muffin Pan
Line a standard 12-cup muffin pan with paper liners. Paper liners are not just there to look cute. They make it much easier to remove the pies without turning your dessert into an archaeological dig. For a more polished look, use sturdy parchment-style cupcake liners.
Heat the oven to 350°F. Even though the filling is no-bake, briefly baking the cookie crust gives it a firmer texture and helps it hold together when you unwrap each mini pie.
2. Make the Chocolate Cookie Crust
Place the chocolate sandwich cookies in a food processor and pulse until they become fine crumbs. No food processor? Put the cookies in a zip-top bag and crush them with a rolling pin. This is also an excellent way to release minor frustration without sending anyone a strongly worded email.
Transfer the crumbs to a bowl. Stir in the melted butter and pinch of salt until the mixture resembles damp sand. Divide the crumbs among the muffin cups, using about 1 1/2 tablespoons in each liner. Press the crumbs firmly into the bottom of each cup with the back of a measuring spoon or the bottom of a small glass.
Bake for 5 to 6 minutes, just until the crusts look set and smell like chocolate cookies are plotting world domination. Let them cool completely before adding the filling.
3. Make the Mint Cream Cheese Base
In a medium bowl, beat the softened cream cheese until smooth. Add the confectioners’ sugar, sour cream, peppermint extract, and salt. Beat again until creamy and fully combined.
Add green gel food coloring, if using. Start small. Green food coloring is like a karaoke microphone: once it is in your hand, it is easy to get carried away. A few drops are usually enough for a soft minty shade. Use gel coloring rather than liquid coloring when possible, since it gives stronger color without thinning the filling.
4. Whip the Cream
In a separate cold bowl, beat the heavy cream and granulated sugar until medium peaks form. The whipped cream should hold its shape when you lift the beaters, but it should still look smooth and soft. Avoid whipping it until it becomes stiff and grainy, unless your goal is to accidentally invent mint-flavored butter.
Fold one-third of the whipped cream into the cream cheese mixture to lighten it. Then gently fold in the rest. Use a spatula and broad, slow motions so the filling stays fluffy.
5. Fill and Chill the Mini Pies
Spoon or pipe the mint filling evenly over the cooled crusts. Smooth the tops with a small spoon or offset spatula. Refrigerate the pies for at least 2 hours, or until the filling feels firm and chilled.
For a cleaner bakery-style finish, transfer the filling to a piping bag fitted with a large round tip. Pipe a soft swirl into each crust. It looks fancy, but it is mostly just controlled squeezing.
6. Add the Toppings Before Serving
Top each mini grasshopper pie with a small dollop of whipped cream. Finish with chocolate curls, finely chopped chocolate, crushed mint candies, or cookie crumbs. A tiny mint leaf can add a fresh pop of color, but it is optional. The pies already have enough personality.
Tips for Perfect Mini Mint Chocolate Pies
Use Block Cream Cheese, Not the Tub Kind
Block-style cream cheese gives the filling a firmer, richer texture. Spreadable cream cheese from a tub often contains extra moisture, which can make the filling softer than intended. Your pies should be creamy, not emotionally uncertain.
Do Not Rush the Cooling Step
The cookie crusts must cool before the filling goes in. Warm crusts can soften the mint cream and make the paper liners greasy. Let the crusts cool completely on the counter, then fill them.
Measure Peppermint Carefully
Peppermint extract is powerful. A little gives you that cool grasshopper pie flavor; too much can make the filling taste like it has been brushing its teeth all afternoon. Start with 1 teaspoon, then taste the cream cheese base before folding in the whipped cream.
Use Cold Cream for Better Whipping
Cold heavy cream whips faster and holds its shape more reliably. Chill the mixing bowl and beaters for 10 minutes before whipping if your kitchen is warm or your air conditioner has decided to take the day off.
Press the Crust Firmly
A loose cookie crust will crumble when the liners come off. Press the crumbs down firmly, especially around the edges. You want a compact base that stays attached to the filling instead of abandoning it halfway through the first bite.
Easy Variations for Mini Grasshopper Pies
Chocolate Ganache Mini Grasshopper Pies
Add a thin layer of chocolate ganache between the cookie crust and mint filling. Melt 3 ounces of semisweet chocolate with 1/4 cup warm heavy cream, let it cool slightly, and spoon about 1 teaspoon into each crust. Chill for 10 minutes before adding the mint filling. The extra chocolate layer makes these pies feel especially luxurious.
Mint Chocolate Chip Version
Fold 1/3 cup mini chocolate chips into the finished filling. This adds small bursts of chocolate in every bite and gives the pies a texture similar to mint chocolate chip ice cream.
Frozen Mini Grasshopper Pies
For a frozen dessert, place the finished pies in the freezer for 1 to 2 hours after chilling. Serve them slightly softened, not rock-hard. A few minutes on the counter will make the filling creamy enough to bite into without requiring dental equipment.
Adult Grasshopper Pie Variation
For a grown-up version, stir 1 tablespoon of crème de menthe into the cream cheese mixture and reduce the peppermint extract to 1/2 teaspoon. Keep the amount modest so the filling stays thick and balanced. The goal is a minty dessert with a little sparkle, not a pie that starts telling long stories at dinner.
Gluten-Free Option
Use gluten-free chocolate sandwich cookies for the crust. Check the labels on candies, chocolate shavings, and whipped toppings as well, especially when making these mini pies for guests with dietary restrictions.
How To Store Mini Grasshopper Pies
Keep the pies covered in the refrigerator until serving. They are best within 2 days, when the cookie crust is still crisp and the whipped filling is fresh and airy. Add whipped cream, chocolate shavings, and mint leaves shortly before serving so the toppings stay neat.
To freeze, place the chilled pies on a tray until firm, then transfer them to an airtight container. Freeze for up to 1 month. Thaw in the refrigerator for several hours before serving. Add the final toppings after thawing for the prettiest result.
What To Serve With Mini Grasshopper Pies
These chocolate mint pies are rich enough to stand alone, but they pair beautifully with coffee, espresso, hot chocolate, or a cold glass of milk. For a holiday dessert table, place them next to brownies, chocolate cookies, vanilla cupcakes, or fresh strawberries.
If you are serving them after a heavier meal, keep the portions small and the toppings simple. The mint flavor naturally feels refreshing, but the filling is still creamy and indulgent. Think of it as a tiny tuxedo: compact, polished, and ready to make chocolate look important.
Frequently Asked Questions About Mini Grasshopper Pies
Why Are They Called Grasshopper Pies?
The name refers to the classic chocolate-and-mint grasshopper flavor profile, not an ingredient. There are no actual grasshoppers in this dessert, which should be a relief to both your guests and the backyard ecosystem.
Can I Make These Without Food Coloring?
Absolutely. The pies will be pale cream rather than green, but they will still taste delicious. The green color is festive, not mandatory.
Can I Use Mint Extract Instead of Peppermint Extract?
Yes, but mint extract can taste more herb-like and less bright than peppermint extract. Use the same amount, taste the filling, and add a little more only if needed.
Can I Use Store-Bought Whipped Topping?
Yes. Replace the homemade whipped cream with about 2 cups thawed whipped topping. The filling will be a little sweeter and more stable, which can be helpful when making the pies a day ahead.
Can I Make These in a Mini Muffin Pan?
Yes. A mini muffin pan will make about 24 bite-size grasshopper pies. Reduce the crust amount to about 2 teaspoons per cup and use roughly 1 tablespoon of filling in each. These are dangerously snackable, so consider yourself warned.
Experiences and Lessons From Making Mini Grasshopper Pies
The first time you make mini grasshopper pies, you may assume they are simply a cute version of a larger pie. Then you set out twelve little green-and-chocolate desserts, and suddenly people begin acting as though you have opened a tiny luxury bakery in your kitchen. That is the charm of individual desserts: they make ordinary ingredients feel special.
One of the best things about these pies is how forgiving they are. You do not need a perfectly rolled crust, a pie shield, or the kind of confidence usually associated with people who own a kitchen torch. The cookie crust is pressed in, the filling is folded together, and the refrigerator handles the difficult part. If a swirl of whipped cream leans slightly to the left, it does not look like a mistake. It looks handcrafted. Very artisan. Very intentional.
Mini grasshopper pies are especially useful when hosting because they remove the last-minute dessert scramble. A full pie can be beautiful, but it asks a lot of the person serving it. You have to slice evenly, lift carefully, and somehow avoid getting filling on the knife, plate, counter, and your sleeve. With mini pies, everyone simply takes one. The dessert table stays tidy, and you get to spend more time talking instead of performing pastry surgery.
They also encourage creativity without demanding a whole new recipe. One batch can be topped with chocolate curls, another with crushed mint candies, and another with a tiny drizzle of ganache. You can make half the tray green and leave the other half naturally cream-colored. You can use dark chocolate cookies for a more grown-up flavor or mint chocolate cookies for a bigger peppermint punch. The base recipe remains steady while the toppings get to have fun.
There is also something wonderfully nostalgic about the chocolate-and-mint combination. It has the same comforting energy as a box of after-dinner mints, a scoop of mint chip ice cream, or a chocolate cookie sneaked from the pantry when nobody is looking. It is cool, sweet, rich, and familiar without being boring. The mint cuts through the creaminess, while the chocolate keeps the dessert from drifting into overly sweet territory.
For parties, these pies are often the dessert that disappears first because they look manageable. Guests may hesitate before taking a large slice of cake, but a mini pie seems harmless. This is a clever illusion. One mini pie is perfectly reasonable. A second mini pie is also understandable. A third mini pie is where the chocolate crumbs begin to tell on you.
Making them ahead also changes the mood of entertaining. Instead of rushing to finish dessert while guests arrive, you can pull a tray from the refrigerator, add toppings, and look entirely calm. Whether that calm is real is between you and your kitchen timer. The important part is that the mini grasshopper pies are ready, cold, creamy, and waiting to make everyone happy.
Note: This recipe is made for a standard 12-cup muffin pan. For the cleanest edges, keep the pies chilled until the moment you are ready to serve them.