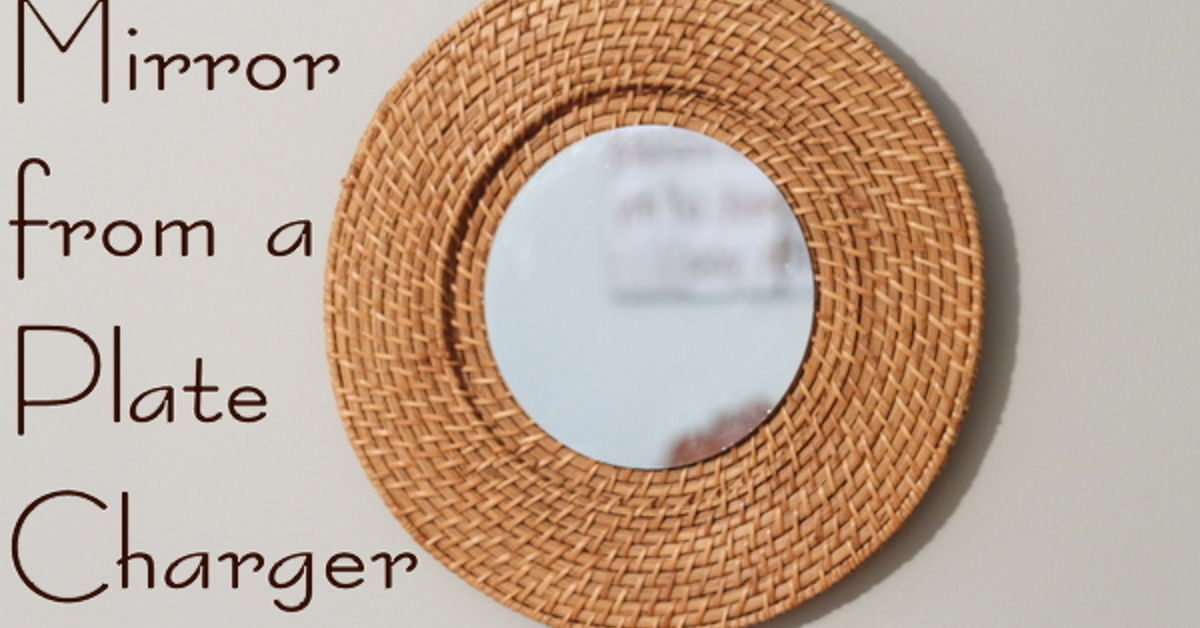
Some DIY projects begin with a grand vision. Others begin with wandering through a dollar store, holding a plastic plate charger, and thinking, “You look suspiciously like wall decor.” This woven mirror from a $1 plate charger belongs proudly in the second category.
With a lightweight charger plate, a small round mirror, rope or raffia, and a little patience, you can create a textured piece of budget home decor that looks far more expensive than its humble origin story. The finished result can fit beautifully in a boho bedroom, coastal entryway, gallery wall, dorm room, powder room, or awkward little wall corner that has been begging for a personality upgrade.
This project is not about tricking people into believing you spent hundreds of dollars on designer decor. It is about turning an inexpensive everyday object into something personal, useful, and unexpectedly stylish. A plate charger may begin its life under a dinner plate, but with the right materials, it can become a woven wall mirror with enough charm to make guests ask where you found it.
Why a Plate Charger Makes a Great Mirror Base
A charger plate is already doing much of the hard work for you. It is round, lightweight, shallow, and usually has a decorative rim. That rim creates a natural place to attach rope, raffia, yarn, jute, or faux cane trim. Instead of constructing a mirror frame from scratch, you are simply giving a ready-made shape a new career.
The most useful charger plates for this DIY mirror are plastic, woven-look, bamboo-look, metallic, or textured styles. Smooth chargers work too, but textured rims create more visual interest and make the final piece look more layered. A charger with a raised edge can also help the mirror sit neatly in the center.
Best of all, the project is flexible. Your mirror can look coastal, rustic, modern, farmhouse-inspired, eclectic, tropical, or soft and minimalist depending on the material you wrap around it. A simple plastic plate charger has no strong opinion about your decorating style. It is emotionally available for anything.
Materials for a Woven Plate Charger Mirror
Gather your materials before you begin. This is a small project, but having everything nearby prevents the classic DIY situation where one hand is covered in glue and the other hand is desperately searching for scissors.
- One round plate charger, ideally lightweight plastic or woven-look material
- One small round mirror or mirror tile
- Natural jute rope, cotton rope, raffia, twine, yarn, or faux rattan trim
- Strong craft adhesive, mirror-safe adhesive, or heavy-duty glue suitable for your materials
- Hot glue gun for quick decorative attachment, if appropriate for your chosen materials
- Scissors
- Pencil or washable marker
- Ruler or measuring tape
- Hanging hardware, adhesive picture strips, or a sawtooth hanger rated for the finished weight
- Optional paint, stain, beads, tassels, shells, wooden balls, or metallic wax
Before You Start: Check the Size and Weight
Before glue enters the chat, place your mirror in the center of the charger plate and step back. The mirror should leave a visible border around the edge. That border is where the woven texture will shine.
A small mirror usually looks best when it covers roughly the center half to two-thirds of the charger plate. If the mirror is too large, the frame can disappear. If it is too small, the project may look less like a mirror and more like a decorative pizza with a reflective center.
Also consider where the finished mirror will hang. A lightweight charger mirror may work well with properly rated removable hanging strips on a clean, smooth wall. For heavier versions, use hardware designed for the wall type and the total weight of the project. Do not rely on hot glue alone as a wall-hanging method. Hot glue is wonderful for craft details, but it is not a licensed structural engineer.
How to Make a Woven Mirror from a Plate Charger
Step 1: Clean the Charger Plate
Wipe the front of the charger plate with a clean cloth to remove dust, packaging residue, or fingerprints. If the surface feels slick or glossy, lightly scuff the center area with fine sandpaper only if your adhesive instructions allow it. This can help certain adhesives grip better, but do not sand a delicate finish unless you are comfortable changing it.
Let the charger plate dry completely before moving on. Adhesive and mystery moisture are not a glamorous design duo.
Step 2: Find the Center
Place the mirror in the center of the charger plate. Use a ruler to check the distance between the mirror edge and the charger edge at several points. Adjust until the spacing looks even.
Once you are happy with the placement, lightly trace around the mirror with a pencil or marker. This outline gives you a guide when applying adhesive. It also saves you from the awkward moment when the mirror lands one inch too far left and suddenly your “organic handmade style” becomes “why is it staring at me sideways?”
Step 3: Attach the Mirror Securely
Apply a mirror-safe adhesive according to the manufacturer’s instructions. Avoid using an adhesive that may damage the reflective backing of the mirror. Place the mirror inside the traced outline and press gently.
Keep pressure even across the surface. Do not press too hard on a glass mirror, especially if it is thin. Place a lightweight book or flat object on top only if the adhesive instructions recommend it and only after protecting the mirror surface with a clean cloth.
Allow the adhesive to cure fully before adding heavy decorative materials. This is the least exciting part of the project, but curing time is where the mirror earns its long-term staying power.
Step 4: Create the Woven Border
Now comes the fun part: turning a plate charger into woven wall decor. Start at the back or bottom edge of the charger, where the beginning of your rope or raffia will be less visible.
For a simple wrapped design, apply a small amount of glue to a short section of the charger rim and press the rope into place. Continue working around the edge in small sections. Avoid adding glue around the entire charger at once, because it may dry before you reach it, and nobody wants to wrestle a half-glued rope snake.
For a more woven look, layer your rope in overlapping rows. Start with a thick rope closest to the mirror, then transition to thinner twine near the outside edge. You can also alternate materials, such as jute and raffia, to create texture without making the design look overly busy.
Another option is a sunburst effect. Cut several lengths of raffia, rope, or yarn and glue them outward from the charger edge like rays. This creates a more dramatic boho mirror style and works especially well with natural tan, cream, or muted earth tones.
Step 5: Finish the Edges
Once the border is complete, inspect the mirror from several angles. Trim loose fibers, tuck in any rope ends, and reinforce areas that look weak. Add a small dab of glue beneath a stubborn section instead of coating the entire piece in adhesive.
For a polished finish, add decorative beads, wooden balls, tassels, shells, or a narrow strip of faux leather around the outer edge. Keep embellishments balanced. One tassel can look intentional. Seventeen tassels can make the mirror look like it joined a parade.
Easy Style Variations for Your DIY Woven Mirror
Coastal Rope Mirror
Use thick jute rope, ivory cotton cord, and a few small shells. Keep the palette simple: sand, cream, white, and driftwood brown. This version works well near entryways, bathrooms, beach-inspired bedrooms, or patio doors.
Boho Raffia Mirror
Create a fuller sunburst border with raffia or natural straw trim. Mix a few uneven lengths for a relaxed, handmade appearance. This style pairs well with woven baskets, linen curtains, plants, and warm neutral walls.
Modern Black-and-Natural Mirror
Paint the charger plate matte black, then add natural rope around the mirror. The contrast makes the texture feel more contemporary and helps the mirror stand out against pale walls.
Farmhouse-Inspired Mirror
Use cotton rope, white chalk-style paint, and a narrow strip of distressed wood trim or braided twine. This version can fit beautifully above a small console table, in a laundry room, or near open shelving.
Colorful Kids’ Room Mirror
Wrap the charger with chunky yarn in cheerful colors. Add pom-poms, felt shapes, or painted wooden beads. Use lightweight acrylic mirror material instead of glass for a child-friendly decorative version, and secure it carefully using hardware rated for the wall and finished weight.
Where to Hang a Plate Charger Mirror
A woven plate charger mirror can be small, but it still has visual power. Mirrors reflect light and can help a compact room feel brighter and more open when placed thoughtfully. Position your mirror where it reflects a window, a lamp, greenery, artwork, or another attractive part of the room.
Avoid hanging it directly opposite clutter, laundry piles, or the mysterious chair that collects every item nobody knows where to put. A mirror reflects what is in front of it, so it can either double the charm or double the chaos.
Great placement ideas include:
- Above a narrow entryway table
- As part of a gallery wall with baskets and framed prints
- Above a nightstand in a bedroom
- In a small bathroom as decorative accent wall art
- Near a reading nook or indoor plant corner
- Grouped with two or three different-sized woven mirrors
- Above a dresser, console, or bar cart
Common Problems and Simple Fixes
The Mirror Looks Off-Center
If the mirror has not fully cured, gently reposition it before the adhesive sets. If it has already dried, do not force it loose unless your adhesive instructions explain how to remove it safely. Instead, add a slightly thicker decorative border on the side with more visible space to create a balanced visual effect.
The Rope Will Not Stay Flat
Work in shorter sections and use less glue at a time. Press each section firmly until it begins to hold. If the rope keeps lifting, switch to an adhesive designed for the charger material and allow more curing time between layers.
The Charger Plate Feels Too Cheap
Paint can change the entire personality of the project. Matte black, antique gold, terracotta, soft white, warm beige, or muted sage can make a plastic charger look much more intentional. Paint before attaching the mirror and woven materials so the finish looks clean.
The Finished Mirror Feels Too Plain
Add texture rather than random decoration. Layer two rope widths, add a row of wooden beads, create a raffia fringe, or paint a thin ring around the mirror. A small change in texture often looks more elevated than adding lots of unrelated embellishments.
Real-World DIY Experiences: What Making This Mirror Actually Feels Like
The first thing most people notice when making a woven mirror from a $1 plate charger is how quickly the project changes their opinion of inexpensive materials. At the beginning, the charger plate can feel almost too simple to become anything interesting. It may be shiny, lightweight, and obviously meant for a table setting. But once the mirror is attached and the rope begins to wrap around the rim, the project starts to shift. The charger plate becomes less visible, and the texture becomes the main event.
That transformation is one of the most satisfying parts of budget DIY decor. You are not starting with a flawless designer object. You are taking something ordinary and giving it a new purpose. The slight imperfections in the rope placement, the uneven edges of raffia, and the handmade texture are not necessarily mistakes. They often become the details that make the piece feel warmer and more personal than a mass-produced mirror.
There is also a useful lesson in slowing down. The project itself is not difficult, but glue, rope, and mirrors reward patience. Rushing the adhesive can lead to slipping materials. Wrapping too quickly can create gaps. Trying to decorate every inch can make the final piece feel crowded. The best results usually happen when you pause, step back, and look at the mirror from a few feet away before adding another layer.
Many DIY projects look different up close than they do on the wall. A tiny uneven rope line may feel enormous while you are holding the mirror in your hands, but once it is hung among plants, artwork, furniture, and natural light, it may not be noticeable at all. This is a helpful reminder that home decor does not have to be perfect to be beautiful. A handmade item should look handmade. Otherwise, what was the point of spending an afternoon with glue on your fingers?
The project can also become a creative experiment. One person may make a neutral jute mirror for a calm bedroom. Another may paint the charger plate cobalt blue and use bright yarn for a playful dorm room accent. Someone else may create three smaller mirrors and hang them together as a woven mirror wall. The basic process stays the same, but the finished look can be completely different.
It is also an approachable project for people who do not consider themselves especially crafty. You do not need advanced woodworking skills, expensive power tools, or a workshop full of mysterious equipment. You need a charger plate, a mirror, adhesive, and enough patience to let things dry. That makes it a practical entry point for beginners who want to try DIY wall decor without committing to a major renovation.
Perhaps the best experience comes after the mirror is hung. A small handmade piece can change the mood of an overlooked corner, make a blank wall feel intentional, or become the starting point for a larger gallery wall. It may not be a giant luxury mirror with a dramatic price tag, but it has something better: a story. You saw a $1 plate charger, imagined a different possibility, and gave it a second life. That is a pretty good return on investment for something that once expected to spend its days under a salad plate.
Final Thoughts
A woven mirror from a $1 plate charger proves that stylish home decor does not have to begin with an expensive shopping trip. With a few affordable materials and a little creative energy, a simple charger plate can become a textured, eye-catching accent for almost any room.
Whether you choose jute rope, raffia, yarn, beads, or a bold painted finish, let the mirror reflect your style rather than a copy of someone else’s. The best DIY decor is not the piece that looks the most expensive. It is the piece that makes your space feel more like yours.