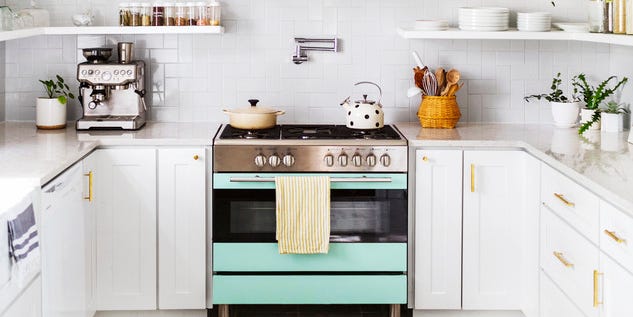
Painting appliances sounds like one of those weekend projects that begins with confidence, a playlist, and one innocent can of spray paintthen ends with you wondering why your refrigerator looks like it got into a fight with a glitter cannon. But done correctly, appliance painting can be a smart, budget-friendly way to refresh a kitchen, laundry room, basement bar, rental unit, or garage fridge without buying a brand-new machine.
The key phrase is done correctly. You cannot treat a refrigerator, dishwasher, washer, or dryer like an old bookshelf. Appliances are made from slick, coated metal, plastic trim, rubber gaskets, vents, controls, and sometimes heat-producing or moisture-heavy components. That means the wrong paintor the right paint applied lazilycan chip, peel, smell, block ventilation, interfere with operation, or create safety concerns.
So, should you paint your appliances? Sometimes, yes. If the appliance works well, has a dull or scratched exterior, and is made of paintable metal, appliance paint can make it look dramatically better. But if the appliance is near the end of its life, under warranty, exposed to high heat, or covered in specialty stainless steel or textured finishes you care about preserving, painting may be more trouble than triumph. Let’s break it down before your dishwasher becomes “abstract art.”
The Quick Answer: Yes, But Not Every Appliance Should Be Painted
You can paint many appliance exteriors, especially refrigerators, freezers, washers, dryers, and some dishwasher front panels. The best candidates are older, functional appliances with cosmetic wear: yellowed white finishes, small rust spots, scratches, mismatched colors, or outdated almond tones that scream “1997 called and wants its kitchen back.”
However, appliance painting is not recommended for every surface. Avoid painting stovetops, oven interiors, heating elements, burners, cooking surfaces, door seals, control panels, vents, electrical parts, and any area that gets hot during normal use. Most appliance epoxy paints are made for indoor metal exteriors, not for surfaces exposed to direct flame, high heat, steam, or constant scrubbing.
Think of appliance paint as a cosmetic coat, not a mechanical repair. It can make a tired washer look fresh. It cannot make a failing refrigerator cool better, silence a clanking dryer, or convince a dishwasher to stop redecorating your plates with yesterday’s oatmeal.
What Is Appliance Paint?
Appliance paint is usually a hard enamel or epoxy-style coating designed to stick to smooth metal surfaces and create a durable, washable finish. It is available as spray paint, brush-on paint, and small touch-up bottles or pens. Common colors include white, black, almond, stainless-look silver, and occasionally specialty shades.
Unlike regular wall paint, appliance paint is formulated to resist moisture, stains, household cleaners, and mild abrasion. That matters because appliances live hard lives. Refrigerator doors get fingerprints. Dishwasher panels face steam and splashes. Washers and dryers deal with laundry detergent, lint, elbows, baskets, and the occasional sock-related tragedy.
Still, appliance paint is not magic armor. It will not perform like factory-baked enamel or powder coating applied during manufacturing. The factory finish is typically cured under controlled conditions for maximum hardness. A DIY paint job can look excellent, but it depends heavily on surface prep, product choice, thin coats, drying time, and patience. Patience, unfortunately, is the one supply no hardware store stocks in aisle seven.
Best Appliances to Paint
Refrigerators and Freezers
A refrigerator is often the most popular appliance to paint because it has large, flat panels and a huge visual impact. A clean matte black, glossy white, soft green, navy, or retro-inspired color can completely change the mood of a kitchen. Garage fridges and basement freezers are especially good practice projects because perfection is less critical. If the result is slightly imperfect, your frozen pizza probably will not judge you.
Washers and Dryers
Laundry appliances are strong candidates for painting because they usually have paintable metal cabinets and do not face the same food-prep scrutiny as kitchen appliances. A washer and dryer set can be refreshed with matching appliance epoxy, or a laundry room can get a bold design moment with dark charcoal, soft cream, or even a playful color.
Dishwasher Front Panels
Some dishwasher fronts can be painted, especially older metal panels. Be careful around controls, vents, handles, and rubber seals. Many modern dishwashers have plastic, stainless, or coated panels that may need special primer or may not be worth painting at all. If the panel is removable, painting it separately can make the project cleaner and easier.
Small Metal Appliances
Metal file-cabinet-style mini fridges, beverage coolers, and certain old appliance carts can be painted successfully. However, avoid painting surfaces that heat up, touch food directly, or have complex electrical openings.
Appliances and Areas You Should Not Paint
Do not paint oven interiors, stovetops, burners, heating elements, toaster interiors, air fryer baskets, microwave interiors, or any food-contact surface. Even high-temperature paint is not automatically food-safe, and it is not a shortcut for repairing damaged cooking equipment.
Also avoid painting over warning labels, serial-number plates, vents, fan openings, ice dispensers, rubber gaskets, touchscreens, knobs, and hinges that need free movement. Paint build-up around moving parts can cause sticking, cracking, or ugly wear patterns. A painted handle that is touched 40 times a day will chip faster than you can say, “Maybe stainless steel wasn’t so bad.”
Stainless steel appliances deserve special caution. You can paint stainless steel if it is properly cleaned, scuffed, and primed, but painting it is usually a one-way design decision. Once the original stainless look is covered, restoring it can be difficult. If the appliance is high-end, new, or still attractive, consider removable peel-and-stick appliance film or magnetic panels instead.
Pros of Painting Appliances
It Costs Much Less Than Replacing
A new refrigerator, dishwasher, washer, or dryer can cost hundreds or thousands of dollars. Painting an appliance may cost far less, especially if you already own basic supplies like painter’s tape, sandpaper, drop cloths, and cleaning products. For a working appliance with only cosmetic issues, paint can stretch the life of your existing machine and keep more money in your wallet.
It Reduces Waste
If an appliance works well, replacing it only because the color is outdated may be unnecessary. Painting can delay replacement and reduce bulky waste. That said, if the appliance is inefficient, unreliable, leaking, or constantly breaking down, replacement may be the more responsible long-term choice.
It Lets You Customize Your Space
Appliance painting can turn a boring white fridge into a design feature. Want a black laundry set without paying for a premium finish? Want a cheerful retro refrigerator in a cottage kitchen? Want your garage freezer to stop looking like it survived a haunted estate sale? Paint gives you options.
It Can Hide Scratches, Rust, and Discoloration
Small chips, surface rust, and yellowing can make an otherwise good appliance look neglected. With sanding, rust treatment, primer when needed, and appliance-grade paint, you can create a cleaner, more unified finish.
Cons of Painting Appliances
The Finish May Not Last Forever
A DIY appliance paint job can chip, scratch, or peel over time, especially around handles, corners, edges, and high-touch zones. The most common reason paint fails is poor prep. Slick factory finishes do not welcome paint with open arms. They need cleaning, sanding, and sometimes priming before paint will hold.
It Can Look DIYin the Bad Way
There is charming DIY, and then there is “I painted this during a thunderstorm with one hand and a burrito in the other.” Drips, overspray, brush marks, dust, lint, and uneven sheen can make the appliance look worse than before. Thin coats and controlled conditions matter.
It May Affect Warranty or Resale Value
If your appliance is new or still under warranty, painting it can complicate service claims. Manufacturers may not cover cosmetic or functional issues related to altered finishes. Painting a newer appliance can also reduce resale appeal, especially if the buyer prefers the original finish.
Safety Requires Attention
Many appliance paints contain strong solvents and require excellent ventilation. Spray paint also creates overspray and fumes. You should unplug the appliance when possible, move it away from flames or pilot lights, protect electrical openings, and follow the product label exactly. If the label says “indoor metal surfaces only,” it is not secretly inviting you to paint your oven rack.
How to Paint Appliances the Right Way
Step 1: Decide Whether the Appliance Is Worth Painting
Before buying paint, ask a brutally honest question: is this appliance healthy? If the refrigerator struggles to stay cold, the dishwasher leaks, or the dryer smells like electrical drama, do not beautify the problem. Repair or replace first. Painting makes sense when the issue is appearance, not performance.
Step 2: Check the Surface Material
Most appliance epoxy products are designed for metal exteriors. If your appliance has plastic panels, coated stainless steel, glass, porcelain, or textured vinyl, read the paint label carefully and consider using a bonding primer. When in doubt, test a hidden area first.
Step 3: Clean Like Your Paint Depends on ItBecause It Does
Appliances collect grease, fingerprints, detergent film, wax, dust, pet hair, and mystery smudges. Wash the surface thoroughly with a degreasing cleaner or mild detergent, then rinse and dry completely. Any residue left behind can prevent paint from bonding. Paint does not stick to grime; it sticks to your disappointment.
Step 4: Remove Handles and Hardware When Possible
Remove handles, logos, kick plates, and detachable trim if you can do so safely. If parts cannot be removed, tape them carefully. Good taping is the difference between a crisp custom finish and a refrigerator that looks like it applied mascara in a moving car.
Step 5: Sand the Surface
Lightly sand glossy surfaces with fine-grit sandpaper to create tooth for the paint. You do not need to grind the appliance down to bare metal unless there is rust or loose paint. For rusty spots, remove loose rust with sandpaper or a wire brush, then use a suitable primer or rust-inhibiting product according to the label.
Step 6: Protect Vents, Seals, Floors, and Walls
Cover nearby floors, cabinets, countertops, walls, and anything else you do not want lightly misted in “oops.” Tape rubber gaskets, vents, screens, controls, labels, and openings. For refrigerators, avoid sealing over areas that need airflow.
Step 7: Choose Spray or Brush-On Paint
Spray appliance paint often creates the smoothest finish, but it requires more masking, ventilation, and overspray control. Brush-on or roll-on appliance epoxy is easier indoors and can work well with a high-density foam roller. For large flat panels, many DIYers prefer a foam roller plus a small brush for edges.
Step 8: Apply Thin Coats
Do not try to cover everything in one heroic coat. Thick paint is more likely to drip, wrinkle, or cure poorly. Apply multiple thin coats according to the product directions. Respect recoat windows. Some paints require recoating within a short time or after a longer waiting period.
Step 9: Let It Cure
Dry to the touch does not mean fully cured. Give the finish plenty of time before reinstalling handles, pushing the appliance back, loading magnets onto the door, or scrubbing the surface. A finish that feels dry can still be soft underneath. Treat it gently for the first several days.
Appliance Painting vs. Appliance Refinishing
DIY painting is the budget route. Professional appliance refinishing is the more polished route. A professional may use commercial-grade coatings, better spray equipment, controlled prep, and more experience with tricky surfaces. Professional refinishing can be a good choice for visible kitchen appliances, vintage pieces, or expensive units that need a cleaner finish than a weekend project can provide.
However, professional refinishing is not always worth it. If the appliance is old, inefficient, or near replacement age, spending money on refinishing may be like putting a tuxedo on a raccoon. Impressive, yes. Wise, maybe not.
What About Peel-and-Stick Appliance Wraps?
Peel-and-stick vinyl wraps, contact paper, and magnetic covers are alternatives to paint. They are especially useful for renters, stainless steel appliances, or people who fear commitment in both design and life. Wraps can mimic stainless steel, matte black, marble, wood grain, or bold colors.
The downside is durability. Wraps can bubble, peel at corners, trap moisture, or look cheap if poorly installed. They also may not handle heat, steam, or heavy cleaning well. Still, for a refrigerator door or dishwasher panel, a removable wrap may be safer than paint if you want a temporary makeover.
Design Tips Before You Paint
Choose a color that works with your cabinets, countertops, flooring, and hardware. Black appliances can look sleek, but they may show dust and fingerprints. White looks clean but can highlight drips or uneven coverage. Soft neutrals are forgiving. Bold colors are fun, especially in retro kitchens, laundry rooms, pantries, and garage spaces.
If you are painting only one appliance in a kitchen full of stainless steel, make the choice look intentional. A single colorful fridge can be charming. A random beige dishwasher in a stainless kitchen can look like it wandered in from another ZIP code.
For the most professional effect, keep the finish simple. Gloss appliance epoxy often looks closest to a traditional factory finish. Matte and chalky finishes can be stylish, but they may need a protective topcoat and may show scuffs more easily.
Common Mistakes to Avoid
Skipping Sanding
Glossy metal needs scuffing. Without sanding, paint may peel off in sheets. That is not a patina. That is a cry for help.
Painting Over Grease
Kitchen appliances are often coated in invisible grease. Clean twice if needed. If the surface feels slick, it is not ready.
Painting Rubber Seals
Rubber gaskets flex and need to seal properly. Paint can crack, transfer, or interfere with the seal.
Ignoring Ventilation
Solvent-based coatings need fresh air. Work in a ventilated space, wear appropriate protection, and avoid flames or sparks.
Using Regular Wall Paint
Interior wall paint is not designed for appliance surfaces. It may scratch, peel, stain, or feel tacky. Use paint made for the surface and conditions.
So, Is Painting Appliances Worth It?
Painting appliances is worth it when the appliance works well, the exterior is metal and paintable, the project is cosmetic, and you are realistic about durability. It is especially worthwhile for laundry rooms, garage fridges, basement appliances, budget kitchen updates, vintage refreshes, and mismatched sets you want to unify.
It is not worth it when the appliance is failing, under warranty, high-end, heat-exposed, difficult to prep, or likely to be replaced soon. If you are hoping paint will make an appliance feel new again, remember: paint changes the outfit, not the personality.
Real-World Experience Notes: What Homeowners Learn After Painting Appliances
One of the biggest lessons people learn from appliance painting is that prep takes longer than painting. The actual spraying or rolling may take less than an hour, but cleaning, moving the appliance, removing handles, sanding, taping, and setting up drop cloths can take half a day. Anyone who says, “I’ll just quickly paint the fridge before dinner,” has never met a refrigerator handle screw hiding behind a trim cap.
Another common experience is that lighting matters. A finish can look smooth in a dim garage and then reveal stripes, dull spots, or dust nibs once the appliance returns to bright kitchen lighting. For this reason, it helps to inspect each coat from different angles before adding the next one. A small work light can save you from discovering roller marks after everything has cured.
People also learn that appliance paint has a smell. Even when used correctly, many epoxy and enamel products release strong fumes during application and drying. Opening windows, using fans for ventilation, wearing a respirator when recommended, and keeping children and pets away from the work zone are not optional “fancy pro” steps. They are the difference between a smart project and a kitchen that smells like a robot got a manicure.
Color choice is another surprise. Black can look modern and expensive, but it may show dust, lint, and fingerprints. White is classic, but if the existing appliance is dark or stained, it may require extra coats. Metallic “stainless” paint can help an appliance blend in, but it rarely looks exactly like real stainless steel. Bold colors are delightful when intentional, but they can clash quickly if the rest of the room changes.
High-touch areas usually wear first. Handles, door edges, corners, and areas around controls take the most abuse. Many experienced DIYers keep a small bottle of matching touch-up paint for future chips. That is not failure; it is maintenance. Even factory finishes can scratch, especially in busy homes.
Patience after painting may be the hardest part. A surface that feels dry the next day may still dent or scratch if you reinstall hardware too soon or push the appliance against a wall. Letting the coating cure properly is boring, but boring is better than repainting a door because the handle left a permanent crescent-shaped scar.
Finally, appliance painting tends to work best when expectations are honest. It can create a beautiful improvement, especially from normal viewing distance. It can make an old laundry pair feel coordinated, help a garage fridge look less gloomy, or give a kitchen a fun focal point. But it will not always look factory-perfect up close. If you want showroom perfection, hire a refinishing pro or buy a new panel. If you want a smart, affordable refresh with a little DIY personality, appliance painting can be surprisingly satisfying.
Conclusion
Painting your appliances can be a clever makeover when you choose the right appliance, the right paint, and the right process. A refrigerator, freezer, washer, dryer, or dishwasher panel with a tired exterior can often be refreshed beautifully with appliance epoxy or enamel. But the project has boundaries: do not paint heat-exposed parts, food-contact surfaces, vents, seals, controls, or failing appliances that need repair more than decoration.
The best appliance paint jobs start with careful cleaning, light sanding, smart masking, thin coats, and enough curing time. The worst ones start with “How hard could it be?” and end with fingerprints permanently fossilized in semi-dry enamel. Respect the materials, read the label, protect the working parts, and treat painted appliances gently. Done well, this project can save money, reduce waste, and give your home a fresh look without replacing a perfectly good machine.
Note: This article is for general home-improvement guidance. Always follow the appliance manufacturer’s manual and the coating manufacturer’s label before painting any appliance.