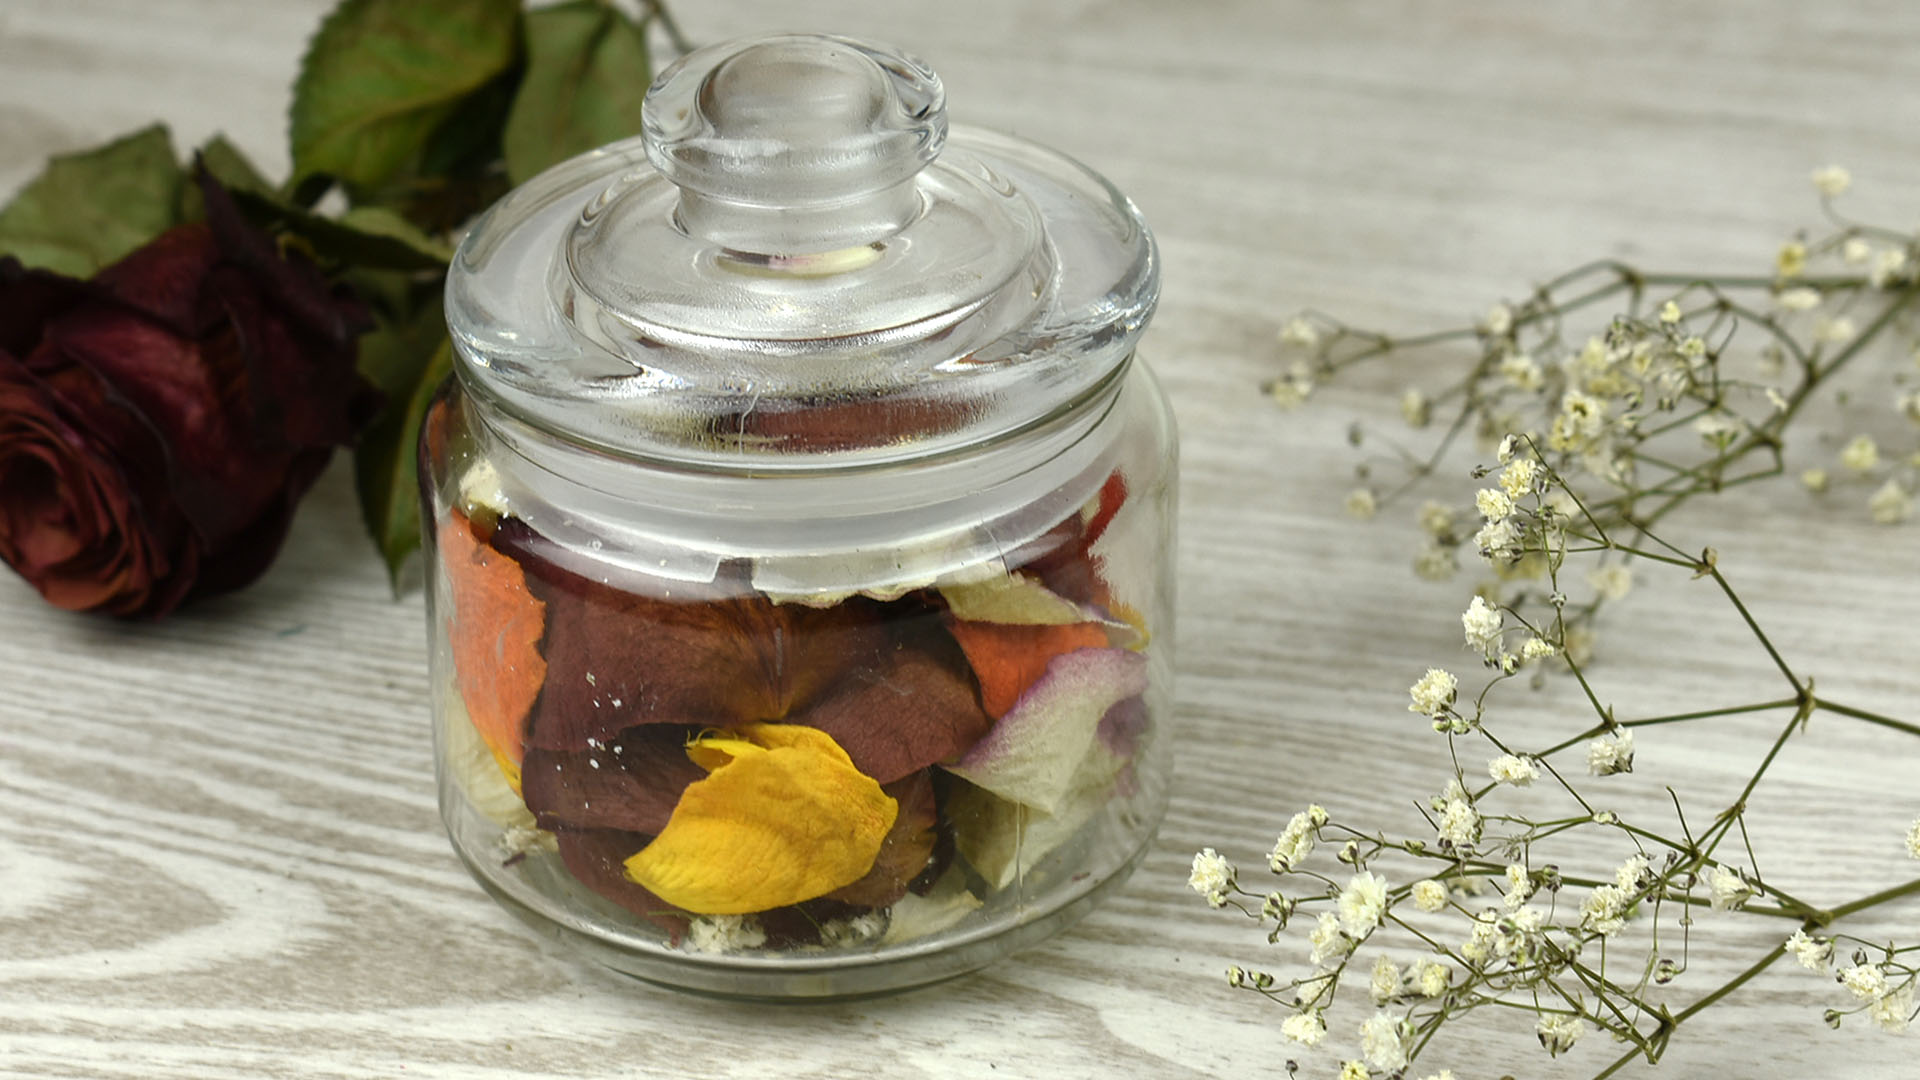
Fresh flowers are wonderful, but they have one tiny personality flaw: they are dramatic. One day they are glowing on the table like they own the room; a few days later, they are slouching over the vase like they just read a sad novel. The good news? You can preserve flowers in a jar and turn a short-lived bouquet into a keepsake, a decorative accent, or a handmade gift that looks far more expensive than it actually is.
Whether you want to save roses from a wedding bouquet, wildflowers from a weekend walk, lavender from your garden, or a single bloom from a meaningful date, a glass jar can become a tiny time capsule. It protects dried flowers from dust, gives them structure, and makes even a few petals look intentional. Very “boutique gift shop,” minus the price tag and the person asking whether you want a receipt emailed.
In this guide, you will learn how to preserve flowers in a jar using three easy and beautiful methods: air drying, silica gel drying, and glycerin preservation. Each method creates a different look, so the best choice depends on your flowers, your patience level, and whether you want rustic charm, near-fresh color, or soft preserved greenery.
Before You Start: Choose the Right Flowers for Jar Preservation
The secret to a pretty preserved flower jar starts before anything goes into the jar. Fresh, healthy blooms preserve better than flowers that are already wilted, bruised, or shedding petals like confetti at a parade. Pick flowers when they are close to their prime but not overblown. If the bloom already looks tired, preservation will not magically turn it into a botanical supermodel.
Best flowers for drying and displaying in jars
Some flowers naturally behave better when preserved. Good choices include roses, lavender, statice, strawflowers, baby’s breath, globe amaranth, yarrow, celosia, hydrangeas, marigolds, zinnias, carnations, daisies, and small chrysanthemums. For greenery, eucalyptus, fern fronds, magnolia leaves, ivy, and camellia foliage can work well, especially with glycerin preservation.
Flowers with thick, watery petals can be more difficult because they hold moisture longer. That does not mean you cannot try peonies, orchids, or ranunculus, but these usually need a more controlled method such as silica gel. If you are a beginner, start with sturdy flowers. Your future self will thank you, possibly with snacks.
Prepare your jar and supplies
Use a clean, dry glass jar with a lid. Mason jars, spice jars, apothecary jars, jam jars, and tall cork-topped bottles all work. Wash the jar with warm soapy water, rinse it well, and let it dry completely. Moisture is the villain in this story. Even a small amount trapped inside the jar can cause mold, foggy glass, or sad flowers that smell like a forgotten basement.
Depending on the method, you may also need twine, rubber bands, silica gel crystals, a soft brush, vegetable glycerin, lukewarm water, scissors, floral wire, tweezers, labels, ribbon, dried moss, or a small packet of silica desiccant. Keep preserved flowers away from direct sunlight, steamy bathrooms, damp kitchens, and open flames. Dried flowers are decorative, delicate, and not interested in becoming a tiny campfire.
Method 1: Air-Dried Flowers in a Jar
Air drying is the easiest and most affordable way to preserve flowers for a jar. It creates a romantic, vintage look with muted colors and a slightly rustic texture. Think cottagecore, old letters, linen curtains, and a person who definitely owns nice tea.
What this method is best for
Air drying works best for flowers with sturdy stems and lower moisture content. Lavender, roses, statice, baby’s breath, strawflowers, globe amaranth, yarrow, and small hydrangeas are excellent candidates. The final flowers will be dry, papery, and somewhat stiff. Colors often fade, especially pinks and reds, but blue, yellow, orange, and purple flowers can hold their charm beautifully.
Supplies you need
- Fresh flowers in good condition
- Scissors or pruning shears
- Rubber bands or twine
- A dark, dry, well-ventilated space
- A clean glass jar with a lid
- Optional: silica packet, dried moss, ribbon, label, or kraft tag
Step-by-step instructions
Step 1: Trim and clean the stems. Remove extra leaves from the lower stems. Leaves often dry poorly and can make the jar look crowded. Trim the stems so they will fit your jar, but leave them slightly longer than needed at first. You can always cut more later; you cannot politely ask the stem to grow back.
Step 2: Bundle flowers loosely. Gather flowers in small bunches of five to eight stems. Do not make the bunch too thick, because air needs to move between the stems. Tie the bundle with a rubber band or twine. Rubber bands are helpful because stems shrink as they dry.
Step 3: Hang upside down. Hang the flowers upside down in a warm, dry, dark place with good air circulation. A closet, attic, pantry, or spare room can work. Avoid direct sunlight because it fades color. Avoid humidity because it encourages mold. Your goal is dry and boring, which is rarely a life goal but absolutely a flower goal.
Step 4: Wait two to three weeks. Most air-dried flowers need about two to three weeks. They are ready when petals feel crisp and stems feel dry. If they still feel cool, flexible, or damp, give them more time.
Step 5: Arrange in the jar. Once fully dry, trim the stems to fit. Place the tallest flowers in the center or back, then add smaller blooms and filler around them. For a loose “wild meadow in a bottle” look, add dried grass, baby’s breath, or lavender. Drop a silica packet into the bottom if you live in a humid climate, then close the lid.
Design ideas for air-dried flower jars
For a farmhouse look, use a wide-mouth Mason jar with twine around the neck. For a romantic keepsake, add a handwritten tag with the date or event. For a minimalist display, use one type of flower only, such as lavender or white statice. If your flowers are short or fragile, layer dried moss or clean sand at the bottom to support the stems.
Method 2: Silica Gel Flowers in a Jar
If air drying is the relaxed friend who says, “Let’s see what happens,” silica gel is the precise friend with a spreadsheet. Silica gel drying is one of the best methods for preserving flower shape and color. It removes moisture quickly while supporting petals, which helps blooms keep a more natural, three-dimensional appearance.
What this method is best for
Silica gel is ideal for roses, daisies, marigolds, zinnias, carnations, mums, pansies, ranunculus, and small peonies. It is especially useful for sentimental flowers because it can preserve more detail than air drying. The flowers will still be dry and fragile, but they often look fresher and fuller.
Supplies you need
- Fresh flowers
- Silica gel crystals made for flower drying
- An airtight container for drying
- A spoon or small cup
- A soft paintbrush or makeup brush
- Tweezers
- A display jar with a lid
- Optional: dried moss, floral wire, glue dots, or a flower frog
Step-by-step instructions
Step 1: Choose blooms at their best. Use flowers that are fresh, dry on the surface, and free from bruises. If you are cutting from a garden, harvest after dew has dried. Damp flowers are harder to preserve well.
Step 2: Prepare the drying container. Pour a layer of silica gel into the bottom of an airtight container. A depth of about one to two inches is usually enough to cushion the blooms.
Step 3: Place flowers carefully. Set flowers face up unless they are flat-faced flowers like daisies, which may dry better face down. Keep blooms from touching each other. If petals are folded, gently position them before adding more silica. Flowers dry in the shape they are supported in, so give them a nice pose. This is their statue moment.
Step 4: Cover slowly with silica gel. Use a spoon to pour silica around and over the petals. Go slowly so you do not crush the flower. Try to let the crystals settle between petals and around the bloom. Cover the flower completely.
Step 5: Seal and wait. Close the container tightly and place it somewhere dry and undisturbed. Thin flowers may dry in two days, medium flowers often need three to four days, and thicker blooms may take five to seven days or longer. If you remove a flower too early and it feels damp, rebury it and wait.
Step 6: Remove and clean. Gently uncover the flower and lift it out with care. Brush away silica dust using a soft brush. Do not rinse the flower. Water is no longer invited to this party.
Step 7: Display in a jar. For a single rose, use a tall narrow jar and place the bloom on a short stem. For several blooms, create a layered arrangement with dried moss at the bottom. You can also place only flower heads in a shallow jar for a modern keepsake look.
Silica gel jar display ideas
Try a “memory jar” with one preserved rose, a ribbon from the bouquet, and a small date label. For a colorful spring jar, combine silica-dried pansies, daisies, and marigolds. For an elegant wedding keepsake, preserve a few focal flowers and arrange them under a bell jar or wide glass jar with a cork lid.
Method 3: Glycerin-Preserved Flowers and Greenery in a Jar
Glycerin preservation is different from drying. Instead of simply removing moisture, glycerin replaces some of the water in the plant tissue. This can keep leaves and some flowers more flexible, less brittle, and softer to the touch. It is especially useful for greenery and foliage, but it can also work with certain flowers.
What this method is best for
Glycerin works beautifully for foliage such as eucalyptus, magnolia, ivy, camellia, ferns, and leafy stems. It may also be used with some flowers, but results vary. Hydrangeas, roses, and sturdy botanical materials can sometimes preserve well, though colors may deepen, brown, or shift. If you want perfect petal color, silica gel is usually the better choice. If you want soft, flexible greenery for a jar arrangement, glycerin is your friend.
Supplies you need
- Fresh stems or foliage
- Vegetable glycerin
- Lukewarm water
- A clean container for soaking
- Scissors or pruning shears
- Paper towels
- A clean display jar
Step-by-step instructions
Step 1: Mix the solution. Combine one part glycerin with two parts lukewarm water. Stir well. You only need a few inches of solution in the container, enough to cover the cut ends of the stems.
Step 2: Prepare the stems. Cut stems at an angle to help them absorb the solution. Remove any leaves that would sit below the liquid line. For woody stems, lightly split the bottom inch of the stem to encourage uptake.
Step 3: Place stems in the solution. Set the stems upright with cut ends submerged. Keep the container at room temperature and away from direct sun. Make sure the stem ends remain below the liquid surface. If they dry out, the plant material may shrivel instead of preserving.
Step 4: Wait one to four weeks. Timing depends on the plant. Some foliage absorbs glycerin in about a week, while thicker leaves can take several weeks. The leaves may feel heavier, softer, and slightly waxy when ready. Some color change is normal.
Step 5: Rinse, pat, and air dry. Remove the stems, lightly rinse excess solution from the surface, and pat dry. Let them air dry in a room with good airflow before placing them in a jar.
Step 6: Arrange in the jar. Glycerin-preserved greenery looks beautiful as a base for dried flowers. Try eucalyptus with silica-dried roses, magnolia leaves with dried hydrangeas, or ivy with baby’s breath. Because glycerin-treated stems may feel slightly oily at first, make sure they are fully dry before sealing the jar.
How to Keep Preserved Flowers Looking Beautiful in a Jar
Preserving flowers is only half the job. The jar display matters too. A good jar protects the flowers while making the arrangement look finished rather than “I shoved old bouquet pieces into glass and hoped for emotional value.”
Control moisture
Only place fully dried or properly preserved flowers in a sealed jar. If there is any remaining moisture, mold may form. In humid areas, add a small silica packet at the bottom of the jar, hidden under moss, paper shred, dried petals, or decorative sand.
Avoid harsh sunlight
Direct sunlight fades preserved flowers. Display your jar on a shelf, desk, dresser, or mantel that gets indirect light. Bright windows may look tempting, but they can bleach your flowers faster than you expect.
Handle gently
Dried flowers are fragile. Use tweezers for small blooms and hold stems instead of petals whenever possible. If a petal falls off, do not panic. Place loose petals at the bottom of the jar as part of the design. Congratulations, you have invented “intentional texture.”
Label the memory
If the flowers came from a wedding, graduation, anniversary, memorial, garden harvest, or vacation, add a small label. A simple tag with the date and place instantly turns a decorative jar into a keepsake.
Common Mistakes to Avoid
Using flowers that are already wilting
Preservation captures the condition of the flower at the time you start. If the flower is drooping, browning, or bruised, those flaws usually become more obvious after drying.
Sealing damp flowers in a jar
This is the fastest way to grow mold. Flowers must be crisp-dry for air drying and silica drying, or fully treated and surface-dry for glycerin preservation.
Choosing the wrong jar size
A jar that is too small crushes the arrangement. A jar that is too large can make a few flowers look lonely. Match the jar to the display: tall jars for stems, shallow jars for flower heads, and wide jars for layered arrangements.
Overpacking the jar
Give the flowers some breathing room visually, even though they no longer need actual breathing room. A few well-placed blooms often look more elegant than a jar packed tighter than a suitcase before a long vacation.
Which Flower Preservation Method Should You Choose?
Choose air drying if you want the easiest, cheapest, most rustic option. It is great for beginners, garden flowers, and casual décor.
Choose silica gel if you want to preserve flower shape and color more accurately. It is best for sentimental blooms, roses, daisies, carnations, and flowers you want to display as focal pieces.
Choose glycerin preservation if you want flexible foliage or greenery that feels less brittle. It is ideal for eucalyptus, magnolia leaves, ivy, and mixed jar arrangements where greenery supports dried flowers.
Experience Notes: What Preserving Flowers in a Jar Is Really Like
The first thing many people notice when preserving flowers in a jar is that the project feels simple, but it rewards patience. The actual steps are not difficult. Trim, dry, arrange, seal. Easy enough. The hard part is waiting while the flowers transform. Air drying can feel especially slow because the bouquet hangs upside down for weeks, quietly looking like a tiny floral bat colony. But once the stems become crisp and the colors settle into soft vintage tones, the result feels worth it.
A common beginner experience is learning that not every flower behaves the same way. Lavender is wonderfully cooperative. Baby’s breath dries like it has been training for this job its whole life. Roses can be beautiful, but they often shrink and darken. Hydrangeas can look dreamy or slightly haunted depending on when they are picked. This is not failure; it is part of the craft. Preserved flowers are natural materials, not plastic decorations. Their little imperfections are what make the jar feel personal.
Silica gel often creates the biggest “wow” moment. When a bloom comes out of the crystals still holding its shape, it feels almost like a magic trick. The color may not be exactly the same as the fresh flower, but it is usually brighter than air-dried results. The main lesson is to pour the silica slowly. Dumping it too quickly can flatten petals, and nobody wants a rose that looks like it lost an argument. A spoon, patience, and a light hand make a noticeable difference.
Jar arranging is where the project becomes creative. Some people prefer a clean, museum-style display with one perfect flower in the center. Others like a layered memory jar with petals, moss, ribbon, a ticket stub, or a handwritten note. A wedding rose with a bit of bouquet ribbon feels romantic. Garden lavender in a spice jar feels cozy. Wildflowers in a tall cork bottle feel like summer got politely trapped for later.
The most useful practical lesson is to keep moisture out. A jar may look dry, but if it was washed recently and not fully aired, condensation can appear later. Let the jar sit open overnight before arranging. Add a hidden silica packet if your home is humid. Also, do not store preserved flower jars in bathrooms, laundry rooms, or sunny windows. They will last much longer in a dry, shaded spot.
Perhaps the best part of preserving flowers in a jar is that it turns ordinary blooms into a story. A grocery-store bouquet becomes a kitchen keepsake. A garden rose becomes proof that June happened. A few petals from a special event become something you can hold onto without keeping an entire dried bouquet balanced awkwardly in a closet. The jar gives the flowers a boundary, a purpose, and a second life. And unlike fresh flowers, it will not ask for water, drop leaves on the table, or dramatically faint by Thursday.
Conclusion
Learning how to preserve flowers in a jar is one of the easiest ways to turn meaningful blooms into long-lasting décor. Air drying gives you a soft, rustic look with very little equipment. Silica gel preserves shape and color more beautifully, making it perfect for special flowers. Glycerin preservation keeps greenery flexible and adds fullness to jar arrangements. With the right flowers, a clean dry jar, and a little patience, you can create a keepsake that feels personal, handmade, and genuinely beautiful.
Start small with one jar and a few sturdy flowers. Try lavender, baby’s breath, roses, or eucalyptus. Once you understand how each method works, you can create memory jars for weddings, birthdays, holidays, garden harvests, memorials, or simple “this flower made me happy” moments. Preserved flowers may not last forever in the literal sense, but in a well-sealed jar, they can keep their charm for months or years. That is a pretty good deal for something that once had a vase life shorter than a carton of strawberries.