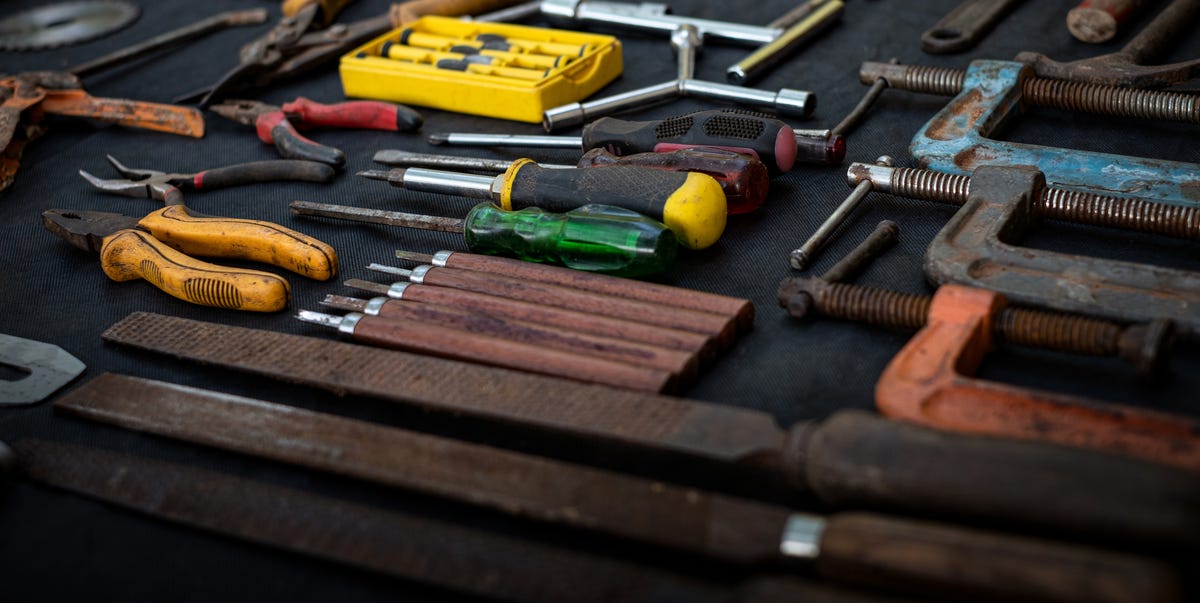
Rusty tools have a special talent for making you feel judged. You open a toolbox expecting a faithful wrench, and instead you find something that looks like it was recovered from a pirate ship. The good news? Most rusted tools are not doomed. With a few basic supplies, a little patience, and a firm refusal to let corrosion win, you can remove rust from tools and bring them back to useful, respectable life.
This guide explains how to clean rusty hand tools, garden tools, pliers, screwdrivers, wrenches, pruning shears, and other metal tools using safe, practical methods. You will learn when to use vinegar, baking soda, lemon juice, steel wool, commercial rust removers, and protective oil. More importantly, you will learn how to keep rust from coming back, because nobody wants to fight the same orange enemy every weekend.
Why Tools Rust in the First Place
Rust forms when iron or steel reacts with oxygen and moisture. In plain garage language, metal plus water plus time equals trouble. Tools stored in damp basements, humid sheds, unheated garages, or outdoor boxes are especially vulnerable. Dirt, plant sap, fingerprints, and salt can speed up the process because they hold moisture against the metal surface.
Surface rust is usually easy to remove. It looks reddish-brown, dusty, or flaky, but the tool still feels solid. Heavy rust is more serious. It can create pits, weaken edges, freeze moving parts, and make a tool unsafe or inaccurate. If a hammer head is cracked, a wrench jaw is badly eaten away, or pruning shears no longer close properly after cleaning, replacement may be smarter than restoration.
What You Need Before You Start
Before removing rust from tools, gather your supplies. You do not need a chemistry degree, a welding mask, or a dramatic movie soundtrack. You just need the right cleaning materials and a safe workspace.
Basic Supplies
- Dish soap and warm water
- Distilled white vinegar
- Baking soda
- Lemon juice or citric acid, optional
- Steel wool, scouring pad, or wire brush
- Old toothbrush for small grooves
- Clean rags or microfiber towels
- Bucket, tray, or plastic container
- Mineral oil, machine oil, camellia oil, or tool oil
- Gloves and eye protection
Work in a ventilated area, especially if you use a commercial rust remover. Never mix vinegar, bleach, ammonia, hydrogen peroxide, or household cleaners together. Some combinations can create harmful fumes, and rusty pliers are not worth turning your garage into a science-fair disaster.
Step 1: Clean Off Dirt, Grease, and Loose Debris
Rust removal works best when the tool is clean first. If you soak a muddy shovel or greasy wrench, the rust remover has to fight through grime before it can reach the metal. Start by washing the tool with warm water and a few drops of dish soap. Scrub away dirt with a stiff brush, then rinse and dry the tool thoroughly.
For garden tools, pay close attention to corners, hinges, and blade edges. Soil can hide in seams and hold moisture long after the tool looks dry. For hand tools like pliers and adjustable wrenches, open and close the moving parts while cleaning so you can remove grit from the joints.
Step 2: Choose the Best Rust Removal Method
The best way to remove rust from tools depends on how bad the rust is. Light rust may only need baking soda and a scrub pad. Moderate rust often responds well to vinegar. Heavy rust may require a longer soak, a commercial rust remover, or careful abrasive cleaning.
For Light Rust: Baking Soda Paste
Baking soda is gentle, inexpensive, and easy to control. It works especially well on small rust spots, tool edges, screwdriver shafts, and areas where you do not want to use a strong acid.
- Mix baking soda with a little water until it forms a thick paste.
- Spread the paste over the rusty areas.
- Let it sit for one to two hours.
- Scrub with steel wool, a scouring pad, or an old toothbrush.
- Rinse, dry completely, and oil the metal.
This method is a good first choice for tools with small rust stains. It is also helpful for lightly rusted blades or delicate areas where aggressive scrubbing could scratch more than necessary.
For Moderate Rust: White Vinegar Soak
White vinegar is one of the most popular homemade rust removers because its acidity helps loosen iron oxide from metal. It is especially useful for wrenches, sockets, pliers, screwdrivers, bolts, and removable metal parts.
- Place the rusty metal portion of the tool in a plastic container.
- Pour in enough distilled white vinegar to cover the rusted area.
- Soak for several hours or overnight.
- Check the tool. If the rust has softened, scrub it with steel wool or a wire brush.
- Rinse thoroughly with clean water.
- Dry immediately and completely.
- Apply a thin coat of protective oil.
Do not forget the drying step. Vinegar removes rust, but water left behind can invite new rust to appear faster than a raccoon at an open trash can. After rinsing, wipe the tool dry, then let it air-dry fully or use a hair dryer on a low setting for hinges and crevices.
For Stubborn Rust: Vinegar and Salt
For more stubborn rust, some restorers add salt to vinegar. Salt increases the cleaning power, but it can also be harsher on metal, so use it carefully. This method is better for sturdy tools than for precision tools, antique tools, or anything with a fine finish.
Mix about one-half cup of salt into one-half gallon of white vinegar, soak the metal parts, then scrub and rinse thoroughly. After cleaning, neutralize any remaining acidity by wiping the tool with a baking soda and water solution, then rinse again and dry well. Finish with oil.
For Small Spots: Lemon Juice and Salt
Lemon juice contains citric acid, which can help loosen light rust. Sprinkle salt over the rust, squeeze lemon juice on top, and let the mixture sit for 30 minutes to two hours. Scrub with a pad or brush, rinse, dry, and oil.
This method smells better than vinegar, which is nice if you do not want your workspace to smell like a salad dressing factory. It works best on small rust patches rather than deeply corroded tools.
For Quick Scrubbing: Aluminum Foil
Crumpled aluminum foil can remove light rust from chrome or polished metal surfaces. Wet the foil with water or vinegar and rub it gently over the rust. Aluminum is softer than many tool metals, so it can scrub without being as aggressive as a steel brush.
Use this method for surface rust on tool handles, chrome-plated parts, or areas where you want a lighter touch. Avoid using heavy pressure on plated finishes, because once a protective coating is damaged, rust can return more easily.
Step 3: Scrub the Rust Away
After soaking or applying a paste, the rust should loosen. Now comes the satisfying part: scrubbing. Use fine steel wool for light rust, a scouring pad for general cleaning, and a wire brush for tougher corrosion. For tight spots, use an old toothbrush, dental pick, or small brass brush.
Scrub with the shape of the tool instead of attacking it randomly. On blades, move along the length of the edge. On wrenches, focus on jaws and adjustment grooves. On pliers, work the joint gently and repeatedly. The goal is to remove rust without removing more metal than necessary.
If rust remains after the first round, repeat the process. Several gentle treatments are usually better than one wild session that leaves the tool looking like it fought a cheese grater.
Step 4: Rinse, Neutralize, and Dry Completely
Once the rust is gone, rinse the tool with clean water. If you used vinegar or lemon juice, wipe the metal with a mild baking soda solution to help neutralize leftover acid. Then rinse again.
Drying is not optional. It is the difference between “restored tool” and “rust sequel.” Use a towel first, then give the tool extra time in a warm, dry spot. For pliers, pruners, shears, and adjustable tools, open and close the moving parts while drying so trapped water does not hide in the joint.
Step 5: Oil and Protect the Metal
Clean metal needs protection. Apply a thin layer of mineral oil, machine oil, camellia oil, 3-in-ONE oil, or another tool-safe lubricant. Wipe away the excess so the tool does not feel greasy. For garden tools, many people prefer plant-based oils or products that are less likely to contaminate soil. For workshop tools, light machine oil works well.
Moving parts need special attention. Add a drop of oil to hinges, pivot points, ratchets, adjustable wrench screws, and pruner springs. Work the mechanism several times, then wipe off extra oil. A clean, lightly lubricated tool works better and resists future corrosion.
How to Remove Rust From Specific Tools
How to Clean Rusty Pliers
Wash the pliers first, then soak only the metal portion in vinegar. After several hours, scrub the jaws, handles, and pivot area. Rinse and dry thoroughly. Add oil to the joint and open and close the pliers until they move smoothly. If they still feel stiff, apply another drop of oil and keep working the handles.
How to Clean Rusty Wrenches and Sockets
Wrenches and sockets usually handle vinegar soaking well. Soak, scrub with steel wool, rinse, dry, and oil lightly. For sockets, make sure the inside is fully dry before storing. A cotton swab can help remove moisture from tight interiors.
How to Clean Rusty Garden Tools
Shovels, hoes, trowels, and pruning tools usually collect soil and moisture, so start with a serious wash. Scrape off caked dirt, scrub with soapy water, then treat rust with vinegar or a baking soda paste. After cleaning, sharpen dull edges with a file if needed and apply oil to the metal. Wooden handles can be sanded smooth and treated with boiled linseed oil or another wood-safe finish.
How to Clean Rusty Pruners and Shears
Pruners need both rust removal and sanitation. Remove dirt and sap first. Treat rust with vinegar, baking soda paste, or lemon juice and salt. Scrub carefully around the blade and hinge. After drying, oil the pivot point. If the pruners were used on diseased plants, disinfect them according to safe garden-tool cleaning practices before storing.
When to Use a Commercial Rust Remover
Commercial rust removers can be useful for heavily rusted tools, large batches of hardware, or stubborn corrosion that does not respond to household methods. Some products are designed for soaking, while others come as gels or sprays that cling to vertical surfaces.
Always read the label before using any rust remover. Wear gloves, protect your eyes, and work with good ventilation. Do not assume that “stronger” means “better.” A product made for concrete stains may not be right for hand tools, and a harsh remover may damage finishes, handles, or surrounding materials.
For valuable vintage tools, start with the gentlest method first. Original finishes, maker’s marks, and patina can be part of the tool’s value. Sometimes the goal is not to make an old tool look brand-new; it is to make it clean, safe, and usable while preserving its character.
What Not to Do When Removing Rust
Do not leave tools soaking in vinegar for days without checking them. Acid can eventually affect the metal surface. Do not put wet tools back in a toolbox. Do not use a grinding wheel on every rusty tool just because it looks powerful and makes sparks. Aggressive grinding can remove too much metal and ruin edges, jaws, or precision surfaces.
Also, do not ignore rust on moving parts. A little orange dust around a hinge can become a frozen joint later. Treat early rust quickly, and your future self will thank you instead of muttering in the garage while holding a stuck pair of pliers.
How to Prevent Rust From Coming Back
Removing rust is useful. Preventing rust is better. The simplest rule is this: clean, dry, oil, store. That tiny routine can add years to your tools.
Clean Tools After Use
Wipe tools after each use, especially if they touched soil, water, sap, fertilizer, or outdoor materials. Garden tools should be brushed clean before storage. Workshop tools should be kept free of grease, dust, and moisture.
Dry Before Storing
Never store tools while damp. Even a little water in a toolbox drawer can start corrosion. If your garage or shed is humid, consider using silica gel packs, a dehumidifier, or a better-sealed storage cabinet.
Apply a Protective Coating
A thin layer of oil helps block moisture. For garden tools, some people use a bucket of dry sand mixed with oil. Pushing clean metal blades into the sand helps remove debris and leaves behind a light protective coating. Avoid oils that may contaminate soil if the tool is used in vegetable beds.
Hang Tools When Possible
Hanging tools keeps them off damp floors and improves airflow. Pegboards, wall hooks, magnetic strips, and tool racks are simple upgrades that make tools easier to find and less likely to rust.
Common Mistakes Beginners Make
The first mistake is scrubbing before soaking. Dry rust can be stubborn, and you may waste energy while scratching the metal. Let vinegar, baking soda paste, or a rust remover loosen the corrosion first.
The second mistake is skipping oil after cleaning. Bare metal is vulnerable. Once rust is removed, the surface needs protection immediately.
The third mistake is using the same method for every tool. A rusty shovel can handle tougher treatment than a precision caliper. A garden hoe does not need the same delicate care as an antique hand plane. Match the method to the tool.
Field Notes: Real-World Experiences With Rusty Tools
Anyone who has opened an old toolbox knows that rust removal is part cleaning project, part treasure hunt, and part emotional negotiation. The first lesson from experience is that rust often looks worse than it is. A wrench covered in orange dust may clean up beautifully after an overnight vinegar soak and a few minutes with steel wool. The tool that looked ready for retirement can suddenly become the most dependable one in the drawer.
One of the most practical experiences is learning to be patient. Beginners often want instant results, so they scrub too hard too soon. That usually leads to sore hands and scratched tools. A better approach is to let the rust remover do the boring work. Soak the tool, check it, scrub lightly, and repeat if needed. Rust removal is not a race. It is more like convincing the tool to stop being dramatic.
Garden tools teach another lesson: dirt is not innocent. A shovel put away with damp soil on the blade can rust faster than expected. Pruners with sticky sap around the hinge can become stiff, rusty, and annoying. After cleaning several neglected garden tools, it becomes obvious that the best maintenance happens before rust appears. A quick wipe after use feels small, but it prevents a much bigger cleaning job later.
Another useful discovery is that drying matters more than most people think. Many tools look clean after rinsing, but water hides in screw threads, socket interiors, plier joints, and pruning-shear springs. The rust comes back in those hidden places first. After a few frustrating repeat cleanings, you learn to dry tools like you mean it. A towel, a little air time, and a drop of oil in the joint can make a big difference.
There is also a difference between “restored” and “perfect.” Not every tool needs to shine like it belongs in a catalog. Some old tools have pitting, stains, or worn handles, and that is fine if they are clean, smooth, safe, and functional. In fact, a few battle scars can make a tool more satisfying to use. The goal is not always showroom beauty. The goal is a tool that works without leaving rust on your hands or squeaking like a haunted gate.
Experience also teaches you to separate tools worth saving from tools that are unsafe. A rusty screwdriver can often be cleaned. A cracked hammer head, badly weakened wrench, or deeply pitted cutting blade may not be worth the risk. Restoration is satisfying, but safety wins. If rust has damaged the structure of the tool, let it retire with dignity.
The final lesson is that prevention becomes a habit. Once you spend an afternoon rescuing rusty tools, you become much more willing to wipe them down, hang them up, and add a little oil before storage. It is a small ritual, almost relaxing. Clean tool, dry tool, oil tool, store tool. Future you opens the toolbox and smiles instead of sighing. That is the real victory.
Conclusion
Learning how to remove rust from tools is one of the most useful DIY skills you can have. Most rusty tools can be saved with simple materials like white vinegar, baking soda, lemon juice, steel wool, and protective oil. Start by cleaning the tool, choose the right rust removal method, scrub gently, rinse carefully, dry completely, and protect the metal before storage.
The secret is not just removing rust once. It is building a simple routine that keeps rust from returning. Clean your tools after use, keep them dry, oil the metal lightly, and store them away from moisture. Do that, and your tools will last longer, work better, and stop looking like they spent the winter at the bottom of a lake.
Note: This article is written as original, publication-ready HTML body content based on commonly recommended tool-care, rust-removal, and rust-prevention practices from reputable home improvement, gardening, and cleaning guidance.