Hydroponics has a funny way of making ordinary household objects look suspiciously useful. A plastic cup? Potential net pot. A yogurt container? Future lettuce throne. A takeout soup tub? Well, maybe not always the best ideabut we will get to food-safe plastic in a minute.
If you are building a small indoor garden, deep water culture bucket, Kratky jar, floating raft system, or simple nutrient film technique setup, hydroponics net pots are one of those tiny parts that do a surprisingly big job. They hold your plant upright, keep growing media in place, allow roots to grow freely into the nutrient solution, and prevent your baby basil from doing an Olympic dive into the reservoir.
The good news is that you can make your own hydroponics net pots at home with basic tools, careful material choices, and a little patience. The goal is not to create something that looks like it came from a glossy catalog. The goal is to create a sturdy, clean, root-friendly pot that fits your hydroponic system and supports healthy plant growth. Bonus points if it costs less than your last fancy coffee.
What Are Hydroponics Net Pots?
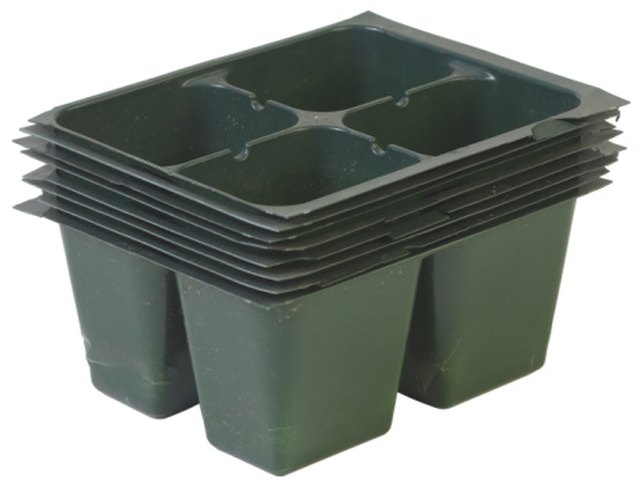
Hydroponics net pots are small containers with slots, holes, or mesh-like openings along the sides and bottom. Unlike regular flower pots, they are designed to let water, nutrients, and oxygen move freely around the root zone. In many systems, the pot sits inside a hole in a lid, raft, bucket, pipe, or grow tray while the plant roots extend down into the nutrient solution or moist growing medium.
Net pots are commonly used in deep water culture, floating raft systems, Kratky jars, aeroponics, aquaponics, and some nutrient film technique systems. They are especially popular for leafy greens, herbs, strawberries, small peppers, and starter plants. The pot itself does not feed the plant. It acts more like a tiny plant seatbelt: supportive, practical, and not something you want to forget.
Why Make Your Own Hydroponics Net Pots?
Buying premade net pots is easy, and for many growers, it is still the fastest option. However, DIY hydroponics net pots make sense when you want custom sizes, need a quick replacement, enjoy experimenting, or are building a budget-friendly hydroponic garden from scratch.
Homemade net pots are also useful when your container holes are odd sizes. Maybe you drilled a 2-inch hole in a storage tote lid, but the net pots you ordered are slightly too small and wobble like a chair with one short leg. Making your own lets you match the pot to the system instead of forcing the system to behave.
Best reasons to make DIY net pots
- You can customize the diameter, depth, and hole pattern.
- You can reuse suitable containers instead of buying every small part new.
- You can test different designs for different crops.
- You can make emergency replacements when a pot cracks or disappears into the mysterious gardening supply void.
- You can save money on small-scale hydroponics projects.
Choose the Right Material First
The most important step is choosing a safe and durable material. Because hydroponic plants grow in water and nutrient solution, the pot material should be stable, washable, and appropriate for contact with edible crops. Food-grade plastic is the most practical choice for most DIY net pots.
Look for containers made from polypropylene, high-density polyethylene, or other plastics clearly labeled for food contact. In simple terms, choose containers that were originally designed to safely hold food, not random garage chemicals, paint, automotive fluids, or mystery substances from 2009. Your lettuce deserves better than “probably fine.”
Good DIY container options
- Clean food-grade plastic cups
- Small yogurt or deli containers made from suitable plastic
- Food-safe nursery-style cups
- Reusable food storage cups
- Plastic condiment cups for microgreens or small herbs
- Sturdy disposable cups for short-term seedling projects
Materials to avoid
- Containers that held chemicals, cleaners, oils, paint, or pesticides
- Very brittle plastic that cracks when drilled
- Thin plastic that collapses under wet growing media
- Metal containers that may corrode in nutrient solution
- Containers with unknown residue or strong odors
- Painted or coated containers not intended for food or water contact
Clear plastic can work, but it may encourage algae growth if light reaches the nutrient solution. Dark or opaque containers are usually better. If you only have clear cups, you can block light by wrapping the sides with black tape, foil, or a dark sleeve, leaving the drainage holes open.
Tools and Supplies You Will Need
You do not need a professional workshop to make your own hydroponics net pots. A basic set of household tools can do the job. The key is to drill or cut slowly so the plastic does not crack.
- Food-safe plastic cups or small containers
- Drill with small drill bits
- Utility knife or hobby knife
- Scissors or snips
- Sandpaper or a small file
- Marker
- Ruler or measuring tape
- Gloves and eye protection
- Dish soap and clean water
- Optional: hole punch, rotary tool, soldering iron, or heated metal skewer
A drill is usually the cleanest option. A heated tool can melt holes, but it should only be used in a well-ventilated area and never on unknown plastic. Melting plastic can create fumes, and nobody wants their DIY gardening project to smell like a robot sneezed.
Step-by-Step: How to Make Your Own Hydroponics Net Pots
Step 1: Measure Your Hydroponic System
Before cutting anything, measure the hole where the net pot will sit. For a bucket or storage tote lid, measure the diameter of the opening. For a mason jar or Kratky container, measure the mouth of the jar. For a raft system, measure the hole in the foam board or floating panel.
Your DIY net pot should rest securely at the rim without falling through. The top lip of the cup or container should be wider than the hole. If the pot is too narrow, it may drop into the reservoir. If it is too wide, it may sit awkwardly and leave gaps where light can enter.
Step 2: Pick the Right Pot Depth
Short pots work well for lettuce, basil, cilantro, parsley, and small leafy greens. Deeper pots are better for larger herbs, strawberries, and plants that need more support. For most beginner systems, a 2-inch to 3-inch net pot size is practical. Larger plants may need 4-inch pots or additional support as they mature.
In deep water culture and Kratky systems, the bottom of the pot should allow the growing medium or starter plug to stay moist early on. Once the roots reach the nutrient solution, the plant becomes much more independent. Until then, your net pot design should help bridge the gap between seedling and “look at me, I have roots now.”
Step 3: Mark the Hole Pattern
Use a marker to plan your openings. A good DIY net pot needs enough holes for root growth and water movement, but not so many that the pot becomes weak. Start with several holes around the lower sides and bottom. Leave enough solid plastic near the rim so the pot remains strong.
A simple pattern is three rows of holes around the sides, spaced evenly, plus several holes in the bottom. For small cups, use small round holes. For larger containers, you can create vertical slots. The slots should be wide enough for roots but narrow enough to keep clay pebbles, coco coir chunks, or rockwool pieces from escaping.
Step 4: Drill or Cut the Openings
Place the plastic cup on a stable surface. Drill slowly using light pressure. If the plastic flexes too much, support the inside with a scrap piece of wood or a rolled towel. Start with small holes and enlarge them only if needed.
If using a utility knife, make small vertical slits instead of large random cuts. Clean, controlled openings are better than aggressive chopping. Remember, you are making a net pot, not auditioning for a cooking show where the secret ingredient is plastic.
Step 5: Smooth the Edges
After drilling or cutting, inspect every opening. Sharp burrs can damage young roots, trap debris, or scratch your hands during cleaning. Use sandpaper, a small file, or the edge of a knife to smooth rough spots.
This step is easy to skip, but do not skip it. Roots are delicate when young. A smooth pot gives them a friendly path outward instead of turning the root zone into an obstacle course.
Step 6: Wash and Sanitize
Wash the finished net pots with warm water and dish soap. Rinse thoroughly. For used containers, cleaning is especially important because oils, food residue, and old labels can interfere with sanitation and water quality.
If you are reusing pots between crops, sanitize them before planting again. Many growers use a properly diluted bleach solution or another suitable disinfecting method, then rinse and air-dry completely. Never mix bleach with ammonia, vinegar, or other cleaners. Cleaning is not glamorous, but neither is discovering algae slime has moved into your system and started paying rent.
Best Hole Designs for Homemade Net Pots
There is no single perfect pattern for every hydroponic setup. The best design depends on your crop, growing medium, and system type.
Round-hole design
This is the easiest design for beginners. Drill many small holes around the bottom half of the cup. It works well with rockwool cubes, starter plugs, and larger clay pebbles. Round holes are less likely to crack the plastic than long cuts.
Vertical-slot design
Vertical slots give roots more room to escape and are useful for vigorous plants. They work well in deep water culture and raft systems. Keep the slots narrow enough to prevent growing media from falling out.
Bottom-heavy drainage design
This design places most holes near the bottom of the pot. It is helpful when you want a starter plug to wick moisture from below. It may not offer as much side airflow, but it is simple and sturdy.
Hybrid design
A hybrid net pot has bottom holes plus side slots. This is the most versatile style for home hydroponics. It supports seedlings, encourages roots to grow downward, and allows good nutrient flow as the plant matures.
What Growing Media Works Best?
The net pot supports the plant, but the growing medium supports the seedling. Common hydroponic growing media include expanded clay pebbles, rockwool cubes, coco coir, perlite, vermiculite, growstones, and starter plugs. Each option behaves differently.
Clay pebbles are reusable, airy, and easy to rinse, but they do not hold as much moisture as coco coir or rockwool. Rockwool holds water well and is popular for seed starting, but it should be handled carefully because dry fibers can irritate skin and lungs. Coco coir is natural and moisture-retentive, though loose particles can escape through large holes. Perlite is lightweight and airy, but it can float and make a mess if your net pot openings are too large.
For beginners, a simple combination works well: place a starter cube or plug in the center, then surround it with rinsed clay pebbles. The plug keeps the seedling moist, while the clay pebbles stabilize the plant and allow oxygen movement.
Matching DIY Net Pots to Different Hydroponic Systems
Deep water culture
Deep water culture systems suspend plants above an aerated nutrient reservoir. Homemade net pots for DWC should be sturdy, opaque, and wide enough to keep the plant stable. Make sure the pot sits securely in the lid and does not allow light into the water.
Kratky method
The Kratky method is a passive hydroponic approach where roots grow into a nutrient solution without pumps. DIY net pots work nicely here, especially for lettuce and herbs. The pot should hold the seedling firmly while allowing roots to grow downward into the solution. Leave an air gap as the water level drops so roots can access oxygen.
Floating raft systems
In floating raft systems, net pots sit inside holes cut into foam or another floating panel. The pot must fit snugly enough to stay upright. Side holes help roots spread into the nutrient solution beneath the raft.
Nutrient film technique
NFT systems use a shallow flow of nutrient solution through channels. DIY net pots for NFT should not be too deep or bulky. The roots need access to the flowing nutrient film without clogging the channel. For small herbs and greens, compact cups with clean side openings are usually best.
Common Mistakes to Avoid
Using unsafe plastic
Do not use random containers that were never meant for food, water, or plants. Hydroponics keeps plastic in constant contact with moisture and nutrients. Choose food-safe materials whenever possible.
Making holes too large
Large holes may look root-friendly, but they can let growing media escape. Once clay pebbles start dropping into your reservoir, cleaning becomes less of a garden task and more of an underwater treasure hunt.
Weakening the rim
The rim carries the weight of the plant. Avoid cutting too close to the top. A strong rim keeps the pot seated in the lid or raft.
Letting light reach the nutrient solution
Light plus nutrients plus water equals algae’s dream vacation. Use opaque pots or block light around the opening. This keeps the reservoir cleaner and helps protect root health.
Skipping cleaning between crops
Reusable net pots should be cleaned before each new planting. Old roots, mineral buildup, and algae can affect water quality and plant performance.
How to Maintain Homemade Hydroponics Net Pots
After each crop, remove old roots and growing media. Rinse the pot under running water, scrub away residue, and inspect for cracks. If the pot has become brittle, warped, or rough, replace it. DIY is wonderful, but a failing pot in the middle of a thriving lettuce crop is not the kind of drama anyone requested.
Mineral deposits can build up when nutrient solution dries on the plastic. A gentle soak and scrub usually removes them. Avoid harsh chemicals that may leave residues. Always rinse thoroughly before returning pots to the system.
Are Homemade Net Pots as Good as Store-Bought Ones?
Sometimes, yes. A well-made DIY net pot can perform beautifully in small home hydroponic systems. It can hold media, support roots, fit your container, and last through several plantings. Store-bought net pots usually have more consistent shape, flexible mesh sides, and professional durability, but homemade versions are perfectly useful for experiments, school projects, hobby gardens, and budget builds.
The biggest difference is consistency. If you are growing dozens or hundreds of plants, commercial net pots save time. If you are growing basil on a windowsill or lettuce in a storage tote, DIY pots may be more than enough.
Practical Example: DIY Net Pot for a Lettuce Kratky Jar
For a simple lettuce setup, use a wide-mouth jar, an opaque sleeve, and a small food-safe plastic cup. Drill holes around the bottom third of the cup and several holes in the base. Place a starter plug with a lettuce seedling in the cup, then surround it with rinsed clay pebbles. Fill the jar with nutrient solution so the bottom of the plug is slightly moist. As the plant grows, roots will reach into the solution, and the water level will gradually drop, creating an air space for oxygen.
This setup is low-cost, compact, and great for learning. It also makes you feel like a kitchen scientist, which is one of the underrated joys of hydroponics.
Practical Example: DIY Net Pot for a 5-Gallon Bucket
For a larger herb or small pepper plant, use a sturdy food-safe container about 3 to 4 inches wide. Drill side slots and bottom holes, keeping the rim intact. Cut a matching hole in the bucket lid so the container rests securely. Add a starter plug and clay pebbles. In a deep water culture setup, use an air pump and air stone to oxygenate the nutrient solution. Check that roots can grow freely through the pot openings and that the lid blocks light from the reservoir.
Extra Experience: Lessons Learned From Making DIY Hydroponics Net Pots
The first lesson is simple: make one test pot before making twenty. It is tempting to grab a stack of cups, drill holes like a caffeinated woodpecker, and declare victory. But different plastics behave differently. Some drill cleanly. Some crack. Some melt slightly. Some make you question every life choice that led to that exact cup. Testing one container helps you choose the right drill bit, hole spacing, and cutting pressure before committing to a full batch.
The second lesson is that fit matters more than beauty. A homemade net pot can look a little awkward and still grow excellent lettuce. But if it wobbles, tips, or lets light leak into the reservoir, you will have problems. When making DIY net pots, always test the fit in the lid, jar, pipe, or raft before adding plants. A snug fit keeps the plant upright and reduces algae risk. If the pot is slightly loose, a foam collar, rubber gasket, or carefully cut lid insert can help stabilize it.
The third lesson is to match the hole size to the growing medium. Clay pebbles need bigger openings than coco coir particles. Rockwool cubes can sit securely in a pot with side holes, while loose perlite may escape if the slots are too wide. Many beginners make the holes too large because they imagine roots needing giant windows. Roots are surprisingly good at finding their way through modest openings. The pot only needs to provide access, not a luxury root resort with skylights.
The fourth lesson is that opaque materials make life easier. Clear cups are fun because you can see moisture and roots, but they also allow light to reach wet surfaces. That can encourage algae, especially in nutrient-rich water. If you use clear containers, cover the sides with dark tape or a sleeve. This small detail can make the system easier to manage over time.
The fifth lesson is to clean as you go. Homemade net pots often have tiny burrs, plastic dust, label glue, or old food residue. Wash them thoroughly before use. After each growing cycle, remove root fragments before they dry into stubborn little plant fossils. A toothbrush dedicated to garden cleaning works well for scrubbing holes and slots.
The sixth lesson is that different crops need different support. Lettuce and basil are forgiving. They grow quickly, stay relatively light, and do not demand much structural support. Tomatoes, peppers, cucumbers, and large flowering plants need more stability than a thin plastic cup can usually provide. For heavier crops, use larger pots, stronger lids, plant clips, trellises, or external supports. The net pot should not be forced to do the job of an entire tomato cage.
The final lesson is to keep experimenting, but keep notes. Write down which container you used, how many holes you made, what crop you planted, and how the roots performed. Hydroponics rewards small improvements. One extra row of holes, a better-fitting rim, or a darker cup can noticeably improve your setup. DIY net pots are not just about saving money; they are about learning how roots, water, oxygen, and support work together. Once you understand that, every container in your recycling bin starts looking like a possible garden upgrade. Use this power responsibly.
Conclusion
Making your own hydroponics net pots is one of the easiest ways to customize a home hydroponic system. With food-safe plastic, careful hole placement, smooth edges, and proper cleaning, you can create sturdy net pots for lettuce, herbs, strawberries, and other small crops. The best DIY designs allow roots to grow freely, hold growing media securely, block excess light, and fit snugly into your reservoir lid, raft, jar, or channel.
Store-bought net pots are convenient, but homemade net pots give you flexibility. They let you adapt your garden to the containers you already have and understand the mechanics of hydroponic growing more deeply. Plus, there is something deeply satisfying about turning a humble plastic cup into a plant-supporting device. It is not magic, but when the basil starts growing, it feels close.