Cedar planter boxes are the rare DIY project that can make your patio look more expensive, your herbs easier to reach, and your neighbors suspiciously curious about your “new gardening era.” The best part? You do not need a professional woodshop, a contractor’s license, or a dramatic home renovation budget. With cedar boards, outdoor screws, a drill, a saw, and a little patience, you can build beautiful wooden planters that hold flowers, herbs, vegetables, or ornamental grasses.
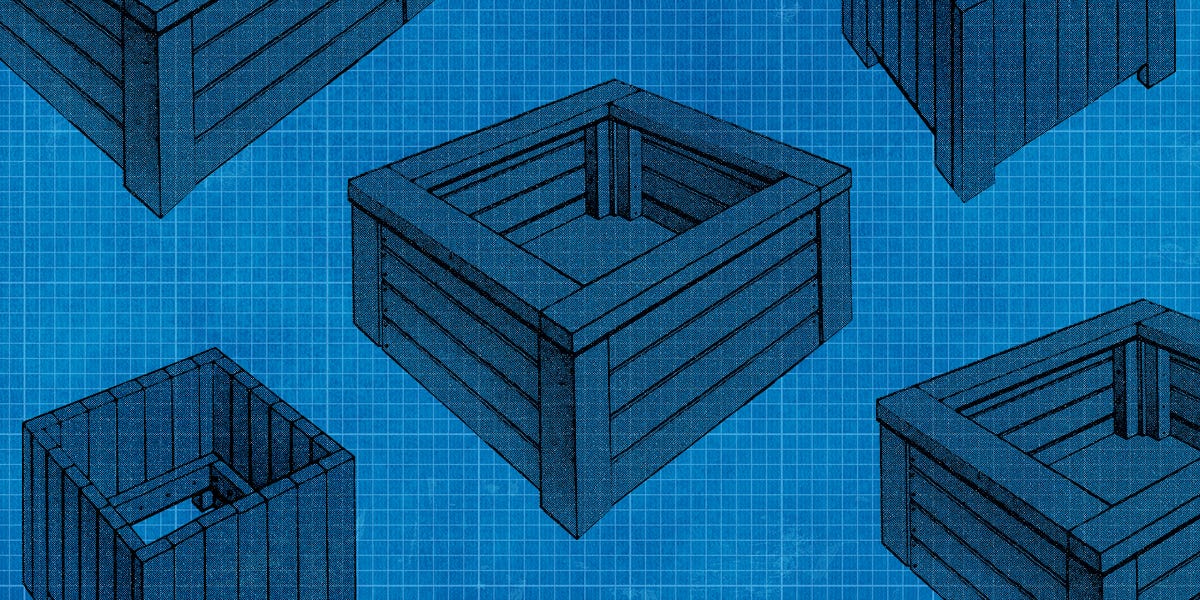
This guide shows you how to make three cedar planter boxes: a classic rectangular patio planter, a tall square porch planter, and a slim deck or window-style planter. Each design uses simple construction methods, common lumber sizes, and practical drainage details so your plants do not end up living in a swamp with decorative trim.
Cedar is a favorite for outdoor planter boxes because it is naturally resistant to decay, lightweight, attractive, and easy to work with. It also weathers beautifully, turning a soft silvery gray if left unfinished. Whether you want a rustic herb box near the kitchen door or a polished pair of planters flanking the front steps, these three designs give you a strong starting point.
Why Cedar Is Great for DIY Planter Boxes
Before cutting boards, it helps to understand why cedar is worth using. Cedar contains natural oils that help it resist moisture, insects, and rot better than many untreated softwoods. That does not mean it is immortalthis is wood, not superhero armorbut it does give your planter boxes a longer outdoor life.
Cedar also has a warm color and straight grain that looks good with almost any home style. It fits farmhouse patios, modern balconies, cottage gardens, and suburban decks where the grill is doing most of the landscaping work. It is lighter than many hardwoods, which matters once the box is filled with potting mix, plants, and water.
For edible gardens, untreated cedar is a smart choice because you avoid unnecessary chemical treatments near herbs and vegetables. If you plan to grow only ornamental plants, you can use an exterior stain or clear sealer to extend the life of the wood. For vegetable or herb planters, many DIYers prefer leaving the inside unfinished and treating only the exterior surfaces.
Tools and Materials You Will Need
Basic Tools
- Miter saw, circular saw, or hand saw
- Drill and driver bits
- Measuring tape
- Speed square or carpenter’s square
- Clamps
- Sandpaper or sanding block
- Pencil
- Safety glasses and hearing protection
Recommended Materials
- Cedar boards, such as 1×6, 1×4, and 2×2 stock
- Stainless steel exterior screws or high-quality corrosion-resistant deck screws
- Landscape fabric or mesh screen for drainage holes
- Exterior wood glue, optional
- Potting mix, not heavy garden soil
- Exterior stain or clear sealer, optional
Use stainless steel screws when possible, especially with cedar. Cedar contains tannins that can react with certain metals and leave dark stains. Stainless steel costs more than bargain-bin screws, but it saves your planter from looking like it got eyeliner in the rain.
Planter Box 1: Classic Rectangular Cedar Patio Planter
This is the all-purpose cedar planter box. It works for flowers, herbs, lettuce, compact peppers, annuals, or a cheerful mix of “thriller, filler, and spiller” plants. A good finished size is about 36 inches long, 14 inches wide, and 16 inches tall.
Cut List
- Front and back boards: four cedar 1×6 boards cut to 36 inches
- Side boards: four cedar 1×6 boards cut to 12 1/2 inches
- Corner posts: four cedar 2×2 pieces cut to 15 inches
- Bottom slats: three cedar 1×4 boards cut to 32 inches
- Top trim: two cedar 1×2 boards cut to 36 inches and two cut to 14 inches
Step 1: Build the Side Panels
Lay two 36-inch cedar boards side by side to form the front panel. Place a 2×2 corner post at each end, keeping the top edges flush. Drill pilot holes, then fasten the boards to the posts with exterior screws. Repeat this process for the back panel.
For the short ends, attach two 12 1/2-inch boards between the front and back assemblies. Keep the corners square as you work. Clamps are helpful here, especially if your boards have a small bow. Wood has opinions; clamps politely disagree with them.
Step 2: Add the Bottom Slats
Turn the planter upside down and attach the three 1×4 bottom slats across the base. Leave small gaps between the slats so water can drain. Do not make the bottom airtight. Plants need moisture, but they also need oxygen around the roots.
Step 3: Attach the Top Trim
Add the 1×2 trim around the top edge. This gives the box a finished look and adds rigidity. Mitered corners look polished, but simple butt joints are perfectly fine. The plants will not judge your joinery, and if they do, they are being rude.
Step 4: Sand and Finish
Sand rough edges and corners until the planter is pleasant to handle. If you want the cedar to keep more of its warm color, apply an exterior-rated clear sealer or stain to the outside. Avoid coating the interior if you are growing food crops unless the finish is labeled safe for that use.
Planter Box 2: Tall Square Cedar Porch Planter
A tall square planter is perfect beside a front door, around a patio, or anywhere you want instant height. It is especially good for ornamental grasses, dwarf shrubs, upright annuals, or seasonal displays. The trick is to build a false bottom so you do not have to fill the entire box with potting mix. Your back and your wallet will both send thank-you cards.
Suggested Finished Size
A practical size is 16 inches wide, 16 inches deep, and 24 inches tall. This gives the planter visual presence without making it impossible to move before filling.
Cut List
- Vertical corner posts: four cedar 2×2 pieces cut to 24 inches
- Side boards: sixteen cedar 1×4 boards cut to 16 inches
- Interior support cleats: four cedar 1×2 pieces cut to 12 inches
- False bottom slats: three cedar 1×4 boards cut to 12 inches
- Top cap trim: four cedar 1×2 boards cut to fit the top edges
Step 1: Assemble Two Opposite Panels
Start by building two flat panels. Lay two 2×2 posts parallel, then attach four 1×4 boards across them, stacking the boards vertically with small, even gaps or tight joints depending on your preferred look. Repeat for the opposite panel.
Step 2: Connect the Remaining Sides
Stand the two panels upright and connect them with the remaining 1×4 side boards. Work from the bottom upward and keep checking for square. Tall planters show twists more easily than short boxes, so do not rush this part. A square planter should not resemble a wooden tornado.
Step 3: Install the False Bottom
Decide how deep you want the planting area. For most annuals and herbs, 10 to 12 inches of soil depth is plenty. Screw the interior cleats around the inside of the planter at that depth, then rest and fasten the false bottom slats on top of the cleats. Leave gaps between slats for water drainage.
Step 4: Add Drainage and Top Trim
Drill several drainage holes through the false bottom if needed. Cover the openings with mesh screen or landscape fabric to slow soil loss while still allowing water to pass through. Attach the top cap trim for a clean, furniture-like finish.
Planter Box 3: Slim Cedar Deck or Window Planter
The slim cedar planter is made for narrow spaces: deck edges, balcony corners, porch rails, fences, or under windows. It is ideal for trailing flowers, compact herbs, pansies, petunias, thyme, oregano, or strawberries. Because it is long and shallow, choose plants with modest root systems.
Suggested Finished Size
A useful size is 30 inches long, 8 inches wide, and 8 inches deep. You can adjust the length to fit your railing, window, or ledge.
Cut List
- Front and back boards: two cedar 1×8 boards cut to 30 inches
- End boards: two cedar 1×8 boards cut to 6 1/2 inches
- Bottom board: one cedar 1×8 board cut to 28 1/2 inches
- Optional trim: cedar 1×2 pieces for the top edge
Step 1: Build the Box Shape
Set the front and back boards on edge. Place the end boards between them and fasten through the long boards into the ends. Drill pilot holes first to reduce splitting. Cedar is easy to work with, but thin boards can crack if you attack them with screws like you are assembling a battleship.
Step 2: Install the Bottom
Slide the bottom board into place and fasten it from the sides. Drill several drainage holes along the bottom, spacing them evenly. For a long planter, more small holes usually work better than one lonely hole trying to do the job of an entire plumbing department.
Step 3: Add Trim or Mounting Support
If the planter will sit on a deck or table, add small feet underneath to lift it slightly and improve airflow. If it will attach to a railing or wall, use strong brackets rated for outdoor use and for the expected weight of wet soil. A planter that looks light when empty can become surprisingly heavy after watering.
Drainage: The Detail That Saves Your Plants
Good drainage is essential for all three cedar planter boxes. Most plants dislike sitting in soggy soil because roots need oxygen. Instead of filling the bottom with a thick layer of rocks, focus on drainage holes, quality potting mix, and enough soil depth. A mesh screen, coffee filter, or small piece of landscape fabric can help keep soil from washing out without blocking water flow.
Use potting mix rather than garden soil. Garden soil is often too dense for containers, and it can compact over time. A good potting mix stays lighter, drains better, and gives roots a friendlier place to grow. For vegetables and herbs, choose a high-quality container mix and refresh it with compost or fertilizer as the season progresses.
Best Plants for Cedar Planter Boxes
For the Rectangular Patio Planter
Try basil, parsley, chives, lettuce, compact peppers, marigolds, zinnias, or dwarf tomatoes with support. This planter has enough room for a small kitchen garden or a colorful flower display.
For the Tall Square Porch Planter
Use upright plants such as ornamental grasses, dwarf evergreens, canna lilies, coleus, or seasonal arrangements. In fall, this planter looks great with mums and ornamental kale. In winter, use evergreen cuttings and branches for a festive display.
For the Slim Deck or Window Planter
Choose trailing and compact plants such as petunias, calibrachoa, thyme, oregano, strawberries, pansies, or nasturtiums. Keep plant spacing reasonable so the box fills in without becoming a botanical traffic jam.
Common Mistakes to Avoid
Skipping Pilot Holes
Pilot holes help prevent splitting, especially near board ends. They also make assembly smoother and more accurate.
Using the Wrong Screws
Interior screws are not made for rain, sun, and seasonal temperature changes. Use stainless steel or exterior-rated screws that can handle outdoor conditions.
Forgetting the Final Location
Move the planter into place before filling it. Wet potting mix is heavy, and dragging a full cedar box across a deck is not a gardening technique. It is a lower-back negotiation.
Overwatering
Containers dry out faster than garden beds, but that does not mean they need constant watering. Check the soil with your finger. If the top inch feels dry, water thoroughly until excess moisture drains out.
Maintenance Tips for Longer-Lasting Cedar Planters
To extend the life of your cedar planter boxes, keep them slightly raised off solid surfaces with small feet or blocks. This improves airflow and prevents the bottom from staying wet after rain. Clean out old roots and tired potting mix at the end of the growing season. If the exterior begins to look dry, lightly sand and reapply a suitable outdoor finish.
If your cedar turns gray, do not panic. Natural weathering is normal and can look beautiful. If you prefer the fresh cedar tone, use a UV-resistant exterior finish and reapply it according to the product directions.
Real-World Experience: What I Learned Making Cedar Planter Boxes
The first thing you learn when building cedar planter boxes is that the project looks simple because it is simplebut only if you measure carefully. A planter box is basically a wooden rectangle with confidence. If one board is slightly longer than the others, that confidence disappears quickly. For the cleanest results, cut matching parts at the same time or use the first piece as a template for the rest.
The second lesson is that clamps are not optional if you want a neat build. Cedar boards can twist a little, especially thinner boards from the lumber rack. A clamp holds everything steady while you drill pilot holes and drive screws. Without clamps, you may find yourself using one elbow, one knee, and three facial expressions to hold the box together. That method technically works, but it is not recommended for human dignity.
Another useful experience is to dry-fit the planter before final assembly. Set the boards in position, check the corners, and make sure the bottom pieces fit before adding screws. This small step helps you catch mistakes early. It is much easier to trim a board before assembly than to remove eight screws while muttering at a harmless piece of cedar.
Drainage also matters more than beginners expect. A beautiful planter with poor drainage can kill plants faster than a heat wave. Drill enough holes, keep them clear, and use a proper potting mix. Do not rely on a thick gravel layer at the bottom. In practice, the best-performing planter boxes are the ones with free-flowing drainage, breathable soil, and enough depth for roots.
I also recommend deciding whether the planter is decorative, productive, or both. If you want herbs, place the box near the kitchen door so you actually use them. Basil across the yard becomes “decorative basil” surprisingly fast. If you want flowers, consider height and trailing habits. Tall plants in the center or back, medium plants around them, and trailing plants at the edges create a full, professional look without needing a landscape designer to whisper Latin plant names at you.
Finally, remember that cedar planter boxes improve with use. The first season teaches you how much sun your patio gets, how quickly the soil dries, and which plants thrive in your climate. By the second season, you will know whether to add casters, raise the box on feet, build a matching pair, or make the next planter longer. That is the dangerous part of cedar projects: one box becomes three, three becomes six, and suddenly you are the person at the lumberyard saying, “Just a few more boards,” with absolutely no credibility.
Conclusion
Making these three cedar planter boxes is a practical, good-looking way to upgrade your outdoor space without turning your weekend into a construction saga. The rectangular patio planter gives you flexible growing space, the tall square planter adds height and curb appeal, and the slim deck or window planter makes use of narrow areas that usually sit empty. With cedar boards, outdoor screws, proper drainage, and a little careful measuring, you can build planters that look custom and perform beautifully through the growing season.
Whether you grow herbs, flowers, vegetables, or a rotating cast of seasonal plants, cedar planter boxes offer a satisfying mix of woodworking and gardening. Build one, learn from it, then build the next one better. That is how DIY skills growright alongside the basil.