Beets are the garden’s little buried treasures: colorful, nutritious, surprisingly low-maintenance, and just dramatic enough to stain your cutting board like they are auditioning for a crime show. If you have been staring at your beet patch wondering whether those leafy tops are hiding beautiful round roots or a vegetable-sized disappointment, you are not alone. Knowing how and when to harvest beets from your garden is the difference between tender, sweet roots and oversized, woody bulbs that taste like they spent the summer lifting weights.
The good news is that beets are one of the friendliest root crops for home gardeners. They tell you when they are close to ready, they can be harvested young or mature, and both the roots and greens are edible. In other words, beets are not just a crop; they are a two-for-one garden bargain with leaves.
This guide explains when beets are ready to harvest, how to check root size without yanking up half the garden, how to harvest beet greens, how to pull roots cleanly, and how to store your harvest so it stays fresh. Whether you grow classic red beets, golden beets, candy-striped Chioggia, or baby beet varieties, the harvesting rules are similar: watch the calendar, check the shoulders, feel the size, and do not wait until your beets become underground bowling balls.
Understanding the Beet Harvest Window
Most garden beets are ready to harvest about 50 to 70 days after planting, depending on the variety, weather, soil, and how much attention they received while you were busy pretending weeds were “biodiversity.” Baby beets can be harvested earlier, while larger storage varieties may need a little more time.
The seed packet is your first clue. If it says “55 days to maturity,” begin checking around day 45 or 50. Do not treat the number like a courtroom verdict; treat it like a friendly nudge. Cool weather, crowded seedlings, dry soil, or poor fertility can slow growth. Warm weather may speed things up but can also reduce tenderness if beets become stressed.
Beets are cool-season vegetables, which means they usually perform best in spring and fall. They tolerate light frost, and many gardeners find fall beets sweeter because cool temperatures can improve flavor. In hot summer conditions, however, beets may become tough, bitter, or slow to size up. If your climate has blazing summers, grow beets in early spring and again in late summer for a fall harvest.
How to Tell When Beets Are Ready to Harvest
The best way to know when beets are ready is to look at the top of the root, often called the shoulder. As beets mature, the shoulder usually pushes slightly above the soil line. You do not need to dig up the entire plant to check it. Simply brush away a little soil around the base and look at the root diameter.
Ideal Beet Size for Harvesting
For baby beets, harvest when roots are about 1 inch across. These small roots are tender, mild, and excellent for roasting whole or slicing into salads. For standard mature beets, the sweet spot is usually 1.5 to 3 inches in diameter. At that size, they are flavorful, tender, and easy to cook.
Once beets grow much larger than 3 inches, quality can decline. Some large varieties are bred for storage and can remain pleasant at bigger sizes, but many common garden beets become fibrous or earthy in a not-so-charming way. Think of it like picking zucchini: small is elegant; enormous is a cry for help.
Signs Your Beets Are Ready
Look for healthy greens, visible root shoulders, and roots that feel firm when gently checked at the soil line. If the beet shoulder is round, smooth, and roughly golf-ball to tennis-ball size, it is probably ready. If the greens are lush but the roots are tiny, your plants may need more time, more spacing, or less nitrogen-heavy feeding.
You can also harvest one beet as a test. Choose the largest-looking plant, loosen the soil, and pull it. If it is perfect, continue harvesting the rest as needed. If it is small but tasty, wait several more days or a week before checking again. Gardeners call this “sampling.” Hungry gardeners call it “quality control.”
When to Harvest Beet Greens
Beet greens are edible, nutritious, and often underappreciated. They taste earthy and slightly sweet, similar to Swiss chard because the two crops are close relatives. You can harvest beet greens when leaves are young and tender, usually around 4 to 6 inches tall.
The key is moderation. Remove only a few outer leaves from each plant at a time, leaving the center leaves intact so the root can keep growing. If you strip the plant bald, the beet will not have enough leaf power to feed root development. Beets may forgive many gardening mistakes, but they do not appreciate being turned into a leafy skeleton.
For salad greens, harvest smaller leaves when they are tender. For cooking, larger leaves work well sautéed, steamed, or added to soups. Wash them carefully because soil loves clinging to beet leaves like it has attachment issues.
Best Time of Day to Harvest Beets
The best time to harvest beets is in the morning, especially during warm weather. Morning harvests are cooler, crisper, and less stressful for the plant tissues. Roots harvested during the heat of the afternoon may wilt faster, and greens can lose freshness quickly.
If your soil is dry and hard, water the beet bed the day before harvesting. Moist soil makes pulling easier and reduces the chance of snapping roots. However, avoid harvesting from muddy soil unless you enjoy cleaning vegetables that look like they just returned from a monster truck rally.
How to Harvest Beets Step by Step
Harvesting beets is simple, but a gentle hand matters. Beet skins bruise, roots can snap, and damaged beets do not store as well. Follow these steps for a clean harvest.
Step 1: Check the Root Size
Brush soil away from the beet shoulder and estimate the diameter. If the root is between 1 and 3 inches across, it is ready for most kitchen uses. For baby beet harvests, pull earlier. For storage beets, check your variety description to see whether it can size up without becoming woody.
Step 2: Loosen the Soil
Use a garden fork, hand trowel, or small spade to loosen soil around the roots. Insert the tool several inches away from the beet to avoid stabbing it. A punctured beet will still be edible, but it will not store well, and it may bleed juice like it is making a dramatic exit.
Step 3: Pull by the Base, Not the Leaves Alone
Grip the plant near the crown, where the leaves meet the root, and pull upward while gently rocking the beet. If the leaves tear off, loosen the soil more and lift the root from below. Do not yank aggressively, especially in compacted soil.
Step 4: Shake Off Loose Soil
Gently remove loose dirt by hand. Avoid scrubbing the skin if you plan to store the beets. Damaged skin shortens storage life. If you are cooking them the same day, washing is fine. If you are storing them, wait to wash until just before use, unless you are preparing them for short-term refrigerator storage.
Step 5: Trim the Tops
Cut beet greens off about 1 inch above the root. Do not cut flush against the beet, and do not cut into the crown. Leaving a short stem helps reduce moisture loss and prevents the root from bleeding excessively during storage. Also leave the taproot intact until cooking, if possible.
How to Harvest Beets Without Disturbing Nearby Plants
Beets often grow in clusters because each “seed” is actually a seed cluster that can produce more than one seedling. If you did not thin them early, you may have several roots growing shoulder-to-shoulder like commuters on a crowded subway.
To harvest one beet from a cluster, loosen the soil carefully around the largest root. Hold nearby plants in place with one hand while gently twisting and lifting the selected beet with the other. If roots are tangled, use a small knife or trowel to separate the soil. This keeps smaller beets growing for a later harvest.
If the bed is very crowded and roots are not sizing up, harvest the biggest plants as baby beets. This creates more space for the remaining plants. Thinning by eating is one of gardening’s more satisfying management strategies.
Spring vs. Fall Beet Harvest
Spring beets are usually planted as soon as the soil can be worked and harvested in late spring or early summer. They are tender and quick, but they can suffer if hot weather arrives before harvest. Once temperatures climb, beets may become stressed, and flavor can decline.
Fall beets are often even better. Plant them in late summer, giving them enough time to mature before hard freezes. As the weather cools, growth may slow, but flavor often improves. Light frost usually does not ruin beet roots, though greens may show damage after colder nights.
In many regions, the ideal fall harvest happens before the ground freezes hard. If your area has mild winters, you may be able to leave beets in the ground longer with mulch. In colder regions, harvest storage beets before deep freezes lock them into the soil like buried red marbles.
Common Mistakes When Harvesting Beets
Waiting Too Long
The most common mistake is leaving beets in the ground too long. Bigger is not always better. Oversized beets may become tough, woody, or less sweet. Check often once roots approach harvest size.
Pulling from Dry, Compacted Soil
Hard soil can cause broken tops and damaged roots. Water the bed before harvest or use a fork to loosen soil first. A little patience beats a snapped beet every time.
Removing Too Many Greens
Harvesting beet greens is smart, but overharvesting slows root development. Take only a few leaves per plant if you want the roots to continue growing.
Cutting Too Close to the Root
Trimming leaves too close can cause bleeding and reduce storage quality. Leave about 1 inch of stem attached.
Washing Roughly Before Storage
Scrubbing beets before long-term storage can damage their skin. Brush off soil gently and store only healthy, unbruised roots.
How to Store Freshly Harvested Beets
Fresh beets store best when the greens are removed and the roots are kept cold and humid. After trimming the tops, place roots in a perforated plastic bag or container in the refrigerator crisper drawer. They can often keep for several weeks under good refrigerator conditions.
For longer storage, beets prefer temperatures close to 32°F and high humidity. A root cellar, cold basement storage area, or extra refrigerator can work if conditions are right. Store only firm, uninjured roots. Use damaged beets first because they are the troublemakers of the storage bin.
Beet greens do not store nearly as long as roots. Wash them, dry them well, and keep them in the refrigerator. Use them within a few days for best flavor and texture.
What to Do After Harvesting Beets
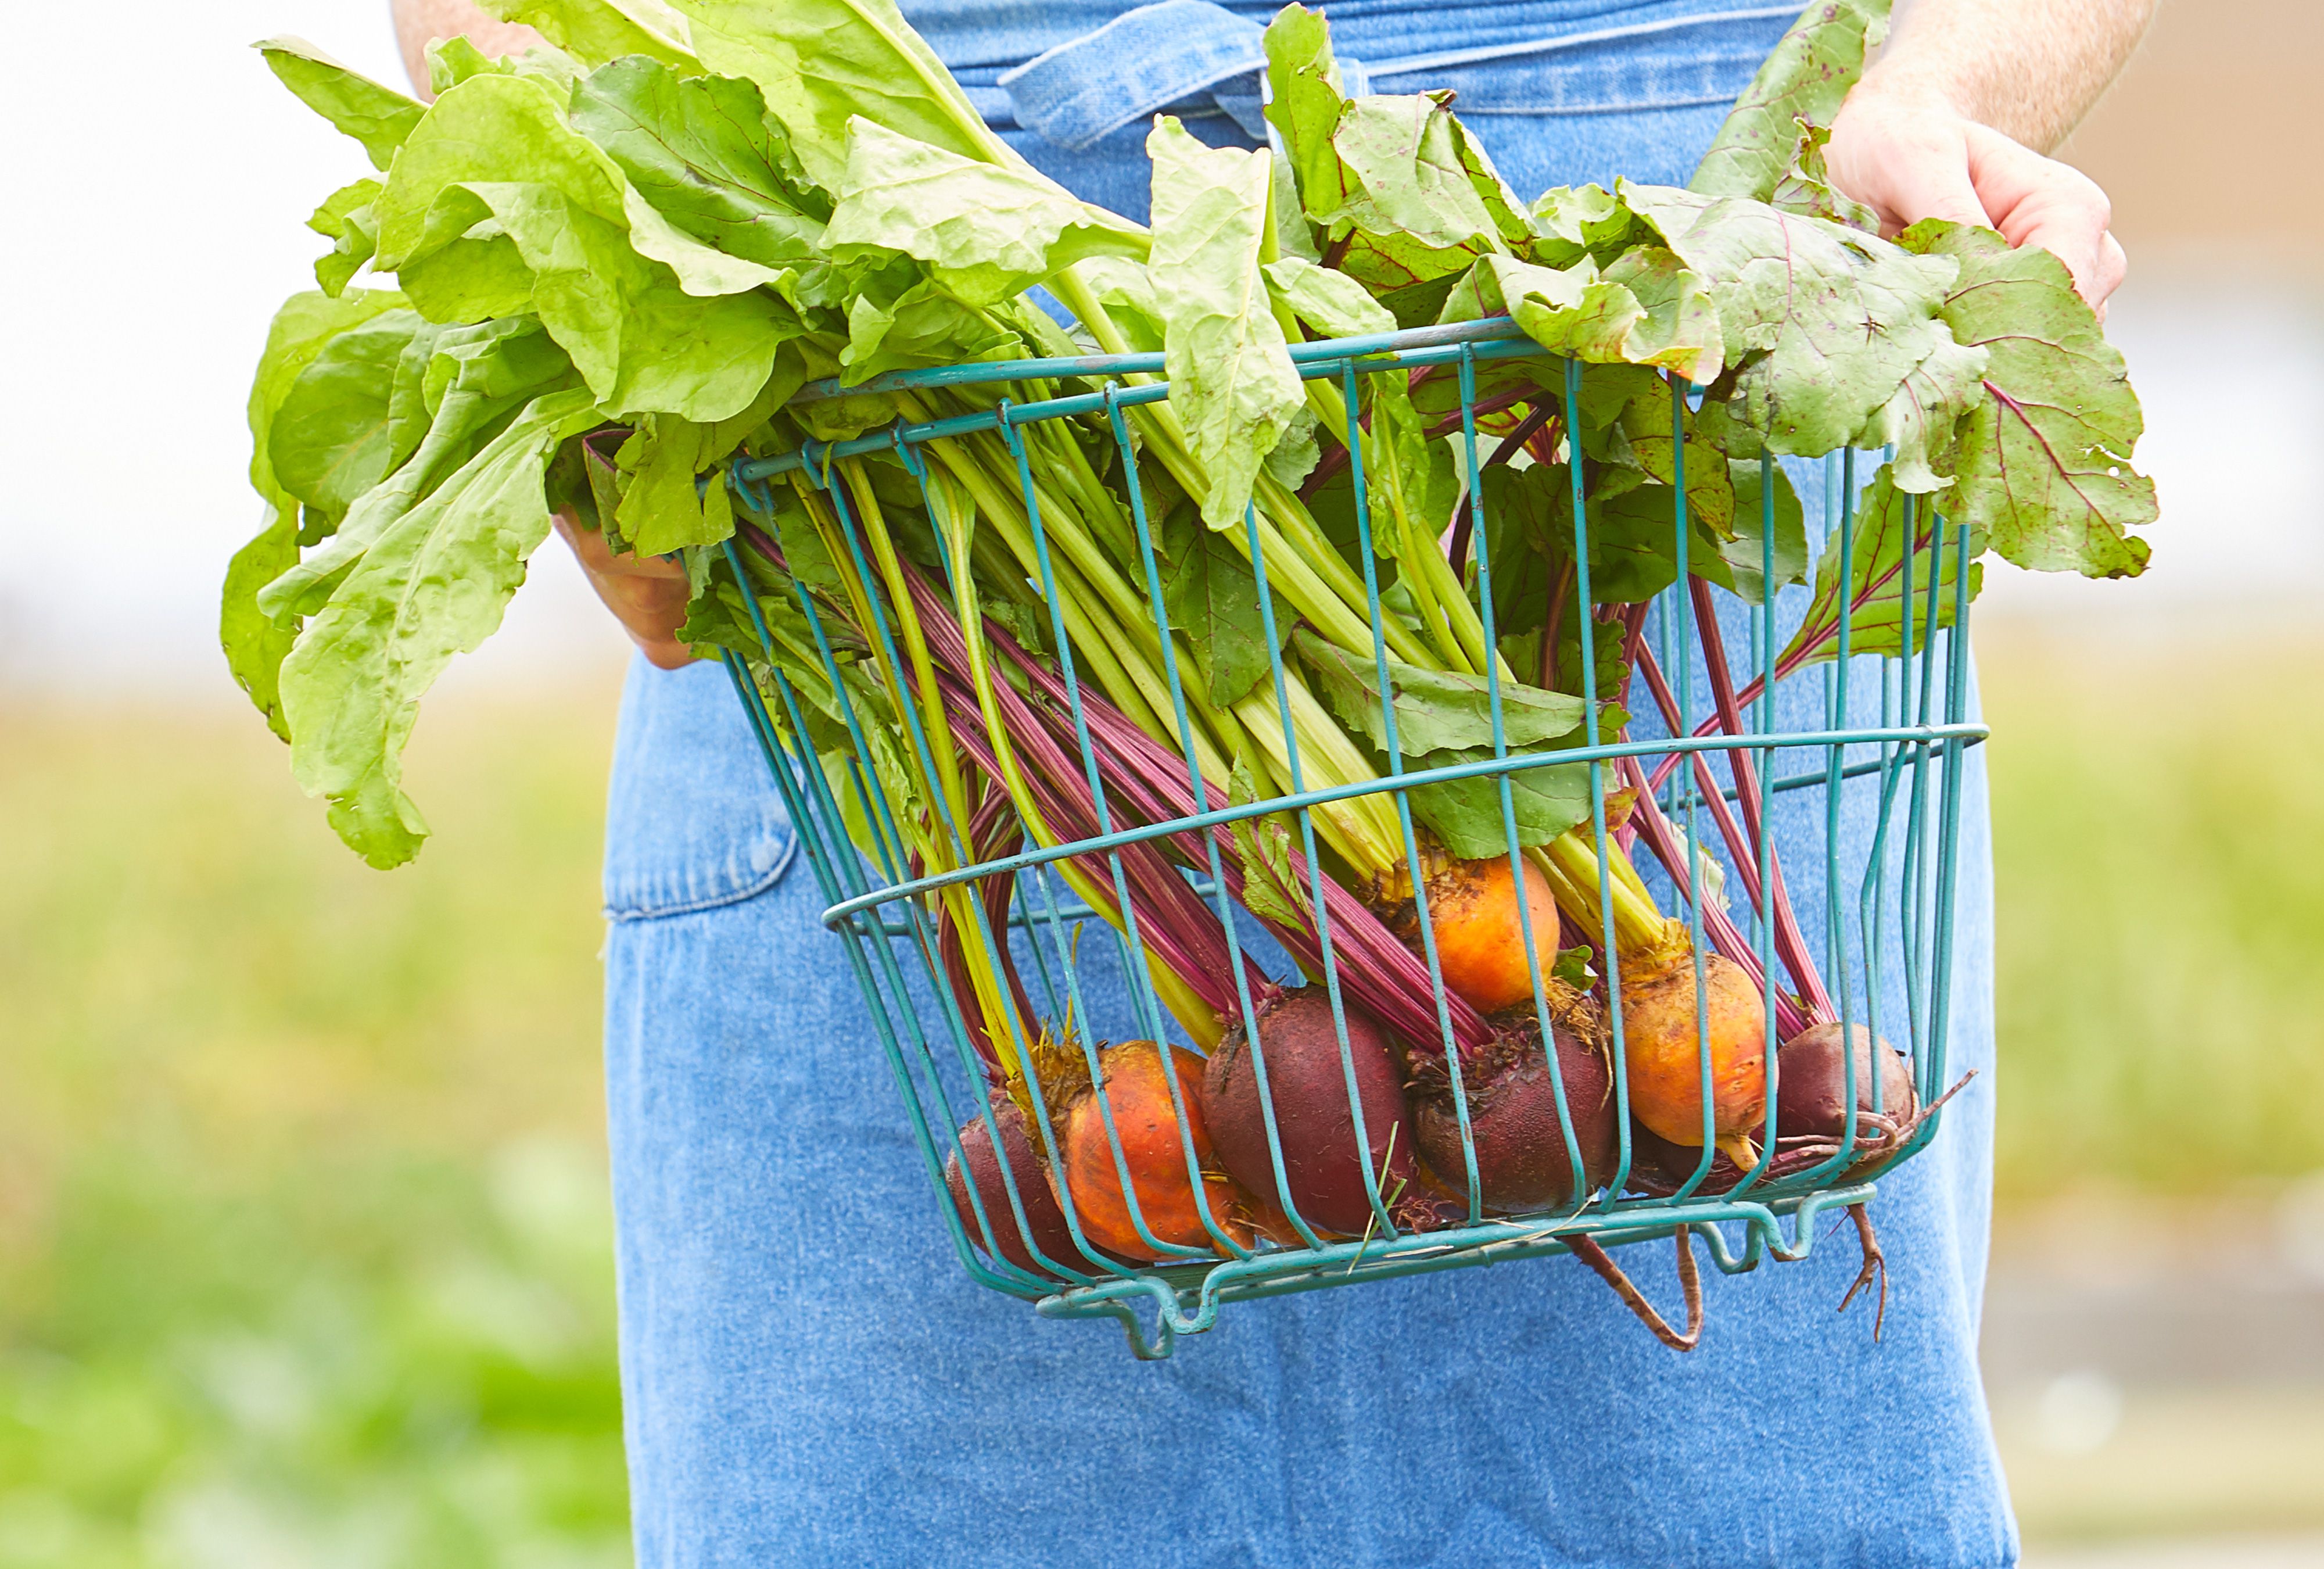
Once your beets are out of the ground, you have options. Roast them for deep sweetness, steam them for salads, pickle them for tangy crunch, shred them raw into slaws, or add them to soups. Golden beets are great when you want beet flavor without turning the kitchen magenta. Chioggia beets are beautiful raw or lightly cooked, though their rings may fade with longer cooking.
Do not throw away the greens. Sauté them with garlic and olive oil, stir them into scrambled eggs, add them to pasta, or use them anywhere you would use chard or spinach. If the stems are tender, chop and cook them too.
Troubleshooting Small or Tough Beets
If your beets are all leaves and no root, overcrowding is a likely cause. Thin seedlings early so plants have room to form bulbs. Most beets need several inches between plants. Another cause is excess nitrogen, which encourages leafy growth at the expense of root development.
If your beets are tough, they may be overmature, heat-stressed, or grown with inconsistent moisture. Beets prefer steady water and loose soil. Dry spells followed by heavy watering can lead to uneven growth. Mulch helps keep soil cool and moist, especially in warmer climates.
If your roots are misshapen, compacted or rocky soil may be the problem. Beets grow best in loose, well-prepared soil free of stones. Raised beds are excellent for beets because they provide good drainage and softer soil.
Personal Garden Experiences and Practical Beet Harvesting Lessons
Every gardener eventually learns that beets have a sense of humor. They look calm above ground, all leafy and polite, while underground they may be swelling beautifully, growing sideways, crowding their neighbors, or doing absolutely nothing because you forgot to thin them. The first practical lesson is this: do not trust the leaves alone. Big greens do not always mean big roots. A beet plant can look like a leafy champion and still be hiding a root the size of a marble.
One of the best habits is to start checking early. Around six weeks after planting, brush soil away from a few beet shoulders and see what is happening. This small inspection prevents surprises. If the roots are tiny, you still have time to adjust watering, thin crowded plants, or simply wait. If they are already golf-ball size, you can begin harvesting gradually instead of waking up one day to a bed full of overgrown beets.
Another useful experience is harvesting in stages. You do not need to pull the whole row at once. Take the largest beets first and leave smaller ones to continue growing. This is especially helpful in home gardens where plants mature unevenly. Staggered harvesting gives you fresh beets over several weeks and keeps the kitchen from turning into a beet-processing factory.
For better flavor, harvest before intense heat when possible. Spring beets that sit too long into hot weather can lose their tenderness. Fall beets, on the other hand, often taste sweeter after cool nights. If you have struggled with bitter or woody beets, try planting a late-summer crop for autumn harvest. The cooler finish can make a noticeable difference.
When pulling beets, gentle soil loosening is worth the extra minute. Trying to yank roots from dry ground usually ends with broken greens in your hand and the beet still sitting underground like it won the argument. A garden fork placed a few inches away from the row makes harvesting much easier. Lift slightly, loosen the soil, and then pull by the crown.
One more lesson: trim greens quickly. Beet leaves continue pulling moisture from the root after harvest, which can make roots soften faster. Cut the tops to about an inch, save the greens separately, and refrigerate both. This small step keeps roots firmer and greens fresher.
Finally, do not be afraid of imperfect beets. Small beets are delicious. Odd-shaped beets are still useful. Beets with minor surface marks can be cooked right away. The only roots to avoid storing are badly damaged, soft, or diseased ones. Homegrown food does not need to look like it came from a grocery store photo shoot. Sometimes the crooked beet is the sweetest one in the bunch, and honestly, it has more personality.
Conclusion
Learning how and when to harvest beets from your garden is mostly about timing, observation, and a little restraint. Start checking roots around 50 days after planting, harvest baby beets at about 1 inch, and pull mature beets when they are roughly 1.5 to 3 inches across. Use the visible shoulder as your guide, loosen soil before pulling, trim greens properly, and store roots in cold, humid conditions.
Beets reward gardeners who pay attention. Harvest too early, and you get tender baby roots. Harvest at the right time, and you get sweet, full-sized beets. Harvest too late, and dinner may involve chewing something that feels suspiciously like garden furniture. Keep an eye on size, weather, and texture, and your beet harvest will be colorful, flavorful, and wonderfully satisfying.