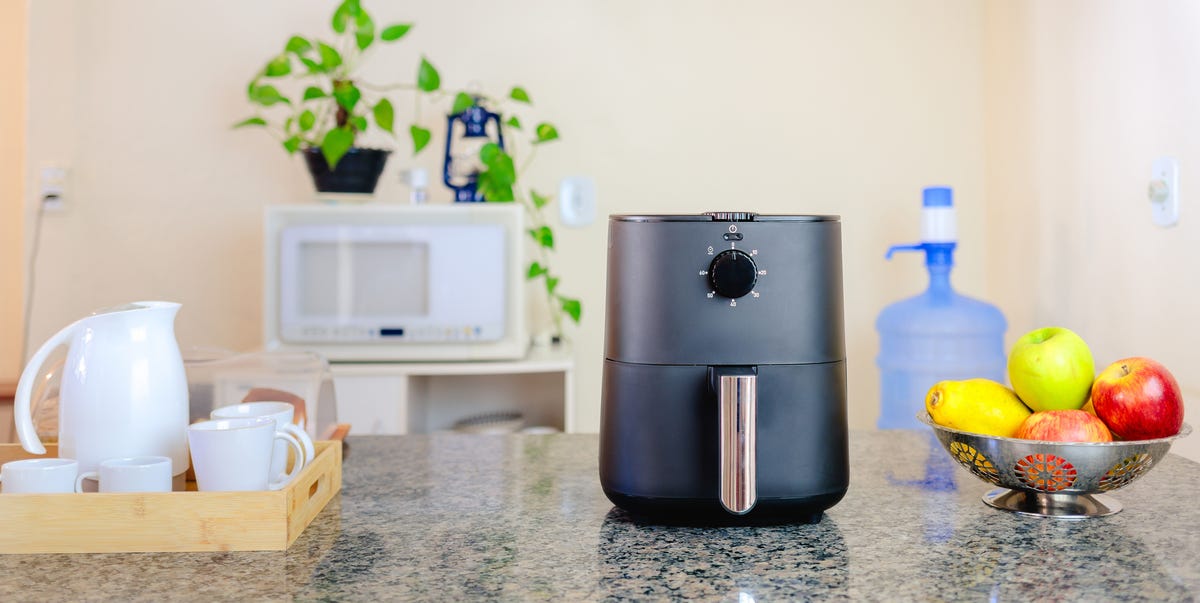
Your air fryer may produce beautifully crisp chicken wings with hardly any oil, but it does not make grease magically disappear. That oil, along with crumbs, marinades, melted cheese, and the occasional runaway french fry, collects on the basket, beneath the crisper plate, and sometimes around the heating element.
Leave that mess long enough and your convenient countertop cooker can begin smoking, smelling like last Tuesday’s salmon, or transferring burnt flavors to otherwise innocent food. Fortunately, learning how to clean an air fryer is easier than wrestling a roasting pan into the sink. Cleaning professionals and appliance manufacturers generally recommend a simple formula: unplug the machine, let it cool, wash removable parts gently, wipe the main unit, and tackle stubborn grease without damaging the nonstick coating.
This guide explains how to clean an air fryer after everyday cooking, how to deep-clean baked-on grease, which cleaning mistakes to avoid, and how to keep the appliance cleaner between meals.
Why Cleaning Your Air Fryer Matters
An air fryer is essentially a compact convection oven. A fan circulates very hot air around the food, while a perforated basket or crisper plate helps that air reach multiple surfaces. The same powerful airflow that crisps potatoes can also send tiny droplets of grease toward the interior walls and heating element.
Regular cleaning helps prevent:
- Smoke caused by old grease or crumbs overheating
- Stale or burnt odors
- Flavor transfer between foods
- Sticky residue that becomes harder to remove
- Reduced airflow through clogged basket openings
- Premature wear on removable components
Consumer and appliance-care experts commonly advise cleaning the basket and other food-contact parts after every use. The main housing should never be submerged, and the specific care instructions in the manufacturer’s manual should take priority because dishwasher compatibility and coating materials vary by model.
What You Need to Clean an Air Fryer
You do not need a chemical arsenal worthy of a laboratory. In most cases, a few gentle supplies will do the job:
- Warm water
- Mild grease-cutting dish soap
- A soft sponge or nonabrasive dishcloth
- A microfiber cloth
- A soft-bristled brush or clean toothbrush
- Paper towels or a dry dish towel
- Baking soda for stubborn residue
- White vinegar for greasy film or lingering odors
- Wooden toothpicks for carefully clearing small openings
Cleaning products and tools to avoid
Skip steel wool, metal scrapers, stiff wire brushes, oven cleaner, chlorine bleach, and highly abrasive powders. These can scratch nonstick coatings, damage finishes, or leave chemicals near surfaces that contact food.
Do not attack stuck-on cheese with a knife, even when the cheese appears to have signed a permanent lease. Soaking and gentle scrubbing are safer than scraping.
How to Clean an Air Fryer After Every Use
A basic cleaning normally takes about 10 minutes, not counting soaking or drying time. Cleaning shortly after cooking is easier because residue has not had hours to become countertop concrete.
Step 1: Unplug the air fryer and let it cool
Turn off the appliance, unplug it from the outlet, and allow it to cool until all surfaces can be handled safely. Removing the basket may help the machine cool more quickly.
Do not begin wiping the heating chamber while the air fryer is connected to power. Also, never pour water directly into the electrical housing or immerse the main unit in a sink. Manufacturer instructions consistently emphasize these basic precautions.
Step 2: Remove the basket, tray, and other accessories
Take out the basket or cooking drawer, crisper plate, drip tray, rack, and any other removable accessories. Shake loose crumbs into the trash or compost before adding water. Removing dry debris first prevents the sink from becoming a soup featuring breadcrumb croutons.
If grease has pooled in a drawer or drip tray, pour it into a disposable container rather than down the drain. Cooking fat can cool and solidify inside plumbing.
Step 3: Wash removable parts with warm, soapy water
Fill the sink or a basin with warm water and add a small amount of mild dish soap. Wash each removable component with a soft sponge or cloth, paying attention to corners, vents, and the underside of the crisper plate.
Use a soft-bristled brush for perforations that trap crumbs. Avoid aggressive pressure, especially when cleaning a nonstick basket. Good Housekeeping’s cleaning experts note that hand-washing can help preserve a nonstick finish even when the component is labeled dishwasher-safe.
Step 4: Soak stuck-on food instead of scraping it
When residue refuses to move, soak the basket and tray in warm, soapy water for 10 to 30 minutes. A longer soak may be appropriate for sugary sauces, melted cheese, or grease that has been reheated several times.
After soaking, scrub gently with a nonabrasive sponge. Repeat the process rather than reaching for a metal utensil. Ninja and Instant appliance-care instructions both recommend warm, soapy soaking for stubborn food and grease.
Step 5: Wipe the cooking chamber
With the basket removed, use a damp microfiber cloth or soft sponge to wipe the interior walls and bottom of the air fryer. The cloth should be damp, not dripping.
Check seams, corners, and the area where the drawer slides into the housing. These are popular hiding places for crumbs that apparently believe rent is optional.
Do not spray cleaner directly into the machine. Apply a suitable cleaner to the cloth first if your manufacturer permits it. This provides better control and reduces the chance of liquid entering electrical components.
Step 6: Wipe the exterior and controls
Clean the handle, control panel, buttons, and exterior with a lightly dampened microfiber cloth. Greasy fingerprints usually come off with a drop of dish soap diluted in water.
Use a separate dry cloth to prevent streaks, especially on stainless steel. Never allow water to pool around buttons, display panels, vents, or cord connections.
Step 7: Dry everything thoroughly
Rinse the removable pieces and dry them with a clean towel or allow them to air-dry completely. Wipe the cooking chamber dry before reassembling the machine.
Trapped moisture can contribute to odors and may collect in small seams. Reassemble the air fryer only when every component is dry.
Can Air Fryer Parts Go in the Dishwasher?
Some baskets, racks, crisper plates, and trays are dishwasher-safe, but the answer depends entirely on the model. Consult the owner’s manual rather than assuming that every removable part can survive the dishwasher.
Even when a basket is dishwasher-safe, repeated exposure to strong detergent, intense water jets, and high drying temperatures may shorten the life of some nonstick finishes. Hand-washing is often the gentler choice. For dishwasher-approved parts, the top rack may provide milder heat and water pressure when the component fits safely.
The main electrical unit must never go in the dishwasher. Yes, someone needed to hear that.
How to Deep-Clean a Greasy Air Fryer
Deep cleaning becomes necessary when the machine smokes during normal cooking, smells unpleasant after routine washing, or has visible grease around the interior and heating element.
Make a gentle baking soda paste
Combine baking soda with just enough water to create a spreadable paste. Apply a thin layer to stubborn residue on washable, manufacturer-approved surfaces. Let it sit for approximately 10 to 20 minutes, then wipe or scrub gently with a soft sponge.
Baking soda provides mild abrasion without the sharp edges of a scouring pad. Still, test it on a small area and avoid vigorous scrubbing on delicate coatings.
Use vinegar for greasy film
For a greasy film that remains after washing, dampen a cloth with a mixture of equal parts white vinegar and water. Wipe the affected surface, then wipe again with a clean water-dampened cloth.
Do not pour vinegar into the appliance housing or saturate electrical components. Vinegar is useful for cutting film and reducing odors, but more liquid does not mean more cleaning power. It usually means more liquid under your appliance.
Cleaning specialists interviewed by Martha Stewart, Real Simple, and The Spruce recommend gentle combinations of dish soap, baking soda, or diluted vinegar rather than harsh abrasive products.
Clean small vents and basket openings
Use a soft toothbrush or bottle brush to loosen grease around basket holes, tray edges, and tight corners. A wooden toothpick can help dislodge a crumb from an individual opening, but avoid forcing it into fans, sensors, or electrical spaces.
How to Clean the Air Fryer Heating Element
The heating element is often located above the cooking chamber. Grease can reach it when the basket is overloaded, food is especially fatty, or loose ingredients are blown upward by the fan.
- Unplug the machine and allow it to cool completely.
- Remove all baskets, trays, and racks.
- Check the manual to determine whether the unit can be carefully tilted for access.
- Use a dry or barely damp soft-bristled brush to loosen crumbs.
- Wipe accessible surfaces gently with a damp cloth.
- Use baking soda paste only when the manufacturer permits it.
- Remove all cleaning residue with a clean damp cloth.
- Let the appliance dry completely before reconnecting it.
Never bend the heating coil, flood the chamber, or poke objects into the fan assembly. If heavy grease is trapped behind a shield that is not designed to be removed, contact the manufacturer instead of dismantling the appliance.
Cleaning professionals warn that an overloaded basket can increase splatter around the heating element, while manufacturer instructions recommend using a soft cleaning brush to remove accessible food residue.
How to Clean an Oven-Style Air Fryer
Air fryer toaster ovens generally have more surfaces and accessories than basket-style models. Remove the crumb tray, racks, baking pan, and air-fry basket before cleaning.
Wash approved accessories in warm, soapy water. Wipe the interior walls and glass door with a soft cloth, keeping liquid away from electrical openings. Clean the crumb tray frequently because crumbs beneath a heating element can burn and smoke.
Some oven-style air fryers have dishwasher-safe racks but hand-wash-only baking pans or crumb trays. Ninja’s oven guidance, for example, distinguishes among accessories and cautions against abrasive or chemical cleaners inside the appliance.
How to Remove Odors From an Air Fryer
First, wash every removable food-contact surface and wipe the cooking chamber. Odors often come from a thin grease film rather than an obvious piece of food.
Next, wipe washable surfaces with diluted vinegar and follow with a clean damp cloth. Leave the basket out and allow the appliance to air-dry with the drawer open.
If the odor resembles burning plastic, inspect the unit for forgotten packaging, damaged components, or a loose liner. A persistent electrical or melting smell is not a cleaning challenge. Stop using the appliance and contact the manufacturer.
Air Fryer Cleaning Mistakes to Avoid
Submerging the main unit
The housing contains electrical components. Clean it with a damp cloth, never by soaking or rinsing it under running water.
Using metal scrubbers
Steel wool and metal brushes can scratch nonstick surfaces. Once a coating is damaged or peeling, consult the manufacturer about replacement parts.
Cleaning the appliance while it is hot
Warm grease may wipe away more easily, but the machine must be cool enough to handle safely. Never clean near a hot heating coil.
Spraying cleaner into the air fryer
Overspray can enter vents, controls, and electrical spaces. Apply any approved solution to your cloth or sponge instead.
Running soapy water in the air fryer
Online hacks sometimes recommend filling the basket with soap and water and turning on the appliance to create steam. This may conflict with manufacturer instructions, create excessive foam, blow liquid toward electrical parts, or damage the coating. A conventional soak in the sink is safer.
Ignoring the top of the cooking chamber
People often clean the basket while forgetting the area above it. Inspect the heating zone periodically, particularly after cooking bacon, chicken wings, burgers, or other fatty foods.
How Often Should You Clean an Air Fryer?
- After every use: Wash the basket, crisper plate, drip tray, and other food-contact components.
- After greasy or messy foods: Wipe the cooking chamber and inspect the heating area.
- Weekly for frequent users: Clean the exterior, controls, basket slots, and accessible interior surfaces.
- Monthly or as needed: Perform a deeper inspection for grease around the heating element, fan cover, door, racks, and seams.
- Immediately: Clean the machine when it smokes, smells rancid, or contains burned residue.
The right schedule depends on usage. Someone reheating dry toast twice a week has a different cleaning situation from a family air-frying sticky barbecue wings every evening.
How to Keep an Air Fryer Cleaner
Use only as much oil as necessary
Excess oil can collect beneath the basket and splatter onto the heating area. Lightly coat food rather than pouring oil into the cooking chamber.
Do not overcrowd the basket
Overcrowding restricts airflow and pushes food closer to the heating element. Cook in batches when necessary. Your fries need personal space too.
Use compatible liners correctly
Perforated parchment or reusable silicone liners can catch drips, but they must be approved for the appliance and should not block airflow. Never place loose parchment in an empty basket during preheating. The fan can lift it into the heating element. Add the liner only when food is present to hold it down.
Clean spills before reheating them
A small drip is easy to wipe away today. After three more high-temperature cooking cycles, it may require negotiation, soaking, and a baking soda intervention.
Check beneath the crisper plate
The top may look spotless while grease and crumbs hide below. Remove the plate every time you wash the basket.
Real-World Air Fryer Cleaning Experiences: What Actually Works
In everyday kitchens, the biggest cleaning lesson is that the type of food matters more than the length of the cooking cycle. Frozen fries and dry breaded nuggets usually leave a handful of crumbs. Bacon, marinated chicken, salmon, burgers, glazed vegetables, and cheese-filled snacks can decorate the entire interior with grease before you have finished choosing a dipping sauce.
Consider a typical batch of chicken wings. After cooking, the top of the basket may appear reasonably clean, but lifting the crisper plate often reveals a shallow layer of rendered fat and browned seasoning. Washing the basket immediately with warm dishwater takes only a few minutes. Leaving it until the next morning gives the fat time to turn waxy and makes every perforation harder to clean.
Sticky sauces create a different problem. Honey, barbecue sauce, teriyaki glaze, and brown sugar can caramelize against the basket. Scrubbing immediately may feel productive, but it can damage the coating without removing much residue. A 20-minute soak generally does more work than five minutes of furious scrubbing. The experience is humbling: warm water has defeated an enemy that your elbow grease merely annoyed.
Melted cheese is another common test. Mozzarella escaping from a stuffed snack can wrap itself around the crisper plate and harden as it cools. Let the basket cool, remove any large loose pieces with a soft silicone or wooden utensil, and soak the rest. A soft toothbrush is particularly effective around holes and raised edges where a standard sponge cannot reach.
Fatty foods also demonstrate why the upper interior needs attention. After several batches of bacon or burgers, an air fryer may begin smoking even though the basket was washed. The overlooked culprit is often a film of grease above the basket or near the heating element. Once the unplugged appliance is completely cool, a careful wipe and gentle brushing can remove the residue responsible for the smoke.
Odor problems are usually solved by persistence rather than perfume. Spraying fragrance inside the unit only combines “clean linen” with “old salmon,” creating a scent no candle company plans to release. Washing the removable parts, wiping the chamber with diluted vinegar, rinsing with a clean damp cloth, and allowing everything to dry separately is more effective.
Long-term users also learn that dishwasher-safe does not necessarily mean dishwasher-every-day. Dishwashers are convenient after a large meal, but regular hand-washing may be kinder to a nonstick basket. A soft sponge, warm water, and mild dish soap provide enough cleaning power for routine residue while limiting abrasion.
The most effective habit is simple: clean the appliance before sitting down for the evening. Remove the basket after dinner, let it cool while you clear the table, and place it in warm, soapy water. By the time the counters are wiped, most residue will slide away. The air fryer stays ready for breakfast, and you avoid discovering yesterday’s chicken grease moments before adding today’s cinnamon bites.
Final Thoughts
The best way to clean an air fryer is neither complicated nor glamorous. Unplug it, let it cool, remove the washable parts, use warm water and mild dish soap, and choose soaking over aggressive scrubbing. Wipe the main housing rather than submerging it, inspect the heating area after greasy meals, and follow the manufacturer’s manual whenever instructions differ.
Cleaning after every use prevents most deep-cleaning emergencies. It also keeps smoke, stale odors, and mystery flavors away from your next meal. Your air fryer may never thank you aloud, which is fortunate because a talking kitchen appliance would raise several additional concerns, but cleaner food and easier maintenance are convincing enough.
Note: Appliance designs and coating materials vary. Always follow the cleaning and dishwasher instructions in the owner’s manual for your specific model. This article synthesizes practical guidance from U.S. consumer publications, cleaning specialists, and major appliance manufacturers.