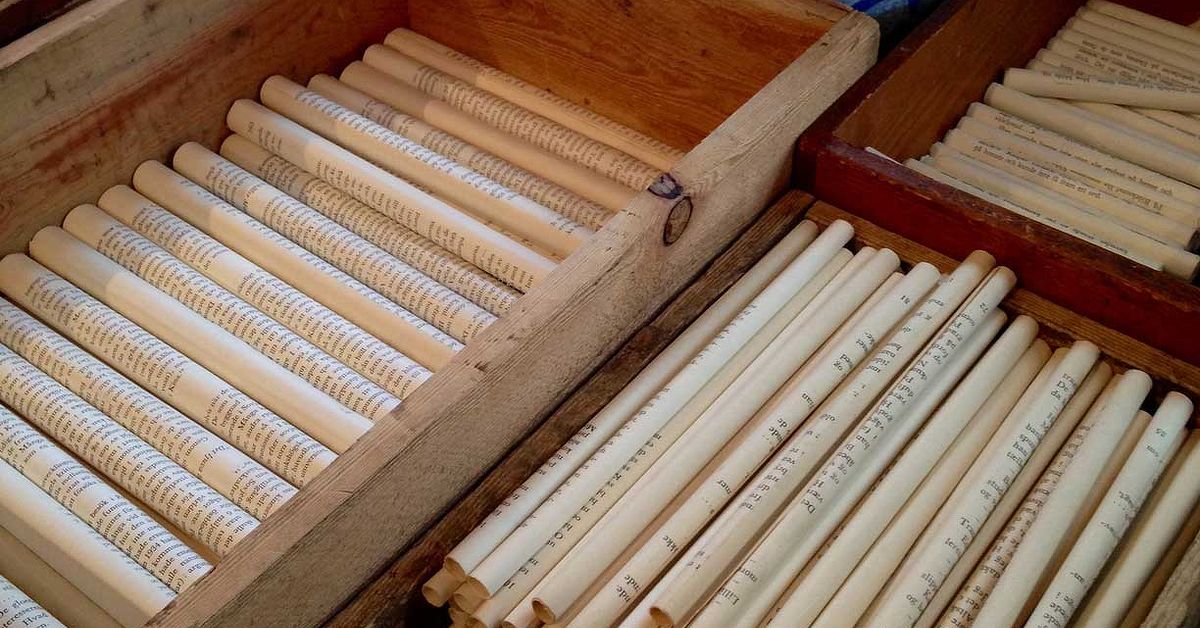
Old books have a certain dignity, even when their covers are falling off, their pages smell faintly like somebody’s attic, and Chapter Seven has mysteriously disappeared. A damaged book may no longer be suitable for reading, but its printed pages, textured spine, and naturally aged paper can still become beautiful home decor.
That is where recycled book art comes in. With a few basic tools, you can transform an unwanted volume into a folded sculpture, a layered botanical picture, or an elegant book-page wreath. These projects are inexpensive, customizable, and surprisingly forgiving. A slightly uneven fold often adds character. A crooked paper petal can be called “organic.” Crafting is wonderful that way.
Before reaching for the scissors, however, make sure the book truly belongs in the craft pile. Books that remain readable should generally be donated, sold, exchanged, or shared before they are dismantled. The U.S. Environmental Protection Agency places reuse ahead of recycling in its preferred waste-management hierarchy, while organizations such as Little Free Library encourage people to place usable books in community book-sharing boxes.
Once you have selected a damaged, outdated, incomplete, or otherwise unwanted book, the fun can begin. Here are three simple recycled book art ideas that look far more sophisticated than their modest supply lists suggest.
Before You Begin: Choose the Right Books and Materials
Use books that cannot reasonably be reused
A book with a cracked spine, missing pages, water stains, obsolete information, or extensive writing may be an excellent candidate for upcycled art. Old dictionaries, withdrawn reference books, damaged paperbacks, and incomplete textbooks are especially useful because they provide plenty of printed paper without sacrificing a readable novel.
Avoid cutting books that may be rare, historically important, signed, collectible, or personally meaningful. Check the title, edition, publication date, publisher, and any handwritten inscriptions. When uncertain, search the book’s details or ask a used-book dealer or librarian before altering it.
Do not craft with actively moldy books. Mold can spread to nearby materials and may create health concerns. A mildly musty book is different from one displaying fuzzy growth, damp pages, or widespread spotting. Severely mold-damaged books should be isolated and handled according to appropriate local disposal guidance.
Handle fragile pages carefully
Wash and dry your hands before working, clear crumbs and drinks from the table, and support weak covers while opening the book. The Library of Congress emphasizes that careful handling is one of the simplest and most effective ways to reduce damage to books and paper.
That advice matters even when a book is destined for art. Brittle paper can tear before you have shaped it, and greasy fingerprints may become permanent features of your design. Unless “mysterious potato-chip thumbprint” is part of the artistic vision, clean hands are recommended.
Gather a basic recycled book art toolkit
- One or more damaged or unwanted books
- A metal ruler
- A sharp craft knife or utility knife
- A self-healing cutting mat or thick scrap cardboard
- Scissors
- A pencil and eraser
- White craft glue, bookbinding glue, or decoupage medium
- A small paintbrush or foam brush
- Binder clips or clothespins
- Cardstock, recycled cardboard, or an old frame
- Twine, ribbon, wire, or embroidery hoops
- Optional embellishments such as dried flowers, buttons, beads, ink, or watercolor
Use strong adhesive sparingly. Thick layers of glue can make paper stiff, warped, or brittle. Smithsonian conservation work has documented how rigid adhesive can restrict paper movement and contribute to cracking when pages are flexed. A thin, even application is usually cleaner and more durable than a glue puddle large enough to qualify as a neighborhood pond.
1. Make a Folded Book Sculpture
Folded book art turns the page edges of a closed book into a three-dimensional pattern. Hearts, initials, geometric waves, diamonds, and simple words can all be created without removing a single page. It is one of the best old book craft ideas for beginners because the original binding does most of the structural work.
Best books for folded designs
Choose a hardcover book with a secure spine and at least 150 usable pages. Books with 250 to 400 pages provide enough material for fuller designs, while books with wide margins are easier to fold neatly. The finished shape appears along the outer edge of the text block, so a book with even page dimensions produces the cleanest result.
How to fold a simple heart
- Find the center. Divide the number of usable pages by two and mark the middle with a removable paper tab.
- Create a template. Draw or print a symmetrical heart that fits within the height of the pages. Place it behind the page edges or beside the book as a visual guide.
- Begin near the center. Fold the top corner of the first selected page inward to meet the upper edge of the heart outline. Fold the bottom corner inward to meet the lower edge.
- Work outward. Repeat the process page by page, gradually shortening or lengthening the folded area according to the heart’s curve.
- Mirror the pattern. After reaching one side of the design, repeat the measurements in reverse order.
- Refine the shape. Stand the book upright, fan the pages slightly, and adjust any folds that interrupt the outline.
Tips for a cleaner folded-book design
Use a ruler or bone folder to sharpen each crease. Apply consistent pressure, but do not press so aggressively that brittle pages split. Fold one page at a time and pause every 10 to 15 pages to inspect the shape from the front.
For a more dramatic sculpture, darken the folded edges with diluted watercolor, stamping ink, or a dry brush of acrylic paint. Test the color on a spare page first because old paper absorbs liquid quickly. Too much moisture can produce wrinkling, bleeding, and the general appearance of a book that survived a very emotional rainstorm.
Display the completed book open at a comfortable angle on a shelf, mantel, or small easel. Do not force the covers completely flat, especially if the binding is weak.
2. Create Layered Book-Page Botanical Wall Art
Layered paper artwork is an excellent way to use loose pages, detached covers, illustrations, chapter headings, and interesting typography. Botanical designs work particularly well because leaves and flowers can be built from simple shapes. The printed text provides texture, while shadows between the layers create depth.
Framed book pages have long been used as affordable wall decor, and design publications have highlighted grids of vintage pages, illustrations, and coffee-table-book images as an inexpensive way to create a coordinated display.
Plan the composition
Choose a design before cutting. A single oversized flower creates a bold focal point, while three stems in different heights produce a calmer, more traditional arrangement. You can also make mushrooms, butterflies, feathers, birds, herbs, or abstract leaves.
Place a sheet of plain cardstock inside an old frame and lightly sketch the main stems. Neutral backgrounds make aged pages stand out, but dark blue, charcoal, or forest-green cardstock can create a moodier library-inspired look.
Cut and shape the paper pieces
- Select pages with varied text sizes, margins, illustrations, or headings.
- Draw leaf and petal templates on scrap cardboard.
- Trace the templates onto the book pages with a pencil.
- Cut several sizes of each shape.
- Curl petals around a pencil or paintbrush handle to create dimension.
- Score a line down the center of each leaf and fold it slightly.
- Arrange every piece before applying glue.
For a five-petal flower, overlap the bases of five rounded paper shapes, then glue a button, rolled paper coil, or small circle of contrasting text in the center. Build larger flowers by adding a second layer of smaller petals.
Assemble the artwork without flattening it
Apply glue only to the center or base of each element. Leaving the outer edges loose allows the petals and leaves to cast natural shadows. Foam adhesive squares can raise selected pieces, although small folded scraps of recycled cardboard work almost as well.
Add stems using thin twigs, rolled paper tubes, embroidery thread, or lines drawn with an archival pen. A light wash of watercolor can introduce color while allowing the printed words to remain visible.
Mount the finished composition in a shadow-box frame or remove the glass from a standard frame so the raised elements are not crushed. Keep paper artwork away from prolonged direct sunlight, excessive humidity, cooking grease, and steamy bathrooms. Light and moisture can accelerate fading, discoloration, and distortion in paper objects.
3. Build a Sculptural Book-Page Wreath
A book-page wreath combines dozens of simple paper cones, loops, or rosettes into one impressive decoration. It works above a desk, on an interior door, over a fireplace, or as a backdrop for a literary-themed wedding or party.
Book-page wreath tutorials commonly use a circular base with repeated folded pages arranged in overlapping rings. Embroidery hoops, wood circles, and recycled cardboard can all provide the foundation.
Make an inexpensive wreath base
Trace a large dinner plate onto sturdy cardboard, then trace a smaller plate in the center. Cut out the resulting ring. Corrugated shipping boxes work well and cost nothing, assuming you have not already used every box to store other boxes.
Cover the cardboard with strips of book paper or neutral paint so exposed areas blend into the final design. Attach a loop of wire or strong twine to the back before adding decorations.
Create paper cones or loops
For a full, traditional wreath, roll individual pages diagonally into loose cones. Secure each cone with a small dot of glue near the narrow end. Make 40 to 80 cones, depending on the size of the base and the thickness of the paper.
For a softer design, accordion-fold each page lengthwise, bend it in half, and glue the inner edges together to form a fan. Several fans can be joined into round rosettes. You can also cut pages into strips and form loops for a cleaner, more modern wreath.
Arrange the layers
- Place the largest cones around the outer edge of the base.
- Angle them consistently and overlap their sides slightly.
- Glue each piece only after testing the spacing.
- Add a second ring with the cones positioned between those in the first layer.
- Continue inward until the cardboard is hidden.
- Finish the center with a paper rosette, small mirror, vintage button, photograph, or wooden initial.
Rotate the wreath as you work instead of completing one side at a time. This prevents the arrangement from becoming dense in one area and suspiciously bald in another.
Customize the recycled book wreath
Use sheet music for a musical theme, damaged cookbooks for kitchen decor, dictionaries for a typography-heavy design, or children’s book pages for colorful nursery art. Gold paint applied lightly to the paper edges creates a festive finish. Black ink gives the wreath an aged, dramatic appearance, while white paint produces a softer farmhouse style.
Small paper stars, leaves, or birds can be added between the cones. Better Homes & Gardens has featured ornaments made from old book pages, including accordion-folded and layered bird forms, demonstrating how simple cut-and-fold techniques can turn printed paper into dimensional decorations.
How to Work Safely With Book Art Tools
Always cut on a stable surface with a cutting mat underneath. Pull the blade away from your hands and body, keep fingers out of the cutting path, and replace dull blades rather than forcing them through thick paper. A dull blade may sound less threatening, but it is more likely to slip.
Craft knives and utility knives should be used by adults or under close adult supervision. Country Living, for example, specifically limits the utility-knife portion of its recycled book-spine project to adults.
When using hot glue, protect the work surface and avoid touching freshly applied adhesive. Low-temperature glue guns are preferable for many lightweight paper projects. White craft glue or a suitable decoupage medium is slower but gives you more time to reposition pieces.
Ventilate the room when using spray sealers, strong adhesives, or paint. Follow the product label, and do not assume that “craft supply” automatically means “pleasant to inhale for an entire afternoon.”
Common Recycled Book Art Mistakes
Using too much glue
Excess adhesive causes rippling, staining, stiffness, and slow drying. Apply a thin coat with a brush, then press gently. Place wax paper or parchment between glued sections and neighboring pages when necessary to prevent accidental bonding.
Cutting before arranging
Make templates and test the composition with scrap paper first. Once a rare illustration or perfect chapter heading has been sliced into twelve petals, negotiations are officially over.
Ignoring the direction of the text
Randomly oriented words can look energetic, but deliberate alignment usually creates a more polished result. Decide whether the text should run vertically, horizontally, or in mixed directions before tracing your templates.
Choosing extremely brittle paper
Pages that crack when folded are better for flat collage pieces than cones or sculptural petals. Test one page before committing to a design. Stronger pages can be folded, curled, stitched, or rolled; fragile pages should be supported with cardstock.
Skipping the donation question
Recycled book art should rescue materials that have reached the end of their useful reading life, not shorten the life of a perfectly good book. Better Homes & Gardens and the EPA both recommend considering donation, book sharing, resale, or other forms of reuse before recycling or discarding books.
Experience-Based Lessons From Making Recycled Book Art
The most noticeable lesson from recycled book projects is that the material decides much of the final design. Newer paperback pages are flexible and easy to roll, but they may look too bright for vintage-style decor. Older pages provide warm cream and brown tones, yet they can split along sharp folds. Testing a single page can save an hour of wrestling with a design that the paper simply does not want to become.
It also helps to accept variation rather than trying to make every component identical. A wreath containing 60 perfectly matched cones can look machine-made, while small differences in width and curl create movement. Layered flowers become more convincing when some petals bend forward and others lean back. The trick is controlled imperfection: enough consistency to show intention, with enough variation to keep the finished piece alive.
Planning the workspace matters more than most beginners expect. Book art generates an astonishing number of narrow paper strips, failed petals, trimmed corners, dried glue strings, and tiny fragments containing half of a dramatic sentence. Separating usable scraps from trash keeps the project manageable. Small leftovers can become flower centers, mosaic backgrounds, paper beads, gift tags, or confetti for another craft.
Drying time is another practical lesson. Paper may appear secure after a few minutes while the adhesive underneath remains wet. Moving a wreath too early can pull cones out of alignment. Placing wall art in a frame before the glue dries can trap moisture and flatten raised elements. It is better to finish the main assembly, leave the work on a level surface, and return later for final adjustments.
Display conditions influence how long the project stays attractive. Paper placed in direct afternoon sunlight may fade or become increasingly yellow. A wreath hung near a stove can collect grease and dust. A folded sculpture stored in a humid room may relax, sag, or develop wavy pages. Interior walls, shaded shelves, and dry rooms are generally kinder to recycled paper decor.
One of the most rewarding aspects of the process is discovering meaningful details inside an otherwise unwanted book. A chapter title may fit the theme of a collage. A handwritten grocery list may become part of a family keepsake. A botanical illustration can inspire the entire color palette. These discoveries make recycled book art feel different from projects made with newly purchased craft paper. The material arrives with history already printed into it.
Not every project will be a masterpiece, and that is useful too. A lopsided rosette teaches spacing. A torn fold reveals that the paper is too brittle. A cloudy layer of decoupage medium demonstrates that more glue is not always more commitment. Because the supplies are inexpensive, experiments feel less risky. The book has already lived one life, so giving its remaining materials room to become something unexpected is part of the appeal.
Finally, recycled book art tends to invite conversation. Visitors notice readable fragments, recognizable illustrations, and familiar typography. They may step closer to inspect a page or ask where the book came from. The finished object is not merely paper decor; it is a transformed piece of storytelling. Even when the original plot is no longer intact, the pages continue doing what pages do best: making people pause, look, and imagine.
Conclusion
Turning old books into art does not require advanced equipment or professional training. A folded book sculpture uses repetition and patience. Layered botanical wall art transforms loose pages into dimensional shapes. A book-page wreath turns simple cones or fans into a dramatic decorative piece.
The best results begin with thoughtful material selection. Preserve books that remain valuable or readable, donate those that can serve another reader, and reserve crafting for volumes that are damaged, incomplete, obsolete, or genuinely unwanted. Work slowly, apply glue lightly, test fragile pages, and let the typography become part of the design.
With those habits, recycled book art becomes more than a clever way to use old paper. It is a practical form of upcycling that combines sustainability, creativity, and literary character. Your shelves get more space, your walls get original artwork, and an exhausted dictionary finally gets a second career that does not involve defining “aardvark.”